
Related Manuals for 2DI ThermaViewer

Summary of Contents for 2DI ThermaViewer
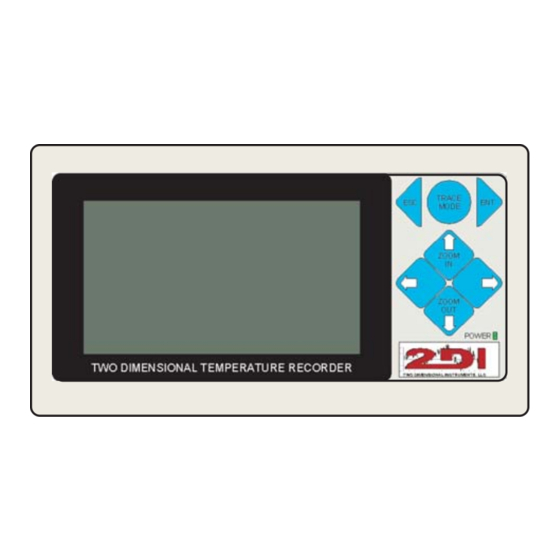
- Page 1 ThermaViewer The BEST way to look at temperature Installation and Use and Care Guide...
- Page 2 Congratulations! Your concerns about temperature are over! ThermaViewer is a high-quality temperature tracking system that is designed to give you years of reliable service. It can be used to track room temperature as well as temperatures in appliances such as refrigerators, freezers, salad bars, etc.
-
Page 3: Table Of Contents
Table of Contents Components and Packing List ..................4 Quick Start ........................5 Installation ........................8 Power, Thermal, and Data Connections ............... 9 Battery Installation ......................11 User Controls ........................ 13 Features and Operation Active Mode ....................... 19 Sleep Mode ....................... 23 Trace Mode ........................ -
Page 4: Components And Packing List
Probe Cable A small PCB with a Ten-foot cable for digital temperature connection of thermal probe permanently probe to ThermaViewer. affixed to it. Longer cables are PC Cable available -- contact Two- Ten-foot cable for connection of PC to Dimensional Instruments... -
Page 5: Quick Start
Quick Start Your ThermaViewer can be installed and operating in minutes. Factory defaults are set to be used with a refrigerator (21 F. min., 41 F. ref., 70 F. max.). If you are installing a ThermaViewer on an appliance other that a refrigerator, additional set up will be required (see page 27). - Page 6 > System Parameters Probe 1 Parameters/Setup Probe 2 Parameters/Setup Illustration Two Illustration One System Parameters Time 0:00:00 Date 1/01/01 Auto-sleep after 10:00 (min:sec) Reset to factory defaults no Download Data yes Password 1234 disabled...
- Page 7 Quick Start (continued) 5. Reset the display Insert a straighten paper clip into the reset hole to reset the display (see illustration on page nine). 6. Set date and time. Press Enter key The menu pictured in Illustration One (at left) will appear. Using the Up Down arrow keys, select System Parameters and press the Enter key...
-
Page 8: Installation
The nine-pin D9 connector is compatible with a computer serial port. The stereo plug connector is plugged into the ThermaViewer. If the cable is too short to reach a computer, the ThermaViewer may be temporarily removed from the wall and carried to the PC location. -
Page 9: Power, Thermal, And Data Connections
Power, Thermal, and Data Connections 1. PC Interface PC cable output for downloading data. 2. Thermal Probe One Jack for thermal probe cable number one. 3. Thermal Probe Two Jack for thermal probe cable number two. Side View 4. Power Receptacle The power cord (wall transformer) plugs into this 12 VAC/500mA receptacle. - Page 10 Battery Cover Illustration One Illustration Two...
-
Page 11: Battery Installation
Battery Installation Battery backup The ThermaViewer has two types of batteries. One is a small “button” type battery that is not user accessible. Its purpose is to ensure an accurate date and time. It has an estimated ten-year life span. The second battery is a nine-volt, user-accessible battery requiring periodic replacement. Its purpose is to supply temporary backup power during a power outage. -
Page 13: User Controls
19. The Buttons 1. The ESC key is used two different ways, depending upon the mode of the ThermaViewer: • In the Active Mode the ESC key toggles the choice of probes (one or two). • In the Menu Mode the ESC key moves the cursor back one field and the original entry for that field is retained. - Page 15 User Controls (continued) 4. Up arrow key • In the Active or Trace Modes, pressing this key causes the display to zoom in. The zoom-in effect causes the time frame of the graph to change. For example, if the current graph is set to show four temperatures in each column, pushing the Up arrow key causes the parameters to change so that each column only shows two temperatures, etc.
- Page 17 User Controls (continued) 6. Left arrow key. • In the Active Mode, pushing the Left arrow causes the displayed data to scroll left one screen at a time. • In the Trace Mode pushing the Left arrow key causes the double headed arrow on the bottom data display line to move left.
- Page 18 01/01 01/01 01/01 08:00 08:30 09:00 70.0 41.0 21.0 Ea Row= 1.0 55.9 9:00:00 Ea Col= 30 Seconds 1/01/02...
-
Page 19: Features And Operation
Features and Operation Active Mode 1. The probe is sampling data and a graphic is displayed on the LCD. Past and present data may be viewed. Also called the Awake Mode, it is the most-frequently viewed display. 2. The left side of the display shows the user-defined temperature criteria for the probe being monitored. - Page 20 01/01 01/01 01/01 08:00 10:00 12:00 70.0 41.0 21.0 Ea Row= 1.0 55.9 9:00:00 Ea Col= 2 Minutes 1/01/02...
- Page 21 6. In the zoomed-out mode more than one collected temperature appears in each column. So if the ThermaViewer is set to store data every minute and the graph is set to “each column = 2 minutes,” then each column will have a vertical line in it with the high temperature as the top of the line and the low temperature being the bottom of the line (see illustration at left).
- Page 22 01/01 01/01 01/01 08:00 08:30 09:00 70.0 41.0 21.0 Ea Row= 1.0 55.9 9:00:00 Ea Col= 30 Seconds 1/01/02...
-
Page 23: Sleep Mode
7. If the roll-over option in the Systems Parameters menu is set to “on,” the oldest data will be overwritten. If the roll-over option is set to “off,” no data will be added once the ThermaViewer’s memory is full of collected values. - Page 24 System Parameters > Probe 1 Parameters/Setup Probe 2 Parameters/Setup Illustration Two Illustration One System Parameters Time 9:00:00 Date 1/01/01 Auto-sleep after 10:00 (min:sec) Reset to factory defaults no Download Data yes Password 1234 disabled...
-
Page 25: Menu Mode
(continued) Menu Mode When the ENT key is pressed during the Active Mode the ThermaViewer enters the Menu Mode (see illustration one at left). By using the Up or Down arrow keys, one of three menu options may be chosen. Press the ENT key to display the selected menu. - Page 26 System Parameters > Probe 1 Parameters/Setup Probe 2 Parameters/Setup Illustration Two Illustration One Probe 1 Parameters/Setup Sample data once every 30 seconds 30 seconds 30 seconds 30 seconds 30 seconds Store data once every 30 seconds Recorded temperature average Temperature Scale F Maximum display temperature 122.0 Minimum display temperature 32.0 Reference Line...
-
Page 27: Probe One And Two Parameters/Setup
The Probe One (or Probe Two) Parameters/Setup Menu allows customization of the ThermaViewer’s display (such as sample rate, data storage rate, and data storage value) to meet the owner’s specific needs (see illustration two at left). The fields described in the following pages may be changed by an owner. - Page 28 Probe 1 Parameters/Setup Sample data once every 30 seconds 30 seconds 30 seconds 30 seconds 30 seconds Store data once every 30 seconds Recorded temperature average Temperature Scale F Maximum display temperature 122.0 Minimum display temperature 32.0 Reference Line 72.0 Memory rollover on Relay disabled...
- Page 29 (continued) Features and Operation The following Probe One/Probe Two Parameters/Setup fields may be changed by the owner: v i f v i f v i f v i f i n i i n i...
- Page 30 Probe 1 Parameters/Setup Sample data once every 30 seconds 30 seconds 30 seconds 30 seconds 30 seconds Store data once every 30 seconds Recorded temperature average Temperature Scale F Maximum display temperature 122.0 Minimum display temperature 32.0 Reference Line 72.0 Memory rollover on Relay disabled...
- Page 31 The first three fields determine what temperatures are actually sampled and stored by the ThermaViewer. The ThermaViewer can be set to sample a temperature every 15 seconds but only record a temperature every minute, or every five minutes, etc. This causes the temperature data to be buffered in order to filter out quick temperature fluctuations.
- Page 32 Stereo Jack Side View...
-
Page 33: Downloading Temperature Data
2. Using terminal emulation software (like Microsoft Windows HyperTerminal), configure the PC to receive data. 3. Press the ENT key on the ThermaViewer to open up the menu. Press the ENT button to select System Parameters, move to the download data selection, and select Yes. Data will be imported... -
Page 35: Warranty
Warranty Warranty Two Dimensional Instruments, LLC warrants the ThermaViewer line of instruments to be free from defects in material and workmanship for a period of twelve months after delivery. In the event of a claim under this warranty the product or part must be returned to the factory for repair or replacement (shipping prepaid) with a Return Authorization Number. - Page 36 FCC Regulations This equipment has been tested and found to comply with the limits for a Class B digital device, pursuant to Part 15 of the FCC Rules. These limits are designed to provide reasonable protection against harmful interference in a residential installation. This equipment generates, uses, and can radiate radio frequency energy and, if not installed and used in accordance with the instructions may cause harmful interference to radio communications.
Need help?
Do you have a question about the ThermaViewer and is the answer not in the manual?
Questions and answers