Table of Contents
Advertisement
Quick Links
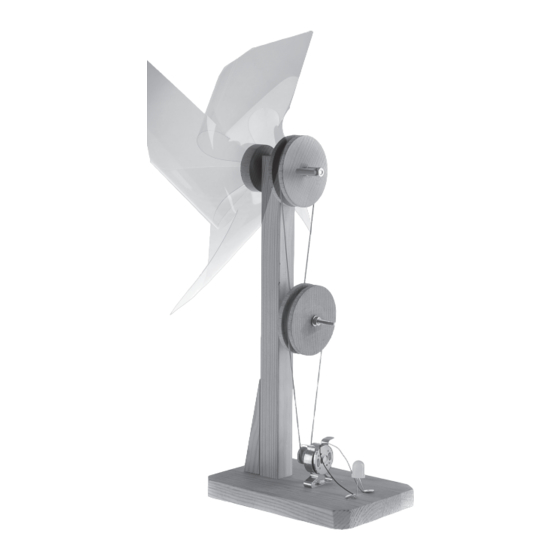
W i n d g e n e r a t o r
The OPITEC range of projects is not intended as play toys for young children.They
are teaching aids for young people learning the skills of Craft, Design and Technolo-
gy.These projects should only be undertaken and tested with the guidance of a fully
qualified adult. The finished projects are not suitable to give to children under 3
years old. Some parts can be swallowed. Dan- ger of suffocation!
103.410
Please Note
Parts list
- 1x Jumbo Light Diode
- 1x Solar motor
- 1x Spring clip
- 1x Reducer 4/2 mm
- 2x Pulley ø 15 mm
- 2x Pulley ø 60 mm
- 1x Wooden disc ø 40 mm
- 1x Hand crank
- 1x Vacuum plastic, transparent, DIN A4
- 2x Brass sleeve ø 6/4 x 20 mm
- 2x Machine screw 4 x 70 mm
- 10x Nuts M4
- 10x Washers M4
- 2x Drawing pins
- 1x Screws 3 x 12 mm
- 2x Rubber bands ø 90 x 1 mm
- 1x Wooden base 15 x 100 x 150 mm
- 1x Wooden base 20 x 20 x 350 mm
Necessary tools
Ruler, pencil
Hacksaw, wood saw
Drills ø 4 + ø 5 mm
Spanner 7 mm
Screwdriver
Crosshead screwdriver
Scissors
Hole punch
Advertisement
Table of Contents

Summary of Contents for Opitec 103.410
- Page 1 Hole punch Please Note The OPITEC range of projects is not intended as play toys for young children.They are teaching aids for young people learning the skills of Craft, Design and Technolo- gy.These projects should only be undertaken and tested with the guidance of a fully qualified adult.
- Page 2 10,0 20,0 20,0 40,0 20,0 Instructions 150,0 1. Base (15 x 100 x 150 mm) mark out and saw the corners as shown. Sand the corners to finish. 10,0 150,0 2. Support wedge (20 x 20 x 80mm) cut this from the wood strip 20 x 20 x 350 mm Sand to finish 270,0 80,0 3.
- Page 3 Instructions 5. Glue the stand and support on the base as shown Place for Motor diode clamp Wooden strip Support 6 Drill the centre of the pulleys 15 and 60mm dia out to 6mm 7. Lay the pulleys on top of each other and glue them together so that the holes line up. Insert the 6/4 x 20 mm sleeve Note: Remove any burr at the ends 8 Hand crank, shorten to 6 mm 9.
- Page 4 Instructions 10. Cut the plastic foil for the sail into a square as shown. Mark out the diagonals. The circle shows, where at a later stage, the cuts go. Use a hole punch to make a 4mm dia. in each corner as shown. Cut the foil down to the circle and then punch a 4mm dia.
- Page 5 Instructions 12. To continue, slide a washer up to the nut. Insert the machine screw in the bearing in the stand and on the other side add a further washer and nut. Tighten and adjust the assembly so that the sail can spin freely. Now add the single large wooden disc and tighten it with a nut.
Need help?
Do you have a question about the 103.410 and is the answer not in the manual?
Questions and answers