
Related Manuals for Robur AY Series


Summary of Contents for Robur AY Series
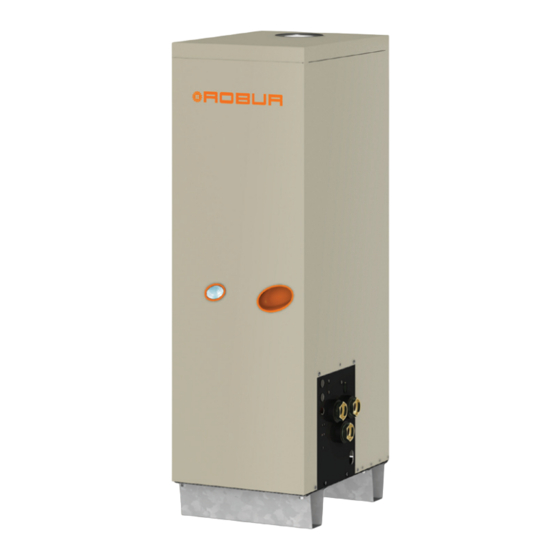
- Page 1 Installation, user and maintenance manual AY Condensing line, AY series 4 star condensation boiler for heating Gas powered...
- Page 2 Revision: A Code: D-LBR531 This manual has been drawn up and printed by Robur S.p.A.; whole or partial reproduc- tion of this manual is prohibited. The original is filed at Robur S.p.A. Any use of this manual other than for personal consultation must be previously authori- sed by Robur S.p.A.
-
Page 3: Table Of Contents
Installation, user and maintenance manual – AY Condensing line, AY series INDEX OF CONTENTS PREFACE �������������������������������������������������������������������������������������������������������� 5 OVERVIEW AND TECHNICAL CHARACTERISTICS ������������������������������������� 7 2.1 WARNINGS ...............................7 2.2 OVERVIEW OF OPERATION ......................10 2.3 TECHNICAL MANUFACTURING CHARACTERISTICS ..............11 2.4 TECHNICAL DATA ..........................11 2.5 DIMENSIONS AND SERVICE PANEL .................... -
Page 5: Preface
SECTION 5 is intended for use by the electrical installation technician; it provides the information required to hook up the appliance electrically. SECTION 6 is intended for use by the Robur TAC; it provides the indications necessary to carry out the entire initial activation procedure (preliminary verification of plant com- pliance, initial activation, and regulation of gas flow to the burners) and the operations for change of gas type, if required. - Page 6 = START OF OPERATING PROCEDURE = REFERENCE to another part of the manual or other document...
-
Page 7: Overview And Technical Characteristics
Installation, user and maintenance manual – AY Condensing line, AY series OVERVIEW AND TECHNICAL CHARACTERISTICS In this section, for all users, you will find general warnings, the operating principle of the appliance and its manufacturing characteristics. This section also contains techni- cal data and dimensional drawings of the appliance. - Page 8 Ro- bur S.p.A. Before contacting your authorised Robur Technical Assistance Centre (TAC) for the ini- tial activation, the firm must ensure that: •...
- Page 9 To carry out entire procedure correctly, follow the instructions in Paragraph 6.1 PROCE- DURE FOR INITIAL ACTIVATION → 63. Contact your local Robur TAC. To find out who your local TAC is, contact Robur on 035 888.111. (Tel. +39.035.888111). The guarantee could be voided if the initial activa- tion is not carried out (and validated) by a Robur TAC.
-
Page 10: Overview Of Operation
If the appliance is to be disposed of, contact Robur S.p.A. for its correct disposal. If the appliance is to be sold or transferred to another owner, ensure that this “Installa- tion, user and maintenance manual” is handed over to the new owner and installation technician. -
Page 11: Technical Manufacturing Characteristics
Installation, user and maintenance manual – AY Condensing line, AY series The appliance is a Range Rated boiler: the power delivery of the appliance can be adapted to the real system requirements by regulating the nominal gas flow (nominal thermal input). - Page 12 maximum °C Hot water return temperature Minimum °C Nominal °C Nominal 1900 Hot water flow rate maximum 3200 Minimum 1500 at nominal water Hot water pressure drop 0.18 flow maximum °C Ambient air temperature (dry bulb) Minimum °C methane G20 m3/h 3.69 (nominal)
- Page 13 Installation, user and maintenance manual – AY Condensing line, AY series Table 2�2 – SERIE AY SERIE AY Water T. Water flow 20°C (l/h) Pressure drops (bar) 1008.0 0.066 1198.0 0.085 1398.0 0.106 1608.0 0.136 1801.0 0.165 2007.0 0.204 2199.0 0.234...
-
Page 14: Dimensions And Service Panel
2�5 DIMENSIONS AND SERVICE PANEL Figure 2�2 – Dimensional drawing of model AY00-120 LEGEND Series AY model AY00-120 AY00-120 - front and RH side views (dimensions in mm). - Page 15 Installation, user and maintenance manual – AY Condensing line, AY series Figure 2�3 – SERVICE PANEL: Series AY - AY Condensing line LEGEND gas fitting ("G 3/4 M) outlet water fitting ("G 1 1/4 F) inlet water fitting ("G 1 1/4 F) condensate drain fitting (ext.
-
Page 17: Normal Operation
Installation, user and maintenance manual – AY Condensing line, AY series NORMAL OPERATION In this section you will find all the indications necessary for the activation, regulation and control of operation of the appliance via the controller present in the electrical panel. -
Page 18: On-Board Electronics
2 of the controller: the procedure is illustrated in Paragraph 3.3 RESET OPERA- TIONS → 21. After it is reset, the appliance will make a new attempt to activate. If the appliance locks out several times, contact a Robur TAC by calling the Technical Service Department of Robur S.p.A. (tel. +39.035.888111). - Page 19 Installation, user and maintenance manual – AY Condensing line, AY series Figure 3�1 – On-board electronics LEGEND 4 digit display for data and operating codes. Knob for scrolling through/ selecting operating data Controllers AY10 and S70. Description of menu of AY10 controller The parameters and settings of the appliance are grouped in the menus shown on the controller’s display:...
- Page 20 To set new values for the parameters, see Paragraph 4.9 PROGRAMMING OF HYDRAULIC PARAMETERS → 38. Menus 4, 5, 6 and 7 exclusively concern the installation technician and Robur’s autho- rized Technical Assistance Centre.
-
Page 21: Reset Operations
Installation, user and maintenance manual – AY Condensing line, AY series the display will show the first of the menu’s parameters, in this example "0.0" or "0.40" (= menu 0, parameter "0" or "40"). turn the knob to scroll through content (menus, parameters,... -
Page 22: Operating Settings
(action "20") or "reset other codes" (action "21"). Actions "23", "24" and "25" are used to regulate the combustion parameters or for gas type changeovers, and are thus for use only by the installation technician or Robur TAC. Reset flame controller (parameter "20"): You will need: the display reads "2.20"... -
Page 23: Prolonged Periods Of Disuse
Installation, user and maintenance manual – AY Condensing line, AY series The user modifiable parameters (only if the appliance is not controlled by a DDC) are those in menu 3 of the controller, as follows: • parameter "160": thermostat control. - Page 24 Before starting this procedure, the hydraulic system installation technician must: • Ascertain whether the appliance requires any maintenance (contact your authorised Robur Technical Assistance Centre or refer to Paragraph 6.2 MAINTENANCE → 68); • fill the system circuit if it has been emptied, as given in Paragraph 4.6 FILLING THE SYSTEM CIRCUIT (APPLIANCE) →...
-
Page 25: Hydraulic System Installation Technician
Installation, user and maintenance manual – AY Condensing line, AY series HYDRAULIC SYSTEM INSTALLATION TECHNICIAN In this section you will find all the instructions necessary for installing the appliance from a hydraulic viewpoint. Before proceeding with operations to create the hydraulic and gas supply plant of the appliance, the professionally qualified personnel concerned are advised to read Pa- ragraph 2.1 WARNINGS →... - Page 26 The dimensions and weight of the appliance are given in Paragraph 2.4 TECHNICAL DATA → 11. Supporting base Always position the appliance on a flat level surface that is made of fireproof material and able to sustain the weight of the appliance itself. Installation at ground level •...
-
Page 27: Hydraulic Connections
Installation, user and maintenance manual – AY Condensing line, AY series Figure 4�1 – Clearances LEGEND * dimensions in mm. sample minimum clearances. 4�3 HYDRAULIC CONNECTIONS General indications • The hydraulic plant may be created using pipes in stainless steel, black steel, copper or crosslinked polyethylene suitable for heating and cooling plants. - Page 28 If the Robur appliances are not controlled by a DDC. In appliances with only hot and only cold modules (e.g.: AY series) or appliances of the 4 pipe type with two distinct cold and hot modules, the module is ALWAYS "active". in 2 pipe type (hot and cold) appliances, the “cctive”...
- Page 29 Technical Assistance Centre (TAC). These operations are described in Section 6 INITIAL ACTIVATION AND MAINTENANCE → 63. The products’ guarantee is void if initial activation is not carried out by a Robur TAC. The following figures show examples of typical hydraulic circuits, composed of a single or multiple appliances.
-
Page 30: Gas Supply System
Figure 4�3 – Diagram of hydraulic system (type with several appliances) LEGEND anti-vibration coupling pressure gauge flow regulator valve water filter check valve system expansion tank system water circulator AY00-120 stand-alone Example of hydraulic plant diagram for connection of no. 2 AY00-120 units. 4�4 GAS SUPPLY SYSTEM The installation of gas supply pipes must be carried out in compliance with norms and... -
Page 31: Condensate Discharge Connection
Installation, user and maintenance manual – AY Condensing line, AY series LPG systems must be equipped with a first stage pressure reducer near the liquid gas tank to reduce the pressure to 1.5 bar and a second stage pressure reducer from 1.5 to 0.03 bar near the appliance. -
Page 32: Filling The System Circuit (Appliance)
restore the appliance. If the appliance is operated with the siphon empty, there is a risk of leaks of combusted gas. 4�6 FILLING THE SYSTEM CIRCUIT (APPLIANCE) After having completed all the connections of the hydraulic, electrical and gas supply plants, the hydraulic system installation technician can proceed with filling the hydrau- lic circuit, observing the following stages: •... -
Page 33: Filling The Appliance's Internal Circuit
Installation, user and maintenance manual – AY Condensing line, AY series Nevertheless, it is advisable to consult the technical specifications of the monoethyle- ne glycol used. If automatic loading systems are used, a seasonal check of the quantity of glycol present in the plant is also necessary. -
Page 34: Exhausting The Combustion Products
The supplied fumes kit must be installed by the installation technician. The DN80 union for connecting the fumes kit to the appliance is located at the top of the latter (see Figure 4.5 AY Condensing line, AY series → 35) with a vertical outlet. - Page 35 Installation, user and maintenance manual – AY Condensing line, AY series Figure 4�5 – AY Condensing line, AY series LEGEND seen from above Fumes outlet fitting dimensions. FUMES EXHAUST EQUIPMENT FOR EXTERNAL INSTALLATION (installation technician only) Install the equipment externally as follows (see Figure 4.6 Fumes evacuation pipe kit →...
- Page 36 Figure 4�6 – Fumes evacuation pipe kit LEGEND roof mounting terminal (DN80) extension tube (DN80) rain cover (DN80) flanged fitting (DN80) on top panel A+B+C fumes evacuation pipe kit fumes kit for exterior configuration (B53P). SIZING FUMES PIPES FOR TYPE B INSTALLATIONS If the installation requires the combustion products to be conveyed in a type B confi- guration, the flue must be sized with reference to the following table.
- Page 37 Installation, user and maintenance manual – AY Condensing line, AY series To install the appliance in a type C configuration, you must purchase an optional type C conversion kit (see Section 7 ACCESSORIES → 75), made by Centrotherm, and refer to the following technical data table for the sizing of the combustion fumes outlet and combustion air intake pipes.
-
Page 38: Programming Of Hydraulic Parameters
Type C boiler connected, via its pipes, and optionally via a fitting, to an air supply terminal and connected to a dedicated or collective flue. Description of possible appliance installation configurations. 4�9 PROGRAMMING OF HYDRAULIC PARAMETERS The hydraulic parameters can be set according to the procedure described in this pa- ragraph only when the appliance is not connected to a DDC. - Page 39 Installation, user and maintenance manual – AY Condensing line, AY series The appliance switches off; the system water temperature slowly drops (loses heat to the environment); the intake water temperature reaches +38 °C (= setpoint + differential); the appliance turns back on: heating starts again. The cycle is repeated.
- Page 40 (parameter "156") and the intake (parameter "157"), accessible in menu 5 (and hence for the Robur TAC only). For example, if the appliance is used on a system for underflo- or heating, parameters "156" and "157" must be set to limit the user's options in set- ting temperature setpoint parameter "161"...
-
Page 41: Electrical System Installation Technician
Installation, user and maintenance manual – AY Condensing line, AY series ELECTRICAL SYSTEM INSTALLATION TECHNICIAN In this section you will find all the instructions necessary for connecting the appliance and DDC from an electrical viewpoint. The procedures to follow in order to complete the entire process of electrical installa- tion of the appliance are the following: CONNECTING THE APPLIANCE TO THE MAINS. - Page 42 Table 5�1 – AY10 and S70 controller components CONTROLLER COMPONENT LEGEND CODE DESCRIPTION COMPONENTS OF CONTROLLER S70 limit thermostat connector gas solenoid valve connector gas valve ON indicator lamp connector flame controller connector fumes thermostat connector circuit water differential pressure switch connector A1 - A2 auxiliary connectors circuit water circulator controller jumper...
- Page 43 Installation, user and maintenance manual – AY Condensing line, AY series Figure 5�2 – Functional diagram Appliance wiring diagram.
-
Page 44: Connecting The Appliance To The Mains
5�1 CONNECTING THE APPLIANCE TO THE MAINS The examples of connection of the appliance to the mains in this paragraph refer to: • single appliance plants • multiple appliance plants SINGLE APPLIANCE PLANTS The appliance must be connected to a 230 V 1N - 50 Hz power supply, as follows (see example in Figure 5.3 connection to electrical mains (230 V 1N - 50 Hz) →... - Page 45 Installation, user and maintenance manual – AY Condensing line, AY series Make sure the ground cable is longer than the live cables. In this way it will be the last wire to be pulled away if the mains cable should accidentally be pulled, and will thus guarantee the ground connection.
-
Page 46: Electrical Connections For The System Circulator
Disconnect the appliance from the electrical power supply via the external disconnec- ting switch only after having performed the shutdown cycle (via the DDC or consent switch) and having waited for it to terminate (approximately 3 minutes). Make sure the ground cable is longer than the live cables. In this way it will be the last wire to be pulled away if the mains cable should accidentally be pulled, and will thus guarantee the ground connection. - Page 47 Installation, user and maintenance manual – AY Condensing line, AY series Locate, on the appliance’s controller (SCH), jumper "J2" on the S70 (bottom right, below the "NO Contact" contacts) and make sure that it is set as shown in detail "A"...
- Page 48 CONNECTIONS FOR CONTROLLING A SHARED CIRCULATOR This connection applies to hydraulic circuits which have a single primary circuit circu- lator for multiple appliance (shared circulator) installed on the plant. For example: 1 circulator/3 appliances. In such cases, a three-phase water circulator (400 V AC) may be required. The choice of water circulator depends on the number of appliances being served as the specifications of the system (water flow rate, head, etc.) which are determi- ned during the design process.
- Page 49 Installation, user and maintenance manual – AY Condensing line, AY series Figure 5�6 – Direct control of shared circulator Example of electrical connection of a shared three-phase circulator (400 V AC).
-
Page 50: Connections For Consent Switch Operation
> IF THE WATER CIRCULATOR CONTROL IS NOT TO BE HANDLED BY THE APPLIAN- CE BUT RATHER BY AN EXTERNAL DEVICE: • the electrical system installation technician must make the electrical connection in such a way that, after the appliance is switched off, the circulator remains in operation for at least another 3 minutes. -
Page 51: Use Of The Direct Digital Controller
Installation, user and maintenance manual – AY Condensing line, AY series Figure 5�7 – Series AY - operated by on-off consent switch LEGEND controller (AY10+S70) HOT consent terminal common terminal consent switch Example of operation consent connection. 5�4 USE OF THE DIRECT DIGITAL CONTROLLER This paragraph is dedicated to the installation of the Direct Digital Controller (DDC). - Page 52 Figure 5�8 – Direct Digital Control (DDC) LEGEND ambient temperature probe - 2-pole connector external alarm systems - 3-pole connector power supply 24 V AC - 4-pole connector external consents - 6-pole connector CAN BUS network connector (orange) 232 serial connection to PC - 9-pole connector mounting holes DDC Front and rear views with detail of electrical connections.
- Page 53 Installation, user and maintenance manual – AY Condensing line, AY series Figure 5�9 LEGEND Holes for mounting DDC’s to panel horizontal: 168 mm vertical: 158 mm Centre distances of mounting holes for Direct Digital Controller (DDC). The DDC's operating temperature range is 0 - 50 °C. If the temperature of the room where the DDC is installed falls below zero, it continues to operate correctly to -10 °C.
- Page 54 The DDC is equipped with a backup battery which retains the memory settings in case of power failure. The battery has a service life of around 7 years, after which it must be replaced by the Robur TAC. 3) How to connect the Direct Digital Controller (DDC) to the appliance...
- Page 55 Installation, user and maintenance manual – AY Condensing line, AY series The CAN network can link together a maximum of: 3 DDC's, each of which is in turn connected to 16 hot only modules + 16 cold only modules or 16 hot/cold modules.
- Page 56 The ROBUR NETBUS cable is available as an accessory (see Section 7 ACCESSORIES → 75). > CONNECTION PROCEDURE Instructions for the specific operations to be carried out for the connection of the CAN bus cable follow: • Step A: connect the CAN BUS cable to the DDC.
- Page 57 Installation, user and maintenance manual – AY Condensing line, AY series Figure 5�13 – Connection from CAN BUS to connector P8 LEGEND Insulating tape to protect board/shield CAN BUS cable wires CAN bus cable shield terminal and screw for fixing ...
- Page 58 Figure 5�14 – detail wires and jumpers J21 - terminal/intermediate node DDC LEGEND Direct Digital Control Jumper CAN-BUS in DDC board detail case "terminal node" (3 wires; J21=jumper "closed") detail case "intermediate node" (6 wires; J21=jumper "open") H,L,GND data signal wires Detail terminal and intermediate node: jumpers position J21: "closed"...
- Page 59 Installation, user and maintenance manual – AY Condensing line, AY series Phase B: connect the CAN BUS cable to the appliance The CAN BUS cable must be connected to the orange socket on the machine’s on-bo- ard controller (see detail "D" in Figure 5.15 Connection of CAN BUS cable to connector P8 on controller AY10 →...
- Page 60 Connect the three coloured wires to the orange connector, as shown in detail "A" in Figure 5.16 detail of wires and jumpers J1 - appliance terminal/intermediate node → 60. Observe the terminal markings L, H, GND (on the board at the base of the socket "P8") which are given both in Table 5.2 CAN BUS cables type →...
- Page 61 Installation, user and maintenance manual – AY Condensing line, AY series Figure 5�17 – CAN BUS connection for single appliance systems LEGEND digital control panel controller (AY10+S70) CAN BUS jumper on AY10 controller CAN BUS jumper on DDC board terminal node connection (3 wires; J1 and J21 = "closed") H,L,GND data signal wires CAN BUS cable connection between DDC and one appliance.
- Page 62 Figure 5�18 – CAN BUS connection for multiple appliance systems CAN BUS cable connection between 1 DDC and multiple appliances.
-
Page 63: Initial Activation And Maintenance
MAINTENANCE → 68): general information and warnings; general indications regarding checks, controls and cleaning. • Instruction for the Robur TAC or gas type conversion (Paragraph 6.3 CHANGE OF GAS TYPE → 70). Before proceeding with the operations described in this section, the installation techni- cian concerned is invited to read Paragraph 2.1 WARNINGS →... - Page 64 During the initial activation procedure, the combustion parameters must be checked and set ONLY by a Robur TAC. In this stage, NEITHER the user NOR the installation tech- nician is authorised to perform such operations, and in so doing may invalidate the...
- Page 65 Installation, user and maintenance manual – AY Condensing line, AY series The appliance is supplied with all of its units already regulated for the type of gas for which the appliance itself is set up. In this step, the combustion parameters must AL- WAYS be checked and set.
- Page 66 → 67 and the fumes With reference to Table 6.1 Gas type identification values analyser reading, check that the CO content percentage of the combustion pro- ducts is within ±0,2 of the characteristic value for the gas being used. If the value is in the correct range, go to step "17". Otherwise, remove the side panel (N) and follow the instructions given in steps "25"...
- Page 67 Installation, user and maintenance manual – AY Condensing line, AY series Figure 6�2 – Gas valve LEGEND Torx wrench TX40 CO2 adjuster screw Mains gas pressure fitting Gas valve Honeywell VK 4115V Table 6�1 – Gas type identification values TYPE OF GAS...
-
Page 68: Maintenance
Press the knob again to execute the forcing. The request stops flashing, and the display shows “2.23” again. The forcing operation has been performed. To exit the menu, turn the knob clockwise until “2.E” displays, and press it to re- turn to the menu selection: "2.". - Page 69 (GS) and the gas valve. Any operation that regards internal components of units of the appliance must be carried out by an authorized Robur Technical Assistance Centre (TAC), according to the instructions supplied by the manufacturer. Ordinary scheduled maintenance Perform the operations described below at least once a year.
-
Page 70: Change Of Gas Type
FILLING THE SYSTEM CIRCUIT (APPLIANCE) → 32. 6�3 CHANGE OF GAS TYPE The following procedure must be done by a Robur TAC or professionally qualified technician. To convert the appliance to operation with a different type of gas from that indica- ted on the sticker on the appliance's internal panel and the packaging, proceed as follows. - Page 71 Installation, user and maintenance manual – AY Condensing line, AY series - CHECK THE VALUE OF PARAMETER "45"� Turn on the master power switch (GS). Enter menu 1 (accessible to everyone) and check the setting of parameter "45". 10. If the value does not coincide with the value specified for the type of gas with which the appliance is to be operated (see Table 6.1 Gas type identification va-...
- Page 72 Fit a combustion products probe in one of the points provided fro this purpose on the external fumes equipment. Switch the appliance on and wait for it to stabilise (3 minutes). → 67 and the fumes With reference to Table 6.1 Gas type identification values analyser reading, check that the CO content percentage of the combustion pro- ducts is within ±0,2 of the characteristic value for the gas being used.
- Page 73 Installation, user and maintenance manual – AY Condensing line, AY series Switch off and completely restore the appliance. Figure 6�3 – Gas type conversion LEGEND tube/valve connection nut tube/air-gas mixer connection nut gas valve gas nozzle gasket (large) on tube/valve fitting...
-
Page 75: Accessories
Installation, user and maintenance manual – AY Condensing line, AY series ACCESSORIES This section contains a list of the accessories that are available for the installation and use of the appliance. To order these accessories, contact Robur S.p.A. on +39.035.888111. - Page 76 Cable for data Maximum length: 450 communication Robur “NETBUS” CAN m (for details, see the networks: for network O-CVO008 BUS CABLE electrical connections connection between section). DDC and appliance. List of appliance accessories.
-
Page 77: Appendix
Installation, user and maintenance manual – AY Condensing line, AY series APPENDIX 8�1 MACHINE OPERATING CODES If, during the operation of the appliance, the display of the controller of the appliance (or also of the display of the Direct Digital Controller, if connected) signals an operating code, it is necessary to: •... - Page 78 E 112 parameter 20 (or via DDC). If the code CONTROL UNIT possible attempts to ignite persists, contact authorised Robur TAC. the burner have failed. The status of the pressure MACHINE switch does not correspond...
- Page 79 Installation, user and maintenance manual – AY Condensing line, AY series The gas solenoid valve has been off for more than 10 minutes (with the flame GAS SOLENOID controller on), or "E 101" is Reset via the controller, menu 2,...
- Page 80 Contact authorised Robur TAC. UNSUCCESSFUL E 89 AMBIENT Interruption or short circuit of E 90 TEMPERATURE ambient temperature sensor. Contact authorised Robur TAC. SENSOR DEFECTIVE One of the following is absent or incorrect: serial number of controller, hardware CONTROLLER E 91 version code or encryption Contact authorised Robur TAC.
- Page 81 Installation, user and maintenance manual – AY Condensing line, AY series...
- Page 82 Robur is dedicated to dynamic progression in research, development and promotion of safe, environmentally-friendly, energy-efficiency products, through the commitment and caring of its employees and partners. La Mission Robur Robur Spa tecnologie avanzate per la climatizzazione Via Parigi 4/6 24040 Verdellino/Zingonia (Bg) Italy...
Need help?
Do you have a question about the AY Series and is the answer not in the manual?
Questions and answers