Brigade Backeye 360 Select Installation Manual
Hide thumbs
Also See for Backeye 360 Select:
- Installation & operation manual (48 pages) ,
- Installation manual (23 pages) ,
- Quick user manual (16 pages)

Related Manuals for Brigade Backeye 360 Select


Summary of Contents for Brigade Backeye 360 Select
- Page 1 ® Backeye 360 Select Installation Guide Please be sure to read and understand this manual before you perform any installation or calibration of this system. Installation Guide 4647B...
-
Page 2: Table Of Contents
2.6 BN360-100C-FIX (Fitting Kit) ........................... 4 2.7 BN360-LXXX (Camera Cables) ..........................4 3 Calibration Tools ................................5 3.1 BN360-CT-01 Brigade SD Calibration tool ......................5 3.2 BN360-CAL-MAT Calibration mats (4 of) ......................... 5 3.3 Backeye®360 Select USB ............................5 4 Hardware Installation ............................... 6 4.1 Cameras (4 of) ................................. -
Page 3: Introduction
The installer is responsible for the fitness for purpose of the overall system and adheres to relevant regulations and legislation. Operators of the vehicle to which the Brigade Backeye®360 Select system is fitted must be made fully aware of how to interpret the images provided by the system so they will not be distracted by or rely completely on it. -
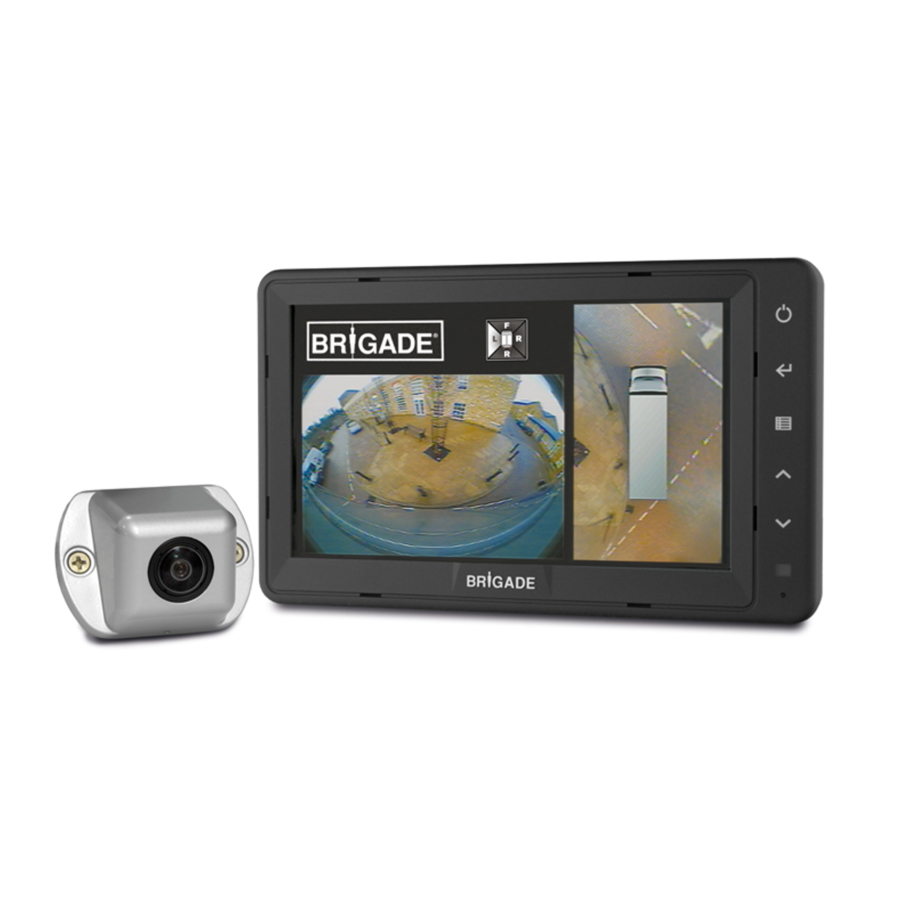
Page 4: System Components
System Components 2.1 BN360-ECU-10 The ECU is the interface between all of the cameras and the monitor. 2.2 BN360-100C (4 cameras) The cameras comprise of the camera attached to a mounting bracket and a camera housing that covers the camera and its bracket. 2.3 BN360-10H-01 The 40 pin system cable includes all inputs and outputs to the ECU. -
Page 5: Calibration Tools
The USB contains all documentation, software and support files required to install and calibrate the system. Refer to section 12 for USB contents. For the latest USB contents please contact Brigade Electronics. Backeye®360 Select Calibration Software (supplied on the Backeye®360 Select USB) This is the software used to calibrate the system. -
Page 6: Hardware Installation
10% of the image at the bottom in the centre. In some cases the angle of the cameras will need to be addressed. This will involve either using one of Brigade’s universal mounting brackets see section 11.3 or fabricating suitable brackets to adjust the angle of the cameras to give the 10% occupancy of the image. -
Page 7: Horizontal Mounting
brackets can be used to correct camera angle Vehicle body now occupies approximately 10% of the image in the centre 4.1.3 Horizontal mounting Cameras can be mounted under slung on a horizontal plane. When mounted in this orientation the camera needs to be rotated through 180°... -
Page 8: Cabling
4.3 Cabling Camera cables should be run in conduit and along suitable cable runs throughout the vehicle. Avoid running cables with vehicle power cables to prevent possible interference. To prevent cable damage Always Allow a reasonable radius when folding excess cable and do not over tighten cable ties. Note: 13mm hole required to pass connectors through. -
Page 9: Initial System Power Up And Test
Initial System Power Up And Test Turn on the vehicle ignition and check the image output on the monitor. Each cameras single view can be checked by pressing the View Select button on the Set-up & View Select button. Connecting the calibration tool (without SD card) will put the system into full screen mode, where the cameras can be viewed better. -
Page 10: Calibration
Calibration 6.1 Calibration Environmental A minimum 2m perimeter is needed around the vehicle. The floor needs to be a flat surface as calibration may not be possible if the ground is uneven. The calibration pattern is made up of four triangles positioned as shown in Calibration pattern and vehicle alignment below. -
Page 11: Setting Up The Sd Card For Calibration
The image collection process will create an image file on the SD card and store the images captured (front.bmp, rear.bmp, right.bmp and left.bmp. The progress will be displayed on the monitor as shown below. Note: Do not remove the SD card during this process. WARNING: Take care not to overwrite existing wanted files on the SD Card as there will be no warning;... -
Page 12: Running The Pc Program
Please contact Brigade for the latest version. Once the installation is complete double click the desktop icon to open the Brigade Calibration Software, the start screen is shown below. System version status bar 1: System version status bar (Displays the software version and the currently loaded Config file see section 6.5) -
Page 13: Opening The Configuration File
Tool bar 6: Input configuration file (loads configuration file from SD card see section 6.5) 7: Input image (loads the images from the SD card section 6.6) 8: Around View preview (opens the surround view preview screen insert see section 6.8) 9: Save Lut (saves the calibrated data files to the SD card see section 6.14 ) 10: Exit (exits the program) 6.5 Opening the Configuration file... -
Page 14: Opening The Image Files
6.6 Opening the image files The 4 camera images on the SD Card acquired from the Backeye®360 Select ECU must be loaded after the configuration file is loaded. Click the “Image Load” icon from the calibration tool bar. Select the SD Card from “Image Load” window by pressing the ‘▼’... -
Page 15: Surround View Preview
Selecting the correct control point coordinates and control point modification Align the control point to the outermost corner as shown below, aligning the blue lines to the triangle. The images below show before and after alignment. It is recommended to move the control point outside of the triangle to leave a clear gap between it and the triangle then work the point back towards the triangle until it meets the outer edge of the triangle. -
Page 16: Surround View Adjustments
6.9 Surround View adjustments Surround View Property Change “Enter Marker Length” box to the triangle size of the calibration grid setup (Brigade calibration mats have 1500mm sides). Once the value has been entered press the enter key. Mask Type Change the Mask Type from ‘Predefined’ to ‘Blending Auto’ or ‘Blending FOV’ in the drop down box. ‘Blending Auto’... - Page 17 Adjusting the vehicle body size When the Mask type is selected the vehicle dimensions can be entered. Input the vehicle length and width into the “Vehicle Dimensions” window and press the enter key to apply. This will determine the size of the vehicle mask area.
- Page 18 Click the left/right movement button to move the image left and right Once the preferred mask position has been established check to see there is not excessive vehicle body or camera blind area (red area) shown. In some cases, the exact vehicle dimensions may leave some of the body or camera blind area visible (this is due to camera positioning and mounting angles).
-
Page 19: Loading Vehicle Overlay
6.10 Loading Vehicle overlay Click the “Load Car Image” button this will open a windows explorer window. Select an appropriate vehicle image from the Backeye®360 Select USB stick The vehicle image files can be found in the Vehicle images folder on the USB stick. -
Page 20: Parking Guide (Standard System Only)
The selected view will be displayed Rotation buttons can be used to rotate the image. Pan Up/Down button can be used to pan the view up and down Pan Left/Right button can be used to pan the view left and right Zoom in/out buttons can be used to zoom the view in and out 6.12 Parking Guide (Standard system only) -
Page 21: Lut Version
Select an appropriate Parking Line from the Backeye®360 Select USB stick see section 12. Bespoke Parking Lines can be created, the image must be 24bit .bmp format, background must be Black (RGB 0,0,0), line colour RGB must have no 0 values). Any colour that contains a 0 value in the RGB will be displayed as transparent. -
Page 22: Creating Surround View Data For Download To Ecu
If the input is too long or the version is set to 0.0 then a warning message will be displayed. 6.14 Creating Surround view data for download to ECU Save LUT file to SD Card Click the “Save LUT” button on the tool bar. SD Card selection Click the ‘▼’... - Page 23 The ‘Data Upload Info’ screen will show ‘Success’ for each element loaded. If there are any changes carried out after the initial ECU upload then a second upload is required, you may see Standard System ‘Failed’ next to some elements, this means that the file is the same and does not need updating (this will most commonly be seen with the “OSD Data”...
-
Page 24: Checking System Functionality
Checking System Functionality Check to see if the output is normal after the ECU resets. Ensure all blended areas are fully tested to make sure there are no blind spots around the vehicle. It is recommended to get an assistant to walk around the vehicle in the surround view to evaluate the calibration. 7.1 Good calibration All ground level objects i.e. -
Page 25: Dsp Upload
DSP Upload The DSP file on the ECU can be updated to provide either Standard View or Full Screen View operation if required. Note! If the vehicle images have already been captured (see section 6.2) save these to the PC to reload ready for recalibration once DSP has been updated. - Page 26 Please note if changing the DSP from the Standard system to the Full Screen system or vice versa the system may display an error message. This will be resolved once the correct calibration files have been loaded to the ECU. Delete the DSP file from the SD Card.
-
Page 27: Version Information Screen
Version Information Screen The system information loaded to the ECU can be viewed to identify system setup. With the ignition OFF, connect the calibration tool (without an SD card inserted) to the ECU and turn the ignition ON (the monitor will display the full screen image of the front camera). Press the Program button on Set-Up & View Select Button for more than 2 seconds and release the “Version Information”... -
Page 28: System Drawing
10 System Drawing... -
Page 29: Ecu & Camera Dimensions
11 ECU & Camera Dimensions 11.1 ECU NOT TO SCALE 11.2 Cameras NOT TO SCALE... -
Page 30: Brackets
11.3 Brackets 11.3.1 BN-360-100C-BKT03 This is a precut aluminium plate that can be shapped to allow camera mounting 11.3.2 BN360-100C-BKT02 This is a pre formed stainless steel adjustable bracket that will allow the camera angle to be adjusted 11.3.3 BN360-100C-BKT03C This is a camera protector that deflects objects from striking the cameras (to be used with the camera on its own) 11.3.4 BE-360-CD... -
Page 31: Usb Stick Content
12 USB Stick Content 1. Installation guide 1.1. Backeye®360 Select Installation Guide 2. Software 2.1. Backeye®360 Select calibration software 2.2. Standard DSP 1.65 2.3. Full Screen DSP 1.67 3. Default SD Card Data 3.1. Standard system 3.2. Full Screen system 4. -
Page 32: Sw Revision History
13 SW Revision History Calibration SW Version Release date Changes V2.23.2 07/2014 Initial release V2.61.0 Calibration of Full Screen system added (when calibrated with config “sbQLSTopConfig.bin’ and DSP SB1.67_01R00Q ) Parking Guide feature added (when calibrated with config “sbQConfigV1.bin”... - Page 33 This Page is left Blank Intentionality...
Need help?
Do you have a question about the Backeye 360 Select and is the answer not in the manual?
Questions and answers