
Summary of Contents for Spartan CRIMSON FIRE GLADIATOR CLASSIC 2009
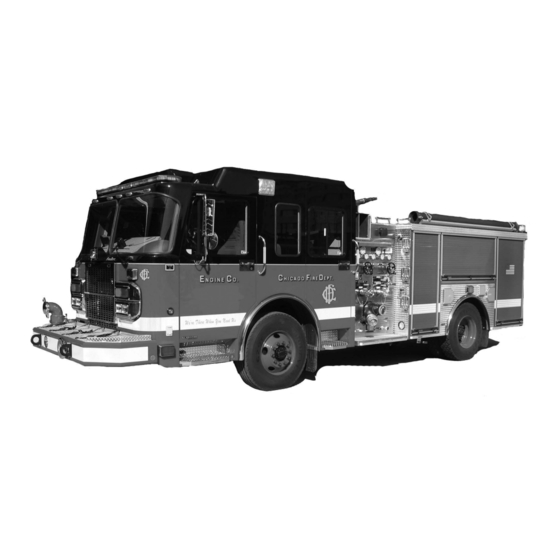
- Page 1 2009 SPARTAN/CRIMSON GLADIATOR CLASSIC Custom Pumper GUIDELINES FOR OPERATION HIGH PRESSURE PUMPER...
- Page 2 Department and covers Operational and Maintenance Procedures which need to be thoroughly understood and practiced, thereby ensuring both SAFE and EFFICIENT operation of your apparatus. Applicable expertise from the manufacturers, Spartan Motors, Inc., Crimson Fire Apparatus Company, LTD., and Hale Fire Pump Division of Idex Corporation, has been provided herein.
- Page 3 This manual is provided to assist those individuals assigned to drive and operate the 2009 Spartan/Crimson Custom Pumper. It is each Engineers responsibility to read and understand the information and instructions contained within this manual prior to operating the equipment.
- Page 4 CHASSIS Manufacturer: Spartan Motors, Incorporated Model: Gladiator Classic Cab Construction: Aluminum Components: • Detroit Series 60 - 12.7 Liter, 350 HP Turbo charged electronic diesel engine. • Allison, Model HD4060 electronic 5-speed automatic transmission with 4 gear lock-up. • Switchable transmission retarder.
- Page 5 CAPACITIES GROSS VEHICLE 42,000 lbs. WEIGHT RATING Front axle capacity - 18000 lbs. Rear axle capacity - 24000 lbs. FUEL CAPACITY: 63 Gallons CRANKCASE CAPACITY: 38 U.S. Quarts Crankcase oil type - 15W40, API Classification CF4/SG COOLANT CAPACITY: 55.5 U.S. Quarts - 50/50 mixture of Ethylene Glycol and water, which meets GM specifications POWER STEERING: 7 U.S.
- Page 6 PUMPER BODY Manufacturer: Crimson Fire Apparatus Co., LTD. Construction: Stainless Steel with Aluminum roll-up compartment doors Booster Tank: Booster tank is constructed of Polypropylene and is “L” shaped to provide for a lower hose bed height Features: • Reinforced hose bed cover with elastic band fastener •...
- Page 7 FIRE PUMP Manufacturer: Hale Products Division of Idex Corporation Model: QTWO 150-23S Type: Three-stage centrifugal Rated Capacity: 1500 Gallons per minute 1500 G.P.M. @150 PSI - - 1509 Engine RPM (nominal) 1500 G.P.M. @ 165 PSI - - 1550 Engine RPM (nominal) 1050 G.P.M.
- Page 8 PREVENTIVE MAINTENANCE OF PUMP Pump Gear Box: Use SAE 90 Weight Gear Oil. Check oil level on the front of the pump gear case at the plug marked “OIL LEVEL”. Oil level should be up to the bottom of the of the plug opening. Level should be checked monthly.
-
Page 9: General Preventive Maintenance
GENERAL PREVENTIVE MAINTENANCE General daily preventive maintenance checks begin with essential fluid levels for safe and reliable operation of the apparatus. Engine oil dipstick, engine oil fill and windshield solvent can be checked and added in the drop down portion of the front grille. -
Page 10: Hot Check
COLD CHECK: • The only purpose of the COLD CHECK is to determine if the transmission has enough oil to be safely operated until a HOT CHECK can be made. • Park the vehicle on a level surface and apply the brake as specified above. •... -
Page 11: Air System
CHASSIS LUBE SYSTEM: The automatic chassis lubrication system pump and reservoir are located in the upper front of the pump compartment, immediately below the cross-lay hose beds. While it is not the responsibility of the engineer to refill the reservoir, the lubricant level should be checked at least ONCE EACH WEEK and a work order obtained when it is less than one-quarter full. - Page 12 CAB CONTROLS UPPER DASHBOARD: Figure 3 shows the upper portion of the dashboard with the main gauges used to monitor vehicle performance. Below is a list of these gauges. Figure 3 Fuel Level Gauge Filter Minder (Air Filter Restriction) Tachometer with Digital Engine Hour Meter Speedometer with Digital Odometer/Trip Meter (Message Center) 4 in 1 Gauge •...
- Page 13 LOWER DASHBOARD: Figure 5 shows the lower portion of the dashboard assembly. Below is a list of the controls located on the lower portion of the dashboard. Figure 5 1. Master Battery Switch 2. Ignition Switch 3. Engine Start Button 4.
- Page 14 The upper forward section of the motor doghouse serves as a mounting for several controls for the both the engineer and the officer. The items shown in Figure 7 are listed below. Figure 7 1. Windshield wiper switch 2. Panel light dimmer switch 3.
- Page 15 OFFICER’S SIDE DASHBOARD: The M.D.C. is mounted directly in front of the Officer’s seat where the glove box would normally be located (Figure 8). A special module was designed for mounting the M.D.C. which includes a slide-out tray for the keyboard.
- Page 16 A small on-board air compressor is mounted on the cab floor behind the driver’s seat. This compressor ensures adequate air pressure when an alarm is received. It should be tested weekly by deliberately draining the apparatus air supply. This can be accomplished by repeatedly pumping the air brake pedal with the motor shut off.
- Page 17 PUMP AND PUMP CONTROLS Figure 11 The Hale QTWO-23S pump (Figure 11) installed in this apparatus was designed to meet or exceed the performance requirements specified by the Chicago Fire Department. Working closely with the pump and apparatus manufacturers, Department representatives attempted to develop a design which provides superior flow characteristics for L.D.H.
- Page 18 Figures 12 and 13 show the location of the external remote radio control head and microphone. In order to provide a position convenient to the pump operator and yet not vulnerable to the elements, the control head and microphone are mounted inside the “Engineers Compartment”.
- Page 19 While the operation of this pump is similar to earlier models, there are some new innovations as well as required accessories that should be discussed. The following is a list of these items. SUCTION RELIEF VALVE: N.F.P.A. STANDARD 1901 requires that all new pumpers be equipped with an automatic intake pressure relief system.
- Page 20 The large side intakes are equipped with manually operated valves, which are opened or closed with a hand wheel. As mentioned earlier, the L.D.H. discharges have hand wheel operated valves, which prevent rapid opening or closing. The deck gun has a valve, which requires extra effort to open or close to comply with this standard.
- Page 21 GENERAL OPERATING PROCEDURES STARTING THE ENGINE: Turn ON master battery switch. Turn ON ignition switch. Engage starter by depressing starter button. ENGINE SHUT DOWN: Transmission in NEUTRAL gear. Engage parking brake or chock wheels. Turn OFF ignition switch. Turn OFF master battery switch. PUMP ENGAGEMENT: Bring the vehicle to a complete STOP.
-
Page 22: Driving Procedures
You may now proceed with the pumping operation, following established pump operating Class 1 procedures and information provided in the Operation Guide. SHUTTING DOWN THE PUMP: 1. Make certain to press the “IDLE” switch on the Pressure Governor Panel to bring the engine to idle speed and cancel the “PRESSURE”... -
Page 23: Transmission Retarder
When slippery, snowy, or icy road conditions, or steep grades are encountered, it may be desirable to operate in a lower speed range. By depressing the “MODE” button and then the “DOWN ARROW” button, the display can be changed to 3, 2, or 1 to lower the maximum gear in which the transmission will operate. - Page 24 CAB TILT PROCEDURES CAB TILT: 1. Master Battery Switch “ON”. 2. Engine not running. 3. Parking Brake Engaged. (Wheels Chocked) 4. Move the front suction swivel to the FORWARD position. 5. (This usually requires stretching out the soft suction) 6. Check the front bumper area for any other items (including hose butts etc.) that may interfere with the raising of the cab.
- Page 25 CAB LOWERING: 1. Push electric tilt switch “UP” button to free-up manual safety holding device. 2. Pull cable release with right hand (Figure 21), (CONTINUE TO HOLD ONLY LONG ENOUGH TO DISENGAGE MANUAL SAFETY). At the same time, with the left hand, push the electric tilt switch “DOWN”...
- Page 26 LifeGaurd SRS System: The apparatus is equipped with the LifeGaurd SRS system. This provides side roll protection for the driver, officer and rear-facing seat behind the driver. Figure 24. The system will be activated in any type of rollover crash. Figure 24 DPF (Diesel Particulate Filter) Aftertreatment System: The Diesel Particulate Filter (DPF) system is set up to reduce the amount of pollution...
- Page 27 When a manual regeneration is called for, the control switches to perform the manual regeneration can be found under the pump shift PTO box on the lower left side of the steering column. Figure 25 Perform a Parked Regeneration OR bring vehicle to highway speeds to allow for an Automatic Regeneration Solid Perform a Parked Regeneration OR bring vehicle to...
- Page 28 While performing the regeneration process the vehicle should be placed in an area where there is sufficient space to release exhaust temperatures that are higher than normal. The exhaust will reach very high temperatures and are dangerous for firefighters and civilians. Figure 26 Redundant Lighting Circuit Switch: The redundant lighting circuit switch Figure 27 allows...
-
Page 29: Work Lights
OTHER MISCELLANEOUS ITEMS WORK LIGHTS: The apparatus is equipped with work lights at several locations on the body. The pump panels are illuminated by a switch located on the pump operator’s panel. The rear tailboard area can be illuminated with work lights operated from a switch on the left side of the rear of the apparatus. - Page 30 ANY DEFECTS FOUND DURING INSPECTIONS OR OPERATIONS MUST BE PROMPTLY REPORTED, AND WORK ORDERS OBTAINED FROM THE DEPARTMENT OF FLEET MANAGEMENT, WARNING - PER SPARTAN MOTORS, INC. NO WELDING BY FIELD PERSONNEL ON THIS APPARATUS! EXTREME DAMAGE WILL RESULT TO THE AUTOMATIC TRANSMISSION ELECTRONIC CONTROLS.
Need help?
Do you have a question about the CRIMSON FIRE GLADIATOR CLASSIC 2009 and is the answer not in the manual?
Questions and answers