Table of Contents
Advertisement
Quick Links
Advertisement
Chapters
Table of Contents

Summary of Contents for ProLogic H-Motion H500
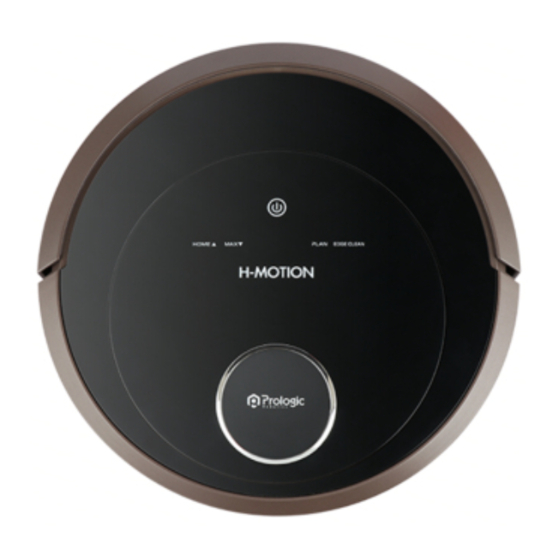
- Page 1 吸 塵 機 械 人 H500 FLOOR CLEANING ROBOT...
- Page 2 說明書 ................ZH-HK Instruction Manual ............感謝您選購 Pro Logic Robotics 產品 —— H-MOTION吸塵機械人!希望您 使用愉快,我們相信這款全新吸塵機械人將幫助您擁有更整潔的家居環境,並 為您省下更多時間,享受生活。 使用中如果遇到任何問題,請聯絡我們的售後服務中心,將有專業人員為您解答 問題。 如欲了解更多產品資訊,請瀏覽:www.prologic.hk 本資料產品以實物為準,本公司保留產品更新的權利,如有變動,恕不另行通知。 感謝您選擇H-MOTION!...
-
Page 3: Table Of Contents
目錄 1. 安全注意事項 ....................2 2. 產品特徵 ......................2 3. 產品組成 ......................5 3.1 包裝隨附物件 ....................5 3.2 技術參數 ....................6 組件名稱 ....................7 4. 產品使用 .......................12 4.1 使用前須知 .....................12 快速操作 ....................13 多重清掃模式 ..................14 時間/預約設定 ..................15 安裝水箱拖地抹布組件 ................17 4.6 吸掃互換 ....................17 5. 清洗與保養 ....................18 6. 疑難排解 .......................23 ZH-HK... -
Page 4: 安全注意事項
1. 安全注意事項 使用產品前請仔細閱讀此說明書。 請保管好此說明書。 使用產品時,請保持一貫的警惕性, 遵 循以下事項: 1. 產品不能由8 歲以下兒童或精神上有障礙的人使用。若需要使用,請在監護人的監督指 導 下 進行。 請不要讓兒童騎坐在產品上,或將產品作為玩具玩耍。 2. 針對產品在清掃中可能出現的問題,應及早排除。清理地面上的電源線和細小物品 避 免產品 在清潔過程中受阻。將地毯的流蘇 邊 翻折到地毯下,並使垂掛的窗簾、桌布等不要接觸面。 3. 若有如樓梯等懸空環境,請先測試產品是否可以檢測到懸空區域邊沿而不跌落。應在懸空區 域 邊 沿設定防護欄以防產品跌落及確保該防護設施不會引發絆倒等人身傷害。 4. 請按照說明書的指示使用產品。僅使用製造商推薦或銷售的配件。 5. 確保電源電壓符合充電插座上標註的電壓。 6. 僅在室內家庭環境中使用。請勿在室外、商業及工業場所使用。 7. 僅使用製造商專配的原裝可充電電池及充電插座。嚴禁使用不可充電電池,電池規格資訊請 參閱「技術參數」。 8. 使用產品前確保集塵盒、 過 濾材料已安裝到位。 9. 切勿在有明火或易碎物品的環境中使用產品。 10. -
Page 5: 產品特徵
2. 產品特徵 本產品是一款與眾不同的具有劃時代的自動清掃機器人,本機器具有普通的掃地功能, 雙邊刷及強力吸塵,還具有滾刷組件功能。並自行決定機器的工作方式,讓機器更加 有效的清潔地板。 人性化設計 操作簡單、易上手。只需輕輕一 按" "鍵,便可操控機器。 儲塵盒可用水沖洗 儲塵盒及濾網都可以直接用水進行沖 洗,不需花費您過多的勞動;而且用 水沖洗儲塵盒還可以避免灰塵飛揚造 成的二次污染。... - Page 6 2. 產品特徵 地圖⾃動導航 1.使用前,請將機器靜止平放於地面。 2.閉合電源開關,然後輕按主機“ ”按鍵或遙控器“ON/OFF”按鍵;顯示幕顯示 “5、4、3、2、1”倒數,語音提示“System rebuilding,please wait”。 3.倒數完畢後按鍵背景燈全亮,此時可按主機“ ”按鍵或遙器“ON/OFF”, 按鍵 開始工作,工作開始時會先沿邊一段距離去校正機器清掃角度。 4.若清掃過程中放置了充電座,機器清掃結束後將會自動尋找充電座。若沒有放置充 電座,機器清掃完成後將回到最初開始工作的地方附近。 原點...
-
Page 7: 產品組成
3. 產品組成 3.1 包裝隨附物件 H500 H500 遙 充電座 電源變壓器 控器 (2)清潔抹布 水箱 高效濾網HEPA 磁條 (4)邊刷 吸塵口 滾刷 說明書 產品保用證... -
Page 8: 技術參數
3. 產品組成 3.2 技術參數 分類 專案 參數 直徑 350mm 結構類 高度 91mm 淨重 3.7kg 電壓 24V,600 mA 電子類 電池規格 Li-ion 14. 6V/2600mAh 充電類型 手動充電 /自動充電 清潔模式 自動、MAX、沿邊、預約、定點 功能參數 充電時間 約 300-360 分鐘 清潔時間 100-120 分鐘 主機按鍵類型 觸摸按鍵 * 因產品持續改善,本公司保留產品更新的權利,如有變動,恕不另行通知。... -
Page 9: 組件名稱
3. 產品組成 3.3 組件名稱 主機圖解 1.保險杠 2. 示屏 3. 摸 4.中間 6.電源開 口 件 13. 電 片 8. 刷 件 14.右 刷 9.左輪子 15.主 10.左 刷 16.右輪子 11.電池 17. 電插口 12.萬向輪 盒 ZH-HK... - Page 10 3. 產品組成 3.3 組件名稱 儲塵盒 2.提手 盒 支架 6.清 毛刷 滾刷組件 1. 刷 2. 刷 3.軸 4. 刷 5. 刷支架 充電座 1.電源指示燈 2.上 3.電源插口 4. 電 點 ZH-HK...
- Page 11 3. 產品組成 3.3 組件名稱 遙控器 1. 示屏 2.回 3.開/ 4. 向 5. 力模式 7.模式 8.預 你可以像使⽤電視機的遙控器⼀樣來使⽤此遙控器,先打開機器底部的開關,並可使 ⽤遙控器上的按鍵來操控機器。 1 顯⽰幕:顯⽰當前操作的內容、資訊和時間; 2 ⾃動回充功能:按回充鍵,開始⾃動回充功能,再按⼀次或者按開/關鍵可使機器 停⽌; 3 開機清掃:短按開/關鍵; 4 待機情況下按上下左右鍵,控制機器⾏⾛⽅向; 5 強⼒清掃:MAX鍵; 6 遙控器時間設置:⻑按時鐘設定鍵,進入時鐘設置,通過改變⽅向鍵來設置間, 然後短按時鐘設定鍵保存當前時間並退出時鐘設置介⾯,這樣你可以輕鬆把握當 前時間; 7 模式選擇:按模式鍵,液晶顯⽰MODE1為沿邊模式,MODE2為區域2*2m清掃 模式,MODE3為隨機模式,MODE4為深度清潔模式(清掃2遍); 8 預約功能:短按預約鍵查詢預約,⻑按此鍵設置預約,詳⾒預約功能設置; 注意: 使⽤前請安裝電池,若⻑時間不使⽤遙控器請將電池取出。...
- Page 12 3. 產品組成 3.3 組件名稱 顯示屏 顯示部分 1.“ ”數字顯⽰時間設定、充電狀態、出錯代碼等等。 按鍵部分 2.“ ”清掃鍵 A.從睡眠模式切換到待機模式;或者⻑按3秒使機器從待機模式切換到睡眠模式 B.在預約清掃模式下,按此鍵完成並確認預約; C.在待機模式下,按此鍵使機器開始⼯作。 3.“ ”⾃動回充/數字+鍵 A.在預約清掃和時間設置模式下,按此鍵使設“預約”間增加: B.在其他模式下,按此鍵使機器⾃動尋找充電基座。 4.“ ”強⼒清掃/數字⼀鍵 A.在預約清掃和時間設置模式下,按此鍵使設“預約”間減⼩: B.在其他模式下,按此鍵使機器開始加⼤吸⼒強⼒清掃。 5.“ ”預約/定時按鍵 待機模式下,短按此鍵進入/退出時間設置模式。 待機模式下,⻑按此鍵進入/退出預約模式。 6.“ ”沿邊按鍵 待機模式下,⻑按此鍵時機器可進⾏配網連接。 待機模式下,短按此鍵時機器可進⾏沿邊清掃。 組合按鍵 7.待機模式下,同時按下“”+“”鍵取消/打開語⾳提⽰。...
- Page 13 3. 產品組成 3.3 組件名稱 磁條 磁條⽤於防⽌吸塵機械⼈進入限制進入的區域。...
-
Page 14: 產品使用
4. 產品使用 4.1 使用前須知 充電座放置 1. 放置充電座。 a. 把電線與充電座連接。 b. 充電座正前方2米、左右各1米不 可有障礙物(盡量靠墻角處)。 2. 若機器側邊電源處於關機狀態,請打開電源開關。 充電模式 1. 對機器進行充電有兩種方式: a. 直接將電源變壓器插孔插到機器,另一 頭接 通 電源。 b. 充電座充電 自動充電 主機在清掃過程中,能感知電力不足 時,自主啟動 “返回充電”模式自動尋 找充電座進行充電。 遙控返回充電 在清掃過程中,按下遙控器“ ” 鍵,主機收訊到後,啟動 “返回充電” 模式,自動尋找充電座進行充電。 注意: 機器充電時,顯⽰幕會從左到右顯⽰“11:11”字樣; 充電完成時,顯⽰幕會顯⽰“FULL"; 待機模式下電量不⾜時,機器會播報語⾳“請充電”,顯⽰幕顯⽰”LO” ⼯作模式下電量不⾜時,機器會⾃動尋找充電座充電,顯⽰幕顯⽰”LO”... -
Page 15: 快速操作
4. 產品使用 4.2 快速操作 1. 工作 確保電源開關(主機側邊)處於“ON”位置。 在待機模式下,按主機“ ”鍵或遙控器“ON/OFF”鍵,使機器開始⼯作。 注意:若機器處於睡眠模式,按主機“ ”鍵使機器從睡眠模式切換到待機模式, 再按⼀次開始⼯作。 2. 待機 待機是指機器電源導通,等待⽤⼾操作,可由以下⽅式進入: ⼯作狀態下,按主機“ ”鍵使機器進入待機模式; ⼯作狀態下,按遙控器上的“ON/OFF”鍵使機器進入待機模式。 3. 睡眠 睡眠模式下,按主機“ ”鍵或遙控器開關鍵可喚醒機器。通過以下⽅式進入睡眠 模式,可最⼤限度延⻑電池使⽤時間: 待機模式下,⻑按主機“ ”鍵3秒以上進入睡眠模式; 待機模式下,若機器電量低電,則機器⾃動進入睡眠模式。 待機模式下,若機器10分鐘以上無操作,則機器⾃動進入睡眠模式。 4. 關機 關機是指機器斷開電源,直接關閉電源開關。... -
Page 16: 多重清掃模式
有 清 , 的 。 機時,按主機“ ”鍵或遙控器“ON/OFF” 鍵,機器進 清 ; 清 按遙控器“ ”鍵進 遙控器 清 : a.按主機 邊鍵或 清 1,遙控器顯示 顯 終 示MODEI,主機顯示 顯示nod1,機器將會按 邊 進 清 。 b. 清 2,遙控器顯示 顯示MODE2,主機顯 起 示 顯示nod2,機器會 2*2m 清 。 c. 清 3,遙控器顯示... -
Page 17: 時間/預約設定
4. 產品使用 4.4 時間/預約設定 注意:機器只能在待機或充電模式下進⾏設置,若機器處於睡眠狀態請按主機“ ”鍵或遙控 器“ON/OFF”鍵將其喚醒;若處於⼯作狀態請先將其停⽌。 在機器顯示屏上設置 A. 機器時間設置(確保機器處於待機或開機狀態) 短按“ ”鍵進入機器時間設置,數碼管顯⽰當前機器時間;此時數碼管左側兩位爍,按 “ ”鍵⼩時數增加,按“ ”鍵⼩時數遞減。按“ ”進入分鐘設置,數碼管 右側兩位閃爍,按“ ”鍵分鐘數增加,按“ ”鍵分鐘數遞減。按“ ”鍵保存 設置,再按“ ”鍵退出時間設置。(在沒有保存設置之前,按“ ”鍵,機器不 保存數據退出設置。) B. 預約時間設置(確保機器處於待機或開機狀態) ⻑按“ ”鍵進入機器預約設置,此時數碼管左側兩位閃。按“ ”鍵⼩時數 增加,按“ ”鍵⼩時數遞減。按“ ”進入分鐘設置,數碼管右側兩位爍, 按“ ”鍵分鐘數增加,按“ ”鍵分鐘數遞減。按“ ”鍵保存設置,再 按“ ”鍵退出預約設置。如果機器處於時間設置,請先按“ ”退出,再⻑ 按“ ”鍵,進入預約設置。(在沒有保存設置之前,按“... - Page 18 4. 產品使用 4.4 時間/預約設定 通過遙控器設置 A. 預約時間設置 確保機器處於待機或者充電狀態下,然後⻑按遙控器上“ ”按鍵,遙控器進入預約設置 模式; 此時遙控器顯⽰幕出現數字閃爍,通過上下按鍵改變閃爍的數字,設置完⼀個數字後通過左 右按鍵移動到下⼀個要設置的數字; 設置好之後將遙控器對準機器,按遙控器的“ON/OFF”鍵,預約成功則機器⾯板會顯⽰相應 的預約時間; 注意: 進⾏預約設置時,遙控器顯⽰幕上的數字是延時時間。 如:當前為上午8點,遙控器設置數值為O1:OO,設置成功後機器會在1⼩時候開始⼯作。既 9點鐘時機器開始⼯作,⽽且會在每天9點鐘開始⼯作。 B. 取消預約設置 在遙控器進入預約設置的模式下,再按⼀次“ON/OFF”鍵。 ( 機器如果顯⽰00:00則表⽰預約取消了,否則請再按⼀次“ON/OFF”鍵。)
-
Page 19: 安裝水箱拖地抹布組件
4. 產品使用 4.5 安裝水箱拖地抹布組件 打開水箱膠塞,在水箱內注入自來水 把拖地布裝入裝入水箱底板。 後,再把膠塞裝入水箱,以免漏水。 拖地布 水箱 膠塞 水箱組件 把機器翻轉過來,再把水箱組件如 圖所示裝入主機。 吸入口組件 滾刷組件 4.6 吸掃互換 您可以互換吸入⼝組件和滾 左輪子 刷組件,安裝在機器底部的 左邊刷 對應位置(參照下圖),您 電池蓋 只需要輕按“ ”鍵, 主機下蓋 萬向輪 在解放您雙⼿的同時,更為 右輪子 您帶來前所未有的清潔。 充電插口 充電彈片 右邊刷... -
Page 20: 清洗與保養
5. 清洗與保養 進行清理維護前,請關閉主機電源 集塵盒與濾材 每次使⽤後請清空儲塵盒,具體步驟如下圖所⽰: 按壓中間蓋並打開 按壓 取出高效濾網 取出儲塵盒 拉開儲塵盒蓋並取出初級濾網 倒掉儲塵盒里的垃圾... - Page 21 5. 清洗與保養 用水沖洗儲塵盒及初級濾網,用清潔 將 初 級 濾 網 和 高 效 濾 網 重 新 裝 回 儲 塵 盒 刷清理高效濾網 注意: 當濾網使⽤15-30天後,建議⽔洗⼀次,⾼效濾網最⼤使⽤壽命24個⽉; 安裝前,請確保濾網處於乾燥狀態; ⾼效濾網和初級濾網都是可以更換的附件; 請勿將濾網置陽光下暴曬。...
- Page 22 5. 清洗與保養 邊刷清潔 1. 檢查邊刷是否受損或有異物; 2. ⽤清潔⼯具或抹布清潔邊刷; 3. 若發⽣捲曲或變形,可將邊刷取下置於溫⽔中約5秒; 4. 當邊刷受損無法使⽤時,請及時更換。 傳感器及輪子清潔 ⽤清潔⼯具或軟布輕輕拭擦感測器及輪⼦,如下圖⽰記的位置。 充電端子清潔 ⽤清潔⼯具或軟布清潔充電基座及主機上的充電端⼦,如下圖⽰記的位置。 吸風通道、重點清掃感測器清潔 將吸風通道組件從機器上取下,然後⽤清潔⼯具或軟布清潔吸風通道及重點清掃感測器, 如下圖⽰記的位置。 注意: * 請勿將⽔,稀釋劑等液體直接接觸感測器。...
- Page 23 5. 清洗與保養 滾刷組件清潔 將滾刷組件從機器上取下,拆出滾刷棒,然後⽤清潔⼯具或軟布清潔滾刷棒或滾刷蓋板, 如下圖所⽰。 (滾刷棒可⽤⽔洗) 注意: * ⽑刷棒⽔洗完將⽔濾幹後再按原拆裝順序返回安裝。...
- Page 24 5. 清洗與保養 電池拆換 1.⽤螺絲⼑將電池蓋上的螺絲擰松取下; 2.取下電池蓋; 3.雙⼿抓住電池,將電池拿起; 4.拔開連接電池和主機的連接頭; 5.將新電池放進電池槽裏,電池有字體的⼀⾯朝上; 6.將電池和主機的連接頭接好; 7.將電池連接頭整理好; 8.將電池蓋裝回原位: 9.鎖上電池蓋。 注意 * 建議不要⾃⾏拆換電池,如拆換電池有困難,請聯絡售後服務。 * 請保護環境,扔棄電池時請尋找合適的電池回收商。...
-
Page 25: 疑難排解
6. 疑難排解 規劃式機器人錯誤代碼 序號 顯示代碼 故障原因 備註 沒有放置儲塵盒 充電時電源開關斷開 電源電壓低或回充失敗 左跌落 右跌落 前跌落 左輪跌落 右輪跌落 萬向輪掛起 前擋左側開關故障 前擋右側開關故障 前擋正前開關故障 左輪超載 右輪超載 左邊刷超載 右邊刷超載 風扇超載 滾刷超載 低電 11:11 正在充電 FULL 充電完成 CONN WIFI 連接中 FAIL WIFI 連接故障 SUCC WIFI 解綁成功 注意:若上述方法無法解決問題,請嘗試以下動作: 1.斷開並重新打開主機電源開關,啟動機器;... - Page 26 Instruction Manual, please contact our Customer Service Center where a technician can address your specific problem or question. For more information, please visit the product website: www.prologic.hk The Company reserves the right to make technological and/or design changes to this product for continuous improvement.
- Page 27 Contents 1. Important Safety Instructions .................26 2. Product Features ..................28 3. Package Contents and Technical Specifications ..........30 3.1 Package Contents .................30 3.2 Technical Specifications .................31 Product Diagram ..................32 4. Operating ....................37 ....................37 4.1 Before use 4.2 Quick Start ....................38 4.3 Mode Selection ..................39 Intelligent Scheduling ................40...
-
Page 28: Important Safety Instructions
1. Important Safety Instructions READ ALL INSTRUCTIONS BEFORE USING THIS APPLIANCE. PLEASE KEEP THE INSTRUCTION MANUAL When using our product, basic precautions should always be followed, including the following: 1. This Appliance is not intended to be used by children under 8 or anyone lacking knowledge on proper use. - Page 29 1. Important Safety Instructions 22. Turn OFF the power switch before cleaning or maintaining the Appliance. 23. The plug must be removed from the receptacle before cleaning or maintaining the Charging Dock. Remove the Appliance from the Charging Dock, and turn OFF the power switch to the Appliance before removing the battery for disposal of the Appliance.
-
Page 30: Product Features
2. Product Features This product is a distinctive, epoch-making and intelligent robot vacuum cleaner, which not only with cleaning function, two side brushes and powerful suction, but also with roller brush kits and suction kits exchangeable function. The machine can automatically identify the kits installed is roller brush kits or suction kits, then it will decide the working mode by itself, which makes the machine cleaning more efficiently. - Page 31 2. Product Features Map Navigation Function 1. Before use, place the robot on flat floor. 2. Turn on power switch, then touch power button on main body or “ON/OFF” button on remote. The display panel shows a countdown from “5555”, “4444”, “3333”, “2222”, “1111”...
-
Page 32: Package Contents And Technical Specifications
3. Package Contents and Technical Specifications 3.1 Package Contents H500 Charging Dock Remote Control H500 Adapter Wet Reservoir Magnet Strip (2) Wet/Dry Cleaning HEPA Filter Cloth Warranty Suction Kit Roller Brush Kit (4) Side Brush Instruction Manual... -
Page 33: Technical Specifications
3. Package Contents and Technical Specifications Technical Specifications Classification Item Detail Mechanical Diameter 350mm Specifications Height 91mm Weight 3.7Kg Electrical Charger rating output 24V, 600mA Specifications Battery Specifications 14.6V/2600mAh rechargeable Li-ion Charging Type Auto Charging/ Manual Charging Functional Cleaning Mode Auto, MAX , Edge, Schedule, Spot Specifications Charging Time... -
Page 34: Product Diagram
3. Package Contents and Technical Specifications 3.3 Product Diagram Main Unit 1.Bumper 2.Display 3.Touch Key 4.Upper cover 5.Bumper Strip 6.Power Switch 7.Suction Kit 13.Charging poles 8.Roller Brush Kit 14.Right side brush 9.Left wheel 15.Bottom cover 10.Left side brush 16.Right wheel 11.Battery cover 17.Charging socket 12.Universal wheel... - Page 35 3. Package Contents and Technical Specifications 3.3 Product Diagram Dust Bin 1.Primary filter 2.Handle 3.Dust bin 4.HEPA filter 5.HEPA filter shelf 6.Clean brush Roller Brush Kit 1. Roller brush coverplate 2. Roller brush bushing 3.Ball bearing 4.Roller brush 5.Roller brush holder Charging Dock 1.
- Page 36 3. Package Contents and Technical Specifications 3.3 Product Diagram Remote Control 1. LCD Display 2. Auto Charging 3. ON/OFF 4. Direction Buttons 5. MAX Spot Cleaning 6. Time Setting Button 7. Scheduling Button 8. Area Cleaning Selection Button Note: A. Install two AAA type batteries into the remote controller before use. B.
- Page 37 3. Package Contents and Technical Specifications 3.3 Product Diagram Display Panel LED Panel ”LED panel displays the time setting, charging status, and error codes by “ numbers, letters or graphs. Touch Buttons 1.“HOME” Auto homing / Number increment button A. Press this button to start auto-homing and charging mode in standby / cleaning mode. B.
- Page 38 3. Package Contents and Technical Specifications 3.3 Product Diagram Magnet Strip The Magnet Strip is used to prevent the robot from entering restricted area.
-
Page 39: Operating
4. Operating 4.1 Before Use Charging Dock Setup 1. Preparation for charging a. Connect the adapter and the charger. b. Placing the charger: Place the charger flushed flatly against the wall. Do not place any objects 1m to its left and right and 2m to its front. -
Page 40: Quick Start
4. Operating 4.2 Quick Start 1. Starting up Power on the robot by turning on the power switch at the right side of robot. Press power button on main body or ON/OFF on remote controller to enter into standby status. In standby mode, press power button on main body or ON/OFF on remote to start cleaning. -
Page 41: Mode Selection
4. Operating 4.3 Mode Selection This product has many cleaning modes to suit different ground conditions to carry out deep cleaning. Selection can be made via the remote controller. Auto cleaning mode The robot can clean a room automatically. Turn on robot's power switch, touch power button on main body or press the “ON/OFF”... -
Page 42: Intelligent Scheduling
4. Operating 4.4 Intelligent Scheduling Note: The robot can only be set when it's in standby or charging on docking station. If the robot is in sleep mode, long press power button on main body to wake it up. If the robot is in cleaning mode, pause it before scheduling. - Page 43 4. Operating 4.4 Intelligent Scheduling Setting scheduling time by remote controller (keep the robot in standby or charging on station ) Long press “PLAN” button on remote to enter scheduling setting, the left two numbers on LED panel will flash, press UP button or DOWN button to increase or decrease hours. Press LEFT button on remote to enter the minute-setting, the left two numbers on LED panel will flash, press UP button or DOWN button to increase or decrease minutes.
-
Page 44: Water Tank And Mopping Cloth Usage
4. Operating 4.5 Water Tank and Mopping Cloth Usage Attach mopping cloth Fill water tank with water Stick mopping cloth on the bottom of Take out rubber plug of water tank, fill water tank. Make sure the sticking side it with water, and then put back the and mopping cloth are facing the rubber plug tightly on its position in appropriate sides, and then stick the... -
Page 45: Suction Kit And Roller Brush Kit
4. Operating 4.6 Suction Kit and Roller Brush Kit Suction kit Roller Brush kit Suction kit and roller brush kit can be exchangeable and installed in appropriate place at bottom of robot (as shown in below figure), Left wheel you just need to gently press power button, the robot will bring Left side brush you unprecedented cleaning. -
Page 46: Cleaning And Maintenance
5. Cleaning and Maintenance Cleaning Dust Bin and Filters Empty and clean dust bin after each use following the steps as shown in the below figures: Press as below image to open the cover. Take out the HEPA. Take out the dust box. Open dust bin cover, take out Empty the dust bin. - Page 47 5. Cleaning and Maintenance Cleaning Dust Bin and Filters I n s t a l l t h e p r i m a r y f i l te r a n d H E PA Wash dust bin and primary filter, clean the HEPA with brush.
- Page 48 5. Cleaning and Maintenance Cleaning Side Brushes Check the side brush when it gets dirty and replace it if it's damaged. Maximum life span for side brush is 12 months. Note: Before replacing side brushes, please pay attention to the left mark and the right ( 'L'/ 'R' ) mark on side brushes, which match with the 'L'/ 'R' mark on the bottom base of robot.
- Page 49 5. Cleaning and Maintenance Cleaning Roller Brush Kit Take out the roller brush kit from robot, remove the roller brush, then clean it and its cover-plate & holder, as shown in the below figure, with soft cleaning cloth or tool. (the roller brush can be washed by water) Note: * Please re-install the roller brush in the original order of disassembly after it's fully dry.
- Page 50 5. Cleaning and Maintenance Battery Removal 1.Remove the screws on battery cover with a screw driver; 2.Remove the battery cover; 3.Grasp the insulating tape at two sides of the battery and lift the battery; 4.Unplug the wire connector that links the battery and robot; 5.Put in the new battery and make the text side face upward;...
-
Page 51: Troubleshooting
6. Troubleshooting Error Code for Sensors Cause Solution Code Error AUBF Suction passage blocked Clean suction passage Put back dust bin and place it in AUBN Dust bin not placed in position or robot without dust bin position E1XX Left collision switch fault Check sensitivity of the front E2XX Right collision switch fault... - Page 52 6. Troubleshooting Error Code for Sensors Cause Solution Error Code Left anti-drop sensor detects cliff, front bumper right EXX9 infrared sensor detects obstacle Front anti-drop sensor detects cliff, front bumper right EXXA infrared sensor detects obstacle Left and front anti-drop sensors detect cliff, front bumper EXXB right infrared sensor detects obstacle Right anti-drop sensor detects cliff, front bumper right...
- Page 53 6. Troubleshooting Error Code for Sensors Cause Solution Error code Check if fan is pressed, and clean dust L01X Fan overloaded L0X1 Left wheel overloaded L0X2 Right wheel overloaded L0X3 Left and right wheels overloaded L0X4 Left side brush overloaded L0X5 Left wheel and left side brush overloaded L0X6...
- Page 54 恆 Web:www.prologic.hk www.iplushome.com...
Need help?
Do you have a question about the H-Motion H500 and is the answer not in the manual?
Questions and answers