Table of Contents
Advertisement
Quick Links
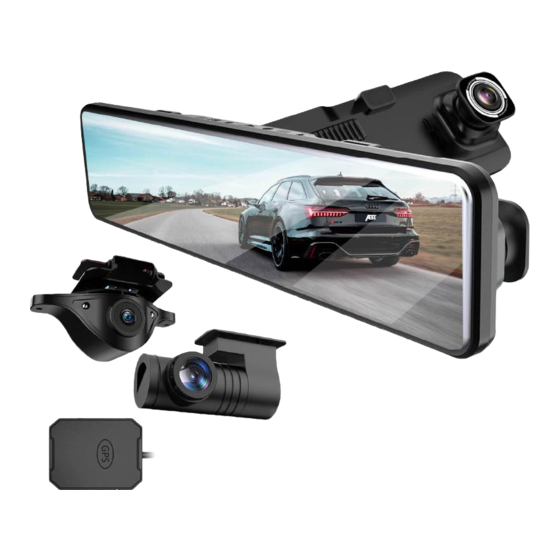
AKEEYO
Intelligent Rear View Mirror Car Recorder
Thank you very much for purchasing our product.
Please read this manual carefully to install and use the product in the correct
manner. After reading this manual, please keep it in a safe place along with
warranty card and use it when necessary.
AKY-X6 PC Player Activation Code
● About the dedicated PC player
(Please scan the QR code on page 34 to download).
Enter the activation code on the paper manual into the dedicated PC player.
After activation, you can use the dedicated PC player.
● One code can only activate one PC, cannot be used multiple times on other PCs.
●Please keep the instruction manual in a safe place.
If you forget/lost the activation code, please contact customer service.
User's Manual
AKY-X6
Advertisement
Table of Contents

Summary of Contents for Akeeyo AKY-X6
- Page 1 After reading this manual, please keep it in a safe place along with warranty card and use it when necessary. AKY-X6 PC Player Activation Code ● About the dedicated PC player (Please scan the QR code on page 34 to download).
- Page 2 Notes Before Installation. This manual is applicable to "AKY-X6-W" and "AKY-X6-N". "AKY-X6-W" / "AKY-X6-N" difference: Use different standard rear camera. ● AKY-X6-N Rear Camera: inside the car special (not waterproof) (Sold separately) ●AKY-X6-W Rear camera: For both outside and inside the car...
-
Page 3: Table Of Contents
Catalog はじめに ●Safety instructions................1-3 ●Notes for use...................4-6 ●Product components list..............7-8 ●Name and function of each part............9-10 ●About Micro SD Card..............11-13 ●About Auto Recording..............13 ●About power on/off................14-15 ●About date setting................16 ●About the LCD display..............17 ●About the cigarette lighter..............18 ●About installation................19-25 ●Screen mode..................26 ●Screen mode ・... -
Page 4: Safety Instructions
Safety instructions For your safety, please be sure to comply with these safety instructions for prevent traffic accidents. Caution Precautions that must be observed to avoid the risk of death or serious injury. Pay attention Precautions to avoid the risk of minor injuries and property damage. Prohibit Precautions that must never be done. - Page 5 Safety instructions Please check the position of the car pipeline, Suitable for cars with DC12V/24V negative fuel tank, etc. before installing. terminal. When drilling holes in the body of the car It is only suitable for cars with DC1 2V/24V for installation, please make sure that it negative terminal.
- Page 6 Safety instructions Do not subject this product to strong shocks. Do not use it for purposes other than in-vehicle use. Dropping, hitting or otherwise impacting this If it is used for purposes other than vehicles product may result in malfunction or fire. (such as recreational boats, outdoor doors, etc.), it may cause smoke, fire, electric shock, injury or malfunction.
-
Page 7: Notes For Use
Notes for use We will not be responsible for any traffic accidents or violations that occur while using this product device. Please pay attention to safe driving. This product cannot guarantee to record video in all conditions. We are not responsible for any damage caused by damage to the recorded video and data. This product cannot be used as evidence in the event of an accident. - Page 8 Notes for use About idling stop car ● In vehicles that are partially idling and stopped, the power to this unit may be turned off when the engine is restarted due to voltage fluctuations. ● Depending on the condition of the vehicle battery, the power of the unit may be turned off when the engine is restarted.
- Page 9 Notes for use About installation ● Follow the tutorial in this manual for installation. ● Please install it correctly to avoid violating the road traffic law and related laws and regulations. ● Do not overlap with the vehicle registration sticker when installing. ●...
-
Page 10: Product Components List
Product components list Host and accessories Before installing, be sure to check the following items in the package. ※ Drawings are for illustration purposes only. Actual conditions may vary. ■ Host ■ Cleaning cloths ■ Manual ■ Cigarette lighter adapter ■ GPS (About 3M) ■ Micro SD Card (About 3.5M) ■ Mounting rubber band x 2 set (Long type * 2 pcs: 100mm * 22mm)... - Page 11 Product components list Rear camera The rear camera differs depending on the model of the product you order. ① Rear camera (Inside the car special) ■ Camera ■ Power cable ■ Mounting bracket (about 10M) ② Rear camera (Universal inside and outside the car) ■ Camera ■ Power cable ■ Mounting bracket...
-
Page 12: Name And Function Of Each Part
Name and function of each part Host ① ⑥ ⑦ ② ③ ④ ⑤ ⑧ ⑨ ⑧ ⑫ ⑩ ⑩ ⑪ ⑪ ⑪ ⑪... - Page 13 Name and function of each part ① Liquid crystal display (mirror) Note: Protective film is attached at the factory. Please tear off before use. ② Front camera Note: Protective film is attached at the factory. Please tear off before use. ③...
-
Page 14: About Micro Sd Card
About Micro SD card 商品構成一覧表 Insert and remove micro SD card 1. Pay attention to the orientation of the microSD card and insert it into the slot. <When viewed from the front of the main unit> 2. Make sure that the microSD card is inserted into the slot. * Until hear a click. - Page 15 About Micro SD card Compatible micro SD card ● Support 8 to 128GB (Class 10 and above) micro SD card. ● Even if the UHS-I standard card is interchangeable with Class 10, it may not be usable. ● Not compatible with UHS-II and U3 standard cards. ●...
-
Page 16: About Auto Recording
About Micro SD card Caution ● The formatting operation can only be performed when the vehicle is stopped. ● Be careful not to turn off the power of this unit during formatting. ● Formatting will delete all data on the microSD card. Please copy important data to your computer and save it. -
Page 17: About Power On/Off
About power on/ off Power on <Engine Interlock> ● When the engine is turned on (ACC on) with the car cigarette lighter power adapter connected, the power will automatically turn on. Automatically open and display the screen. 解像度 <Manual operation> ●... - Page 18 About power on/ off Caution <About the engine interlock function> ● This product is equipped with engine interlock function, when the car engine starts, the power of host will be automatically turned on. When the car engine is turned off, the host will automatically turn off the power.
-
Page 19: About Date Setting
About date setting Please set the date before using. The setting procedure is as follows. 1. Connect the power cable and turn on the power. 2. After power on, it will start recording automatically, please touch the screen and function button.Then touch the 「... -
Page 20: About The Lcd Display
About the LCD display ● If the same video is displayed for a long time or repeatedly, the screen may be burned. The occurrence of screen burn-in can be reduced by adjusting the brightness of the monitor. ● The LCD monitor has 99.99% or more effective pixels, but there may be some pixels that do not light up or that light up continuously. -
Page 21: About The Cigarette Lighter
About the cigarette lighter ● Connect the supplied cigarette lighter adapter to the cigarette lighter socket of your vehicle. ● Do not connect to an adapter with a cigarette lighter socket. Otherwise, it will not operate properly because the power supply to the main unit is insufficient. -
Page 22: About Installation
About installation How to install the host Use the fixing arm and fixing strap to fix this unit to the original rearview mirror of the car. ※ Make sure to support the original rearview mirror when attaching, otherwise a strong load will be placed on it. - Page 23 About installation シガーアダプターについて Camera installation The AKY-X6 series depends on the product model you purchased. The camera configuration is different. The installation method is also different. Connect the GPS and camera cable to the host. Under Development No function ● Connect the main unit and various cables.
- Page 24 About installation Caution · Please make sure that this product is firmly installed on the original rearview mirror before use. · When installing, please support the rear-view mirror to avoid excessive load on the rear-view mirror. · The field of view of this product is different from that of the original rear-view mirror, and the distance and size may be different from the actual scenery.
- Page 25 About installation Cigarette lighter power adapter connection Caution · Be sure to use the cigarette lighter power adapter included in the accessories. · If you use a cigarette lighter power adapter other than the accessory, it may damage the product or the vehicle.
- Page 26 About installation Rear Camera Installation (inside the car special) <Installation steps> 1. Make sure the mounting position of the rear camera and install the bracket to the rear glass. ※ Make sure to wipe off any oil and dirt from the glass, dry it and then firmly adhere it to the rear glass with double-sided tape.
- Page 27 About installation Rear Camera Installation (inside the car special) 3. Lay the rear camera cable to the rear window. As shown on the left, but depending on the model, it may be necessary to run the rear camera cable through the upper part of the car (inside the roof, lining, etc.).
- Page 28 About installation Rear Camera Installation (Universal inside and outside the car) This rear camera is waterproof, so it can be installed inside or outside the car. 〈Installation Location〉 Rear windshield inside the car Top of the license plate 〈Inside the car installation〉 〈Outside the car installation〉...
-
Page 29: Screen Mode
Screen mode Screen mode This machine can be switched between the following two modes. <Camera mode> ● Images from each camera can be displayed simultaneously on the LCD screen. Switch to a different display mode by operation. <Mirror mode> ● Close the LCD screen (used as a rear view mirror). o In the recording mode, press the power button briefly to turn off the LCD screen. -
Page 30: Screen Mode ・ Function Menu Operation
Screen mode ・ Function menu operation How to display the faction menu ● Touch the LCD screen while in recording mode to display the function menu. ● It will be displayed for about 10 seconds at a time, and then disappears automatically. The function of each function menu ①... - Page 31 Screen mode ・ Function menu operation The function of each function menu ⑧ Record button Start / stop recording Recording: stop recording When recording stops: recording starts ⑨ Take picture button One front camera image, one rear camera image, and one side camera image are saved. Recording will not be interrupted if a picture is taken during recording.
-
Page 32: Screen Mode ・ Camera Display Mode
Screen mode ・ Camera display mode ● In recording mode, there are 3 screen display modes. ① Front camera + Rear camera Front camera Rear camera The screens of the two cameras are displayed at the same time. ② Only front camera Front camera Display in full screen. -
Page 33: About Lcd Screen Operation
About LCD screen operation Screen brightness adjustment You can adjust the brightness of the screen by dragging the LCD screen left or right. ● Drag from the left side of the screen to the right side to increase the screen brightness. ●... -
Page 34: Recording Type
Recorder type Type of recording Resume driving Driving (engine on) Parking (engine OFF) (engine ON) <Parking monitor mode> Impact detection recording Loop recording Loop recording Emergency recording Emergency recording Emergency recording Emergency recording (manual) (manual) Loop recording ● Non-stop recording from engine start (ACC ON) to engine stop (ACC OFF). ●... - Page 35 Recorder type Emergency recording If the G sensor detects an impact while recording a video, the video file being recorded will be saved in the [Event] folder. Since the video files of the front camera and the rear camera are saved at the same time, a total of 2 video files are saved. Caution: ●...
-
Page 36: Playback Of Recorded Video
Playback of recorded video Playback on this machine Touch the "Playback Mode" icon on the menu interface to enter the playback. 20200102175739̲000126CH2 20200102175739̲000126CH2.MP4 ① ⑤ ② ⑥ ③ ⑦ ④ 00:00 03:00 ① Continuous recording The files shot by loop recording (continuous recording) are displayed. ②... - Page 37 Playback of recorded video Playback on this PC ● Connect the micro SD card to the PC Make sure the engine is turned off, then remove the micro SD card and use a card reader to connect to your PC. The recorded file will be displayed. ●...
-
Page 38: About Hud Mode
About HUD mode ● The HUD mode can be displayed by connecting to a GPS device. It's like the speed, direction, date and other information appearing in the front of the field of vision. 0 0 : 1 8 0 0 : 1 8 ●... -
Page 39: Setting Menu
Setting menu Touch the 「 」 icon to display the menu interface. 0 0 : 1 8 0 0 : 1 8 About recording settings: Recording settings Resolution Sound recording Loop recording Rearview mirror angle of view Flickerless ● Resolution Front camera can choose 2560*1440 30fps and 1920*1080 55fps. - Page 40 Setting menu Recording setting Resolution Auto Recording ● G sensor sensitivity Set the sensitivity of impact detection (off/high/medium/low). ※ If set to [Off], G sensor will not start. ● Automatic recording When the [Auto Recording] item is set to ON, automatic recording will start after about 30 seconds of inactivity.
- Page 41 Setting menu System Setting Voice Recognition HUD mode Format HUD speed unit Time stamp Initial setting ● HUD mode Displays HUD mode items when GPS is connected. Displays information such as vehicle speed, direction and date. ● HUD speed unit Speed display can be set to km/h or mph.
- Page 42 ● The items marked with (★) are the factory default values. All products will be restored to factory settings when they are shipped. ● If the product is changed, performance and function improvement will not be notified otherwise. ● Please download the updated firmware from our website. https://www.akeeyo.co.jp/pages/support...
-
Page 43: Troubleshooting
Troubleshooting If you encounter any problems during use, please try the following items first. If you cannot solve the problem, please contact customer service. Problem Solve ● Make sure the power connection is normal. Host does not ● Try to remove the microSD card. turn on ●... -
Page 44: Specifications
Specifications Model AKY-X6 Name Intelligent rearview mirror driving recorder Micro SD 8-128GB ( ※ Class 10 or Higher) Micro SD 55FPS/30FPS 2K WDR Front Camera Wide angle : 110° 1920*1080P 60FPS WDR Rear Camera Wide angle : 115° 1920*1080P 1 minute / 3 minutes / 5 minutes... -
Page 45: About Warranty
About warranty Disclaimers · When using this product, please comply with local government regulations and road traffic laws. The user is fully responsible for the use of this product, and the manufacturer, importer and distributor of this product do not bear any responsibility. ·...
Need help?
Do you have a question about the AKY-X6 and is the answer not in the manual?
Questions and answers