Table of Contents
Advertisement
Quick Links
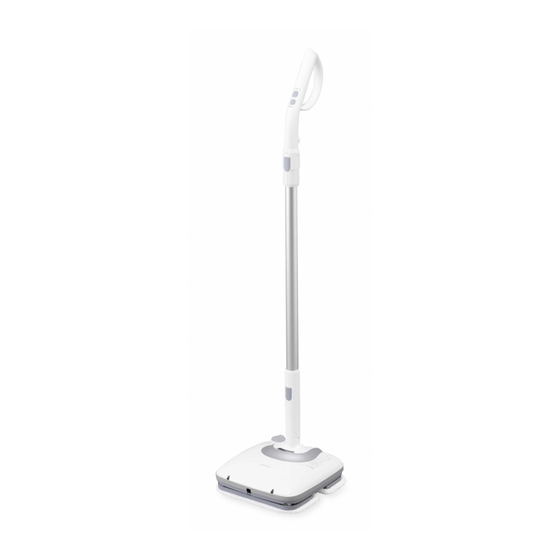
Rechargeable Mop Cleaner
Indoor/Household Use Only
User manual
Content
Preparations
Safety precautions ................................................ 2
Precautions for use ............................................... 4
Parts ..................................................................... 5
Operation instructions
Assembly .............................................................. 7
Charging the battery ............................................. 8
Preparation ........................................................... 9
How to use ............................................................ 9
Cleaning and maintenance ................................. 11
product) .............................................................. 12
Others
Troubleshooting .................................................. 13
Warranty and after-sales services ...................... 15
Warranty card .....................................
IC-M01
..................................................... 14
Back cover
Advertisement
Table of Contents

Summary of Contents for Iris Ohyama IC-M01
-
Page 1: Table Of Contents
Indoor/Household Use Only Rechargeable Mop Cleaner IC-M01 User manual Content Preparations Safety precautions ..........2 Precautions for use ..........4 Parts ..............5 Operation instructions Assembly .............. 7 Charging the battery ..........8 Preparation ............9 How to use ............9 Cleaning and maintenance ......... -
Page 2: Safety Precautions
Safety precautions Carefully read the following "safety precautions" before using. Rules which must be abided by in order to prevent avoid- able personal injury or damage to property are described here. Examplse of symbols This symbol means This symbol means This symbol means nec- "reminding". - Page 3 Use the charging adapter ● Do not use if the charging adapter is ● Product must be used with the accom- damaged or if it does not plug into the panying charging adapter If the product gets connected to other charging Be sure to Prohibited adapters, or if the charging adapter gets connected...
-
Page 4: Precautions For Use
Safety precautions Continued ● When unplugging the charging adapter, ● Make sure to attach the mop pads before be sure to unplug by holding the charg- using ing adapter itself; do not pull on the Unplug the Be sure to power cord It may also damage the mop head of the prod- product... -
Page 5: Parts
Parts ■ Main unit Operating handle Water reser- voir Water supply port Release button Battery indicator light Shaft Release button Swivel LED headlights Mop head Charging Charging port port cover Mop Pads Nozzle ■ Back of the mop head Power spin board Pad attachment surface... - Page 6 Parts Continued ■ Accessories Measuring cup Pin for cleaning the Charging adapter nozzle Charging plug Charging cord Cleaning side Soft pads Scrubby pads Attaching side ※ Place the pads on the ground with cleaning side facing down. Then, place the machine ■...
-
Page 7: Assembly
Assembly ■ Assembly • Remove the shaft, the operating handle can be directly connected to the mop head. How to assemble Stand the product up vertically until you hear the Swivel make a "clicking" sound Click Connect the shaft to the operating handle and to the mop head How to remove •... -
Page 8: Charging The Battery
Charging the battery ■ How to charge Connect the charging plug to the mop head ● Pull open the charging port cover on the mop head, a long period, battery must be put on charge. and then insert the charging plug into the port. •... -
Page 9: Preparation
Preparation How to use ■ Attaching the mop pads want to clean, and push the swivel into Open the mop pads, leaving a space of about place until hearing it "click" • Turn on the power, and then the battery indicator Press down on the mop head from above to at- lights and the LED headlights will light up. - Page 10 How to use Continued Battery indicator light Once cleaning is complete, stand the swivel up vertically until there is a "click- Battery indicator light Status Power remaining in the battery is • O indicator lights and the LED headlights will go out. Indicator lights go out one by one from the right as the power remaining decreases...
-
Page 11: Cleaning And Maintenance
Cleaning and maintenance ■ How to drain the water from ● Before cleaning and maintaining, the water reservoir charging adapter. ● Do not spray with water. Doing so may result in electrical shock, injury or malfunctioning. Open the water reservoir, tilt the mop head, and drain out any water remaining ●... -
Page 12: Removing The Battery (When Disposing Of The Product)
Cleaning and maintenance Removing the battery Continued ■ Mop pads About used batteries ● Remove the used battery and take it to the nearest bat- tery recycling location. Do not throw away used batter- Remove the mop pads ies as general household waste. ●... -
Page 13: Troubleshooting
Troubleshooting following problems before calling for repairs. Status Possible causes Solutions ● The charging plug ● ➡ ➡ plug into the charging port on the plugged into the charging port on the back of the mop head mop head. Cannot charge ➡... - Page 14 Continuous operation time 70 minutes (when operating on ‘high’ mode) Water reservoir capacity 90mL Battery Lithium ion 2-D battery Battery capacity 11.1V / 2,200mAh Battery lifetime ※ 1 The battery can be recharged about 300 times Rated voltage 11.1V Input 100-240V~, 50 / 60Hz Charging power supply Charging adapter)
-
Page 15: Warranty And After-Sales Services
Warranty and after-sales services Please make sure to carefully read the following contents. ■ Purchase Receipt ■ Over the warranty period Be sure to request a Purchase Receipt at the retail Please check with retail shop and you will have to pay shop when purchase the product.
Need help?
Do you have a question about the IC-M01 and is the answer not in the manual?
Questions and answers