Table of Contents
Advertisement
Advertisement
Table of Contents

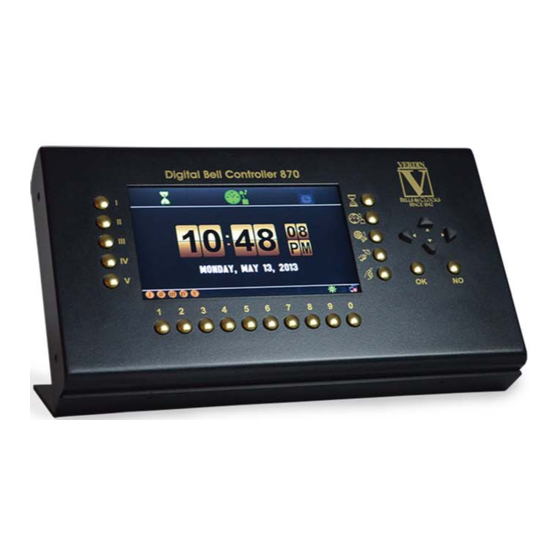
Summary of Contents for Verdin DBC 870
-
Page 2: Main Menu
0.0.0 -MAIN MENU Basic Icons: SYSTEM UNLOCKED. SYSTEM LOCKED. Press "951" to unlock the screen. Press "951" to lock the screen. TIME PROGRAM ACTIVE TIME PROGRAM INHIBITED TIME STRIKE ACTIVE TIME STRIKE INHIBITED TOWER CLOCK ON. TOWER CLOCK OFF. NIGHT SERVICE ON. NIGHT SERVICE OFF. - Page 3 REMOTE CONTROL DATA. REMOTE CONTROL OFF. NO DATA. FLASHING LIGHT INDICATES RX3500 IS RECEIVING DATA. DAYLIGHT SAVING TIME. DAYLIGHT SAVING TIME. ENABLED DAYLIGHT SAVING TIME. STANDARD TIME. SD-CARD PRESENT. SD-CARD ABSENT LAN NETWORK, LAN NETWORK, CONNECTED. DISCONNECTED.
-
Page 4: Direct Access
1.0.0 -DIRECT ACCESS Press button “1” on the main menu to gain access to the following options: 1. Clock setting. 2. Enable/Inhibit service programs, etc. 3. Relay output status. Note: To select one of the icons A, B, C, D & E use either the side arrows or the number keys 1, 2, 3, 4 &... -
Page 5: Clock
1.1.0 -CLOCK To reset the time on the machine or for any other clock resetting, select option 1 from the direct access menu. The screen will show: • Select 1 to modify the time on the machine. • Select 2 to modify the date on the machine. •... -
Page 6: Set Time
1.1.1 -SET TIME From the main menu enter 1, 1, 1 to SET THE TIME. The screen will show: Enter the exact hour, minutes and seconds. Use the left/right arrows to position on the time to be changed, enter the new values. Use the right and left arrows to change AM/PM and press OK to save. -
Page 7: Setting The Tower Clock Hands
1.1.7 -SETTING THE TOWER CLOCK HANDS To set the tower clock hands press 1 1 7 from the main menu. The screen will show: Enter the actual position of the tower clock hands. Press OK each time to confirm the settings. The following screen will appear: Use the side arrows to confirm the upgrade to either YES or NO Confirm by pressing OK. -
Page 8: Enable/Inhibit Standard Time Or Daylight Saving Time
1.1.4 -ENABLE/INHIBIT STANDARD TIME OR DAYLIGHT SAVING TIME Press 1 1 4 from the main menu. The screen will show: To modify, use the top/bottom arrows to the correct position and change the settings. DST = DAYLIGHT SAVING TIME Use the side arrows to change the parameter of the selected setting. -
Page 9: Time Zone
1.1.3 -TIME ZONE Press 1 1 3 from the main menu. The screen will show: US TIME ZONES Atlantic Time Zone Eastern Time Zone Central Time Zone Mountain Time Zone Pacific Time Zone Alaska Time Zone Hawaii Time Zone UTC = Universal Time Zone GMT = Greenwich Mean Time. -
Page 10: Date Format
1.1.6 -DATE FORMAT Press 1 1 6 from the main menu. The screen will show: This menu offers the ability to change the date format according to the following abbreviations: = Day of the month. = Month. YYYY = Year. The available formats are as follows: DD/MM/YYYY MM/DD/YYYY... -
Page 11: Clock Correction
1.1.9 -CLOCK CORRECTION The unit can be set to automatically adjust the internal clock once a month. This is useful if you are experiencing a consistent monthly time drift Press 1 1 9 from the main menu to view: Where necessary, enter the number of seconds in place of the “0” in the menu. The machine will consequently either go forward or backwards for the number of seconds entered each month. -
Page 12: Special Programming/Services
• Option 4 to manually play service programs. • Option 5 to enable the “weekly cycle” feature. Note: Options 4 and 5 should only be used if directed by a Verdin technician. Improper changes made in these menus can result unexpected operation. -
Page 13: Inhibit Time Programming
1.2.1 -INHIBIT TIME PROGRAMMING Press 1 2 1 from the main menu. This function is used to inhibit all time programming for a specific date and time. (However, the clock strike programming will continue to run). The program will be erased from the memory immediately after it has been executed, Enter the time (hours and minutes) at which to inhibit the bell events from playing and confirm by pressing OK. -
Page 14: Special Programming
1.2.2 -SPECIAL PROGRAMMING Press 1 2 2 from the main menu. This menu allows you to add a new program to the normal time programming but only for one day. The program will be deleted from the memory after being played. If programming was made under Normal Programming (section 2.1.1) it will take priority over programming made under Special... -
Page 15: Modify Special Programming
1.2.3 -MODIFY SPECIAL PROGRAMMING Press 1 2 3 from the main menu. The display will show: Use this menu to modify or erase programming which has been previously programmed using Inhibit Programming (1.2.1) and Special Programming (1.2.2). Use the top/bottom arrows to scroll and select. -
Page 16: Time Programming, Editing, Backup
2.0.0 -TIME PROGRAMMING, EDITING, BACKUP Press 2 to enter the Time Programming Menu. Use this menu to schedule, edit and delete bell events and to create and recall system backups. 2.1.1 -NORMAL PROGRAMMING Use this menu to carry out the following type of programming throughout the year: ... - Page 17 Description of the parameters: WD = Week Days An event can be filtered to a precise day of the week: NO_SUN Only on a Sunday Every day except Sunday NO_MON Only on a Monday Every day except Monday NO_TUE Only on a Tuesday Every day except Tuesday NO_WED...
- Page 18 The following is an example for adding program number 51 to play at 12:00 on Sundays only. Press the OK button to confirm Melody. Press 5 1 and press the OK button to confirm. Use the left/right arrows until the letters “SUN”...
-
Page 19: Edit / Delete Programs
2.1.1 -EDIT / DELETE PROGRAMS If necessary, programs can easily be modified or deleted from the normal programming menu. (2 1 1) Highlight the program to be modified or deleted. Press the display will show: • Option 1 = Modify selected program. Option 2 = Delete selected program. -
Page 20: Backup / Restore
2.2 -BACKUP / RESTORE 2.2.1 -INTERNAL BACKUP / RESTORE This function allows you to copy the data inside the machine to internal flash memory. This backup can then be recalled at a later date. Press 2, 2, Password (1 1 1 1) and 2, from the main menu. The display will show: These menus allow you to: 1. -
Page 21: Creating Backups On A Sd-Card
2.3 -CREATING BACKUPS ON A SD-CARD To create an external backup insert a SD-Card into the slot situated on the back of the machine. Wait a few seconds until the SD-Card symbol appears on screen. Now you can create backup files that can be restored at a later date. Press 2, 2, Password (1 1 1 1) and 3, from the main menu. -
Page 22: Bell Sound Menu - Button 3 (Icon C)
3.0 -BELL SOUND MENU – BUTTON 3 (ICON C) Press button 3 from the main menu to enter the Bell Sound Menu. C1 COMPILATION C2 VERIFY C3 GROUPING WARNING: These sections (C1 – C2 – C3) are to be used exclusively by the installer. DO NOT MAKE ANY CHANGES TO THESE SECTIONS, as it could affect the proper functioning of your unit. -
Page 23: Delete Bell Sound
3.5 -DELETE BELL SOUND Use this menu to delete a bell sound which has been created. Only bell sounds which have been created by the user can be deleted Enter the program number to be deleted and press OK to confirm. The screen will request confirmation of the bell sound to be deleted. -
Page 24: Lan Network Setup
DBC 870 with a crossover cable and boot/restart the computer. Press from the main display of the DBC 870 and enter the I.P. address in the address bar of your browser. The following screen will display: Once the connection has been established use password... - Page 25 Follow these steps to adjust the network settings of your DBC 870 carillon. • From the Main Menu, press Button 5. The System Setup Screen displays. Press 3 for INFO/SETUP. Enter Password 7515 to show the INFO/SETUP screen. Then press 2 for the NETWORK SETUP.
-
Page 26: Quick Function Keys
6.0.0 -QUICK FUNCTION KEYS 6.1.0 -TO PLAY A MELODY MANUALLY Press the button with this symbol The display will show: Enter the program number to be played. Example: Enter 100 and press OK to confirm. To see the list of program numbers press: + OK 6.1.1 -REPEAT MELODY PLAYING MANUALLY To increase the number of times a bell event repeats, press OK while the melody is... -
Page 27: Quick Function Keys
6.3.0 -QUICK FUNCTION KEYS These 5 buttons are associated to program numbers 1 – 2 – 3 – 4 – 5. It is possible to copy or create a bell sound and save it in one of the above program numbers. See section 3.4 Copy Bell Sounds for more information on this process 6.3.1 -TO PLAY A MELODY IMMEDIATELY By pressing one of the five quick function keys the title of the melody will appear. -
Page 28: Interruption Of Time Programming - Clock Strike
7.0.0 -INTERRUPTION OF TIME PROGRAMMING - CLOCK STRIKE 7.1.0 -INHIBIT TIME PROGRAMMING To inhibit all time programming for an indefinite time (excluding clock chimes): Press and hold this button for about 5 seconds, the sign will turn off. To check that time programming has been inhibited, press OK. An asterisk will appear next to the time. -
Page 29: Enable Time Programming
7.1.1 -ENABLE TIME PROGRAMMING To enable the time programming press and hold the symbol for about 5 seconds. The led on the symbol will turn on. 7.1.2 -CLOCK STRIKE INTERRUPTION To inhibit clock strike for an indefinite time (the clock strike will automatically turn on if a time clock strike has been programmed to turn on at a certain hour) Press and hold the clock strike symbol for more than 5 seconds. -
Page 30: Checking Daily Events
8.0.0 -CHECKING DAILY EVENTS 8.1.0 -USING THE "OK" BUTTON TO CHECK DAILY EVENTS From the main menu press the OK button to view all the events programmed to play on this day. The display will show: Press the arrow key to see the service programs which have been programmed to ... -
Page 31: Using The "Ok" Button To Inhibit Events For One Day
8.1.1 -USING THE "OK" BUTTON TO INHIBIT EVENTS FOR ONE DAY From the main menu press OK + 0 The display will show: Check the date and modify if necessary. Press OK. The menu will show all the melodies programmed to play on that date. The highlighted program can be inhibited for just that time and day by pressing OK. -
Page 32: Play Bells Manually
9.0.0 -PLAY BELLS MANUALLY 9.1.0 -TOLL BELLS MANUALLY Press the button. The display will show: 1 – BUTTONS 1-9 (Use buttons from 1 to 9 on the machine) 2 – EXT. KEYBOARD (Use a midi keyboard) Option 1 and Option 2 the display will show: Press keypad buttons from 1 to 9 to play for Option 1. -
Page 33: Peal Bells Manually
9.2.0 -PEAL BELLS MANUALLY Press the button. The display will show: Enter the bell numbers you would like to swing and use the top/bottom arrows to set the duration. Press OK to start playing. Press NO three times to interrupt playing. 10.0.0 -RECORD A MELODY USING THE KEYPAD OR KEYBOARD Select option 4. -
Page 34: Remote Controls
11.0.0 –REMOTE CONTROLS The four button remote control enables you to play one of three pre-set bell functions by pressing a key. • Key 1 plays Bell One. • Key 2 plays the Funeral Toll. • Key 3 plays the Instant Toll. •... - Page 35 Number of relay outputs available : 22+2 (3 RL085 relay modules). OPTIONALS: Radio time radio synchronisation GPS 1,000/10.000 channels remote control – 433 MHz frequency Interface for connection to relay power section: Twisted pair (By Contractor Other Than Verdin) •...
-
Page 36: Table Of Contents
INDEX 0.0.0 -MAIN MENU ....................................1 1.0.0 -DIRECT ACCESS ..................................3 1.1.0 -CLOCK ......................................4 1.1.1 -SET TIME ....................................5 1.1.2 -SET DATE ....................................5 1.1.7 -SETTING THE TOWER CLOCK HANDS ........................... 6 1.1.4 -ENABLE/INHIBIT STANDARD TIME OR DAYLIGHT SAVING TIME ................. 7 1.1.3 -TIME ZONE ................................... - Page 37 All information and warnings inside this instruction manual have been carefully checked, however the contents of this manual can be changed without further notice. Verdin and its suppliers are not liable for damage caused by improper use of the product.
Need help?
Do you have a question about the DBC 870 and is the answer not in the manual?
Questions and answers