Advertisement
PACK CONTENTS:
• Face-fit Framing [ Top, Bottom, Left, Right ]
• Top Channels (Front & Back)
• Screws (Assembly, Fixing, Top Channel)
• Hinge Pins
• White Cover Stickers
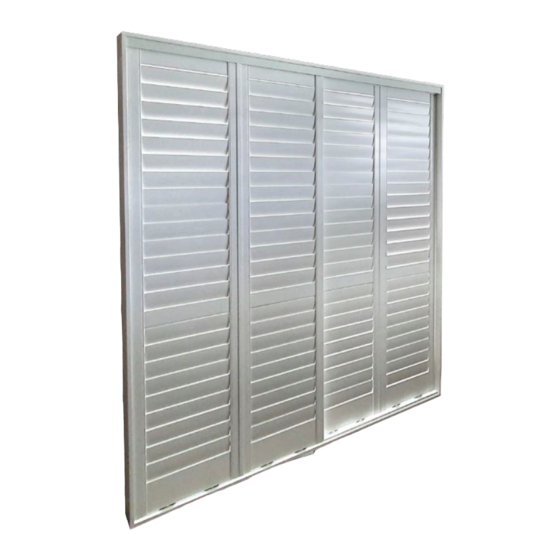
• Sliding Shutter Panels
STEP 1
Unpack Framing Box
a.
Locate Hardware and remove from Pack
b.
Group different pack items together
For more information visit
www.easyas-shutters.com
INTERNAL SLIDING SHUTTER
INSTALL
GUIDE
WHAT YOU WILL NEED:
• Drill
• Drill Bit Suitable for Timber
(3mm required)
• Screw Tip Bit
(PH2 x 150mm Phillips Head Bit Required)
Hardware Pack
A
Advertisement
Table of Contents

Related Manuals for EasyAS INTERNAL SLIDING SHUTTER


Summary of Contents for EasyAS INTERNAL SLIDING SHUTTER
- Page 1 INTERNAL SLIDING SHUTTER INSTALL GUIDE PACK CONTENTS: WHAT YOU WILL NEED: • Face-fit Framing [ Top, Bottom, Left, Right ] • Drill • Top Channels (Front & Back) • Drill Bit Suitable for Timber (3mm required) • Screws (Assembly, Fixing, Top Channel) •...
- Page 2 - Make sure edges are square to wall/architrave Drill pilot holes through beading into architrave using 3mm drill bit Architrave side Fasten with (size mm??) screws supplied Pre-Drilled Beading Place white covers over screw heads For more information visit www.easyas-shutters.com...
- Page 3 While holding the shutter panel securely, guide top edge of shutter panel into top track, followed by placing bottom roller wheels onto bottom tracks Repeat for second ‘joining’ panel making sure hinges pair With panel(s) in place, join panels together using hinge pins on outward facing side of panels For more information visit www.easyas-shutters.com...
- Page 4 Panel edges should meet square against outer frame. - If not, make adjustments to wheel heights (back of panel) using phillips head driver until the shutter panel is square against frame Place white covers over screw holes to finish Counter Clockwise Clockwise For more information visit www.easyas-shutters.com...
Need help?
Do you have a question about the INTERNAL SLIDING SHUTTER and is the answer not in the manual?
Questions and answers