
Summary of Contents for Doosan DX10z
- Page 1 Operation & Maintenance Manual DX10z Compact Excavator 11001 7349203 (09-18) (0) Original Doosan Infracore Europe B.V. Instructions EME A S5-K...
- Page 2 Never modify equipment. Be sure controls are in Operation & Maintenance neutral before starting. Manual, and Operator’s Never use attachments Handbook. not approved by Doosan Sound horn and check Company. behind machine before starting. WRONG WRONG CORRECT CORRECT...
- Page 3 ALPHABETICAL INDEX ........... . . 96 REFERENCE INFORMATION Write the correct information for YOUR Doosan excavator in the spaces below. Always use these numbers when referring to your Doosan excavator.
-
Page 4: Table Of Contents
DOOSAN COMPANY IS ISO 9001 CERTIFIED ........ -
Page 5: Declaration Of Conformity
811/76a Prosecka,19000 Praha 9 - Prosek (Czech Republic) Notified body 1020 for EC Directive 2000/14/EC Measured Sound Power Level: 93 dB A Guaranteed Sound Power Level: 93 dB A Has been manufactured in conformity with the provisions of: 2006/42/EC, 2014/30/EU ______________________________ Signature DX10z Operation & Maintenance Manual... -
Page 6: Doosan Company Is Iso 9001 Certified
ISO 9001 is an international standard that specifies requirements for a quality management system that controls the processes and procedures which we use to design, develop, manufacture, and distribute Doosan products. ISO 9001 means that as a company we say what we do and do what we say. In other words, we have established procedures and policies, and we provide evidence that the procedures and policies are followed. -
Page 7: Lubricants And Fluids
LUBRICANTS AND FLUIDS DX10z Operation & Maintenance Manual... -
Page 8: Serial Number Locations
The delivery report [Figure 4] contains a list of items that must be explained or shown to the owner or operator by the dealer when the Doosan excavator is delivered. The delivery report must be reviewed and signed by the owner or operator and the dealer. -
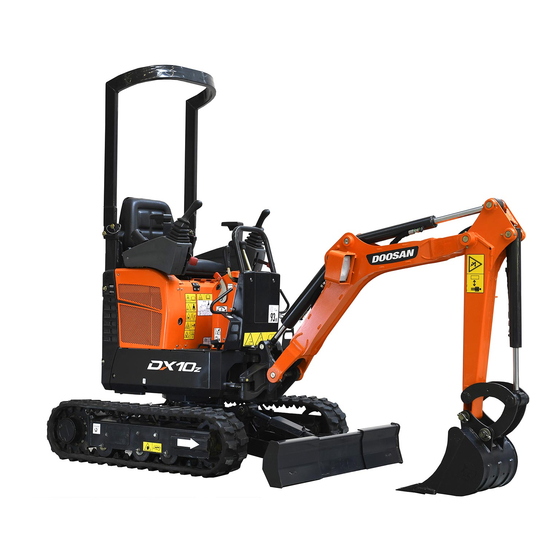
Page 9: Excavator Identification
Bucket Link / Attachment Coupler (If Equipped) Right Side Cover Bucket [A] Track Frames Blade Cylinder Blade Upperstructure Control Levers (Joysticks) Operator’s Seat with Seat Belt [A] BUCKET - Several different buckets and other attachments are available for the Doosan excavator. DX10z Operation & Maintenance Manual... -
Page 10: Features, Accessories And Attachments
Attachments not manufactured by Doosan can not be approved. The versatile Doosan excavator quickly turns into a multi- job machine with a variety of attachments. See your Doosan dealer for more details on these and other attachments and field accessories. • Digging bucket •... - Page 11 Pictorial-Only Safety Signs ..........17 DX10z Operation & Maintenance Manual...
-
Page 12: Safety Instructions
The attachments and buckets are designed for a Rated Lift Capacity. They are designed for secure fastening to the Doosan excavator. The user must check with the dealer, or Doosan literature, to determine safe loads of materials of specified densities for the machine - attachment combination. -
Page 13: Safe Operation Is The Operator's Responsibility
W-2044-1107 The Doosan excavator and attachment must be in good operating condition before use. Check all of the items on the Doosan Service Schedule Decal under the 8-10 hour column or as shown in the Operation & Maintenance Manual. SI EXC EMEA DH-0117... -
Page 14: Avoid Silica Dust
Do not jump start or charge a frozen or damaged battery. Keep any open flames or sparks away from batteries. Do not smoke in battery charging area. SI EXC EMEA DH-0117 DX10z Operation & Maintenance Manual... -
Page 15: Hydraulic System
Welding And Grinding Hydraulic System Always clean the machine and attachment, disconnect the battery, and disconnect the wiring from the Doosan Check hydraulic tubes, hoses and fittings for damage controllers before welding. Cover rubber hoses, battery and leakage. Never use open flame or bare skin to check and all other flammable parts. -
Page 16: Publications And Training Resources
PUBLICATIONS AND TRAINING RESOURCES The following publications are also available for your Doosan excavator. You can order them from your Doosan dealer. For the latest information on Doosan products and the Doosan Company, visit our Web site at http:// www.doosanequipment.com or doosan.com OPERATION &... -
Page 17: Machine Signs (Decals)
MACHINE SIGNS (DECALS) Follow the instructions on all the Machine Signs (Decals) that are on the excavator. Replace any damaged machine signs and be sure they are in the correct locations. Machine signs are available from your Doosan excavator dealer. 7135251... - Page 18 MACHINE SIGNS (DECALS) (CONT’D) Follow the instructions on all the Machine Signs (Decals) that are on the excavator. Replace any damaged machine signs and be sure they are in the correct locations. Machine signs are available from your Doosan excavator dealer. 7135249...
-
Page 19: Pictorial-Only Safety Signs
Read and understand the Operation & Maintenance Manual A safety sign may contain more than one hazard panel prior to transporting or lifting the machine. and more than one avoidance panel. W-2517-0110 DX10z Operation & Maintenance Manual... - Page 20 Keep away from fan and moving parts. Do not WARNING operate with guard removed. Hot surfaces can cause injury. Do not touch. Allow to cool before servicing. Keep away from the operating machine to avoid serious injury or death. W-2521-0106 W-2520-0106 DX10z Operation & Maintenance Manual...
- Page 21 Manual for more information. position can cause serious injury or death. W-2522-0110 To Leave Excavator: 1. Lower attachment and blade to ground. 2. Stop engine and remove the key (if equipped). 3. Raise control console. W-2518-0110 DX10z Operation & Maintenance Manual...
- Page 22 Warning The Hydraulic System ..........40 DX10z Operation & Maintenance Manual...
- Page 23 Fastening To Transport Vehicle ..........50 DX10z Operation & Maintenance Manual...
-
Page 24: Intended Use
Contact with moving parts, a trench cave-in or flying objects can cause injury or death. W-2119-0910 RI017 RI012 IMPORTANT Loading Material Backfilling Avoid impacting objects with the blade. Damage to blade and undercarriage components may occur. I-2256-0507 RI049 RI025 DX10z Operation & Maintenance Manual... -
Page 25: Instruments And Consoles
Light comes ON when Boom Swing (See Boom Swing Pedal on Lockout Indicator hydraulic lockout is ON. Pedal Page 31.) Lamp Blade / Track (See Blade / Track Expansion Expansion Lever on Page 32.) Selector Lever DX10z Operation & Maintenance Manual... -
Page 26: Raising And Lowering The Consoles
[Figure 7] and move the consoles in or out from the The green light (Item 3) [Figure 10] will be ON when operator’s seat. high-range is engaged. Press the button (Item 1) [Figure 10] again to disengage. DX10z Operation & Maintenance Manual... -
Page 27: Tailgate
To close the tailgate, slightly raise the tailgate (Item 1), move the retaining rod (Item 2) [Figure 12] out of the locked position, and then slowly lower the tailgate until it is fully closed. NOTE: The tailgate can be locked using the start key. DX10z Operation & Maintenance Manual... -
Page 28: Operator Canopy (Tops)
OPERATOR CANOPY (TOPS) Figure 14 Description The Doosan excavator has an operator canopy (TOPS) as standard equipment to protect the operator if the excavator is tipped over. The seat belt must be worn for TOPS protection. Check the TOPS canopy, mounting, and hardware for damage. -
Page 29: Steering Levers
Slowly move both steering levers Figure 19 (Item 1) [Figure 17] forward for forward travel; backward Right Turn for reverse travel. (Reverse) RI010 Pull the left steering lever backward to turn right [Figure 19] while reversing. DX10z Operation & Maintenance Manual... - Page 30 Left Turn Left Turn (Forward) RI008 B19989 Push the right steering lever forward and pull the left steering lever backward [Figure 23]. Push the right steering lever forward to turn left [Figure 21] while driving forward. DX10z Operation & Maintenance Manual...
-
Page 31: Hydraulic Controls
Lower the work equipment to the ground. • Lower the blade to the ground. • Stop the engine and remove the key. Before slewing the upperstructure, make sure the • Raise the control console. slew lock is disengaged. W-2780-0109 I-2051-0905 DX10z Operation & Maintenance Manual... -
Page 32: Control Lockout Lever
Lower the control console(s) (Item 2) [Figure 26] to engage the hydraulic control functions of the control joysticks. R0114 When you are not using the auxiliary flow, the pedal can be folded to prevent operation of the hydraulic functions [Figure 28]. DX10z Operation & Maintenance Manual... -
Page 33: Boom Swing Pedal
R0018 When not in use, the boom swing pedal can be folded inward to prevent operation of the boom swing function. In this position it can be used as a footrest [Figure 30]. DX10z Operation & Maintenance Manual... -
Page 34: Blade Control
Track Expansion Lever (Item 1) [Figure 33] forward to lower the blade. Move the Blade / Track Expansion Lever (Item 2) [Figure 33] backward to raise the blade. NOTE: Keep the blade lowered when digging to improve digging performance. DX10z Operation & Maintenance Manual... -
Page 35: Track Frame Expansion
The excavator can be operated with the track frame retracted for transport on a trailer or to access narrow areas [Figure 34]. Figure 35 EXPANDED R0025 Expand the track frame [Figure 35] for increased digging performance. DX10z Operation & Maintenance Manual... -
Page 36: Upperstructure Slew Lock
Raise the boom and arm to lower the rear of the excavator to the ground. Raise the blade all the way. Rotate the upperstructure 180 degrees. DX10z Operation & Maintenance Manual... -
Page 37: Daily Inspection
Some regulations require that certain spills and leaks on the ground must be cleaned in a specific manner. See local, state and federal regulations for correct disposal. DX10z Operation & Maintenance Manual... - Page 38 • Direct the stream at a 90 degree angle and at least 300 mm (12 in) from the decal. Wash from the center of the decal toward the edges. I-2226-0910 DX10z Operation & Maintenance Manual...
-
Page 39: Pre-Starting Procedure
NOTE: The control lockout levers must be in the down position for the hydraulic control levers to operate. R0087 Release the seat lever (Item 1) [Figure 42] to adjust the seat forward or backward for comfortable operation. DX10z Operation & Maintenance Manual... -
Page 40: Starting The Engine
Longer use can damage the starter by overheating. Allow starter to cool for one minute R0023 before using starter again. I-2034-0700 Move the engine speed control lever (Item 1) [Figure 46] to low idle. DX10z Operation & Maintenance Manual... -
Page 41: Cold Temperature Starting Procedure
When the engine speed increases, move the engine overheating. Allow starter to cool for one minute speed control lever to the low idle position. before using starter again. I-2034-0700 Turn the key switch OFF to stop the engine [Figure 49], DX10z Operation & Maintenance Manual... -
Page 42: Warning The Hydraulic System
Park the machine in an area where the temperature will be above -18°C (0°F), is possible. W-2381-0211 Let the engine run at least five minutes to warm the engine and the hydraulic fluid before operating the excavator. DX10z Operation & Maintenance Manual... -
Page 43: Buckets And Attachments
Install the link (Item 2) into the bucket, align the hole, install the pivot pin and washer (Item 3) [Figure 51]. Install the retainer pins (Item 4) [Figure 51]. Add grease to the pivot pins before operation. DX10z Operation & Maintenance Manual... -
Page 44: Operating Procedure
When operating on a public road or motorway, always follow local regulations. For example: Slow Moving Lower the control console(s) to engage the hydraulic Vehicle Sign or direction signals can be required. control functions of the joysticks [Figure 52]. DX10z Operation & Maintenance Manual... -
Page 45: Object Handling
Object Handling Figure 54 The excavator must be equipped with the optional lift eye link (Item 1) [Figure 53]. See your Doosan dealer for available Kits. Do not exceed the Rated Lift Capacity. (See MACHINE SIGNS (DECALS) on Page 15.) -
Page 46: Driving The Excavator
Figure 57 RI026 The bucket can also be used to pull the excavator. Raise the blade, extend the arm and lower the boom. Operate the boom and arm in a digging manner [Figure 57]. DX10z Operation & Maintenance Manual... -
Page 47: Operating On Slopes
Damage to the blade or hydraulic cylinder can result. 15 Maximum RI043 When going up slopes or on side slopes that are 15 degrees or less, position the machine as shown and run the engine slow [Figure 59] and [Figure 60]. DX10z Operation & Maintenance Manual... - Page 48 When working with the bucket on the uphill side, keep the bucket as close to the ground as possible. Dump the soil far enough away from the trench or hole to prevent the possibility of a cave-in. DX10z Operation & Maintenance Manual...
-
Page 49: Operating In Water
• If the machine is not used for a long period of time, keep it indoors to prevent direct exposure to sunlight, rain, snow, etc. DX10z Operation & Maintenance Manual... -
Page 50: Stopping The Excavator
Exit machine. Figure 66 R0023 Move the engine speed control lever fully down [Figure 66] and run the engine at idle speed for about 5 minutes to allow it to cool. Stop the engine. DX10z Operation & Maintenance Manual... -
Page 51: Lifting The Excavator
Fasten a chain in the hook of the boom (Item 2) [Figure 68]. Lower the boom, arm, bucket and blade to the transport vehicle. Stop the engine and remove the key. Put blocks under the front and rear of the track shoes. DX10z Operation & Maintenance Manual... -
Page 52: Fastening To Transport Vehicle
AVOID SERIOUS INJURY OR DEATH Adequately designed ramps of sufficient strength are needed to support the weight of the machine when loading onto a transport vehicle. Wood ramps can break and cause personal injury. W-2058-0807 DX10z Operation & Maintenance Manual... - Page 53 Removing And Installing The Battery ........71 DX10z Operation & Maintenance Manual...
- Page 54 Return To Service ............85 DX10z Operation & Maintenance Manual...
-
Page 55: Maintenance Safety
Maintenance procedures which are given in the Operation and Maintenance Manual can be performed by the owner/ operator without any specific technical training. Maintenance procedures which are not in the Operation and Maintenance Manual must be performed ONLY BY QUALIFIED DOOSAN SERVICE PERSONNEL. Always use genuine Doosan replacement parts. -
Page 56: Service Schedule
(See Page 81.) Battery - Check cables, connections, and electrolyte level; add distilled water as needed. (See Page 68.) • Fuel Tank - Drain water and sediment from fuel tank and fuel filter. (See Page 60.) • DX10z Operation & Maintenance Manual... - Page 57 Hydraulic Fluid and Filters - Replace hydraulic fluid and filters. (See Page 73.) • Travel Motors (Final Drive) - Replace fluid. (See Page 79.) • Every 24 Months Coolant - Replace the coolant. (See Page 63.) • DX10z Operation & Maintenance Manual...
-
Page 58: Tailgate
To close the tailgate, slow lift the tailgate (Item 1) and release retaining rod and slowly lower the tailgate. Push on the tailgate until the latch is closed. NOTE: The tailgate can be locked using the start key. DX10z Operation & Maintenance Manual... -
Page 59: Air Cleaner
Install the outer filter and the dust cup. cleaner housing. Press the button on the condition indicator to reset the Check the housing for damage. condition indicator (Item 1) [Figure 76] (the red ring will not show anymore). DX10z Operation & Maintenance Manual... -
Page 60: Seat Belt
/ or the webbing is packed with dirt, the webbing strength can have weakened. your Doosan dealer seat belt system replacement parts for your machine. DX10z Operation & Maintenance Manual... -
Page 61: Fuel System
This biodiesel blend fuel is commonly NOTE: Biodiesel blend fuel does not have long term marketed as B7 blended diesel fuel. B7 stability and should not be stored for more blended diesel fuel must meet EN590 than three months. specifications. DX10z Operation & Maintenance Manual... -
Page 62: Filling The Fuel Tank
Remove the fuel line at the engine and put the end of the hose in a fuel can, squeeze the primer bulb (if equipped) and drain the fuel tank that way (siphon action). (See SERVICE SCHEDULE on Page 54.) for the correct service interval. DX10z Operation & Maintenance Manual... -
Page 63: Removing Air From The Fuel System
W-2072-EN-0909 Doosan engine oils are recommended for use in this machine. If Doosan engine oil is not available, use a good quality engine oil that meets API Service Classification of CJ-4 or better [Figure 84]. -
Page 64: Replacing Oil And Filter
Remove the oil filter (Item 1) [Figure 86] and clean the filter housing surface. Use a genuine Doosan filter. Put clean oil on the filter gasket. Install the filter and tighten by hand. Install and tighten the drain plug (Item 1) [Figure 85]. DX10z Operation & Maintenance Manual... -
Page 65: Cooling System
Tools are being used. protect the internal engine components; reduces the W-2019-0907 boiling point and freeze protection of the system. Always add a premixed solution. Adding full strength concentrated coolant can cause serious premature engine damage. I-2124-0497 DX10z Operation & Maintenance Manual... -
Page 66: Replacing The Coolant
Too little antifreeze reduces the additives which protect the internal engine components; reduces the boiling point and freeze protection of the system. Always add a premixed solution. Adding full strength concentrated coolant can cause serious premature engine damage. I-2124-0497 DX10z Operation & Maintenance Manual... -
Page 67: Alternator Fan Belt
Remove the two bolts (Item 1) and remove the fan cover (Item 2) [Figure 91]. Remove the fill cap (Item 3) [Figure 91] from the hydraulic reservoir. Figure 92 S7554 Remove the four bolts (Item 1) [Figure 92]. Remove the cover. DX10z Operation & Maintenance Manual... - Page 68 (Item 1) [Figure 95] has 13 mm (0.50 in) movement at the middle of the belt span with 58 N (13 lb) of force. Tighten the mounting and adjustment bolts. Install the cover, fill cap and fan apron. DX10z Operation & Maintenance Manual...
-
Page 69: Electrical System
4. Beacon - 10 A 5. Switch Power - 10 A 6. Valves horn - 10 A 7. Switched timer - 10 A 8. Light - 10 A Always replace fuses using the same type and capacity DX10z Operation & Maintenance Manual... -
Page 70: Battery Maintenance
(See Battery Charging on Page 69.) from machine controllers, accessories, and features such as connected machine intelligence. • Check the battery state of charge every 30 days on machines that are not frequently used. (See Battery Testing on Page 69.) DX10z Operation & Maintenance Manual... -
Page 71: Battery Testing
Do not jump start or charge a frozen or damaged battery. Warm battery 16°C (60°F) before connecting to a charger. Unplug charger before connecting or disconnecting cables to battery. Never lean over battery while boosting, testing or charging. W-2066-0910 DX10z Operation & Maintenance Manual... -
Page 72: Using A Booster Battery (Jump Starting)
Connect one end of the first cable to the positive (+) terminal of the booster battery. Connect the other end of the same cable to the positive (+) terminal (Item 1) [Figure 102] of the excavator battery. DX10z Operation & Maintenance Manual... -
Page 73: Removing And Installing The Battery
In case of eye contact get prompt medical attention and wash eye with clean, cool water for at least 15 minutes. If electrolyte is taken internally drink large quantities of water or milk! DO NOT induce vomiting. Get prompt medical attention. W-2065-0807 DX10z Operation & Maintenance Manual... -
Page 74: Hydraulic System
AVOID INJURY OR DEATH Always clean up spilled fuel or oil. Keep heat, flames, sparks or lighted tobacco away from fuel and oil. Failure to use care around combustibles can cause explosion or fire. W-2103-0508 DX10z Operation & Maintenance Manual... -
Page 75: Hydraulic / Hydrostatic Fluid Chart
[3] Doosan All-Season Fluid [4] Doosan Synthetic Fluid Remove the hydraulic filter (Item 1) [Figure 109]. [5] Doosan Biodegradable Hydraulic / Hydrostatic Fluid (Unlike biodegradable fluids that are vegetable based, Clean the housing where the filter gasket makes contact. Doosan biodegradable fluid is formulated to prevent... -
Page 76: Draining Hydraulic Oil
Replace the plate and the right cover. R0124 Before removing the cap, place a container under the drain plug (Item 1) [Figure 111] to collect the oil. Recycle or dispose of the fluid in an environmentally safe manner. DX10z Operation & Maintenance Manual... -
Page 77: Diagnostic Couplers
Support the counterweight with a lifting device and straps before removing the bolts. To gain access, remove the counterweight by removing the two bolts (Item 1) [Figure 112]. The diagnostic couplers can be used by your Doosan dealer to check circuit pressures. Figure 113 R0069 The two diagnostic couplers (Item 1) [Figure 113] are located on the hydraulic block. -
Page 78: Control Lockout Levers
The joystick control levers and traction system must be deactivated when either console is raised. Service the system if these controls do not deactivate when a control console is raised. (See your Doosan dealer for service.) DX10z Operation & Maintenance Manual... -
Page 79: Track Tension
P113829 Raise the blade fully and install jackstands (Item 1) [Figure 117] under the blade and the track frame. Lower the machine until all machine weight is on the jackstands [Figure 117]. Stop the engine. DX10z Operation & Maintenance Manual... - Page 80 If the track tension is still loose after adjusting, it indicates track tension fitting (Item 1) [Figure 121] with the track is worn. See your dealer for replacement parts. the genuine Doosan parts. The fitting is a special fitting designed for high pressure. Raise the excavator and remove the jackstands.
-
Page 81: Drive Motor
Add gear lube through the plug hole if the oil level is below the hole. See Chart for capacity and type. Install and tighten the top plug. Repeat procedure for the other side. DX10z Operation & Maintenance Manual... -
Page 82: Blade Extension
Remove the pin (Item 1) [Figure 124]. Slide the blade extension (Item 2) [Figure 124] away from the blade frame into the extended position. Secure the blade extension in the extended position with the pin. DX10z Operation & Maintenance Manual... -
Page 83: Track Roller And Idler Lubrication
Blade Figure 126 R0082 1. Blade Cylinder-Base End, every 8 – 10 hours (Item 1) [Figure 126] Figure 127 R0081 2. Blade Pivots, every 8 – 10 hours (Item 2) [Figure 127] DX10z Operation & Maintenance Manual... -
Page 84: Boom Swing And Boom Base
5. Boom Swing Pivot, every 8 – 10 hours (Item 5) 7. Boom Cylinder, Base End, every 8 – 10 hours (Item [Figure 129]. 7) [Figure 131]. 8. Arm Cylinder, Base End, every 8 – 10 hours (Item 8) [Figure 131]. DX10z Operation & Maintenance Manual... - Page 85 10. Arm Pivot, every 8 – 10 hours (Item 10) [Figure 133]. 12. Bucket Cylinder, Rod End, every 8 – 10 hours (Item 12) [Figure 135]. 13. Bucket Link, Bucket Cylinder Pivot, every 8 – 10 hours (Item 13) [Figure 135]. DX10z Operation & Maintenance Manual...
-
Page 86: Frame Fittings
Track Expansion Tube Figure 138 P113834 18. Track Expansion Tube, as required (Item 18) [Figure 138]. NOTE: Spread lubriplate gearshield extra heavy grease evenly on wear surfaces on both sides of excavator as required. DX10z Operation & Maintenance Manual... -
Page 87: Excavator Storage And Return To Service
Return To Service Sometimes it can be necessary to store your Doosan After the Doosan Excavator has been in storage, it is Excavator for an extend period of time. Below is a list of necessary to follow a list of items to return the excavator items to perform before storage. - Page 88 Temperature Range ............93 DX10z Operation & Maintenance Manual...
-
Page 89: Excavator Specifications
39.0 in 987 mm 180 mm 38.9 in 15,5 mm 7.1 in 968 mm RETRACTED 0.6 in 220 mm 38.1 in 710 mm 8.6 in 28.0 in 1280 mm EXPANDED 50.4 in 1100 mm 43.3 in DX10z Operation & Maintenance Manual... -
Page 90: Working Range
123.8 in 3093 mm 121.8 in 1374 mm 54.1 in 2685 mm 105.7 in 1899 mm 74.7 in 1818 mm 71.6 in 196mm 7.7 in 230mm 1383 mm 9.1 in 54.4 in 1820mm 71.7 in DX10z Operation & Maintenance Manual... -
Page 91: Lift Capacity (Object Handling Applications Excluded)
EXCAVATOR SPECIFICATIONS (CONT’D) Lift Capacity (Object Handling Applications Excluded) DX10z Operation & Maintenance Manual... -
Page 92: Performance
Two levers control boom, bucket, arm and upperstructure slew Auxiliary hydraulics Left-hand foot pedal Upperstructure slew brake Hydraulic lock on motor Holding brake for upper structure slew Pin lock Steering Direction and speed controlled by two hand levers DX10z Operation & Maintenance Manual... -
Page 93: Engine
Bucket port relief base end 23200 kPa (232 bar) (3365 psi) Control valve Nine-spool parallel type, open centre Hydraulic filter Full-flow replaceable Fluid lines SAE standard tubelines, hoses, and fittings Auxiliary flow 20 l/min (5.3 gpm) DX10z Operation & Maintenance Manual... -
Page 94: Hydraulic Cylinders
Sealed track rollers with box section track roller frame Number of track rollers per side Gradeability travelling down or backing 25° up slopes Gradeability travelling on side slopes 15° Gradeability travelling up side slopes 15° DX10z Operation & Maintenance Manual... -
Page 95: Fluid Capacities
(parent) engine representative of the engine type (engine family) and shall not imply or express any guarantee of the performance of a particular engine. Temperature Range Operation and storage -17° – +43°C (-1.3° – +109.4°F) DX10z Operation & Maintenance Manual... - Page 96 WARRANTY ............. . .95 DX10z Operation & Maintenance Manual...
- Page 97 Corrections by Doosan of non-conformities whether patent or latent, in the manner and for the time period provided above, shall constitute fulfillment of all liabilities of Doosan for such non-conformities, whether based on contract, warranty, tort, negligence, indemnity, strict liability or otherwise, with respect to or arising out of such product.
- Page 98 UPPERSTRUCTURE SLEW LOCK ..34 DOOSAN COMPANY IS ISO 9001 CERTIFIED ........4 WARRANTY .
Need help?
Do you have a question about the DX10z and is the answer not in the manual?
Questions and answers