Table of Contents
Advertisement
Quick Links
Advertisement
Table of Contents

Related Manuals for BCP SKY6209


Summary of Contents for BCP SKY6209
- Page 1 INSTRUCTION MANUAL Collapsible Treadmill SKY6209 Ver. 2...
- Page 2 As shoppers, we’re always trying to find the perfect balance between quality & value. At BCP, we believe we’ve achieved that. Our diverse catalog of everyday essentials is tailored especially to our customers & guaranteed to hit that sweet spot of high quality & low price.
- Page 3 NOTICE Please retain these instructions for future reference. • Keep children and pets away from this machine at all times. • Reconfirm that all bolts, screws, and knobs are secure every 90 days. May vary depending on how often you use this item. •...
-
Page 4: California Proposition
CALIFORNIA PROPOSITION 65 WARNING: This product can expose you to chemicals including Di(2-ethylhexyl) phthalate (DEHP), which is known to the State of California to cause cancer and birth defects or other reproductive harm. For more information go to www.P65Warnings.ca.gov TOOLS REQUIRED ALLEN WRENCH WRENCH SILICONE OIL... -
Page 5: Product Assembly
PARTS CONSOLE RUNNING DECK 1 PC 1 PC PRODUCT ASSEMBLY Locate and unscrew the pre-assembled hardware on the part A console. Interlock the part A console to the part B running deck by connecting the power wires in the side support bars and the console bottom. Slighty raise the side support bars on the part B running deck, then secure part A console with the pre-assembled hardware. - Page 6 PRODUCT ASSEMBLY Raise the side support bars on the part B running deck into the upright position, then secure with four part 3 screws, two part 1 d-washers, and two part 2 washers. Locate and unscrew the pre-assembled hardware on the part B running deck. Pull the part A console into the upright position and secure it to the support bars with pre-assembled hardware.
- Page 7 PRODUCT ASSEMBLY Insert the part 4 tension knob into the tab on the support bar, insert the part 5 fixed knob into the part B running deck, then insert the safety key into the indicated slot on the part A console.
-
Page 8: Technical Specifcations
FOLDING & UNFLODING THE TREADMILL FOLD: Turn o the machine completely. Loosen the part 5 fixed knob on the running deck and lift the running deck into the upright position. Tighten the part 4 tension knob on the side support bar to secure the running board in place. UNFOLD: Make sure the machine is turned o . -
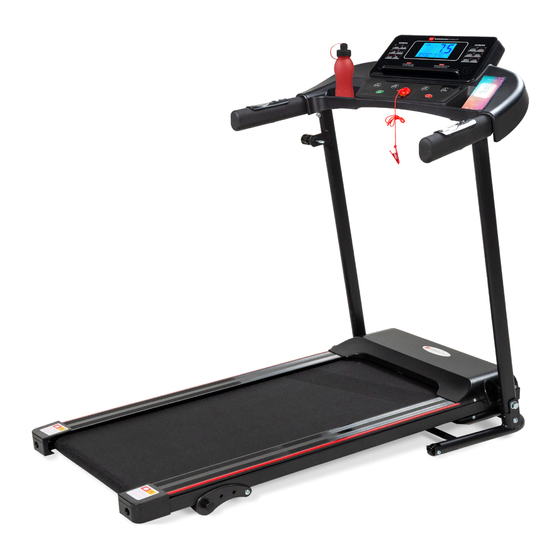
Page 9: Console Instruction
CONSOLE INSTRUCTION Caution! Caution! To avoid Injury, stand Remove the safety key when on the side rails before the treadmill is not in use starting the treadmill Keep children away from the treadmill at all times SPEED PROG. MODE SPEED START STOP Before use, connect the machine to power then turn the switch at the front of the base frame. -
Page 10: Running Belt Adjustment
SILICON OIL APPLICATION Slightly lift the running belt at the back and apply silicon oil to the surface underneath and on top of the running deck. Start the machine and let it run for 3 minutes to spread the oil evenly. NOTE: It is recommended to perform this maintenance every 30 working hours of the machine. -
Page 11: Troubleshooting
TROUBLESHOOTING ERROR MEANING PROBLEM SOLUTION CODE 1. Put safety key in the yellow area of panel Safety key is not on the No Safety Key on 2. Err (or E00) still shows or there is no panel or it is not properly (or E00) Panel function, change the computer... -
Page 12: Help Center
HELP CENTER Question about your product? We're here to help. Visit us at: help.bestchoiceproducts.com CHAT Chat Support Product Inquiry Orders FAQ Product Assembly Returns & Refunds PRODUCT WARRANTY INFORMATION All items can be returned for any reason within 60 days of the receipt and will receive a full refund as long as the item is returned in its original product packaging and all accessories from its original shipment are included.
Need help?
Do you have a question about the SKY6209 and is the answer not in the manual?
Questions and answers