
Summary of Contents for CENTRAL HEATING Rinnai Zen
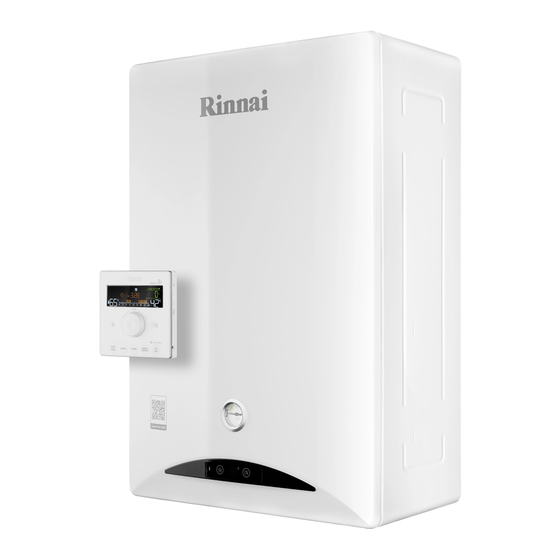
- Page 1 Rinnai Zen Installation & Maintenance Manual Gas-fired, condensing, modulating wall-hung boilers with adjustable power, sealed chamber, forced flow with Wifi room thermostat...
- Page 2 The Rinnai gas-fired combi-boilers are CE certified under Regulation 2016/426/EU and Directive 2014/53/EU. Zen I24 - ZI24 - REB-KBI2424FF Zen I34 - ZI34 – REB-KBI3535FF 0051 0800 357 1233 | info@centralheating.co.nz | trade.centralheating.co.nz Page: 2 of 42...
-
Page 3: Important Safety Information
IMPORTANT SAFETY INFORMATION Meaning of the symbols used in the manual for important information concerning your safety: Indicates a situation of potential serious danger, to respect and follow carefully. IMPORTANT Indicates a potentially hazardous situation which, if not avoided, may lead to injury or property damage. ATTENTION Indicates important information. - Page 4 Do not make any changes to the appliance: do not attempt to repair, replace components, open sealed parts or disassemble the appliance. Any tampering can lead to risks to health, damage to property, compromise the safety and proper functioning of the product: for any type of repair, modification of settings or maintenance of the product and its accessories, we recommend contacting the Rinnai technical service center.
-
Page 5: General Advise
Central Heating New Zealand’s website to obtain this information Rinnai disclaims any liability due to printing or transcription errors and reserves the right to update and change any technical and commercial lists without prior notice. -
Page 6: Warranty
The standard Rinnai warranty does not affect the terms of the legal warranty on customer’s good and relates to Rinnai products purchased. This product is warranted via Central Heating New Zealand (CHNZ) for a period of 5 years. Please refer to our terms & conditions for further details including criteria require to meet our warranty and relevant parts covered. -
Page 7: Table Of Contents
CONTENTS IMPORTANT SAFETY INFORMATION ......................3 GENERAL ADVISE ..........................5 IMPORTANT ............................5 WARRANTY ..............................6 CONTENTS ..............................7 2.1 INSTALLATION WARNINGS ........................9 2.2 UNPACKING THE BOILER ........................11 2.3 DIMENSIONS ............................11 2.4 MAIN COMPONENTS ..........................12 2.5 GENERAL SCHEME AND OPERATION PRINCIPLES ................. 13 2.6 INSTALLATION ............................ - Page 8 2. INSTALLER’S INSTRUCTIONS The following section provides specific instructions for a correct installation of the product. It is intended for the exclusive use of qualified technical personnel. 0800 357 1233 | info@centralheating.co.nz | trade.centralheating.co.nz Page: 8 of 42...
-
Page 9: Installation Warnings
AS/NZS 3000, AS/NZS 3500, AS/NZS 5601.1 & G12/AS1 and all other relevant local codes & standards. Rinnai Zen boilers have been designed only for wall-mounted installations. They are made for domestic (or similar) use, for the production of domestic hot water and for water heating (at a lower temperature than the atmospheric boiling point). - Page 10 EXTERNAL CONDITIONS 2.1.2 AS/NZS 5601 states a minimum horizontal clearance of 500mm between a building structure and obstruction facing the terminal. At 500 mm the obstruction needs to be the full height of the unit, as shown below, and not a partial obstruction.
-
Page 11: Unpacking The Boiler
2.2 UNPACKING THE BOILER Prior to use, verify that the boiler is set up for the correct type of gas and that the appliance is intact. If the appliance is clearly damaged do not proceed with the installation: call your supplier or Rinnai immediately. Together with the appliance, you will find the following parts and accessories in the packaging: PUSH Instructions manual... -
Page 12: Main Components
2.4 MAIN COMPONENTS 0800 357 1233 | info@centralheating.co.nz | trade.centralheating.co.nz Page: 12 of 42... -
Page 13: General Scheme And Operation Principles
2.5 GENERAL SCHEME AND OPERATION PRINCIPLES Heating circling mode (CH) SMOKE COMBUSTION INTAKE OUTLET Igniter Manometer Entrance Domestic hot water circling (DHW) SMOKE COMBUSTION INTAKE OUTLET Igniter Manometer Entrance 0800 357 1233 | info@centralheating.co.nz | trade.centralheating.co.nz Page: 13 of 42... -
Page 14: Installation
2.6 INSTALLATION 2.6.1 HYDRAULIC COUPLINGS The dimensioning and the layout of hydraulic pipes must be properly designed in order to ensure an adequate water flow rate to the appliance. Domestic hot water The DHW connections are: 15A (R1/2”) male type. Where the water supply pressure exceeds 10bar, an approved pressure regulator must be installed at the inlet of the appliance or in the water supply to this appliance. - Page 15 2.6.2 GAS CONNECTION Before connecting the appliance to the gas mains, in order not to invalidate the warranty, it is necessary to clean the pipe and remove any impurities or production residues that could cause Make sure that the appliance is set up for the correct type of gas. The gas connection is: 15A (R1/2”) male type.
- Page 16 Overall dimensions and connection to the boiler The main dimensions of some flue gas elements installed in the boiler are shown below: Coaxial system ø 60/100 The connection of the inlet and exhaust pipes must be made as shown in the figure: •...
-
Page 17: Minimum Flue Clearances
Min. clearances Ref. Item (mm) Minimum Flue Clearances. Fan assisted Extract from AS5601/AG601-2002 5.13.6.5 Fig 5.3 Below eaves, balconies and other projections: Appliances up to 50 MJ/h input • Appliances over 50 MJ/h input • From the ground, above a balcony or other surface † From a return wall or external corner †... - Page 18 2.6.4 ELECTRICAL CONNECTION Connect the boiler to a 230V ±10% / 50Hz power supply. Do not use the gas or hydraulic lines for the grounding. I I M M P P O O R R T T A A N N T T The electricity safety is ensured only when the device is provided with an appropriate grounding and when the grounding system has been realized according to the safety requirements envisaged by the law.
- Page 19 keeping the Rinnai WiFi thermostat connected: in this second configuration the Rinnai command transfers the room temperature control function to the optional thermostat. In order to connect the room thermostat of another brand to the boiler’s electronic board, a special connector (blue) is supplied as standard. Installation of the thermostat (of a different brand) Removing the front panel Isolate the appliance electrically by disconnecting it from the electrical...
-
Page 20: Circulation Pump
2.7 CIRCULATION PUMP The boiler is supplied, as standard, with a built-in circulator with high energy efficiency. The pump is directly managed by the PCB of the boiler and has an automatic operation: it is set for the most suitable operation based on the measured temperature difference between flow and return. -
Page 21: Commissioning The Boiler
2.8 COMMISSIONING THE BOILER The operations listed below must be carried out only by professionally qualified personnel and only in the presence of professionals. A A T T T T E E N N T T I I O O N N Prior to commissioning of the system, the installer must refer to AS/NZS 5601.1, clauses 2.6.8 and 6.11.2. -
Page 22: Gas Conversion And Pressure Adjustment
2.9 GAS CONVERSION AND PRESSURE ADJUSTMENT This procedure can only be performed by qualified technical personnel. Any tampering by unqualified personnel will result in immediate forfeiture of the product warranty. A A T T T T E E N N T T I I O O N N The gas valve assembly and the electronic board are electronically calibrated at the factory during product testing. - Page 23 Phase 3 • Connect the plug to the electrical outlet; The following part of the procedure is particularly sensitive. T T o o a a v v o o i i d d i i r r r r e e p p a a r r a a b b l l e e d d a a m m a a g g e e t t o o t t h h e e b b o o i i l l e e r r , care: if in doubt, d d o o n n o o t t p p r r o o c c e e e e d d f f u u r r t t h h e e r r a a n n d d c c o o n n t t a a c c t t C C H H N N Z Z b b e e f f o o r r e e p p r r o o c c e e e e d d i i n n g g .
-
Page 24: Antifrost Protection
2.10 ANTIFROST PROTECTION The boiler is equipped with an automatic anti-freeze function to protect the heating and DHW heating circuit of the appliance from the cold temperatures. When the water temperature in the heating circuit drops to 6°C, or the ambient temperature in which the boiler is installed drops to 3°C, a first level of protection activates the pump making it run a four-minute cycle of circulation on the heating circuit and a thirty-second cycle on the DHW circuit. - Page 25 3. MAINTENANCE INSTRUCTIONS The following section contains specific instructions for proper product maintenance. It is intended for the exclusive use of qualified technical personnel. 0800 357 1233 | info@centralheating.co.nz | trade.centralheating.co.nz Page: 25 of 42...
-
Page 26: Parameters Menu
3.2 PARAMETERS MENU For safety reasons, it is advisable not to modify the parameters of the menus without having fully understood the meaning of the parameters themselves and the consequences produced on the boiler. It is recommended to always contact CHNZ in advance so as not to damage the boiler or the plant to which it is connected and to exclude potential risks for the user. - Page 27 Initial Parameter Values Description parameter par. Value Led brightness Modifies the brightness of led CH e DHW. 35~80°C 75°C Temperature T1 Programming of daytime temperature of thermostat. (daytime) 5~40°C 21°C 35~80°C 55°C Temperature T2 Programming of reduced temperature of thermostat. (reduced) 5~40°C 16°C...
- Page 28 Black-out 0~1999 Total detected black-out . 1 = 10 times Gas consumption in CH 1 = 100 0~1999 Total gas consumption in CH. mode or Kg) 1 = 100 Gas consumption in 0~1999 Total gas consumption in DHW. DHW mode or Kg ) The boiler power is limited to the set % value, 10 Power limiter CH...
-
Page 29: Pcb
Exhaust sensor -9°C~161°C Detected temperature by the exhaust sensor. °C temperature Fan speed (Input) It shows the rotation speed required to the fan. Fan speed (Output) It shows the detected rotation speed of the fan. PWM of the fan (Input) 0~1023 It shows the PWM of the fan. - Page 30 LED meaning The LEDs of the PCB help as a visual guide during the changes to the microswitches of the bank SW1. The ignition and the flashing have a precise meaning: Red led = gas type Green led = model Yellow led = altitude One blink NG (G20)
- Page 31 0800 357 1233 | info@centralheating.co.nz | trade.centralheating.co.nz Page: 31 of 42...
- Page 32 Measuring point Components Standard values Notes Wiring colors Con.re Electric power supply cable Bl-Br AC 195.5~253V Circulating pump Br-Bl AC 195.5~253V Working Br-G AC 195.5~253V In mode CH Three-way valve Bk-G AC 195.5~253V In mode DHW Anti-freeze resistances AC 195.5~253V Working External circulating pump Bk-Bl...
-
Page 33: Technical Data
3.4 TECHNICAL DATA REB- REB- Model Unit KBI2424FF KBI3535FF CH Input (Max/Min), (G20), (Hi) 24.0 / 5.8 34.88 / 7.9 CH Input (Max/Min), (G230), (Hi) CH Input (Max/Min), (G30), (Hi) 24.6 / 5.9 34.88 / 8.1 CH Input (Max/Min), (G31), (Hi) 24.5 / 5.9 34.88 / 8.1 CH Output (Max/Min), 80°C/60°C, (G20) - Page 34 Working maximum temperature CH °C Temperature range CH (mode: flow heating mode / space heating mode) 35-80 / °C 5-40 Working maximum pressure DHW - PMS Working minimum pressure DHW (portata nominale) Activation minimum load DHW l/min Temperature range DHW 35-60 °C Rated flow DHW (ΔT=25°C)
- Page 35 REB- REB- Model KBI2424FF KBI3535FF Condensing boiler Low temperature boiler B1 Boiler Cogeneration space heater Combination heater Level Unit Element Symbol Rated heat output nominal Useful heat output @ rated heat output (80/60°C) 23.2 33.7 Useful heat output @ 30% of rated heat output (30°C return) 11.2 η...
-
Page 36: Combustion Parameters
3.5 COMBUSTION PARAMETERS REB-KBI2424FF Unit Supply pressure mbar CH Input Qn (Max/Min) - (Hi) 24.0 / 5.8 24.5 / 5.9 Gas flow Vm (Max/Min) 2.529 / 0.611 0.741 / 0.178 (Max) - (front panel on) 9.7 ± 0.6 12.1 ± 0.6 (Min) - (front panel on) 9.4 ±... -
Page 37: Product Fiche
3.6 PRODUCT FICHE Power generator Unit Supplier's name Central Heating New Zealand Ltd Supplier's model REB-KBI2424FF REB-KBI3535FF Gas condensing combi-boiler Declared load profile - DHW Seasonal space heating energy efficiency class (η Water heating energy efficiency class (η Rated heat output (P ) - (80~60°C) -
Page 38: Main Components Disassembly
3.7 MAIN COMPONENTS DISASSEMBLY Front panel • Isolate the appliance electrically by disconnecting it from the electrical socket; • Latches remove the two fixing screws at the base of the panel; • unhook the bolts in the upper part; • remove the front panel from the boiler body taking care not to damage the pressure gauge: first lift it upwards and then away from the boiler... - Page 39 Condensate trap • Electrically isolate the appliance by disconnecting it from the electrical socket; • remove the front panel and the PCB; • disconnect the earth cable and the condensate sensor connector (1); • unscrew the screws (2x) and the fixing clip of the condensate drain pipe that fix the siphon (2);...
- Page 40 Connection joint - flow • Electrically isolate the appliance by disconnecting it from the electrical socket and closing the valves of the heating and gas circuit; • remove the plastic filter on the delivery nozzle and completely empty the CH circuit of the boiler; Empty the exchanger completely so as not to flood the boiler in the subsequent disassembly phases.
- Page 41 Flow switch • Bottom view Electrically isolate the appliance by disconnecting it from the electrical socket and closing the valves of the heating and gas circuit; • remove the plastic filter on the delivery nozzle and completely empty the CH circuit of the boiler; Empty the exchanger completely so as not to flood the boiler in the subsequent disassembly phases.
- Page 42 Tel. 03 357 1233 Email.i n f o @ c e n t r a l h e a t i n g . c o . n z V.1 - 21 - This edition replaces any previous publication. 0800 357 1233 | info@centralheating.co.nz | trade.centralheating.co.nz Page: 42 of 42...