Toshiba RAS-10 Installation Manual
Hide thumbs
Also See for RAS-10:
- Owner's manual (48 pages) ,
- Installation manual (28 pages) ,
- Owner's manual (8 pages)

Related Manuals for Toshiba RAS-10


Summary of Contents for Toshiba RAS-10
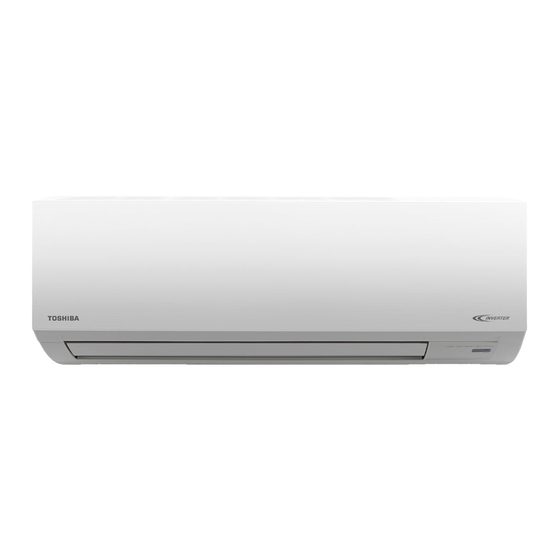
- Page 1 INSTALLATION MANUAL ENGLISH AIR CONDITIONER (SPLIT TYPE) ภาษาไทย Indoor unit RAS-10, 13J2KCVRG-T Outdoor unit RAS-10, 13J2ACVRG-T 1122350101...
-
Page 2: Table Of Contents
สารบั ญ CONTENTS ¢้ Í ¤ÇÃÃÐÇÑ § à¾× è Í ¤ÇÒÁ»ÅÍ´ÀÑ Â PRECAUTIONS FOR SAFETY ..........1 ..........1 ACCESSORY PARTS ............5 ªÔ é ¹ Ê‹ Ç ¹ÍØ » ¡Ã³ à ÊÃÔ Á ..............5 INSTALLATION DIAGRAM OF INDOOR AND ¼Ñ... -
Page 3: Precautions For Safety
PRECAUTIONS FOR SAFETY PRECAUTIONS FOR SAFETY Read the precautions in this manual carefully before This appliance is filled with R32. operating the unit. • Before installation, please read these precautions for safety carefully. • Be sure to follow the precautions provided here to avoid safety risks. The symbols and their meanings are shown below. - Page 4 DANGER • FOR USE BY QUALIFIED PERSONS ONLY. • TURN OFF MAIN POWER SUPPLY BEFORE ATTEMPTING ANY ELECTRICAL WORK. MAKE SURE ALL POWER SWITCHES ARE OFF. FAILURE TO DO SO MAY CAUSE ELECTRIC SHOCK. • CONNECT THE CONNECTING CABLE CORRECTLY. IF THE CONNECTING CABLE IS CONNECTED WRONGLY, ELECTRIC PARTS MAY BE DAMAGED.
- Page 5 • Do not use any refrigerant different from the one specified for complement or replacement. Otherwise, abnormally high pressure may be generated in the refrigeration cycle, which may result in a failure or explosion of the product or an injury to your body.
- Page 6 CAUTION • Exposure of unit to water or other moisture before installation could result in electric shock. Do not store it in a wet basement or expose to rain or water. • After unpacking the unit, examine it carefully for possible damage. •...
-
Page 7: Accessory Parts
ACCESSORY PARTS ACCESSORY PARTS Indoor Unit Part name Part name Installation plate × 1 Wireless remote control × 1 Battery × 2 Remote control holder × 1 Ultra Pure Filter × 1 Mounting screw × 6 Owner’s Manual × 1 Flat head wood screw ×... -
Page 8: Installation Diagram Of Indoor And Outdoor Units
INSTALLATION DIAGRAM OF INDOOR AND OUTDOOR UNITS INSTALLATION DIAGRAM OF INDOOR AND OUTDOOR UNITS For the rear left, bottom left and left piping Wall Hook Installation plate Cut out a piece of SPACER from indoor unit packaging box, roll it and insert between the indoor unit and wall to tilt the indoor unit for better operation. -
Page 9: Indoor Units
INDOOR UNIT INDOOR UNIT When the installation plate is directly mounted Installation Place on the wall • A place which provides the spaces around the indoor unit as shown in the 1. Securely fit the installation plate onto the wall by screwing it in the upper and diagram lower parts to hook up the indoor unit. -
Page 10: Indoor Unit Fixing
How to remove the drain hose NOTE • The drain hose can be removed by removing the If the pipe is bent incorrectly, the indoor unit may unstably be set on the wall. screw securing the drain hose and then pulling out After passing the connecting pipe through the pipe hole, connect the the drain hose. -
Page 11: Outdoor Units
2. Put water in the drain pan and make sure that the water is drained out of CAUTION doors. 3. When connecting extension drain hose, insulate the connecting part of Arrange the drain pipe for proper drainage from the unit. extension drain hose with shield pipe. -
Page 12: Evacuating
(Unit : N·m) CAUTION Outer dia. of copper pipe Tightening torque • KEEP IMPORTANT 6 POINTS FOR PIPING WORK. Ø6.35 mm 16 to 18 (1.6 to 1.8 kgf·m) (1) Take away dust and moisture (inside of the connecting pipes). Ø9.52 mm 30 to 42 (3.0 to 4.2 kgf·m) (2) Tighten the connections (between pipes and unit). -
Page 13: Electrical Works
ELECTRICAL WORKS ELECTRICAL WORKS Model RAS-10J2KCVRG-T RAS-13J2KCVRG-T Power source 50Hz, 220V Single phase Maximum running current 5.30A 6.85A Circuit breaker rating 7.0A 9.0A Power supply cable H07RN-F or 60245 IEC66 (1.5 mm or more) Connecting cable Wiring Connection Outdoor unit Indoor unit Wiring of the connecting cable can be carried out without removing the 1. -
Page 14: Power Supply And Connecting Cable Connection
Power Supply and Connecting Cable Connection Power Supply Input at Outdoor Unit Terminal Block Indoor Unit Outdoor Unit Connecting cable Connecting cable connect to Terminal block Terminal block (1 2 3) Connecting cable Power cord Earth line Earth line Earth line Connecting cable Power cord Connecting cable... -
Page 15: Others
OTHERS OTHERS Gas Leak Test Test Operation To switch the TEST RUN (COOL) mode, press [RESET] button for 10 seconds. (The beeper will make a short beep.) Check places for the indoor unit. OPERATION / RESET Button Check places for the outdoor unit. - Page 17 ข้ อ ควรระวั ง เพื ื ่ อ ความปลอดภั ย ข้ อ ควรระวั ง เพื ื ่ อ ความปลอดภั ย อ่ า นข้ อ ควรระวั ง ในคู ่ ม ื อ นี ้ เครื ่ อ งนี ้ ต ้ อ งเติ ม ด้ ว ย R32 โดยละเอี...
- Page 18 อั น ตร�ย • โปรดใช้ โ ดยผู ้ ช ำ า นาญงานเท่ า นั ้ น • ปิ ด ตั ว จ่ า ยไฟหลั ก ก่ อ นการปฏิ บ ั ต ิ ง านที ่ เ กี ่ ย วข้ อ งกั บ ไฟฟ้ า ให้ แ น่ ใ จว่ า ได้ ป ิ ด สวิ ต ช์ ไ ฟ ทั...
- Page 19 • อย่ า ใช้ เ ครื ่ อ งมื อ ใดๆ ในการเร่ ง กระบวนการทำ า ให้ น ำ ้ า แข็ ง ละลายหรื อ ทำ า ความสะอาด นอกเหนื อ จากที ่ ไ ด้ ร ั บ การแนะนำ า จากผู ้ ผ ลิ ต •...
- Page 20 ข้ อ ควรระวั ง • ถ้ า เครื ่ อ งถู ก นำ ้ า หรื อ ความชื ้ น ก่ อ นการติ ด ตั ้ ง อาจทำ า ให้ เ กิ ด ไฟฟ้ า ลั ด วงจรได้ อย่ า เก็ บ เครื ่ อ งไว้ ใ นห้ อ งใต้ ด ิ น ที ่ ช ื ้ น หรื อ ให้ เ ครื ่ อ งถู ก ฝนหรื อ นำ ้ า •...
- Page 21 ชิ ้ น ส่ ว นอุ ป กรณ์ เ สริ ม ชิ ้ น ส่ ว นอุ ป กรณ์ เ สริ ม ตั ว เครื่ อ งภ�ยใน หม�ยเลข ชื่ อ ชิ ้ น ส่ ว น หม�ยเลข ชื่ อ ชิ ้ น ส่ ว น á¼่...
- Page 22 ผั ง การติ ด ตั ้ ง ตั ว เครื ่ อ งภายในและภายนอก ผั ง การติ ด ตั ้ ง ตั ว เครื ่ อ งภายในและภายนอก การต่ อ ท่ อ ด้ า นหลั ง ซ้ า ย, ด้ า นล่ า งซ้ า ย และด้ า นซ้ า ย ผนั...
- Page 23 ตั ว เครื ่ อ งภายใน ตั ว เครื ่ อ งภายใน àÁ× è Í μÔ ´ Ἃ ¹ μÔ ´ μÑ é § ¡Ñ º ¼¹Ñ § โ´Âμç ÊถÒ¹·Õ è μ Ô ´ μÑ é § 1. ติ ด แผ่ น ติ ด ตั ้ ง เข้ า กั บ ผนั ง โดยใช้ ส กรู ย ึ ด ที ่ ส ่ ว นบนและส่ ว นล่ า งเพื ่ อ เกี ่ ย วเข้ า กั บ •...
-
Page 24: Μñ Ç À¤Ã× È Í §Àòâã¹
ÇÔ ธ Õ ¡ ÒÃถÍ´·‹ Í ¹ํ é Ò ·Ô é § ข้ อ สั ง เกต • สามารถถอดท่ อ นำ ้ า ทิ ้ ง ออกได้ โ ดยถอดสกรู ท ี ่ ย ึ ด ท่ อ ถ้ า ดั ด ท่ อ ไม่ ถ ู ก ต้ อ ง อาจทำ า ให้ ต ั ว เครื ่ อ งภายในติ ด บนผนั ง ไม่ ม ั ่ น คง หลั ง สอดท่ อ นำ... - Page 25 2. ทดลองใส่ น ำ ้ า ในถาดรั บ นำ ้ า ทิ ้ ง เพื ่ อ ทดสอบการระบายของนำ ้ า ออกสู ่ ภ ายนอก ข้ อ ควรระวั ง 3. เมื ่ อ ต่ อ ท่ อ ต่ อ นำ ้ า ทิ ้ ง หุ ้ ม ส่ ว นเชื ่ อ มต่ อ ท่ อ ต่ อ นำ ้ า ทิ ้ ง ด้ ว ยฉนวนหุ ้ ม ท่ อ จั...
- Page 26 (หน่ ว ย : นิ ว ตั น เมตร) ข้ อ ควรระวั ง เส้ น ผ่ า ศู น ย์ ก ลางภายนอกของท่ อ ทองแดง แรงบิ ด ในการขั น แน่ น • 6 จ ุ ด ส ำ � ค ั ญ ในก�รเด ิ น ท ่ อ 6.35 มม.
- Page 27 การทำ า งานเกี ่ ย วกั บ ไฟฟ้ า การทำ า งานเกี ่ ย วกั บ ไฟฟ้ า รุ ่ น RAS-10J2KCVRG-T RAS-13J2KCVRG-T 50Hz, 220 V 1 เฟส แหล่ ง จ่ า ยไฟฟ้ า 5.30A 6.85A กระแสไฟฟ้ า สู ง สุ ด 7.0A 9.0A ขนาดเบรคเกอร์...
- Page 28 แหล่ ง จ่ � ยไฟและก�รเชื่ อ มต่ อ ส�ยเชื่ อ มต่ อ กำ � ลั ง กระแสไฟฟ้ � ของแหล่ ง จ่ � ยไฟที ่ บ ล็ อ คขั ้ ว ต่ อ ของตั ว เครื่ อ งภ�ยนอก ตั ว เครื่ อ งภ�ยใน ตั...
- Page 29 ระบบอื ่ น ๆ ระบบอื ่ น ๆ ¡Ò÷´Êͺ ¡Ò÷´Êͺ¡ÒÃÃÑ è Ç ¢Í§ÊÒ÷ํ Ò ¤ÇÒÁàÂ็ ¹ เพื ่ อ สลั บ ไปยั ง โหมด TEST RUN (COOL) กดปุ ่ ม [RESET] ค้ า งไว้ น าน 10 วิ น าที (จะเกิ ด เสี ย งปี ๊ บ สั ้ น ๆ) จุ...
- Page 32 1122350101...
Need help?
Do you have a question about the RAS-10 and is the answer not in the manual?
Questions and answers