Table of Contents
Advertisement
Quick Links
Advertisement
Table of Contents

Summary of Contents for PROKORD SMART HOME W411-E J300
- Page 1 PROKORD SMART HOME W411-E...
-
Page 2: Indicator Light
Press and hold for 3 s to turn ON/OFF Press and hold for 15 s to force shutdown Thank you for choosing PROKORD SMART HOME W411-3! Clean/local cleaning Our high-end cleaning robot combines high accuracy radar with various sensors that can collaborate... -
Page 3: Parts List
Included products/parts Included products/parts Parts List Parts List Charging base Adapter 2 in 1 electric-controll water tank Remote control HEPA filter + sponge Left side brush x 2 Duster cloth Right side brush x 2 Cleaning brush with knife Cleaning brush... -
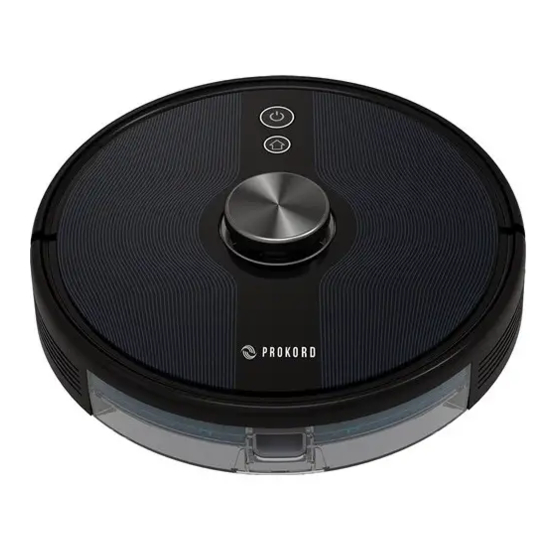
Page 4: Product Introduction
Product Introduction Product Introduction Robot Sensor and Structure LDS laser raning sensor Anti-collision sensor for radar Filter screen cover Wall sensor Anti-collision Anti-drop sensor Dustbin sensor button Charging contact Infrared recharging sensor Universal wheel Side brush System reset button Battery cover Driving wheel System upgrade port (this is only for... -
Page 5: Installation
Product Introduction Installation Charging Base Connect the power adapter to the charging base and wrap 3. Installation of side brushes the excess cable around the wrapping posts into the slot. Power indicator light Signal emission area Place the charging base against the wall, according to the illustration below. - Page 6 Installation Installation Press and hold for 3 seconds to turn on the robot. Installation of the mopping module 8. Remove the mopping module Charge it on the charging base. 1. Attach the mopping cloth onto the bottom of the water When the robot is finished with the mopping, press the clasp tank to assemble the mopping module.
- Page 7 Instructions Connect to the app 4. Open the app and press 5. Select the "Robot vacuum" "+" to add device, or use as the type of device. 1. Find and install the app “TuyaSmart” from Google Play ON/OFF the add device button. You will find the and Apple App store.
- Page 8 Functions 9. Press on the button 8. Enter your Wi-Fi at the bottom of the screen password and press Local cleaning Partial cleaning with app to confirm. confirm. 5 GHz is currently not supported. After the robot is powered on, it scans and generates a map When a local area needs a deep cleaning, you can through and divides it into different areas.
-
Page 9: Remote Control Instruction
Functions Introduction Remote control instruction User-defined area cleaning Wi-Fi reset Use the mobile app (required) to set the size and location of If your mobile phone cannot be connected to the robot, press a specific area that you want to clean. You can set one or more simultaneously for 3 seconds until a voice states areas and the robot cleans accordingly. -
Page 10: Cleaning And Maintenance
Cleaning and maintenance Cleaning and maintenance Main brush Side brushes Dustbin Filters Clean the main brush regularly. Clean the side brushes regularly. Clean the dustbin regularly. Clean the filters regularly. 1. Turn the robot over and press the buckle on the cover to take 1. - Page 11 Cleaning and maintenance Cleaning and maintenance Mopping module Sensors Battery LDS laser ranging sensor Clean the mopping module after every mopping session. Clean the sensors regularly with a soft cloth or with the The host is furnished with high-performance lithium-ion cleaning brush.
-
Page 12: Basic Parameters
Basic Parameters Common Problems Machine Problem Solution Item In case of a low battery level, please place the robot on the charging base and align it at the electrode plate, the machine will be started automatically (if the robot is completely powered off, it can be started automatically The robot cannot be started after charged for a while) Model... -
Page 13: Troubleshooting
Troubleshooting Troubleshooting Prompt Tone Solution Prompt Tone Solution Error 1: Oh dear! I cannot find the dust collector Cleaning is triggered when the dust box is taken out Error 12: Please place me correctly! The robot is tilt The top radar is covered or placed in an open area Error 2: Please check if the radar on top has been covered or blocked Error 13: Please check if my wheels have become blocked somewhere The driving wheel is twined or stuck... -
Page 14: Safety Information
Safety Information Safety Information Usage Limitations Battery and Charging Only for indoor use. The robot is designed for floor cleaning in a home environment. It cannot be used on other surfaces (such as Do not use battery, charging base or charger provided by any third parties. a sofa) or in commercial or industrial environments. - Page 15 For a smarter way of life.
Need help?
Do you have a question about the SMART HOME W411-E J300 and is the answer not in the manual?
Questions and answers