Table of Contents
Advertisement
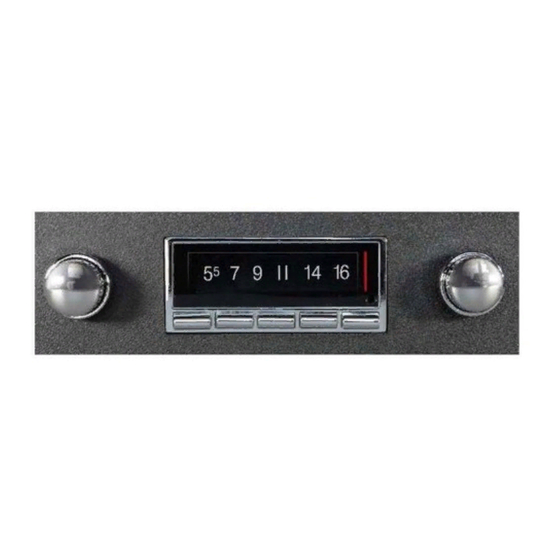
USA 740
AM/FM
RDS T
WITH
HIGH POWER 300 WATTS
AM/FM with RDS & 25 Pre-sets
7 LCD Color Choices (selectable)
BlueTooth
CD Controller
Auxiliary In
Aux1 and Aux2 (on front)
Subwoofer Line out w/ x-over
Front/ Rear Fader
Left/Right Balance
R
EADY TO
T
RADIO
B
T
UNER,
LUE
OOTH and
Bass / Mid / Treble Control
DSP EQ
Clock
USB Jack charge for mobile phones
USB MP3/WMA
Loudness Function
Last Volume Memory
RCA Pre-out 5v (2 Pair)
Auto Antenna lead
I
I
Y
NSTALL
N
OUR
N
A
R
O
SSEMBLY
EQUIRED
User's Manual
O
HE
RIGINATOR OF
V
OEM
EHICLE
FIT
S
1977
INCE
VA D
ISPLAY
/FLAC/WAV
O
D
RIGINAL
ASH
!
C
LASSIC
R
ADIOS
Player
Advertisement
Table of Contents

Summary of Contents for Custom Autosound USA 740
- Page 1 User's Manual RIGINATOR OF LASSIC EHICLE ADIOS 1977 INCE USA 740 RADIO AM/FM RDS T VA D WITH UNER, OOTH and ISPLAY Bass / Mid / Treble Control HIGH POWER 300 WATTS DSP EQ AM/FM with RDS & 25 Pre-sets...
-
Page 2: Table Of Contents
Table of Contents Introduction ........2 General Installation ......3 Radio Connections . -
Page 3: Introduction
California audio research laboratory. The laboratory researched and assem- bled the finest affordable CD controller radio tuner and amplifier sections. Custom Autosound and its staff own over 16 classic special interest cars and trucks. These vehicles are used for research and development, car shows meets and much personal pleasure. -
Page 4: General Installation
Radio Installation Thank you for your purchase of this Custom Autosound product! Owner- Installer: Please review installation instructions and owners manual. Keep in mind that your radio and/or speakers are custom equipment designed specifi- cally for your year vehicle. It should be handled carefully and installed preferably by an auto radio specialist. -
Page 5: Radio Connections
Power and Speaker Connections (Refer to Wiring Diagram on page 5.) Note: Both Red and Yellow wires must be connected for radio to operate. A-Main Power-Red Wire B+ Connect the RED wire (B+) to an accessory fuse that is switched OFF when the key switch is in the OFF position and is switched ON when the key switch is switched to the ON or accessory position. -
Page 6: Wiring Diagram
LNE OUT AUX IN REAR FRONT 1 3 5 7 2 4 6 8 1 3 5 7 2 4 6 8 Connection for Optional Custom Autosound 6CD Changer, CD1 Player IGNION/ACC +12V (A7)RED AUTO GROUND (A8)BLACK (A8)BLUE ANTENNA CONSTANT +12... -
Page 8: Cd Control
Function See FIG.3 Radio Mode USB/CDC/BT AUDIO Pre-set 2 Press to select the #2 radio Press to play 10 seconds of preset. each track on the flash drive Recall/ or CDC Store Press and hold to store pre- Press again to cancel the pre- set 2 into memory. - Page 9 SEE FIG.3 Function See FIG.3 Radio Mode USB/CDC/BT AUDIO System Menu Press and hold the right front knob for 3 seconds to access the sub-menu system where you can adjust: DIMMER,LCD Color,DISPFUN/CLK,SCR OFF/CLK,Auto/Manual turning,DX/LOCAL,STEREO/MONO,A STORE,AREA USA/EUR/AUS/JAP/RUS,BT ON/OFF,BT DISC,BEEP OFF/ON,CT ON/OFF,PTY Search,Vol Adjust/Vol Last and volume default level, TA Seek/Alarm, PI Sound/MUTE, Mask DPI/ALL.
-
Page 10: Adjusting Sound Properties
Adjusting the sound properties: Press the right front knob, then release, to access the sound properties menu. Repeatedly press and release the front right knob to scroll through the available menu options. Turn the left front knob right or left to select a value for the chosen menu option. -
Page 11: Balance/Fader
FADER TURN PRESS The fader control allows you to fade the sound from the front pair of speak- ers to the rear pair of speakers. Adjustment range is 0-20 between front and rear speakers. Loudness TURN PRESS This function boosts bass and treble according to the volume. -
Page 12: Lcd Color / Dimmer
TURN PRESS MID RANGE Use this function to make a more detailed boost or cut adjustment of midrange (vocal) frequencies as fol- lows:0.5K/1.0K/1.25K/1.5KHz.Default setting is 1.0KHz.This is a very useful mode for making very specific tonal adjustments. When selecting one of these 0.5K/1.0K/1.25K/1.5KHz points, array changes to the prior MID menu settings on page 10 (-12 to +12) will boost or cut at the selected frequency setting chosen in this menu. - Page 13 DISP FUN/CLK The unit default setting displays TURN PRESS function info on the screen. Select “DISP CLK” to show the clock as the priority screen view without any operation in 10 second.Turn right front knob either clockwise or counter-clockwise to select “DISP CLK”...
-
Page 14: Tuner Area Usa/Eur/Rus/Jap/Aus
left left... -
Page 15: Rds
PROGRAM TYPE (PTY) (Works in EURO Mode only) This function will allows you to Searching a special PTY Station in FM Mode. Turn the left front knob clockwise or counter-clockwise to select the PTY which you want, And then, Turn the right front knob clockwise to activate the Search process. TA SEEK (Works in EURO Mode only) This function allows you to select the tuner working in TA Seek or TA Alarm mode. - Page 16 TURN CD Changer Operation This radio is only compatible with the Custom Autosound USA-CD60 6 disc changer or the 1disc CD1 player. The CD magazine for the CD60 changer requires the CD’s be loaded with the label facing down. If you get an error message or the changer can not find the CD please check the loading position of the CD in the magazine.
-
Page 17: Noise Suppression
Noise Suppression All CAM electronics are designed for maximum electrical noise rejection. In some instal- lations however, electrical noise may affect the quality of sound reproduction. If electrical noise is present after installing your Slidebar radio, identify the source of the noise using the descriptions under Sources Of Electrical Noise. -
Page 18: Specifications
Elimination 1. Install an L.C. Filter Network in the power leads of the USA 740 radio. The filter should be rated at a minimum of 3 amps. -
Page 19: Trouble Shooting
This radio is for 12volt negative ground vehicles only. If your electrical system is 6volts and or positive ground Custom Autosound has power inverters #PGPI- HC (positive ground power inverter) and voltage boosters #NGVB-HC (negative ground voltage booster) for use with this radio. - Page 20 If your product does not work properly because of a defect in material or work- manship, Custom Autosound Mfg.,Inc. (the Company) will for the length of the period indicated on the chart below, which starts with the date of original pur- chase (“Limited Warranty period”), at its option either (a) repair your product with...
- Page 21 FCC Requirement Any changes or modifications not expressly approved by the party responsible for compliance could void the user’s authority to operate the equipment. This device complies with Part 15 of the FCC Rules. Operation is subject to the following two conditions: (1) this device may not cause harmful interference, and (2) this device must accept any interference received, including interference that may cause...
Need help?
Do you have a question about the USA 740 and is the answer not in the manual?
Questions and answers
Can I wire the Autosound dual voice dash speaker together with kick panel speakers?
Yes, the Custom Autosound USA 740 dual voice coil dash speaker can be wired together with kick panel speakers, especially when using a multi-channel amplifier like the Taramps 400x4. Proper speaker matching and crossover settings are important for optimal sound performance.
This answer is automatically generated
I hear static on the speakers , on my phone it says its connected via Bluetooth but no connection to the actual stereo. I connect the AUX in front of the stereo and it still dose not connect to my phone.