Advertisement
Quick Links
Advertisement

Related Manuals for FiveStar AE DR10

Summary of Contents for FiveStar AE DR10
- Page 1 AE DR10 SWEEPER ASSEMBLY INSTRUCTIONS FOR AE DR10RTR OR DR10 KIT...
- Page 2 To Our Valued Customer: Thank you for your purchase from Five Star Hobbies. We are a small business with a goal to make high quality items that our customer can enjoy. We also want to thank all of you, the customer, for believing in us and spending your hard earned money on our products.
- Page 3 To complete your DR10 Sweeper build in "SLIDER" form, you will need the following items: Part Number Description Of Product Quantity KIT61005 DR10 STREET SWEEPER KIT 70027 DR10 Team Kit Popular items to change on your "SLIDER" are these items: Part Number Description Of Product Quantity To complete your DR10 Sweeper build, you will need the following items: Description Of product Quantity Front Wheels...
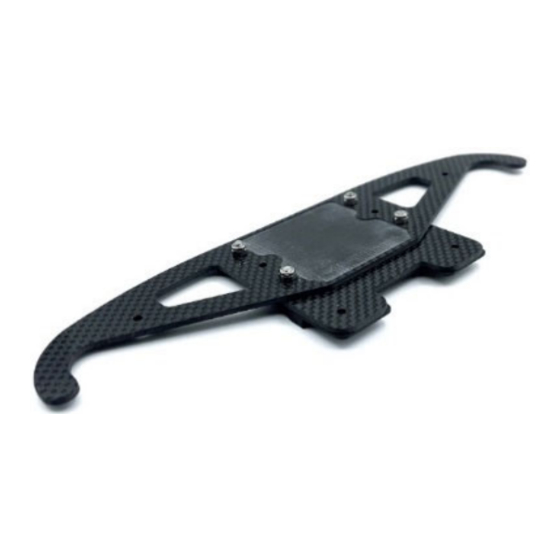
- Page 4 Bag 1 Part Number Description Quantity 61003 Front Bumper ‐ 2.5mm 61004 Front Mid Bumper ‐ 2.5mm 61024 Printed Skid Plate 3x10mm FH Chassis to Mid Bumper 3x10mm BH Mid Bumper to Front Bumper M3 Lock Nuts Mid Bumper to Front Bumper Attach the front bumper to the mid bumper and skid plate using (4) 3x10 BH screws and (4) Lock nuts. At this time you may attach the bumper to the chassis with the remaining (2) 3x10mm FH and lock nuts. Bag 2 Part Number Description Quantity 61207 DR10 Printed Kickup 61213 Printed Bulkhead Spacer 35mm Standoff Chassis to DR10 Top Plate 3x10mm BH Top Plate to Standoff 3x8mm FH Servo Mount 3x10mm FH Chassis to Kickup and Chassis to Standoff 3x18mm BH Kickup to AE Bulkhead Attach the 61207 printed bulkhead spacer onto the AE front bulkhead. Line the kickup, bulkhead spacer, and bulkhead up and insert (4) 3x18mm BH screws into the bottom of the kickup. Once tightened, line up the kickup to the chassis plate and insert (3) 3x10mm FH into the kickup. Install (2) 35mm standoffs into the AE Top Plate with (2) 3x10mm BH on top and (2) 3x10mm FH under the ...
- Page 5 Bag 3 Part Number Description Quantity 61206 V2 Chassis Side Rail 3x10mm FH Chassis to Rail M3 Lock Nut Chassis to Rail Attach the side rails to the chassis plate with (4) 3x10 FH on each side of the car. Bag 4 Part Number Description Quantity 61214 DR10 Rear Riser Plate 3x10mm BH Rear Shock Tower 3x10mm FH Chassis to Rear Riser 3x30mm FH Back Half to Camber plate 3x35mm FH Back Half to Shock Tower M3 Lock Nut Line the rear riser plate up with the chassis and insert (6) 3x10mm FH screws and (6) M3 lock nuts. Slide the rear end of the DR10 onto the 61214 rear riser plate and insert (2) 3x35mm FH into the rear most two holes. Secure them with locknuts. Use 3x30mm FH for the front holes mating the rear riser plate to the DR10 back half. Finally use the (2) 3x10mm BH on the forward facing shock tower holes. Bag 5 Part Number Description Quantity 61228 Waterfall Chassis Mount 61229 Waterfall Tower Mount 61230 Waterfall Turnbuckle 3x10mm FH Chassis to Lower Waterfall Brace 3x25mm FH...
- Page 6 INSTALL THE UPPER WATERFALL BRACE MOUNT ONTO THE REAR SHOCK TOWER WITH (2) 3X25MM FH SCREWS. THEN INSTALL THE LOWER WATERFALL BRACE MOUNT ONTO THE CHASSIS USING (3) 3X10MM FH IN THE THREE NEAREST HOLES TO THE BACK HALF PLATE. FINALLY INSTALL THE TURNBUCKLE TO LINK THE UPPER AND LOWER WATERFALL MOUNTS. DR10 Sweeper Pick List Part # Description Quantity 61003 Front Bumper 61004 Mid Bumper 61024 Skid Plate 61205 DR10 SS Chassis Plate 61206 DR10 SS Chassis Side Rail 61207 DR10 SS Kickup 61213 DR10 SS Kickup Spacer 61214 DR10 SS Rear Riser 61228 DR10 SS Waterfall Chassis Mount 61229 DR10 SS Waterfall Shock Tower Mount 61230 DR10 SS Waterfall Turnbuckle Hardware 3x10mm BH 3x18mm BH 3x25mm BH 3x45mm BH 3x8mm FH 3x10mm FH 3x25mm FH 3x30mm FH 3x35mm FH...