Table of Contents
Advertisement
Available languages
Available languages
Advertisement
Chapters
Table of Contents

Subscribe to Our Youtube Channel
Related Manuals for Stealth Cam STC-QS20


Summary of Contents for Stealth Cam STC-QS20
- Page 1 STC-QS20 Instruction Manual Page 1...
- Page 2 Notice To ensure the product is being utilized to its full potential, we recommend checking our website for new product updates. If your camera is having an issue, please check our website to determine you are using the latest firmware or software version. Contact Us TECHNICAL SUPPORT CUSTOMER SERVICE...
-
Page 3: Table Of Contents
Table of Contents About Your Camera Quick Setup Guide Camera Overview Camera Setup Camera Configuration Viewing and Deleting Images Frequently Asked Questions Camera Care FCC COMPLIANCE Limited Warranty Information Page 3... -
Page 4: About Your Camera
About Your Camera 80 Foot Detection and Flash Range See farther with long-distance PIR sensor and LEDs. 0.8 Second Trigger Speed Never miss a shot with lightning fast 0.8 second trigger speed. Quick Set Options Set up in seconds with pre-programmed options. Burst Rapid-Fire Mode Rapid-fire Burst Mode, multiple exposures per triggering. -
Page 5: Quick Setup Guide
Quick Setup Guide Insert Batteries and SD Card Install 8 AA batteries and a class 10 SD card into camera. Mount Camera Mount the camera at the desired location using the strap mount, Python Lock cable, Articulating Ball Joint Mount, or other desired mounting mechanism. -
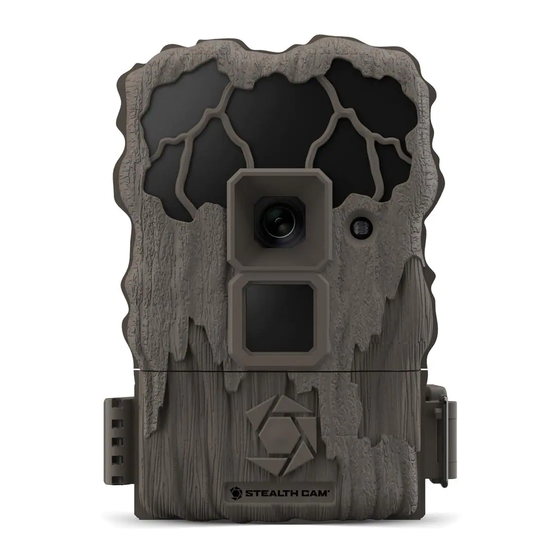
Page 6: Camera Overview
Camera Overview Mode Switch MENU ENTER Menu Down Enter SD Card Slot Universal Battery ¼ - 20 thread Release Switch Page 6... - Page 7 Strap Mounts Python Cable Lock Hole Universal ¼ - 20 thread Page 7...
-
Page 8: Camera Setup
Camera Setup Battery Installation To remove batteries from unit, simply open camera and slide the battery release switch to the left. Once the battery compartment is open, insert batteries into camera, being careful to match the orien- tation marked on your camera. After batteries are inserted, close the battery compartment and secure the battery release switch. -
Page 9: Camera Configuration
Camera Configuration This camera features 4 distinct modes of operation: QSET 1 | QSET 2 | QSET 3 | CUSTOM |. Each setting is activated based upon the position of the switch inside the unit. QSET 1 QSET 2 MENU ENTER QSET 3 Custom... - Page 10 Custom Configuration The CUSTOM setting on your camera allows you to customize every setting to fit your exact needs. To begin, move the slider to the CUSTOM position and press the menu button on the camera. Once inside the custom settings menu, use the Up and Down arrows to scroll through the different settings.
- Page 11 Camera Configuration cont. PHOTO BURST: This setting determines how DATE: This setting is used by the camera to many photos are taken each time the camera is display the correct date on the Info Bar of the activated. image. OPTIONS: 1 photo – 3 photos Note: This setting is only applicable in photo TIME: This setting is used by the camera to display mode.
-
Page 12: Viewing And Deleting Images
Viewing and Deleting Images There are a few methods for viewing and deleting your files. Using an SD Memory Card Reader/Viewer: You will simply need to remove the SD card from the camera and insert it into the reader to view the files; you can also delete them from this device. -
Page 13: Frequently Asked Questions
Q: Is there a warranty that comes with my camera or an extended warranty I can purchase? A: Your Stealth Cam Camera comes with a Limited 1-year warranty. Please contact support at 1.877.269.8490 for more information. Q: Can I mix batteries together? A: No, you should never mix batteries. -
Page 14: Camera Care
Camera Care Operating Conditions This camera is designed to function in 14°F – 104°F (-10°C - 40°C) 20%-85% relative humidity, non-condensing. Product Care • When not in use, store camera in a cool, dust-free, environment. • Handle camera with care. •... -
Page 15: Fcc Compliance
GSM, LLC FCC COMPLIANCE STC-QS20A v2 NOTE: This equipment has been tested and found to comply with the limits for Class B digital device, pursuant to part 15 of the FCC Rules. These limits are designed to provide reasonable protection against harmful interference in a residential installation. This equipment generates uses and can radiate radio frequency energy and, if not installed and used in accordance with the instructions, may cause harmful interference to radio or television receptions, which can be determined by turning the equipment off and on, the user is encouraged to try to correct the... -
Page 16: Limited Warranty Information
Limited Warranty Information Your Stealth Cam Trail Camera is covered by a 365 Day Limited Warranty on parts and labor from the date of original purchase, and purchases must be made through an authorized dealer. The warranty covers defects in workmanship and materials. - Page 17 STC-QS20 Manuel d’instuction Page 17...
- Page 18 Remarquer Pour vous assurer que le produit est utilisé à son plein potentiel, nous vous recom- mandons de consulter notre site Web pour les nouvelles mises à jour du produit. Si votre appareil photo rencontre un problème, veuillez consulter notre site Web pour déterminer si vous utilisez la dernière version du micrologiciel ou du logiciel.
- Page 19 Table of Contents À propos de votre appareil photo Guide d’installation rapide Présentation de la caméra Configuration de la caméra Configuration de la caméra Configuration de la caméra (suite) Affichage et suppression d’images Questions fréquemment posées Salle de soins CONFORMITÉ DE FCC Informations sur la garantie limitée Page 19...
-
Page 20: À Propos De Votre Appareil Photo
À propos de votre appareil photo Détection de 80 pieds et portée du flash Voir plus loin avec le capteur PIR longue distance et les LED. Vitesse de déclenchement de 0,8 seconde Ne manquez jamais un tir avec une vitesse de déclenche- ment ultra rapide de 0,8 seconde. -
Page 21: Guide D'installation Rapide
Guide d’installation rapide Insérez les piles et la carte SD Installez 8 piles AA et une carte SD de classe 10 dans l’appa- reil photo. Monter la caméra Montez la caméra à l’emplacement souhaité à l’aide du sup- port de sangle, du câble de verrouillage Python, du support de rotule articulée ou de tout autre mécanisme de montage souhaité. -
Page 22: Présentation De La Caméra
Présentation de la caméra Changement de mode MENU ENTER Menu Haut Entrer Carte SD Fente Batterie Interrupteur Universel de libération ¼ - 20 fil Page 22... - Page 23 Sangle Montures Câble Python Trou de verrouillage Universel ¼ - 20 fil Page 23...
-
Page 24: Configuration De La Caméra
Configuration de la caméra Battery Installation de la batterie Pour retirer les piles de l’appareil, ouvrez simplement l’appareil photo et faites glisser le bouton de déverrouillage des piles vers la gauche. Une fois le compartiment des piles ouvert, insérez les piles dans l’appareil photo en prenant soin de faire correspondre l’orien- tation indiquée sur votre appareil photo. -
Page 25: Configuration De La Caméra
Configuration de la caméra Cet appareil photo dispose de 4 modes de fonctionnement distincts: QSET 1 | QSET 2 | QSET 3 | CUSTOM. Chaque réglage est activé en fonction de la position du commutateur à l’in- térieur de l’unité. QSET 1 QSET 2 MENU... - Page 26 Configuration personnalisée Le paramètre PERSONNALISÉ de votre appareil photo vous permet de personnaliser chaque paramètre en fonction de vos besoins exacts. Pour commencer, placez le curseur sur la position CUSTOM et appuyez sur le bouton de menu de la caméra. Une fois dans le menu des paramètres personnalisés, utilisez les flèches haut et bas pour faire défiler les différents paramètres.
-
Page 27: Configuration De La Caméra (Suite)
Configuration de la caméra (suite) PHOTO BURST: Ce paramètre détermine le DATE: Ce paramètre est utilisé par l’appareil nombre de photos prises à chaque fois que photo pour afficher la date correcte dans la barre l’appareil photo est activé. d’informations de l’image. OPTIONS: 1 photo –... -
Page 28: Affichage Et Suppression D'images
Affichage et suppression d’images Il existe quelques méthodes pour afficher et supprimer vos fichiers. Utilisation d’un lecteur / visualiseur de carte mémoire SD: il vous suffit de retirer la carte SD de la caméra et de l’insérer dans le lecteur pour afficher les fichiers; vous pouvez également les supprimer de cet appareil. -
Page 29: Questions Fréquemment Posées
Q: Y a-t-il une garantie fournie avec mon appareil photo ou une garantie prolongée que je peux acheter? R: Votre caméra Stealth Cam est livrée avec une garantie limitée d’un an. Veuillez contacter le support au 1.877.269.8490 pour plus d’informations. -
Page 30: Salle De Soins
Salle de soins Des conditions de fonctionnement Cette caméra est conçue pour fonctionner entre 14 ° F et 104 ° F (-10 ° C et 40 ° C). Humidité relative de 20% à 85%, sans condensation. Entretien du produit • Lorsqu’il n’est pas utilisé, rangez l’appareil photo dans un environnement frais et sans poussière. -
Page 31: Conformité De Fcc
GSM, LLC CONFORMITÉ DE FCC STC-QS20A v2 REMARQUE: Cet équipement a été testé et s’est avéré conforme aux limites de la classe B numérique, conformément à la partie 15 des Règles de la FCC. Ces limites sont conçues pour assurer une protection raisonnable contre les interférences nocives dans une installation rés- identielle. -
Page 32: Informations Sur La Garantie Limitée
Informations sur la garantie limitée Votre caméra Stealth Cam Trail est couverte par une garantie limitée de 365 jours sur les pièces et la main-d’œuvre à partir de la date d’achat d’origine, et les achats doivent être effectués auprès d’un revendeur agréé. La garantie couvre les défauts de fabrication et de matériaux.
Need help?
Do you have a question about the STC-QS20 and is the answer not in the manual?
Questions and answers
CANT SET THE CAMERA Er Sd is flashing
To resolve the "Er Sd" flashing error on the Stealth Cam STC-QS20, ensure that the SD card is properly inserted with the label facing the back of the camera. You should feel minimal resistance and hear a click when the card is fully inserted. If the error persists, try using a different SD card that is compatible with the camera.
This answer is automatically generated
Set the time on STC QS20A V2
To set the time on the Stealth Cam STC-QS20, access the time setting option in the camera's menu. This setting is used to display the correct time on the Info Bar of the image. Adjust the time as needed before proceeding to the next settings.
This answer is automatically generated