Advertisement
Quick Links
Advertisement

Summary of Contents for Cartek OBD2
- Page 1 GEAR INDICATOR (OBD2) INSTALLATION GUIDE For off-road use only Made in UK...
- Page 2 THIS PRODUCT IS DESIGNED FOR MOTORSPORT USE ONLY AND SHOULD NOT BE USED ON ROAD/STREET VEHICLES OR ON PUBLIC HIGHWAYS. NO WARRANTY IS MADE OR IMPLIED REGARDING ANY CARTEK PRODUCTS TO PROTECT USERS FROM INJURY OR DEATH. USER ASSUMES ALL RISKS.
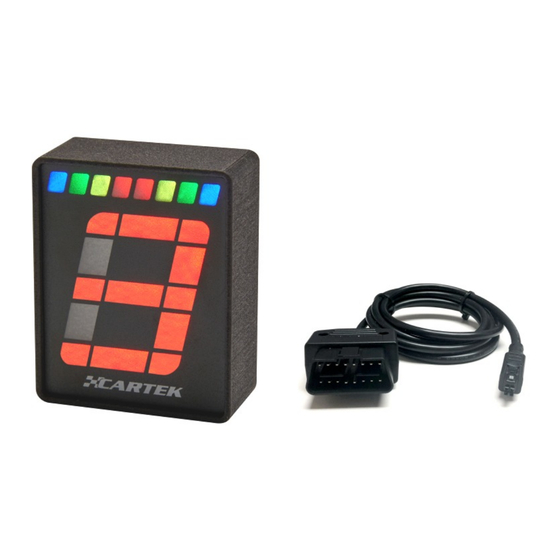
- Page 3 Gear Indicator (OBD2) This version of the CARTEK Gear Indicator can be plugged directly into the OBD2 port on any production car so no additional wiring is necessary. Once the Gear Indicator is connected it will then automatically search for the vehicle’s OBD Protocol.
- Page 4 CONFIGURATION GEAR INDICATOR OBD2 After installing the Gear Indicator, and with the ignition switched ON, Configuration Mode can then be entered where various settings can be checked or adjusted. Configuration Mode is entered by pressing and holding the pushbutton on the rear of the unit. After 2 seconds the gear display will begin flashing ‘G’.
- Page 5 CONFIGURATION GEAR INDICATOR OBD2 Configuration Menu 1 - Gear-Indicator Digit Brightness: Note: This configuration is for the Gear-Indicator digit only. Shift-Light display brightness is separate and described later. There are two adjustable brightness levels, Day brightness level or Night brightness level. During normal operation (not in configuration mode) a simple press of the rear button will switch between the two brightness levels.
- Page 6 CONFIGURATION GEAR INDICATOR OBD2 Configuration Menu 3 - Gear-Indicator Number of Forward Gears: Before the Gear Indicator can learn the gear ratios from the car’s transmission, it needs to know how many forward gears the transmission has. To adjust the Number of Forward Gears, select Configuration Menu 3 as described previously.
- Page 7 CONFIGURATION GEAR INDICATOR OBD2 SHIFT-LIGHT CONFIGURATION MENUS Configuration Mode is entered by pressing and holding the pushbutton on the rear of the unit. After 2 seconds the gear display will begin flashing ‘G’. To enter the Shift-Light configuration menus, continue to hold the pushbutton until the upper Shift-Light LEDs begin to flash and then release it.
- Page 8 CONFIGURATION GEAR INDICATOR OBD2 Configuration 2 - Shift-Light Pattern: On entering Configuration Menu 2, the upper LEDs will demonstrate the current selected Shift-Light pattern. Subsequent quick presses of the pushbutton will cycle through each of the 6 available Shift-Light patterns...
- Page 9 CONFIGURATION GEAR INDICATOR OBD2 Configuration 3 - Shift Light Pattern START RPM: There are two methods available for setting the Shift-Light Pattern START RPM. This can be done by using the pushbutton to enter an exact required RPM value, or running the engine at half the required engine speed.
- Page 10 CONFIGURATION GEAR INDICATOR OBD2 3.2) Shift-Light Pattern START RPM using tachometer (Engine must be running) This method of setting the display sequence START RPM will require the engine to be run at half the preferred speed. This means the engine does not need to be driven at high RPM but make sure the engine is up to normal running temperature before commencing this procedure.
-
Page 11: Rear View
INSTALLATION GEAR INDICATOR OBD2 The Gear Indicator unit should be mounted securely on the dashboard where the display can be clearly seen by the driver. Mounting can be by two M3 screws from the underside or two M3 screws from the rear of the unit.
Need help?
Do you have a question about the OBD2 and is the answer not in the manual?
Questions and answers