Table of Contents
Advertisement
Advertisement
Table of Contents

Subscribe to Our Youtube Channel
Related Manuals for Autel EVO Lite Series


Summary of Contents for Autel EVO Lite Series
- Page 1 User Manual EVO Lite Series V1.0 2021.12...
- Page 2 All other products and company name mentioned in this Manual are the registered trademark of their respective owners. Copyright Without the explicit consent of Autel Robotics, do not copy or forward any part of the Manual in or by any form (electronic, mechanical, reproducing, recording or other forms). Disclaimer In order to ensure safety and successfully operate your EVO Lite aircrafts, please abide by the operating instructions and procedures of this Manual.
- Page 3 Autel Robotics data server. All remote sensing data and flight logs are stored in the data server in the United States, but the data can be uploaded automatically only when the flight log backup option is enabled.
-
Page 4: Table Of Contents
Chapter 3 Remote controller.....................32 3.1 Components description....................32 3.2 Use remote controller....................34 3.3 Remote controller calibration..................36 3.4 Remote controller pairing....................38 3.5 Optimum communication range..................39 Chapter 4 Autel Sky App......................40 4.1 Activation........................40 4.2 Interface introduction....................42 4.3 Camera function......................50... - Page 5 Chapter 5 Flight........................56 5.1 Safe operation guide....................56 5.2 Flight preparation......................58 5.3 Flight operation......................60 5.4 Flight restrictions......................63 Chapter 6 Maintenance and service..................65 6.1 Firmware update......................65 6.2 Storage and maintenance.....................66 6.3 Warranty........................67 6.4 Customer service......................68 Chapter 7 Technical Specification.................... 70...
-
Page 6: Chapter 1 Read Instructions
Chapter 1 Read Instructions Thank you for your purchase of EVO Lite series and welcome your experience in Autel Robotics products. With this Manual, you can understand the features of EVO Lite series and learn to operate this aircraft and remote controller optimally. Before first use of EVO Lite series, please read this Manual and attached documents and get ready this Manual at any moment for reference. -
Page 7: Download Autel Sky App
Method one: Search for Autel Sky in the App Store or Google Play, and click INSTALL. Method Two: Visit the App download page of Autel Robotics' official website and scan the QR code to download: www.autelrobotics.com/download/App_download.html... -
Page 8: Chapter 2 Aircraft
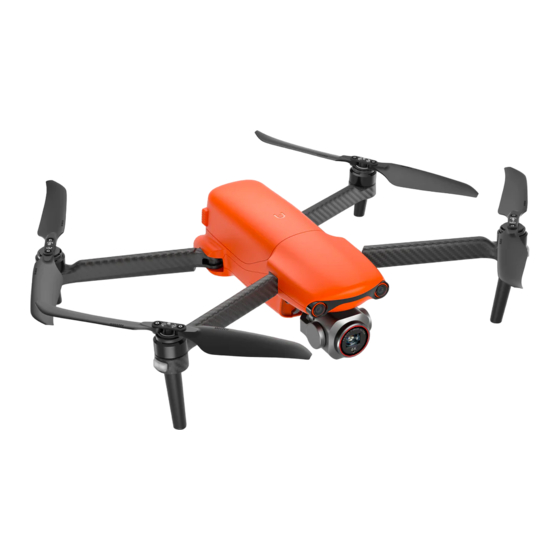
40 minutes. EVO Lite series UAVs include EVO Lite and EVO Lite+, the camera of which adopts 1/1.28 inch and 1 inch CMOS image sensors respectively. EVO Lite is provided with 4-axis gimbal that can steadily shoot 4K high-definition videos and pictures at 50m pixels. -
Page 9: Components Description
2.1 Components description ① Propeller ④ Gimbal camera ② Undercarriage ⑤ Front LED indicator ③ Forward visual system ⑥ Motor ⑦ Power button ⑨ Rear LED indicator ⑧ Rear vision system ⑩ Air outlet ⑪ SD card slot ⑫ Aircraft battery ⑬... -
Page 10: Flight Indicator
⑭ Ultrasonic sensor ⑯ Downward vision system ⑮ Downward LED 2.2 Flight indicator The aircraft has one LED indicator at the end of each arm. The front LED shows steady red to help you to find the head direction. The rear LED shows the current flight status of aircraft. Designated symbol of color: R - Red Y - Yellow... -
Page 11: Aircraft Battery
② Battery level indicator ③ Power button Warning Only the battery and charger provided by Autel Robotics are allowed. Neither modify battery and its charger nor use replace them with the third party equipment. The electrolyte in the battery has strong corrosion. If the electrolyte accidentally touches ... - Page 12 2.3.1 Battery use 1. Check battery level The battery indicator is divided into LED 1, LED 2, LED 3, LED 4. The position of each indicator is shown in the figure below. When the battery is turned off, press the power button for 1 second and then release it quickly to check the battery level.
- Page 13 2. Turn on battery The battery shall be turned off before it is installed. After installation, long press the power button for 3 seconds. The battery level indicator will indicate the current battery level. 3. Turn off battery Long press the power button for 3 seconds to turn off battery. If the battery has been installed on aircraft, LED 1 and LED 4 will flash for five times to remind the shutting down.
- Page 14 6. Charge aircraft battery The aircraft battery and remote controller can use the charger and cable provided for charging. Before each use, the battery shall be fully charged. 1)Connect the adapter to AC power.. 2)Press and hold the disconnect button on both ends of the battery, and connect one end of the charging cable to the charging slot of the aircraft battery.
- Page 15 Please be sure to turn off the aircraft power before installing or disassembling aircraft battery. It is only allowed to use the battery and charger sold or authorized by Autel Robotics for EVO Lite series. The use of any unapproved battery or charger may cause fire, explosion, leakage or other dangers.
- Page 16 The optimal charging temperature range is 22°C~28°C. The charging in this range can prolong the battery life. For EVO Lite series, the multiple chargers are optional to charge multiple batteries at the same time. You can access to Autel Robotics Online Mall to purchase accessories.
- Page 17 ±400°. You can use the gimbal pitching thumbwheel of remote controller or Autel Sky App to adjust the gimbal pitch angle within the range of -90º~30º.
- Page 18 EVO Lite+ is provided with 3-axis stabilization, and the camera includes a built-in 1 inch CMOS sensor to record 6K high-definition video. You can use the gimbal pitching thumbwheel of remote controller or Autel Sky App to adjust the gimbal pitch angle within the range of -90º~30º.
- Page 19 The rolling axis remains consistent with the rolling direction of the aircraft while the pitching axis remains the user-defined angle. This mode is used for first-person perspective. Important EVO Lite series camera gimbal is fixed by one gimbal protective cover that can protect the gimbal from accidental rotation or damage during storage.
- Page 20 The camera can save photos in DNG or JPG format and record videos in MOV or MP4 format. The image and video can be saved in Micro SD card. The real-time image can be displayed in Autel Sky App at a resolution up to 2.7K and a fluency of 30 frames. Important Please use and store the camera within the nominal temperature and humidity range to ...
-
Page 21: Propeller
Before the important video is shot, please conduct the several test shootings to ensure that the equipment is normal. The photo or video stored in Micro SD card can be downloaded through Autel Sky App only when the aircraft is turned on. - Page 22 2.5.1 Install propeller 1. Confirm that the aircraft has been turned off. 2. Select the propeller matched for each motor. 3. Forcibly press down the propeller and rotate it along the locking direction till that it is installed firmly. Propeller With white mark Without white mark Schematic...
-
Page 23: Intelligent Flight Control System
2.6 Intelligent flight control system EVO Lite series is to conduct stable and convenient flight control by its built-in intelligent flight control system. This system can support multiple advanced functions, including course reversal, fail-safe, positioning system, etc. The working description of each module is as shown in the table below. - Page 24 2.6.1 Flight mode EVO Lite series supports the standard, sport and smooth modes which can be switched by APP. 1. Standard mode Use the GPS module and downward vision system to realize the accurate hovering, steady flight and quick shot functions of aircraft. In the case of good GPS signal, the GPS will be used for precise positioning;...
- Page 25 ( ) on the remote controller or click the return icon ( ) in Autel Sky App. Upon receipt of the instruction, the aircraft will automatically return and land on the preset return point. Important The return height (relative to take-off point) is 30m by default.
- Page 26 Autel Sky App will show a notification. The fail-safe will be activated to start the return process. Similarly, you can also press the pause button or click the pause icon in Autel Sky App to recover the control on the aircraft.
- Page 27 In emergency, you can press the pause button ( ) or click the pause icon ( ) in Autel Sky App to pause landing, and manually make the aircraft fly to the nearest safe landing point. 3. Landing features 1) Landing protection When the aircraft arrives above the return point, the landing protection function will be activated to detect the ground environment.
- Page 28 Keep away from all electronic devices (such as mobile device) that may interfere with the calibration. Calibration procedure: 1. Unfold the aircraft and open Autel Sky App and enter the menu setting interface, choose the “safety” option, click the “compass calibration” to the calibration interface, and then click the “start” key.
- Page 29 2. Hold the aircraft and make it horizontal, and then rotate the aircraft till the rear LED indicator of the aircraft is normally on green. 3. Hold the aircraft and make it vertical with the head downwards, and then rotate the aircraft till the rear LED indicator of the aircraft is normally on green.
-
Page 30: Binocular Vision System
Please keep away from the metal or electric object, and maintain the aircraft at about 1.5m above the ground. 2.7 Binocular vision system The vision system use the image data to calculate the distance between the aircraft and the potential obstacles. - Page 31 Remark The vision system has dead zone outside its covering range. It is necessary to pay attention to the ambient environment and App notice during flight to ensure safety. Do not operate the aircraft in a complex environment where there is insufficient light, ...
- Page 32 Remove the surface film, sticker and other covers. – Clean of water drop, fingerprint, dirt, etc. (by non-dust cloth instead of alcohol and – other organic solvents). Return to repair if the surface has shedding, crack, scratch or wear, etc. –...
-
Page 33: Chapter 3 Remote Controller
Autel Sky App. The telescopic mobile device support can stably support the mobile device, and the built-in battery of remote controller is 3930mAh that can work for about 3.5h. - Page 34 ⑨ Mobile device interface ⑩ Photo/video button Start or stop taking photo/recording video. ⑪ User-defined button Use Autel Sky to set functions. ⑫ Gimbal pitching dial Control the pitch angle of camera gimbal. ⑬ Air inlet It is used for remote controller cooling.
-
Page 35: Use Remote Controller
3.2 Use remote controller 3.2.1 Turn on/off remote controller 1. Startup Press the power button ( ) for 2s till that a short beep sound appears. 2. Shutdown Press the power button ( ) for 2s till that a short beep sound appears. Important Be sure to turn on the remote controller before the aircraft power supply is connected. - Page 36 3.2.3 Remotely control aircraft The remote controller includes Mode 1, Mode 2 and Mode 3 based on operation habit and can also be self-defined in Autel Sky App. The beginner is recommended to use the Mode 2 as control mode.
-
Page 37: Remote Controller Calibration
You can calibrate the remote controller by using Autel Sky App. 1. Please turn off the aircraft power supply before operation. 2. Open Autel Sky App, enter the setting interface, click the “control” option, click the “remote controller calibration”, and then click the “start” key. - Page 38 3. Move the left and right command sticks and thumbwheel in turn to their maximum extent in the direction of the arrow on App. When the calibration of a direction is completed, the arrow in the direction will become blue.
-
Page 39: Remote Controller Pairing
LED on the rear of the aircraft will flash quickly to show it is ready to pair. 2. Connect your remote controller and mobile phone, operate Autel Sky App, click “Connect New Aircraft” in “Personal Center,” and follow the pairing instruction. -
Page 40: Optimum Communication Range
3.5 Optimum communication range When controlling the aircraft, it is necessary to timely adjust the orientation and direction between remote controller and aircraft. When the antenna plane directly faces the aircraft, the signal quality between the remote controller and the aircraft can achieve the optimal condition. It is necessary to maintain the aircraft within the best communication range when controlling the aircraft. -
Page 41: Chapter 4 Autel Sky App
4.1 Activation 4.1.1 Device activation When using the EVO Lite series for the first time, follow these steps to activate: 1. Unfold the aircraft arms, remove the gimbal cover, and turn on the aircraft. 2. Turn on the remote controller, connect the remote controller and smart phone, and run the Autel Sky App. - Page 42 Important The user can purchase the Autel Robotics Care only after the activation is successful. The remote controller and the aircraft are paired by default at the factory. After replacing the remote controller or the aircraft, refer to section 3.4 for pairing.
-
Page 43: Interface Introduction
User can view and edit photos and videos in the album. The album includes SD card, internal memory, and device storage (Autel Sky) options. Photos and videos can be downloaded to local album. Click the “Create” option to select templates or tools for manual clipping. - Page 44 Click the “Skill Center” option to select the product type and view the videos and instructions. 3. Personal center View the personal account, flight log, user terms,Autel care, and device management. Other settings include quick connection, device management, clear cache, language, Autel Robotics Care, connect new aircraft, and novice guide.
- Page 45 4.2.2 Camera interface Important The user can slide the image transmission interface up to hide all the information and only display the image transmission screen. 1. Home page Click it to return to homepage. 2. Flight Mode Indicate the current flight mode. 3.
- Page 46 5. Remote controller’s battery level Indicates the current remaining percentage of the remote’s battery. 6. Aircraft battery level Indicates the current remaining percentage of the aircraft battery. 7. Remaining flight time Indicate the remaining flight time of aircraft based on current battery level. 8.
- Page 47 2) Control - Unit: Set default units to metric (km/h or m/h) or imperial (mph/h) - Command stick mode: set the command stick mode as mode 1, mode 2, or mode 3. - Flight mode: set the control speed of the aircraft and gimbal. Options include smooth mode, standard mode, and sport mode.
- Page 48 11. Shooting setting Set the shooting parameters. 12. Zoom Switch the zoom factor. 13. Shooting button Click the button to trigger the camera or start/stop recording video. 14. Album Click to enter the album page. 15. Shooting mode Photo: set shooting mode between (single/burst/AEB/timer), resolution, white balance, HDR, etc.
- Page 49 Important Only the EVO Lite equipped with a four-axis gimbal supports rotate quick shot and rotate hyperlapse shooting. Only the EVO Lite+ supports aperture priority shooting mode. 16. Attitude Indicator Display the current aircraft position, aircraft nose orientation, operator position, home point position, and flight status parameters.
- Page 50 - Positioning: quickly lock the position of aircraft, remote controller, or home point on the map. - Find my drone: find the missing aircraft by activating flashing and beeping. 18. Gimbal Display the pitch angle of gimbal. 19. Tap to takeoff/land Click the takeoff ( ) / landing ( ) icon, hold and scroll it to takeoff/land the aircraft.
-
Page 51: Camera Function
Operating procedure 1. Turn on the aircraft power supply and place the aircraft on the ground. 2. Connect mobile phone to the remote controller, operate Autel Sky App, and pair aircraft and the remote controller. 3. After pairing, open the album, select the required materials and then click the download icon ( ) to realize high-speed download. - Page 52 4.3.2 One-click quick shot The quick shot is shot by four shooting modes, namely fade away, rocket, orbit and flick. The aircraft automatically flies according to the selected shooting mode and continues to shoot for a specific time. Finally, it automatically generates a short video to support continuous editing and rapid sharing in the App.
- Page 53 record video and return the starting point after the completion of shooting. 4. After shooting, click the album to view the short video, and continue to edit it in APP and share it to other social platform. 5. After user clicks the photo/video button on APP camera interface, uses the command stick of remote controller or short presses the remote controller pause button ( ) to quit the short film shooting, the aircraft will brake and hover at current position, and the materials...
- Page 54 1. Make sure the aircraft is fully charged. Run the aircraft and rise to 2.5 m or higher. 2. In the Autel Sky App, enter the camera interface and select the portrait mode. 3. The user can select the subject and scene on the interface, and the aircraft will automatically fly to the correct distance for shooting.
- Page 55 When the distance between the aircraft and the operator is greater than 30 meters, the App will open a window to ask the user whether it should fly to the directed location. Select "Confirm" and the aircraft will fly to that location. As the aircraft is flying to the corresponding scene, the user can interrupt the flight by ...
- Page 56 Night mode is suitable for shooting at night or in other low-light environments. Based on the Autel Moonlight Algorithm, the EVO Lite series can shoot clean, delicate, low-noise night scene photos and videos with high ISO in extremely dark conditions.
-
Page 57: Chapter 5 Flight
Chapter 5 Flight EVO Lite series adopts the unique portable design and has been assembled in factory. In order to ensure safe operation of UAV, please read the following instructions and warnings before first flight. 5.1 Safe operation guide 5.1.1 Flight environment Please abide by the local laws and regulations on UAV flight. - Page 58 Ensure that the aircraft motor, gimbal and camera can work normally after power on. Ensure that all alarms and errors displayed in Autel Sky App have been processed. Ensure that Autel Sky App and its firmware have updated to the latest version.
-
Page 59: Flight Preparation
5.2 Flight preparation 5.2.1 Battery preparation 1. Install aircraft battery Turn off the battery power switch before installing battery, and insert the battery into battery compartment. 2. Charge aircraft battery and remote controller 1) Charge aircraft battery Press and hold the disconnect button on both sides of the battery, insert one end of the charging cable into the battery charging slot, and connect the other end to the AC power supply through the power adapter (rated power 63.75W). - Page 60 Important It is recommended to use the official charging cable and power adapter. 5.2.2 Remote controller preparation 1. Connect mobile device Extend the mobile device support, place the mobile device on the support, insert the mobile phone port of the remote controller connector into the mobile device (it is allowed to replace corresponding Micro USB, USB-C, Lightning interface adapter for remote controller).
-
Page 61: Flight Operation
1. Place the aircraft at an open area. Stand at least 3m from the tail of the aircraft. 2. Turn on your remote controller and aircraft. 3. Operate Autel Sky App, connect the mobile device and the aircraft, and enter the camera interface. - Page 62 5.3.2 Takeoff Remark The aircraft cannot fly when the battery level is 15% or below. Stay away from the rotating propellers and motors. 1. Manual takeoff 1) As shown in figure, press the left and right sticks for 1s to start motor. 2) Slowly push up the left stick.
- Page 63 2) The aircraft will automatically rise to the height of about 2.5m. During the rising, you can adjust the position of the aircraft by using the left command stick. Warning Never take off on moving object, such as moving ship and vehicle. ...
-
Page 64: Flight Restrictions
In the case of low battery alarm, the rear LED of the aircraft will flash red. At this time, it is necessary to return the safe landing point as soon as possible. 5.4 Flight restrictions According to the controlled airspace and UAV management regulations of the ICAO and the air traffic management authorities of each country, UAV must fly in the specified airspace. - Page 65 The maximum height is used to restrict the flight height of the aircraft, and the maximum radius is used to restrict its flight distance. User can make settings in Autel Sky App. In the case of valid GPS, the flight restriction and the height and distance limits in special area will jointly affect the flight.
-
Page 66: Chapter 6 Maintenance And Service
1. Turn on your remote controller and aircraft, connect your mobile phone to the remote controller, operate Autel Sky app. 2. When the system detects new firmware version, Autel Sky app will open a prompt box after it is connected with the aircraft to remind you to download and install the new version. -
Page 67: Storage And Maintenance
SD card. 3. Turn on your remote controller and aircraft, connect your mobile phone to the remote controller, operate Autel Sky app. 4. Insert SD card into the aircraft for automatic update. User can view the upgrade process on App interface. -
Page 68: Warranty
Carefully check all components after each collision or impact. Please contact the customer support of Autel Robotics for any damage. Only use the accessories authorized by Autel Robotics, such as charger. We will provide no warranty for any accident due to the use of unapproved accessories. -
Page 69: Customer Service
disaster, fire, water, dirt, dust, battery leakage, fuse burn-out, theft or any improper use of power supply; When user fails to send the product within 7 natural days after contacting Autel Robotic for warranty service. 6.4 Customer service This section includes the information on technical support, maintenance service, application for replacement and spare parts. - Page 70 For non-warranty: provide the preferred payment mode The customer support personnel of Autel Robotic will evaluate the problem and give a reply within 2 days. Remark All contents of the product may be deleted during maintenance. You are advisable to ...
-
Page 71: Chapter 7 Technical Specification
Chapter 7 Technical Specification Takeoff weight 835g Dimensions (including Folded: 210×123×95mm blades) Unfolded: 427×384×95mm Wheelbase 368mm 5m/s (sport), 4m/s (standard), 3m/s Max ascent speed (smooth) 4m/s (sport), 3m/s (standard), 2m/s Max descent speed (smooth) Max level flight speed (no 18m/s (sport), 10m/s (standard), 5m/s wind, near sea level) (smooth) Max takeoff altitude... - Page 72 Rotate: -360°~360° Stabilization 4-axis Max control speed (pitch) 30°/s Angular vibration range ±0.003° Pitch: -135°~45° Mechanical range Roll: -45°~45° Yaw: -90°~90° Pitch: -90°~ +30° Controllable range Gimbal Yaw: -80°~ +80° (Lite) Stabilization 3-axis Max control speed (pitch) 30°/s Angular vibration range ±0.003°...
- Page 73 Shutter priority (S gear): Shutter/EV adjustable, ISO automatic Video: ISO100 ~ ISO6400 ISO range Photo: ISO100 ~ ISO6400 Night mode: ISO up to 64000 Photo mode: 1/8000 ~ 8s Shutter speed Other: 1/8000 ~ 1/frame rates Real-time image transmission portrait blur Portrait blur and photo portrait blur Defog mode...
- Page 74 Horizontal/Vertical/Wide-angle/Spherical Panorama Original image: 4096*3072, JPG/DNG Supported file system Fat32, exFat Video format MP4/MOV (8-bit) WIFI transfer 20MB/s CMOS: 1 inch Sensor Effective pixels: 20M Pixel size: 2.4μm*2.4μm FOV: 82° Equivalent focal length: 29mm Lens Aperture: f/2.8 ~ f11 Focus range: 0.5m ~ ∞ Focus mode: CDAF/MF Automatic mode (P gear): EV is adjustable, Shutter/Aperture is not adjustable, ISO is...
- Page 75 Photo format JPG (8bit)/ DNG (12bit) / JPG+DNG 5472x3648 (3:2,default) Photo resolution 5472x3076 (16:9) 3840x2160 (16:9) Single shot Burst shooing: 3/5 Auto exposure bracketing(AEB): 3/5 shots Photo shooting mode Interval: 2s/3s/4s/5s (default)/6s/.../60s (DNG minimum 5s) HDR imaging: 3840x2160 Video coding format H265/H264 5472x3076 p30/25/24 3840x2160 p60/50/48/30/25/24...
- Page 76 Single battery charging time 90min Max charging power Mobile App Autel Sky iOS 13.0 and above Mobile system required Android 6.0 and above Built-in storage Storage max. support 256GB(UHS-3 rating SD storage required) WWW.AUTELROBOTICS.COM © 2021-2022 Autel Robotics Co., Ltd. | Copyright reserved...
Need help?
Do you have a question about the EVO Lite Series and is the answer not in the manual?
Questions and answers