
Related Manuals for IC nexus SBC21 Series

Summary of Contents for IC nexus SBC21 Series
- Page 1 Quick Start Guide SBC21/NSD21/EC 21 iMX.6 Processor Series SBC21 / EC21 / NSD21 Quick Start Guide Copyright 2000 – 2014 IC Nexus Corporation. All rights reserved...
- Page 2 Separately list D200 product (P.4) Disclaimer This documentation is provided for use with IC Nexus products. No license to IC Nexus property right is granted. IC Nexus assumes no liability, provides no warranty either expressed or implied relating to the usage, or intellectual property right infringement that may result from its use.
-
Page 3: Table Of Contents
Quick Start Guide SBC21/NSD21/EC 21 Table of Contents TABLE OF CONTENTS ..................3 PACKAGE CONTENTS ................. 4 Single Board Computer ................4 NSD Smart Display ................. 4 All-in-One Embedded Computer .............. 4 Other specially: SBC2000 / NSD2105 ............4 OVERVIEW ..................5 SBC21 Single Board Computer ............... -
Page 4: Package Contents
Quick Start Guide SBC21/NSD21/EC 21 Package Contents Single Board Computer Single board computer include SBC2100. Item Notes SBC2100 Board Power Adapter RS232 IDC cable Pin header for DB9 Software and User's Manual NSD Smart Display NSD smart display products include NSD2107, NSD2110, NSD2115, and NSD2122. Item Notes NSD21xx... -
Page 5: Overview
Quick Start Guide SBC21/NSD21/EC 21 Overview SBC21 Single Board Computer Top View Bottom View Page 5... -
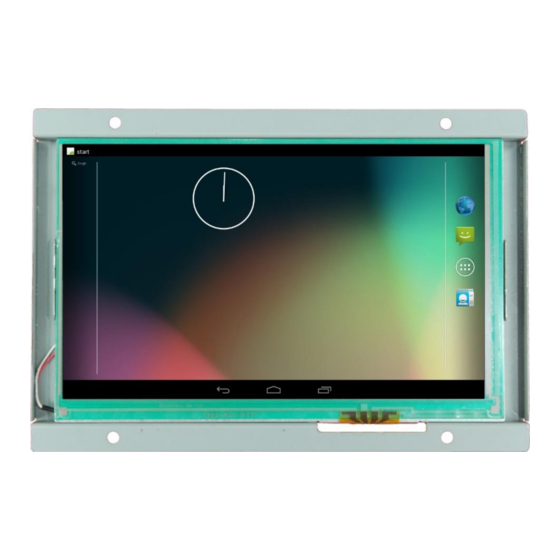
Page 6: Nsd21 Smart Display
Quick Start Guide SBC21/NSD21/EC 21 NSD21 Smart Display Android Enabled Device Ubuntu Enabled Device Page 6... -
Page 7: Nsd2105 Smart Display
Quick Start Guide SBC21/NSD21/EC 21 NSD2105 Smart Display Android Enabled Device Ubuntu Enabled Device Bottom View (The based board is SBC2000) Page 7... -
Page 8: Ec21 All-In-One Embedded Computer
Quick Start Guide SBC21/NSD21/EC 21 EC21 All-in-One Embedded Computer Ubuntu enabled device showing ports on each side Android enabled device with wireless antennas attached Page 8... -
Page 9: Setup
Quick Start Guide SBC21/NSD21/EC 21 Setup Connecting the Debug Port to PC During development, it is a good idea to connect using the debug port. There are different port location between SBC2000/NSD2105 and other 2100 series. SBC2000/NSD2105 Find the debug port on SBC2000/NSD2105 C220 debug board and the cable on it: Page 9... - Page 10 Quick Start Guide SBC21/NSD21/EC 21 Connect the cable on C220 debug board to the debug port of SBC2000/NSD2105 Connect a RS232 IDC cable to C220 debug board Page 10...
- Page 11 Quick Start Guide SBC21/NSD21/EC 21 Other 2100 series (including SBC2100, NSD2107/10/15/22, EC2107/10) Find the debug port on SBC2100 series board Connect a RS232 IDC cable to the debug port Page 11...
- Page 12 Quick Start Guide SBC21/NSD21/EC 21 Connect to PC Turn on the PC, run the terminal program, and open the COM port. We use TeraTerm. You can find this tool and the user guide on our wiki page online. DB9 null modem cable ...
- Page 13 Quick Start Guide SBC21/NSD21/EC 21 Pin Assignment: RS232 IDC Cable and Null Modem Adapter We prefer to use this kind of adapter if your DB9 cable is straight through cable. (Not cross-connected) Console box header (CN3 on PCB) pin assignment ...
-
Page 14: Start Running
Quick Start Guide SBC21/NSD21/EC 21 Start Running After connecting to the debug port, please power on the device to start. 1. Before logging into the system, you can enter into the U-Boot environment to check some variables. After powering on, quickly hit the Enter key within 3 seconds when you see the message below. - Page 15 Quick Start Guide SBC21/NSD21/EC 21 //7” LCD (800 x 480) with RTP > setenv panel 'video=mxcfb0:dev=lcd,LCD-WVGA,if=RGB24 video=mxcfb1:off' //7” LCD-AWT (800 x 480) with RTP > setenv panel 'video=mxcfb0:dev=lcd,SEIKO-WVGA,if=RGB24 video=mxcfb1:off' For other LCD / LVDS panels we support, please contact to our sales in order to get right string value.
-
Page 16: Connecting To The Pc (For Android 4.2)
Quick Start Guide SBC21/NSD21/EC 21 Connecting to the PC (for Android 4.2) For Android systems, connect to a Windows PC by following the steps below: Install Android SDK Connect to PC with USB OTG cable Install USB driver ... - Page 17 Quick Start Guide SBC21/NSD21/EC 21 Page 17...
- Page 18 Quick Start Guide SBC21/NSD21/EC 21 3.3.2 Connecting to the PC with a USB OTG cable Connect the power adapter to an EC21/NSD21/SBC21 power jack and plug the power adapter to an AC outlet. Wait for the EC21/NSD21/SBC21 to boot up and show a standard desktop on the LCD screen.
- Page 19 Quick Start Guide SBC21/NSD21/EC 21 Connect the USB cable to a USB port on the host PC. The following diagram shows a USB connected EC/NSD/SBC and a Windows PC. USB host Connector Mini-USB USB OTG Connector cable Windows PC Page 19...
- Page 20 Quick Start Guide SBC21/NSD21/EC 21 3.3.3 Installing the USB Driver (Android ADB Interface) When first connected, the host PC will prompt you about detecting an unknown USB device and ask you to install a driver. Choose to install software from a specific location.
- Page 21 Quick Start Guide SBC21/NSD21/EC 21 Page 21...
- Page 22 Quick Start Guide SBC21/NSD21/EC 21 Page 22...
- Page 23 Quick Start Guide SBC21/NSD21/EC 21 Page 23...
- Page 24 Quick Start Guide SBC21/NSD21/EC 21 To verify whether or not the driver is correctly installed, you can type adb devices at the Windows command prompt. The attached EC21/NSD21/SBC21 device will be listed with the device ID. If it does not show any attached devices, repeat the previous steps to install the driver again.
- Page 25 Quick Start Guide SBC21/NSD21/EC 21 3.3.4 Installing Extra Apps This part shows you how to install extra apps from the PC to the connected device. After installing the Android ADB interface, connect the EC21/NSD21/SBC21 device to the PC and verify that the device is attached. The install file should be an .apk file.
-
Page 26: Update Firmware Via Usb Dongle (For Android 4.2)
Quick Start Guide SBC21/NSD21/EC 21 Update firmware via USB dongle (for Android 4.2) This section shows you how to update the firmware easily via USB dongle. You only need to prepare the necessary image file and script file to achieve it. ... - Page 27 Quick Start Guide SBC21/NSD21/EC 21 Step 3: Execute the “update” app and the superuser authorization dialog will pop-up, select the “remember choice forever” and click the button “Allow”. Step 4: Insert the USB mass storage or MicroSD card and press “OK”. Step 5: The system will be restart and update the firmware after finished the process.
-
Page 28: Running Software
Quick Start Guide SBC21/NSD21/EC 21 Running Software Android 4.1.1 Settings Click the app drawer icon Page 28... - Page 29 Quick Start Guide SBC21/NSD21/EC 21 Sound Adjust the volume Page 29...
- Page 30 Quick Start Guide SBC21/NSD21/EC 21 Display Adjust the brightness, if supported by the panel. Note: In our Android system, like most of normal Android, there is the sleep mode for power manages. You can set the time out of sleep mode in Settings > Display > Sleep. The minimum is 15 s.
- Page 31 Quick Start Guide SBC21/NSD21/EC 21 Apps Manage all apps. You can force-stop or uninstall an app that you have installed. Page 31...
- Page 32 Quick Start Guide SBC21/NSD21/EC 21 Language & Input You can change the UI display language and the default input methods. Page 32...
-
Page 33: Ubuntu Linux
Quick Start Guide SBC21/NSD21/EC 21 Ubuntu Linux linaro Root Password: 4.2.1 System Settings You can reach settings and information for personal, hardware, and system here. Page 33... - Page 34 Quick Start Guide SBC21/NSD21/EC 21 Screen If you want to disable screen lock or disable turn off/dim screen, go to the Screen option to change the settings. Note: In our Ubuntu system which release after 2014/5/20, we remove dim screen function.
- Page 35 Quick Start Guide SBC21/NSD21/EC 21 4.2.2 Software Center You can use the Ubuntu Software Center to install extra software. Page 35...
- Page 36 Quick Start Guide SBC21/NSD21/EC 21 4.2.3 Update Manager If the Update Manager for Ubuntu appears, please close it. Do not use it to update the system. We do not offer any support should you use the system update manager. Page 36...
- Page 37 Quick Start Guide SBC21/NSD21/EC 21 Page 37...
-
Page 38: Touch Panel Calibration
Quick Start Guide SBC21/NSD21/EC 21 Touch Panel Calibration Android RTP re-calibrate procedure If you want or need to calibrate the touch for any reason such as: Touch is not accurate You have changed output It is your first boot after you updated firmware and set output. Use the commands to calibrate after devices boot. - Page 39 Quick Start Guide SBC21/NSD21/EC 21 After touching several crosses, there will appear a green and red small square. Touch the left green one a while. It is accurate confirmation function; all blue crosses should be within the green square. If not, the calibrator will let you calibrate again automatically.
-
Page 40: Ubuntu Rtp Re-Calibrate Procedure
Quick Start Guide SBC21/NSD21/EC 21 Ubuntu RTP re-calibrate procedure 5.2.1 Ubuntu 11.10 For the Ubuntu 11.10 version, if you want to re-calibrate the touch function, please kindly key in following commands on the console terminal after system booted: # rm -f /etc/pointercal //delete calibration file # shutdown –r now //then reboot... - Page 41 Quick Start Guide SBC21/NSD21/EC 21 5.2.2 Ubuntu 12.04 For the Ubuntu 12.04 version, if you want to re-calibrate the touch accuracy, please kindly follow below steps to accomplish the calibration: 1. First, connected keyboard, mouse and Internet (Ethernet port). 2. Open Ubuntu terminal window which on the left hand side shortcut list. 3.
- Page 42 Quick Start Guide SBC21/NSD21/EC 21 6. Copy the content between [Section “InputClass”] and [EndSection] (refer below picture in white block) 7. On terminal screen, please input sudo gedit linaro And input password: 8. Paste the content what you copied just now in the gedit. Page 42...
- Page 43 Quick Start Guide SBC21/NSD21/EC 21 9. Save the file under the path /usr/share/X11/xorg.conf.d/ And named the file as 99-ak4183ts.conf Then, close gedit. 10. Finally, reboot to check whether touch is correct or not. Page 43...
Need help?
Do you have a question about the SBC21 Series and is the answer not in the manual?
Questions and answers