Table of Contents
Advertisement
Available languages
Available languages
Advertisement
Table of Contents

Summary of Contents for castorama CVE0610F
- Page 1 MANUALE DELLE ISTRUZIONI PER L’USO - RADIATORE ELETTRICO pag. INSTRUCTIONS - ELECTRIC RADIATOR page MODE D’EMPLOI - RADIATEUR ÉLECTRIQUE page 25 INSTRUKCJA OBSŁUGI ELEKTRYCZNEGO - GRZEJNIK ELEKTRYCZNY str. 37 MANUAL CU INSTRUCȚIUNI DE UTILIZARE - CALORIFER ELECTRIC pag. 49...
- Page 2 FIG. / RYS. FIG. / RYS. Zone* 2 Zone* 3 Zone* 3 Zone* 2 Dispositivo di comando Zone* 1 Control device Dispositif de commande Urządzenia zabezpieczające Dispozitiv de comandă * Zona / Zone / Strefa / Zonă FIG. / RYS. FIG.
- Page 3 FIG. / RYS. FIG. / RYS. Zone* 3 Zone* 2 Zone* 3 Zone* 2 Zone* 1 Dispositivo di comando Control device Dispositif de commande Urządzenia zabezpieczające Dispozitiv de comandă * Zona / Zone / Strefa / Zonă FIG. / RYS. FIG.
- Page 4 SCHEMA 1 / SCHEME 1 / SCHÉMA 1 / SCHEMAT 1 Potenza / Power / N° Elementi / N° Mensole inferiori / N° Mensole superiori / Puissance / Moc / N° Elements / N° Lower brackets / N° Upper brackets / Putere N°...
- Page 5 SCHEMA 1 / SCHEME 1 / SCHÉMA 1 / SCHEMAT 1 Potenza / Power / Puissance / Moc / Putere N° Elementi / N° Elements / N° Eléments / N° Elementy X (cm) 16,1 1000 32,2 1500 56,3 1800 72,4...
- Page 6 SCHEMA 1 / SCHEME 1 / SCHÉMA 1 / SCHEMAT 1 max 45 kg max 45 kg 5 cm MIN. max 90 kg...
-
Page 7: Simbologia Usata Nel Manuale
SIMBOLOGIA USATA NEL MANUALE ATTENZIONE! ATTENZIONE! PERICOLO PER LA SICUREZZA DELLE PERSONE, TEMPERATURE ELEVATE. DEGLI ANIMALI DOMESTICI E DEI BENI. PERICOLO DI SCOTTATURA. ATTENZIONE! CONSIGLIO PER IL BUON PERICOLO DI SCOSSA ELETTRICA. FUNZIONAMENTO. ATTENZIONE! NON COPRIRE! PERICOLO DI DANNI AL PRODOTTO. ATTENZIONE Non installare l’... -
Page 8: Informazioni Generali
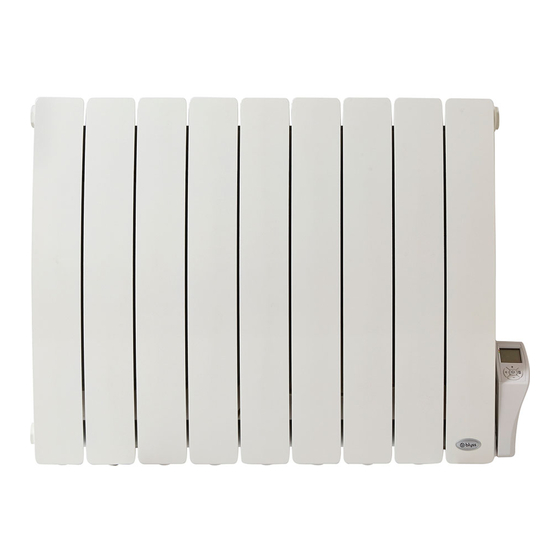
Potenza Lunghezza Altezza Peso Corrente TYPE [cm] [cm] [kg] Nominale [A] L’apparecchio deve essere utilizzato per l’installa- CVE0610F 1000 CVE0915F 1500 istruzioni. Installare l’apparecchio con il termostato CVE1220F 2000 DVE0610F 1000 posizionato in basso (Fig. 2). DVE0915F 1500... -
Page 9: Collegamento Elettrico
3.2 COLLEGAMENTO ELETTRICO 4. REGOLAZIONE E FUNZIONAMENTO ATTENZIONE L’apparecchio è costruito per riscaldare L’installazione va fatta eseguire a un tecnico spe- l’ambiente. Alcune parti di questo pro- cializzato e in conformità con le norme vigenti nel dotto possono diventare molto calde rispettivo paese. -
Page 10: Pannello Di Controllo
UTILIZZO DEL RADIATORE DAL PANNELLO DI CONTROLLO: PANNELLO DI CONTROLLO Tasto “+“ Tasto Conferma imposta- Tasto Selezione “Modo“ zioni/Disattivazione della funzione “Finestra aperta” Tasto ON/Standby Tasto “-“ DISPLAY Modi Finestra Sicurezza Blocco Vacanza operativi Aperta Bambini tastiera Marcia Forzata (2h) Indicatore programma Crono Stato resistenza... -
Page 11: Modi Operativi
4.1 MODE ON/STANDBY CRONO Questo modo consente di selezionare uno dei tre Nel modo “Standby“ il display visualizza l’ico- programmi di cronotermostatazione preimpostati, , l’ora e il giorno della settimana. oppure il programma personalizzabile. Quest’ul- Tutti i modi, compreso il “Filo Pilota”, sono so- timo consente una programmazione giornaliera e spesi, ma l’apparecchio rimane sotto tensione settimanale, con due livelli di temperatura (”Com-... -
Page 12: Scelta Del Programma
SCELTA DEL PROGRAMMA 4.2.2 COMFORT La temperatura di “Comfort” corrisponde alla temperatura appare sul display. Quindi premere contempo- desiderata dall’utilizzatore. raneamente i tasti ”Modo” e ”-”, mantenendoli entrambi premuti per almeno 3 secondi. Il numero che indica il programma (P1, P2, P3 e appare sul display. -
Page 13: Energy Saving
Se così non fosse, premere il tasto “Modo” Per attivare l’“Energy Saving” premere il tasto Quindi premere nuovamente il tasto “Modo” display in sostituzione dell’ora/temperatura. numero che indica il giorno lampeggia. 4.3 FUNZIONI Premere i tasti “+” e “-“ per impostare il giorno della settimana corretto (1=LUN, 2=MAR,…... -
Page 14: Sicurezza Bambini
Anche utilizzando questa funzione i bambini devono essere sorvegliati per sincerarsi che non si mettano in condizioni Fig. 9 di pericolo. Va comunque evitato qualsiasi contatto prolungato tra parti del corpo e l’apparecchio. Se l’apparecchio è già in funzione o è ancora caldo per un utilizzo recente e si attiva la “Sicurezza Bambini”, occorrono ZONA CONSIGLIATA ridotto e quindi la funzione sia operativa. -
Page 15: Blocco Tastiera
Per attivare la funzione premere contempo- ATTENZIONE: L’indicatore fornisce una indicazione esclusi- raneamente i tasti e “-“, mantenendoli en- vamente qualitativa del consumo energetico, non una misu- ra assoluta. sul display. Utilizzare i tasti “+“ e “-“ per impostare il nu- 4.5 INDICATORE DELLA POTENZA mero di giorni (massimo 45 giorni). -
Page 16: Problemi E Soluzioni
6. MANUTENZIONE Qualsiasi tipo di intervento sull’apparecchio deve In caso di problemi tecnici rivolgersi a personale prima di ogni operazione di manutenzione, deve assicurarsi che l’apparecchio sia spento, freddo e ditore o dal fabbricante) o contattare il proprio scollegato elettricamente. rivenditore. -
Page 17: Garanzia
8. GARANZIA 9. SMALTIMENTO Si raccomanda di conservare l’imballo, in tutte le Assicurarsi che il cavo di alimentazione sia scolle- sue parti per l’eventuale restituzione dell’appa- gato dalla linea elettrica prima di qualsiasi opera- recchio al proprio rivenditore, l’apparecchio deve zione. - Page 18 QUESTO APPARECCHIO È CONFORME ANCHE ALLA DIRETTIVA EUROPEA 2009/125/CE E AL RELATIVO REGOLAMENTO UE 2015/1188. Informazioni obbligatorie per gli apparecchi per il riscaldamento d’ambiente locale elettrici. Identificativo del modello: (vedi etichetta caratteristiche sul prodotto) Contatti: (P ) Tipo di potenza termica/controllo della temperatura ambiente Altre opzioni di controllo...
-
Page 19: Symbols Used In The Manual
SYMBOLS USED IN THE MANUAL IMPORTANT! IMPORTANT! DANGER FOR THE SAFETY OF PERSONS, PETS AND HIGH TEMPERATURES. RISK OF THINGS. BURNS. IMPORTANT! TIPS FOR EFFICIENT DANGER OF ELECTRIC SHOCK. OPERATION. IMPORTANT! DO NOT COVER THE APPLIANCE! DANGER OF DAMAGE TO THE APPLIANCE. WARNING Never install the appliance: CAUTION: Some parts of this prod-... -
Page 20: Specifications Of The Appliance
Length Height Weight Rated current TYPE [cm] [cm] [kg] on a wall as described in the instructions. Install the CVE0610F 1000 appliance with the thermostat at the bottom (Fig. 2). CVE0915F 1500 CVE1220F 2000 DVE0610F 1000 In bathrooms (with bath or shower), install the ap-... -
Page 21: Electrical Connections
3.2 ELECTRICAL CONNECTIONS 4. REGULATION AND OPERATION WARNING The appliance is designed to heat To be installed by a specialised engineer in accor- rooms. Some parts of this product can dance with the applicable standards in the country become very hot and cause burns. Par- concerned. -
Page 22: Control Panel
USING THE RADIATOR FROM THE CONTROL PANEL: CONTROL PANEL “+“ key “Mode“ selection key able “Open Window” key ON/Standby key “-“ key DISPLAY Operating Open Children Holiday Keypad Lock modes Window Safety Overdrive (2h) Chrono presets Heating element state Behavioural indicator Standby Mode Instantaneous power Days of the Week... -
Page 23: Operating Modes
4.1 ON/STANDBY MODE CHRONO In this mode, you can select one of the three pre- In “Standby“ mode the LCD displays the set chrono-thermostat programs or the custom Standby icon , the hour and day of the week. program. The latter lets you set a daily and weekly All the operating modes are suspended (“Pilot program with two temperature levels (”Comfort”... -
Page 24: Setting The Current Day And Time
CHOICE OF PROGRAM 4.2.2 COMFORT Press the ”Mode” key until the icon is dis- The “Comfort“ temperature set point is the temperature played. Then press the ”Mode” and ”-” keys to- desired by the user. gether and hold them both down for at least 3 seconds. -
Page 25: Open Window
4.3 FUNCTIONS If you fail to enter the setup in this way, key the “Mode” key until the icon appears on the display. The appliance has a number of special functions to customise Then press the “Mode” key again and hold and optimise use. -
Page 26: Children Safety
Always avoid prolonged contact between the appliance Fig. 9 and the body. If the appliance is already operating or is still hot after recent use and “Children Safety“ is activated, it takes at least two hours for the temperature to drop to the lower value and the function to be operational. -
Page 27: Keypad Lock
Then set up the desired number of days (max- ATTENTION: The behavioural indicator gives an exclusively imum 45) by means of the “+“ and “-“ keys. qualitative indication of the energy consumption. It is NOT an absolute measure. Now the LCD shows the icon and the set 4.5 INSTANTANEOUS POWER INDICATOR number of days, which decreases as the days... -
Page 28: Maintenance
6. MAINTENANCE All operations on the appliance must be carried out Should any technical problems arise, contact a ing maintenance must make sure the appliance is turned off, cold and disconnected from the house- by the dealer or manufacturer) or your local dealer. hold mains. - Page 29 8. GUARANTEE 9. DISPOSAL You are recommended to keep all parts of the pack- Make sure the power cable is disconnected from aging in case the appliance needs to be returned to the power line before performing any operation. the dealer. The appliance must arrive complete and To remove the appliance, follow the procedure for undamaged in order to maintain the validity of the guarantee.
- Page 30 THIS APPLIANCE ALSO COMPLIES WITH EUROPEAN DIRECTIVE 2009/125/EC AND THE CORRESPONDING REGULATION EU 2015/1188. Information requirements for electric local space heaters Model identifier(s): (see the rating plate on the product) Contact details: (P ) Type of heat output/room temperature control Other control options...
- Page 31 PICTOGRAMMES UTILISÉS DANS CETTE NOTICE ATTENTION! ATTENTION! DANGER POUR LA SÉCURITÉ DES PERSONNES, DES TEMPÉRATURES ÉLEVÉES. ANIMAUX DOMESTIQUES ET DES BIENS. RISQUE DE BRULURE. ATTENTION! CONSEIL POUR LE BON DANGER DE DÉCHARGES ÉLECTRIQUES. FONCTIONNEMENT. ATTENTION! NE PAS COUVRIR! DANGER DE DOMMAGES AU PRODUIT. MISE EN GARDE Ne pas installer l’...
-
Page 32: Informations Générales
être destiné à un autre usage. Puissance Longueur Hauteur Poid Courant TYPE [cm] [cm] [kg] nominal [A] CVE0610F 1000 dans la notice. Installer l’appareil de façon à ce que le CVE0915F 1500 thermostat soit placé en bas (Fig. 2). CVE1220F 2000 DVE0610F 1000 DVE0915F 1500 Dans la salle de bains (équipée d’une baignoire ou... -
Page 33: Branchement Électrique
3.2 BRANCHEMENT ÉLECTRIQUE 4. RÉGLAGE ET FONCTIONNEMENT MISE EN GARDE pièce. Certaines parties de l’appa- reil peuvent devenir très chaudes et locales en vigueur. provoquer des brûlures. Faire preuve Avant d’installer l’appareil, s’assurer qu’il n’est pas sence d’enfants ou de personnes vul- La tension d’alimentation de l’appareil est de teurs) à... -
Page 34: Panneau De Contrôle
UTILISATION DU RADIATEUR À L’AIDE DU PANNEAU DE CONTRÔLE: PANNEAU DE CONTRÔLE Touche “+“ Touche Validation des fonction “Fenêtre Ouverte“ Touche ON/Standby Touche “-“ ÉCRAN Modes de fonc- Fenêtre Verrouillage Vacances tionnement Ouverte Enfants Clavier Indicateur programme Chrono Indicateur comportemental Mode Standby Indicateur de la puis- Jours de la semaine... -
Page 35: Modes De Fonctionnement
4.1 MODE ON/STANDBY CHRONO l’heure et le jour de la semaine. programme personnalisable. Ce dernier permet une Tous les modes, y compris le “Fil Pilote“ sont programmation journalière et hebdomadaire avec dans l’attente d’une commande. Eco”). Toutes les commandes du “Fil Pilote“ sont inactives. sur la touche “Standby”. -
Page 36: Sélection Du Programme
SÉLECTION DU PROGRAMME 4.2.2 CONFORT sur la touche ”Mode” et sur la touche ”-” pendant 3 sec. minimum. Appuyer sur la touche “Mode” jusqu’à ce que et P4) clignote: appuyer sur les touches “+“ et “-“ des touches “+” et “-”. et 32 °C. - Page 37 Si ce n’est pas le cas, appuyer sur la touche 4.3 FONCTIONS Puis appuyer de nouveau sur la touche “Mode“ nombre qui indique le jour clignote. personnaliser et d’optimiser l’utilisation de l’appareil. nir le jour de la semaine (1=LUN,2=MAR,… 4.3.1 ASC 7=DIM).
-
Page 38: Sécurité Enfants
L’utilisation de cette fonction ne dispense pas de surveiller Fig. 9 ZONE CONSEILLÉE 4.3.4 MARCHE FORCÉE (2H) ment la pièce. radiateur, la position du radiateur dans la pièce, la sur les touches et “+“ en les maintenant en- La fonction “Fenêtre Ouverte“ ne peut pas être tous les modes de fonctionnement et la fonction L’appareil chauffe pendant deux heures à... -
Page 39: Verrouillage Clavier
ATTENTION! L’indicateur fournit une indication uniquement ment sur les touches et “-” en les mainte- absolue. À l’aide des touches “+“ et “-“ programmer le 4.5 INDICATEUR DE LA PUISSANCE nombre de jours (maximum 45 jours). INSTANTANÉE La programmation voulue est automatique- bours du nombre de jours restants. -
Page 40: Entretien
6. ENTRETIEN Toute intervention sur l’appareil doit être effec- En cas de problèmes techniques, s’adresser à un fabricant) ou contacter le vendeur. 7. PROBLÈMES ET SOLUTIONS L’appareil ne chauffe pas. exemple obstructions, couvertures). L’appareil chauffe continuellement. La pièce reste froide. Lors de première mise en route, il faut environ une paire des heures pour atteindre la L’appareil ne refroidit pas. -
Page 41: Garantie
8. GARANTIE 9. ÉLIMINATION l’emballage en cas de retour de l’appareil au reven- nir les conditions de garantie. Lorsque l’appareil de chauffage est mis au rebut, respecter fauts de production existant au moment de la vente du pro- Avertissements pour l’élimination correcte du produit aux termes de la Directive européenne 2012/19/EC. - Page 42 CET APPAREIL EST CONFORME À LA DIRECTIVE EUROPÉENNE 2009/125/CE ET AU RÈGLE MENT UE 2015/1188 PORTANT APPLICATION DE CETTE DIRECTIVE Exigences d’informations applicables aux dispositifs de chau age décentralisés électriques Référence(s) du modèle: (voir étiquette des caractéristiques sur le produit) Coordonnées de contact: Type de contrôle de la puissance thermique/de la température de la pièce...
- Page 43 SYMBOLE WYKORZYSTANE W INSTRUKCJI UWAGA! UWAGA! WYSOKIE TEMPERATURY. DOMOWYCH I RZECZY. UWAGA! PORADA DLA DOBREGO FUNKCJONOWANIA. UWAGA! UWAGA Nie instalować urządzenia: OSTRZEŻENIE - Niektóre części pro- - bezpośrednio pod lub przed gniazdkiem elek- duktu mogą stać się bardzo gorące i trycznym lub puszką...
- Page 44 Pr d TYPE [cm] [cm] [kg] znamionowy [A] Urz dzenie musi by u ywane po uprzedniej instala- CVE0610F 1000 cji na cianie, jak opisano w niniejszej instrukcji. Za- CVE0915F 1500 instalowa urz dzenie z termostatem w dole (Rys. 2). CVE1220F...
- Page 45 4. REGULACJA I FUNKCJONOWANIE UWAGA ogrzewania otoczenia. specjalizowanego technika i zgodnie z normami czonymi w tabeli 1. kami lub stopami. ogrzewanego powietrza. czenia elektrycznego, przedstawionego na rysunku 8. Jeśli Przewód Sterowniczy nie jest podłączony W przypadku, gdy na etapie mocowania lub przy do centralki programowania, musi zostać...
-
Page 46: Panel Sterowniczy
PANEL STEROWNICZY Przycisk “+“ Przycisk Potwierdzenia usta- Przycisk Wyboru “Trybu“ “Otwartego okna“. Przycisk ON/Standby Przycisk “-“ Tryby Okno Blokada Wakacje operacyjne otwarte stwo dzieci klawiatury Funkcjonowanie wymuszone (2h) “Chrono“ Tryb Standby Dni tygodnia lowej Zegar / Ustawiona tem- peratura Pasek godzin “Chrono“ Programowanie temperatur “Chrono“... -
Page 47: Tryby Operacyjne
4.1 TRYB ON/STANDBY dezaktywowane. “CHRONO“ otrzymanie polecenia. liwia programowanie dzienne i tygodniowe, z dwoma poziomami temperatury (tryb “Comfort“ i “Noc/Eco“). dezaktywowane. ENERGY SAVING podczas gdy w innych trybach pokazuje ustawio- w przypadku, gdy pomieszczenie pozostaje puste. Temperatura ustawiona jest na 17 °C. dezaktywowane. -
Page 48: Wybór Programu
WYBÓR PROGRAMU 4.2.2 COMFORT Temperatura w trybie “Comfort“ odpowiada temperaturze przynajmniej 3 sekundy. Zakres regulacji temperatury wynosi od 7 °C do 32 °C. 4.2.3 NOC/ECO PROGRAM P1 GODZINY TRYB 0 - 6 Noc/Eco 6 - 9 Comfort 9 - 16 Noc/Eco trybie “Noc/Eco”, ta ostatnia zostanie zmieniona. - Page 49 4.3 FUNKCJONUJE godzin. 4.3.1 ASC programu P4. USTAWIENIE PROGRAMU P4 malnie 2 godziny. regulacji minut (zobacz REGULACJA GODZINY). tylko w trybie “Chrono“. (zobacz Rozdz. 4.2.5) Dla optymalnego funkcjonowania ASC koniecz- nych jest kilka dni dla nabycia danych. 4.3.2 OKNO OTWARTE T Noc/Eco T Comfort T Noc/Eco...
- Page 50 Rys. 9 STREFA ZALECANA 4.3.4 FUNKCJONOWANIE WYMUSZONE (2H) rym zainstalowany jest grzejnik, pozycja grzejnika szego ogrzewania pomieszczenia. Funkcja “Otwarte Okno” nie jest aktywowana lub dezaktywowana w trybie “Standby”. kie tryby i funkcja “Wymuszonego Funkcjonowania “Otwartego Okna“ 4.3.3 normalnego funkcjonowania aktywnego trybu (“Comfort“, cjonowania (2h)”.
-
Page 51: Blokada Klawiatury
UWAGA: (maksymalnie 45 dni). Wykres ten pokazuje chwilowe przedstawienie wykorzysty- tomatycznie. WAŻNE: W przypadku braku zasilania, wszystkie aktualne daty i godziny. ciski i “-“. wany tryb “Energy Saving“. WAŻNE: W przypadku braku zasilania przy aktywnej funk- 4.3.6 BLOKADA KLAWIATURY branym trybie operacyjnym. WAŻNE: W przypadku braku zasilania przy aktywnej funk- dni, od momentu przerwania zasilania. - Page 52 6. KONSERWACJA elektronicznego. Pomieszczenie pozostaje zimne. przewodu sterowniczego. ogrzewanie, pomimo otwartego okna i aktywnej funkcji “Otwartego Okna“. le 4.3.2 niniejszej instrukcji. okna, podczas gdy funkcja “Otwartego Okna“ jest aktywna. komunikat “ALL“.
- Page 53 8. GWARANCJA 9. UTYLIZACJA Producent gwarantuje swym klientom wszystkie prawa za- nie (Schemat 1). warte w dyrektywie europejskiej 1999/44/WE oraz prawa padami. Ostrzeżenia dotyczące prawidłowej utylizacji produktu, zgodnie z Dyrektywą Europejską 2012/19/WE. dyrektywami europejskimi: elektromagnetycznej cji i uruchomienia produktu. 2011/65/UE w sprawie ograniczenia stosowania znamionowej).
- Page 54 URZĄDZENIE JEST ZGODNE Z DYREKTYWĄ EUROPEJSKĄ 2009/125/WE I ODPOWIEDNIM ROZPORZĄDZENIEM UE 2015/1188. Wymogi w zakresie informacji dotyczące elektrycznych miejscowych ogrzewaczy pomieszczeń Identyfikator(-y) modelu: (zobacz etykietę charakterystyki na produkcie) Dane teleadresowe: (P ) Rodzaj mocy cieplnej/regulacja temperatury w pomieszczeniu Inne opcje regulacji...
- Page 55 SIMBOLOGIE UTILIZATĂ ÎN MANUAL ATENŢIE Nu instalați aparatul: AVERTISMENT - Unele părţi ale acestui - imediat dedesubtul sau în fața unei prize de produs pot deveni foarte calde și pot curent sau a unei cutii de joncțiuni (Fig. 5) cauza arsuri. Trebuie să se acorde o - în contact cu peretele sau cu podeaua atenţie deosebită...
- Page 56 Înălțime Greutate Curent TYPE [cm] [cm] [kg] Nominal [A] Aparatul trebuie să utilizat pentru instalarea CVE0610F 1000 pe perete conform indicațiilor din aces- CVE0915F 1500 te instrucțiuni. Instalați aparatul cu termostatul CVE1220F 2000 DVE0610F 1000 poziționat în jos (Fig. 2).
-
Page 57: Conectarea Electrică
3.2 CONECTAREA ELECTRICĂ 4. REGLAREA ȘI FUNCȚIONAREA ATENȚIE Dacă Firul Pilot nu este conectat la unitatea de programare, trebuie terminat și izolat. Nu conectați în niciun caz Firul Pilot la sol. Fig. 8... -
Page 58: Panou De Control
UTILIZAREA CALORIFERULUI DE LA PANOUL DE CONTROL: PANOU DE CONTROL AFIȘAJ... - Page 59 4.1 MODE ON/STANDBY CRONOS ENERGY SAVING 4.2 MODURI DE FUNCȚIONARE 4.2.1 FIR PILOT FIR PILOT CONFORT NOAPTE/ECO ANTIGEL...
- Page 60 ALEGEREA PROGRAMULUI 4.2.2 CONFORT 4.2.3 NOAPTE/ECO PROGRAM P1 PROGRAM P2 PROGRAM P3 4.2.4 ANTIGEL PROGRAM P4 PERSONALIZAT 4.2.5 CRONOS REGLAREA DATEI ȘI A OREI...
- Page 61 4.3 FUNCȚII 4.3.1 ASC CONFIGURAREA PROGRAMULUI P4 4.3.2 FEREASTRĂ DESCHISĂ 4.2.6 ENERGY SAVING...
- Page 62 Fig. 9 4.3.4 FUNCȚIONARE FORȚATĂ 2H 4.3.3 SIGURANȚĂ COPII 4.3.5 VACANȚĂ OBSERVAȚII IMPORTANTE:...
- Page 63 ATENȚIE: 4.5 INDICATOR AL PUTERII INSTANTANEE IMPORTANT: 4.3.6 BLOCARE TASTATURĂ IMPORTANT: IMPORTANT: IMPORTANT: IMPORTANT: 5. CURĂȚARE 4.4 INDICATOR DE FUNCȚIONARE Verde Galben Roșu...
-
Page 64: Probleme Și Soluții
6. ÎNTREȚINERE 7. PROBLEME ȘI SOLUȚII... - Page 65 8. GARANȚIE 9. ELIMINAREA Avertismente pentru eliminarea corectă a pro- dusului conform directivei europene 2012/19/EC. CONEXIUNEA ELECTRICĂ CU ȘTECHER A SE CITI CU ATENȚIE...
- Page 66 ACEST APARAT ESTE CONFORM ȘI CU DIRECTIVA EUROPEANĂ 2009/125/CE ȘI CU REGULAMENTUL UE 2015/1188 CORESPUNZĂTOR. Cerințe privind informațiile referitoare la aparatele electrice pentru încălzire locală Identificatorul de model(e): (vezi eticheta cu caracteristicile produsului) Date de contact: (P ) Tip de putere termică/controlul temperaturii camerei Alte opțiuni de control...
- Page 67 Garantie L217-5 du Code de la consommation Le bien est conforme au contrat En vertu de l’article L217-16 du Code de la consommation, lorsque l’acheteur demande au vendeur, pendant le cours de la garantie com- de la demande d’intervention de l’acheteur ou de la mise à disposition (extrait du Code de la consommation) : Article L217-4 du Code de la on la destine, ou qui diminuent tellement cet usage que l’acheteur ne consommation - Le vendeur doit livrer un bien conforme au contrat et...
- Page 68 Cod. xVExxxxF/V 5725011372/03.21...
Need help?
Do you have a question about the CVE0610F and is the answer not in the manual?
Questions and answers