Table of Contents
Advertisement
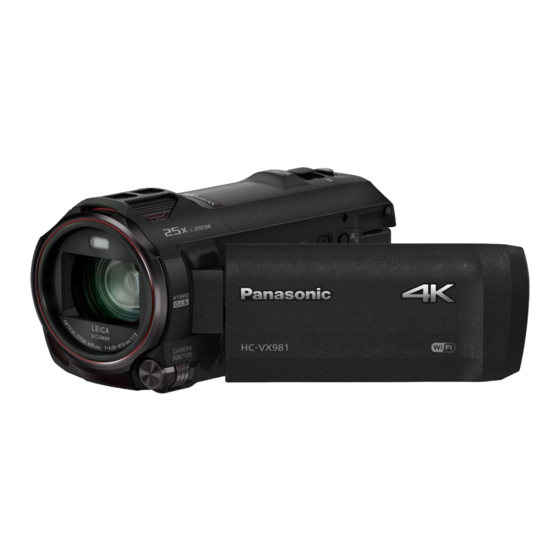
PANASONIC HC-VX981K
4K CAMCORDER
This is a written tutorial on how to use the Panasonic HC-VX981 4K Camcorder. If you have not
watched our video tutorial on it, this document will teach you the basics of how to use the
device. This is not a video on filming fundamentals...only how to operate the camera...as well
as a few other more advanced things you can do to help heighten your filming experience.
Advertisement
Table of Contents

Subscribe to Our Youtube Channel
Related Manuals for Panasonic HC-VX981K


Summary of Contents for Panasonic HC-VX981K
- Page 1 PANASONIC HC-VX981K 4K CAMCORDER This is a written tutorial on how to use the Panasonic HC-VX981 4K Camcorder. If you have not watched our video tutorial on it, this document will teach you the basics of how to use the device.
-
Page 2: Basic Operations
BASIC OPERATIONS The Panasonic HC can be turned on by opening the flap on the side here and pressing the power button. The camera roughly has a 2-3 hour battery life, but this can vary depending on how much of the functions you use as well as how long it is running. It is recommended that when you are not using the Panasonic to turn it off to conserve battery life. - Page 3 The camera function wheel is located on the bottom left of the camera; which will allow you to manually make adjustments to various parts of the camera…such as contrast and brightness. However…you can also make adjustments on the touchscreen itself…which I find far easier to...
- Page 4 5 o clock from it is the video button. This does the opposite of what I mentioned: it turns on the video camera, as well as switches the Panasonic from photo to video mode. Press the button once in video mode to turn on recording…press it again to turn off the recording. The W and T slider at the top controls zoom in, and microphone volume.
- Page 5 On the other side of where the main panel is, you will find the power input for the Panasonic. Plug the AC adapter into it to recharge the Panasonic. We ask that when you are done with your recordings, that you plug it into the socket. On the lower right hand corner, you will see an attachment to plug in a pair of headphones to the Panasonic…so you can better hear the volume...
- Page 6 The bottom area holds the area where the SD card is installed in. You can take this SD card out by pushing up on it and then retrieving it from there. There is also the area of where you can screw in the Pansonic into the tripod that will out and available for use.
- Page 7 The front part of the Panasonic features where the lens is, as well as where you install the wind shield for outside productions. At this time, there is no plans to allow the equipment to be rented out of the library, so you will more than likely not need this attachment. However, should this change, this will protect the Panasonic from wind damage.
-
Page 8: Touchscreen Menus
Most of the functions of the Panasonic are controlled from the touchscreen. Some of the icons shown on the Panasonic is merely relevant data you may need to refer to when conducting a recording, such as battery, date/time codes, format you are recording in, etc. The information displayed on screen will not be shown during a recording or photo, so don’t be concerned too... - Page 9 Setup Menu of the Panasonic. For the moment, these are the options that we have left on the Panasonic as default. You may when using it customize them how you see fit.
- Page 10 Once you press this button, this menu should appear. We will go into what each menu option does...
-
Page 11: Video Options Menu
VIDEO OPTIONS MENU: IA (Intelligent Auto): When you have this setting enabled, the camera will automatically accommodate for things such as glare, light, and adjust the output accordingly so you only receive optimum results. IA+ (Intelligence Auto +): This is the same box as the former, except it provides more options such as color. - Page 12 Person running with After Images (Slow Mo): This gives you the ability to use Slow motion recording. When you record, a button will be made available to press that will let you slow down the recording. Please not you won’t see how it looks until after you do post production. 4K Photo Mode: This mode enables 4K Photography mode…which allows you to have the images in 4 K resolution in your output.
-
Page 13: Photo Mode
PHOTO MODE When you are in photo mode, the options you have for taking shots is different than that of when you video mode: As you can see, the majority of the items from Video Mode are still present. The only different option is the Stop motion mode. -
Page 14: Menu Options
The menu here allows you to change settings on how the Panasonic as a whole works. While some of the options are very easy to describe what they do, others are not as obvious. -
Page 15: Record Setup Options
4K MP4, MP4/iFrame, AVCHD, and 24p. It should be noted that some of these file types disable features on the Panasonic, and some of these file types are required to access other features of it. This is mostly because “X format” is only compatible with “X settings.”... -
Page 16: Setup Menu
In Picture Setup, all it has is an option to adjust the Picture Size. It can be either 14m or 2.1 SETUP MENU: This lets you edit the internal settings of the Panasonic camera. The settings are as follows: DISPLAY: Display lets you decide whether or not data for the shots is shown on screen. - Page 17 2160p, 1080p, 720p, 480p, 360p, etc. VIERA Link: When this is set on, the Panasonic can be controlled remotely with a compatible VIERA TV remote. We have no plans to acquire such a remote at this library, so this feature is useless for your needs here.
- Page 18 Use of this option should not be used without consent from the IDEA Lab or IT department. FORMAT MEDIA: This option formats the SD card on the Panasonic. This option will delete anything on the Panasonic. Use at your own discretion.
- Page 19 SHTR SOUND: This lets you turn on the sound when a photo is taken. FILMING When you want to begin for film making, we recommend you screw the Panasonic into the tripod we have provided for you, so you may perfectly level your shots. The screw is a bit finicky to work with…ask a staff member for assistance if you need it.
-
Page 20: Remote Control
The phone will also output what the camera sees in addition to movement. The Panasonic does have the ability to do Live Casts for streaming, but only if you possess a Ustream account. We do not recommend you get this for live casts with the camera…and instead... - Page 21 SD card. Keep in mind that we will regularly format the SD card to be sure everyone has access to it. And that is it…that is the basic tutorial of how to use the Panasonic camera. Hopefully by reading, you’ll be able to operate the camera without assistance…but please ask if you do need...
Need help?
Do you have a question about the HC-VX981K and is the answer not in the manual?
Questions and answers