Table of Contents
Advertisement
Quick Links
Advertisement
Table of Contents

Related Manuals for Sencor SMC 5700WDB


Summary of Contents for Sencor SMC 5700WDB
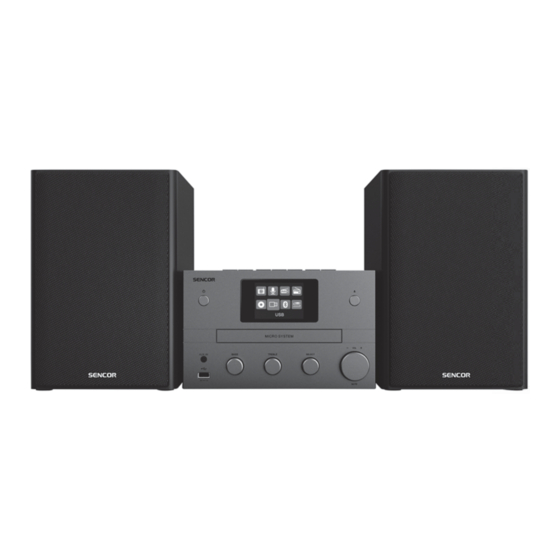
- Page 1 SMC 5700WDB User Manual CD Micro system...
-
Page 2: Table Of Contents
Table of contents Listening to FM radio ....17 FM radio station presets ......17 Storing FM radio stations ......17 Storing FM radio stations Safety Instructions ......3 automatically ..........17 Safety precautions .........4 Selecting a preset FM radio station ..17 Remote control instructions ....... -
Page 3: Safety Instructions
SAFETY INSTRUCTIONS Cleaning CONGRATULATIONS FOR Prior to cleaning, please disconnect PURCHASING THIS HOME CD MICRO power fi rst. For cleaning, don’t use liquid SYSTEM. IT IS CHARACTERISED BY detergents or caustic liquids - just clean ITS ADVANCED DESIGN, MODERN the unit with a soft cloth. APPEARANCE, EXCEPTIONALLY RICH SOUND AND IMPLEMENTATION OF Disc drive door... -
Page 4: Safety Precautions
SAFETY INSTRUCTIONS E. This unit has fallen on the ground Safety precautions from a big height. Burns can be smelled from the Always use original transport box and product inside. packaging to carry the CD player. Manufacturer’s packaging provides the Maintenance best method of protecting the player If you don’t have enough technical... -
Page 5: Remote Control Instructions
SAFETY INSTRUCTIONS 4. Do not leave damaged or discharged Note: Cleaning and adjustment of batteries in the remote. internal parts may only be performed 5. If the remote control is not to be by skilled service technicians, otherwise used for an extended period of time, damage to the player and/or shortening remove the batteries to prevent it from the lifetime may occur. -
Page 6: Features
SAFETY INSTRUCTIONS • Protect this appliance from Features overturning, falling on the fl oor, impacts, shocks and vibrations, Before starting to connect and operate this moisture and dust. product, please read this manual carefully. • This appliance may only be operated Save this user’s manual for possible future by children of appropriate age who use. -
Page 7: Cleaning And Maintenance
SAFETY INSTRUCTIONS • Inspect the appliance on regular basis. Never use a damaged appliance. • The device is equipped with special passive radiators that provide for a rich and natural sound even from a small space and function similarly to a subwoofer. -
Page 8: Device Description
DEVICE DESCRIPTION 2 Device description Description of the main unit SELECT • Turn for navigation in menu options. • Turn to fi ne tune the frequency in FM mode. • Press to confi rm a selection. • Skip to previous track. VOL control (Volume) / MUTE •... -
Page 9: Description Of The Remote Control
DEVICE DESCRIPTION Description of the remote control • Use the numeric keypad to enter numbers. 0 PROG/FAV (Program/Favourites) • Stop programming. • Showing the station list. • Storing a station manually OPEN/CLOSE • CD tray open/close. qs SHUFFLE/REPEAT (Random/Repeat playback) •... -
Page 10: Getting Started
GETTING STARTED 3 Getting Started Power supply connection Warning Warning • Prior powering the equipment on, check that the • Use of controls or adjustments or performance voltage in your electric installation matches the of procedures other than those specifi ed herein voltage on the equipment name plate. -
Page 11: Initial Settings
GETTING STARTED Turn the SELECT control knob to Initial settings select 12 or 24 hour format. • When the power is turned on for the Press SELECT to confi rm. fi rst time [Setup wizard] appears on A list of automatic updates will be the display panel. -
Page 12: Starting
GETTING STARTED • [Push Button]: select this option if your wireless router supports the WPS and PBC setup method. You will be prompted to press the connect button on your router; then press the SELECT knob to continue. • [Pin] (PIN code):select this option •... -
Page 13: Listening To Internet Radio
LISTENING TO INTERNET RADIO • [Last listened]: Switching to the last 4 Listening to internet radio received station. • [Station list]: tuning to any available This radio can play thousands of radio internet radio stations. stations and podcasts from around the •... -
Page 14: Select A Preset Internet Radio Station
LISTENING TO PODCASTS Turn the SELECT knob to select a 5 Listening to podcasts preset number. Press SELECT to confi rm the Press Source, then turn the selection. SELECT knob to select the [Podcasts] A [Preset stored] message will be mode. -
Page 15: Listening To Dab Radio
LISTENING TO DAB RADIO 6 Listening to DAB radio Turn the SELECT knob to select the preset number. Press SELECT to confi rm. DAB radio station presets A [Preset stored] message will be The fi rst time you select the DAB radio shown. -
Page 16: Displaying Dab Information
LISTENING TO DAB RADIO • [Prune invalid] (Delete invalid): Note remove all invalid stations from the station list. • If you do not press any button within 15 seconds, the menu will close. • [DRC] (Dynamic range compression): compression of the radio signal dynamic range in order to increase the volume of the quiet Displaying DAB information... -
Page 17: Listening To Fm Radio
LISTENING TO FM RADIO 7 Listening to FM radio • To delete a previously saved station, save a new station in its place. FM radio station presets Press Source, then turn the SELECT knob to select the [FM radio] Selecting a preset FM radio station mode. -
Page 18: Displaying Rds Information
USING THE SYSTEM SETTINGS MENU [Scan setting] 8 Using the system settings • [Strong stations only?] (Strong menu stations only?) – [YES]: search only for FM radio stations with a strong In the operating mode, press signal. open the menu. •... -
Page 19: Network Settings
USING THE SYSTEM SETTINGS MENU • [Update from Network]: time Network settings synchronization for internet radio stations. Select [System settings] > [Network]. • [No update]: disable time Turn the SELECT knob to select synchronization. an option or sub-option, then press •... -
Page 20: Display The Software Version
USING THE MAIN MENU • [Auto-check setting]: Select 9 Using the main menu whether to regularly check for new software versions. In the operating mode, press • [Check now]: Instant check for new open the main menu. software versions. Keep turning the SELECT knob to select [Main menu]. -
Page 21: Setting The Alarm
USING THE MAIN MENU • [DAB]: select the last DAB radio Setting the alarm station you listened to as the alarm clock source. Note • [FM]: select the last FM radio • You can set two alarms to go off at different station you listened to as the times. -
Page 22: Other Functions
• Enable Bluetooth on your Bluetooth side with the printed label is facing device and search for Bluetooth upwards. devices that can be paired. • Select [SMC 5700WDB] on your Press to close the disc tray. The playback will start device for pairing. -
Page 23: Charging Your Device
OTHER FUNCTIONS Charging your device With this micro music system, you can charge your external device, such as a mobile phone, MP3 player or other mobile device. Use a USB cable to connect the USB jack on this product to the USB port on your machine. -
Page 24: Technical Specifi Cations
TECHNICAL SPECIFICATIONS 11 Technical specifi cations Maximum power: 100W Powerful and impressive sound CD/MP3/CD-R/CD-RW playback Sound: Power output: 50W × 2 (impedance: 6Ω) Frequency response: 84Hz - 16kHz Total harmonic distortion: L/R ≤ 10% (1 kHz) Equalizer modes: Powerful, Clear, Bright, Warm, Balanced Internet radio: Easy connection via WiFi Searching for local stations... - Page 25 FAST ČR, a.s. hereby declares that the radio device type SMC 5700WDB conforms to the 2014/53/EU directive. The text, design and technical specifi cations may be changed without prior notice and we reserve the right to make these changes.
- Page 26 Data on presented documents differs from data on products. Cases when the claiming product cannot be indentified according to the presented documents (e.g. the serial number or the warranty seal has been damaged). Authorized service centers Visit www.sencor. for detailed information about authorized service centers.
Need help?
Do you have a question about the SMC 5700WDB and is the answer not in the manual?
Questions and answers