Table of Contents
Advertisement
Quick Links
SkyHub with SkyCamera Installation
SkyHub Componets
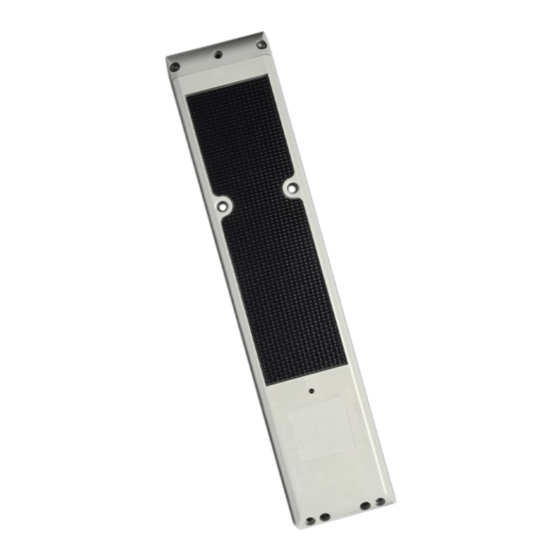
• SHB1000 SkyHub Tracking Device
• SkyHub Mounting Bracket
• 6, 10-32 Tamper Proof Screws
• SkyHub Short Shroud
• 6, 1/8 Inch sealing Blind Rivets
• 3M Primer 94 Ampoule
The SkyHub will be mounted to the exterior front wall of a Dry Van Trailer. The locations described
below are recommended for optimal communications with the SkyCam. The general dimensions
noted may be adjusted to avoid mounting on top of any logos or asset identification. For a Plate
Nose Trailer, the SkyHub will be mounted to the front wall horizontally, about 3 inches down from the
bottom of the top rail, and about 6 inches from the roadside edge with the connector on the left.
For a Sheet and Post Nose Trailer, the SkyHub will be mounted to the front wall vertically, about 3
inches down from the bottom of the top rail, and about 6 inches from the roadside edge with the
connector at the top.
SkyBitz SkyHub & SkyCamera Installation
Tools Required:
• Power Drill and 1/8 in Drill Bit
• 5/32 Inch Pin in Hex Tamper Proof Screwdriver
• Blind Rivet Tool
• 50/50 Isopropyl Alcohol/Water Solution
• Clean Rags
• Tape Measurer
SkyHub Mounting Location
1
Advertisement
Table of Contents

Summary of Contents for SkyBitz SkyHub SHB1000
- Page 1 For a Sheet and Post Nose Trailer, the SkyHub will be mounted to the front wall vertically, about 3 inches down from the bottom of the top rail, and about 6 inches from the roadside edge with the connector at the top. SkyBitz SkyHub & SkyCamera Installation...
- Page 2 • Orient the SkyHub with the connector on the left for a horizontal install, or with the connector at the top for a vertical install, and install it on the bracket • Using a hand driver, secure the SkyHub to the bracket with four, 10-32 tamper proof screws SkyBitz SkyHub & SkyCamera Installation...
- Page 3 Open the roadside door all the way to check for interference from the lock bar location. If the lock bars will hit the SkyCam, move the SkyCamera location forward until it clears the lock bars. SkyBitz SkyHub & SkyCamera Installation...
- Page 4 • Remove the SkyCamera install tool • Using the bracket as a template, drill the eight 3/16-inch rivet holes in the trailer wall • Install the eight 3/16-inch rivets SkyBitz SkyHub & SkyCamera Installation...
- Page 5 Changes or modifications not expressly approved by the party responsible for compliance could void the user’s authority to operate the equipment. This device meets the FCC requirements for RF exposure in public or uncontrolled environments (>20cm for MPE devices). SkyBitz SkyHub & SkyCamera Installation...
- Page 6 SkyBitz SkyHub & SkyCamera Installation...
Need help?
Do you have a question about the SkyHub SHB1000 and is the answer not in the manual?
Questions and answers