
Subscribe to Our Youtube Channel
Related Manuals for Bull 92008


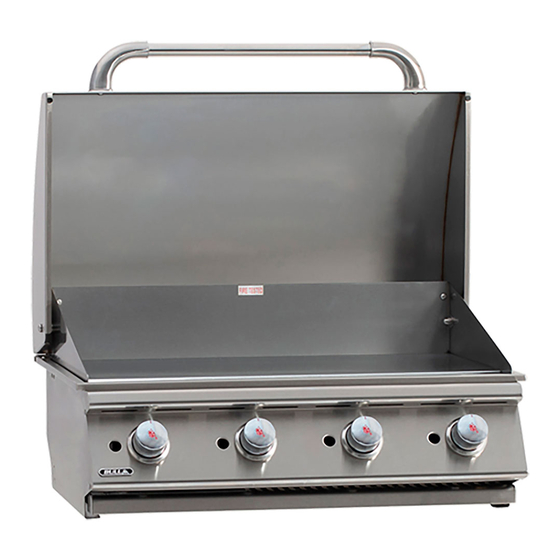
Summary of Contents for Bull 92008
- Page 1 BULL OUTDOOR PRODUCTS OWNERS MANUAL FOR 30” COMMERCIAL GRIDDLE MODELS 92008 LIQUID PROPANE (LP) 92009 NATURAL GAS (NG) PLEASE READ THE ENTIRE OWNERS MANUAL CAREFULLY AND RETAIN FOR FUTURE REF...
-
Page 2: Table Of Contents
We care about your safety, so please …. BE SURE YOUR GRIDDLE IS PROPERLY INSTALLED ASSEMBLED AND CARED FOR. FAILURE TO FOLLOW INSTRUCTIONS IN THIS MANUAL MAY RESULT IN SERIOUS BODILY INJURY AND/OR PROPERTY DAMAGE. IF YOU HAVE QUESTIONS CONCERNING ASSEMBLY OR OPERATION, CONSULT YOUR DEALER OR APPLIANCE SERVICE REPRESENTATIVE FOR ASSISTANCE. -
Page 3: Registering Your Griddle Locations Of Serial Number
This is where your Product Information Reference Card will come in handy for supplying necessary info needed by your Bull Authorized Dealer to assure you get the correct part(s) for your Griddle or additional accessories to keep your Griddle in top working condition. If you don’t have the card, you can still get the Griddle model number and type of gas hook up... -
Page 4: Replacement Parts List And Exploded Illustration
REPLACEMENT PARTS LIST & ILLUSTRATION MODELS # 92008 LP (LIQUID PROPANE) & # 92009 NG (NATURAL GAS) WARRANTY PERIOD REF# PARTS# DESCRIPTION (SHOWN IN YEARS) 92010 LID - FRONT 92011 LID - REAR 92012 INSERT ASSEMBLY Lifetime 92013 CONTROL PANEL... -
Page 5: Safety Instructions
SAFETY INSTRUCTIONS READ CAREFULLY BEFORE ASSEMBLY AND OPERATION OF YOUR GRIDDLE This gas griddle must be installed in accordance with local codes or, if in an area without local codes, with the latest edition of the National Fuel Gas Code ANSI Z223.1. In Canada, installation must conform to the standard CAN/ CGA 1-b149.1 and/or .2 (Installation Code for Gas Burning Appliances and Equipment) and any local codes. -
Page 6: Natural Gas Safety
SAFETY INSTRUCTIONS (CONTINUED) BEWARE OF SPIDERS CAUTION: BURNERS MUST BE INSPECTED AND CLEANED BEFORE FIRST USE. Spiders and small insects occasionally spin webs or make nests in the burners during warehousing, transit and/or after long periods of non- use. These webs can lead to a gas flow obstruction, which could result in a fire in and around the burner tubes. -
Page 7: Installation Instructions
5 inches from the bottom of the island enclosure to the top of the vent. 7) If not using Bull vents, the vents you use must meet ANSI Standard codes. 8) The upper vents must have openings that have a total free area of not less than 1 sq in per lb of stored fuel capacity per vent and the lower vents must have openings that have a total free area of not less than 1/2 sq in per lb of stored fuel capacity per vent. -
Page 8: Natural Gas Connections
NATURAL GAS CONNECTIONS IMPORTANT: Bull Outdoor Products does not recommend the use of any quick connect fittings or lines to the unit. Use of these types of fittings or lines could cause low gas flow and greatly reduce the performance of the unit. -
Page 9: Propane Gas Connections
PROPANE GAS CONNECTIONS CAUTION: Changing the gas tanks must be done away from any source of ignition. LP Gas Tank must be marked in accordance with the Specifications for LP Gas Cylinders, Spheres and Tubes for Transportation of Dangerous Goods and Commission LP Gas Tank connection device is compatible with outdoor cooking appliances. -
Page 10: Outdoor Propane Gas Griddle Installation Specifications
INSTALLATION INSTRUCTIONS (CONTINUED) OUTDOOR NATURAL GAS GRIDDLE INSTALLATION SPECIFICATIONS 1) Vents must be provided for combustion air and ventilation on both sides of built-in cabinet. 2) When choosing a location for your gas griddle keep in mind that it should never be located under any overhead combustible construction. -
Page 11: Lp Gas Tank Retention
6 INCHES MINIMUM BETWEEN TANK AND SURROUNDING WALLS REFERENCE PROPANE TANK RETENTION SYSTEM SHOWING BULL PART NO. 16674 USING 8 SCREWS WITH LOCK WASHERS AND OR LOCK NUTS FOR ATTACHMENT TO ISLAND BASE PROPANE TANK HOLDER RETENTION BOLT TURN CLOCKWISE TO SECURE TANK... -
Page 12: Burner Removal, Inspection And Cleaning
REMOVAL, INSPECTION AND CLEANING OF BURNERS AND GAS VALVES CAUTION – Always turn off the gas supply prior to clearing Burners. Following these procedures on a timely basis, will keep the Burners and Gas Valves working properly with minimum effort. INSTRUCTIONS FOR BURNER REMOVAL: (1) Remove these screws to detach and lift the Front Lid off the Griddle Insert. -
Page 13: Burner Shutter Clip Inspection / Adjustment
Burners. You’ll need to remove the cotter pin from cast peg before carefully lifting burner from the gas valve orifice (See Drawing and Details) or using this link you can see ‘How to remove Cotter Pins from a Bull Grill’ on-line at https://www.youtube.com/watch?v=yhlJR5svLSA... -
Page 14: Burner Replacement Into Insert
INSPECTION AND CLEANING OF BURNERS AND GAS VALVES ORIFICES CAUTION – Always turn off the gas supply prior to clearing Burners. BURNER REPLACEMENT INTO INSERT (1) Replace burners back into the insert assembly. There is no need to replace the cotter pin back into the cast peg, it is for shipping purposes only. -
Page 15: Ignitor / Electrode Check
BURNER IGNITOR ELECTRODE CHECK With all control knobs set to “OFF”, check each igniter individually for presence of spark at electrode. In turn, push each control knob in fully and turn slowly about a 1/4 turn to the left (counter-clockwise) until a click is heard; the trigger hitting the strike block should produce a blue spark at the electrode tip. -
Page 16: Flex Line And Regulator Placement
FLEX LINE AND REGULATOR REPLACEMENT Due to packaging purpose, the regulator will be assembled horizontally in the carton. It is imperative that the regulator carefully be turned pointing downward before use. FLEX LINE SHIPPED HORIZONTAI.LY FLEX LINE MUST BE POINTING DOWN NOW YOUR GAS GRIDDLE IS READY TO USE! Before first use and at the beginning of each season: (1) Please read Safety, Lighting and Operating Instructions carefully. -
Page 17: Lighting Procedures
BURNER LIGHTING PROCEDURE Become familiar with the safety guidelines at the front of the manual. NEVER SMOKE WHILE LIGHTING GRIDDLE OR CHECKING GAS SUPPLY CONNECTIONS! If your griddle fuel source is a LP gas cylinder, check to see that cylinder is filled. Check that the end of each burner tube is properly located over each valve orifice. -
Page 18: Cleaning & Maintenance
These chemicals combined with heat and humidity greatly increase the corrosiveness of these chemicals. Regular cleaning is the best way to prevent corrosion and add years of enjoyment to your Bull stainless steel products. -
Page 19: Troubleshooting
TROUBLESHOOTING IF GRIDDLE FAILS TO OPERATE PROPERLY (1) Turn off gas at source, turn control knobs to “OFF”, and wait five minutes before trying again. (2) Check gas supply/connections. (3) Repeat lighting procedure. If griddle still fails to operate properly TURN “OFF”... -
Page 20: Limited Warranty
MAY NOT APPLY TO YOU. WHO MAY USE THIS WARRANTY? BULL OUTDOOR PRODUCTS, INC. located at address 1011 East Pine St. Lodi, CA. 95240 ("we") extend this limited warranty only to the consumer who originally purchased the product ("you") at the original site of delivery or installation. It does not extend to any subsequent owner or other transferee of the product. - Page 21 Grill Warranty Periods The following parts are covered for one year on all our current gas grill models: The lid, control panel, grease tray, bezels, knobs, temperature gauge, valves, regulator, flex tubes, rotisserie burner, transformer, and all components of the lighting system. The following parts are covered for three years on all our current gas grill models: The manifold, handle end caps, flame tamers, heat shields, and warming rack.
- Page 22 Grill Accessories and Grill Covers do not include a warranty period. WHAT DOES THIS WARRANTY NOT COVER? This limited warranty does not cover any damage due to: (a) transportation; (b) storage; (c) improper installation or use; (d) use on improper fuel/gas supply; (e) failure to follow the product instructions or to perform any preventive maintenance;...
Need help?
Do you have a question about the 92008 and is the answer not in the manual?
Questions and answers