
Related Manuals for AIBOOSTPRO A12

Summary of Contents for AIBOOSTPRO A12
- Page 1 WIFI IP CAMERA CÁMARA IP WIFI A Quick Manual for Android and iOS Devices Manual de Uso Rápido para Dispositivos Android e iOS...
-
Page 2: Product List
Product List: After you open your product, please check that the product and accessories resemble the images below:... -
Page 3: Contenido Del Paquete
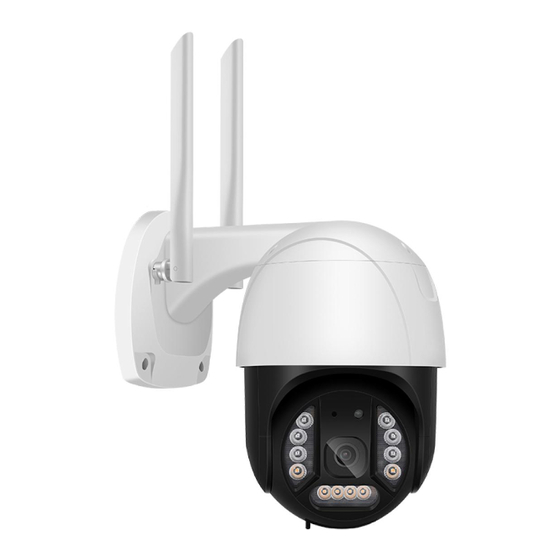
Contenido del Paquete: Cuando abra el paquete, por favor compruebe que el producto y los accesorios coinciden con las imágenes listadas a continuación: PTZ Camera DC12V/2A Cámara PTZ Adapter Adaptador DC12V/2A Waterpprof Cap Screw Set Set de Tornillos Cubierta a Prueba de Agua 32G Micro SD Card User Manual... - Page 4 Tarjeta Micro SD de 32G Manual de Usuario...
-
Page 5: Product Features
Product Features:... -
Page 6: Características Del Producto
Características del Producto: 原文 译文(其他同) WiFi WiFi Micrófono Microphone White LEDs LEDs Blancos... - Page 7 Ranura para Tarjeta TF TFCardSlot IR.Sensor Sensor Infrarrojo Array LEDs LEDs de Matriz Lens Lente Power Alimentación...
-
Page 8: Operation
Operation: 1 - Download the App... - Page 9 Funcionamiento: 1 - Descargue la App 2 - Turn on the camera Install the TF card and connect the camera to the power outlet. 2 - Encienda la cámara Instale la tarjeta TF y conecte la cámara a una salida de alimentación.
- Page 10 3 - Camera Configuration Option 1 - Wireless Network Configuration: 3 - Configuración de la Cámara Opción 1 - Configuración para la Red Inalámbrica: 1) Open the App and click ‘Login’. If you do 2) Click the '+' symbol in the top right-hand not have an account, you will need to register corner.
- Page 11 Option 1 Continued... Opción 1 Continuación... 2) Click ‘add device’. Choose your Wifi router and enter the router password. 2)Cliquee “add device”. Seleccione su router Wifi y ponga la contraseña del router.
- Page 12 Operation:...
- Page 13 Funcionamiento: Option 1 Continued... Opción 1 Continuación... 4) After you hear 'Connect Successfully', 5) Click 'confirm' and enter a Username. you will be asked to enter a password. 4) Cuando oigas “Connect 5) Haga clic en “confirm” e introduzca Successfully”, requerirá...
- Page 14 Option 1 Continued... Opción 1 Continuación... 5) Click 'Save' and you will be brought to a video preview. Your connection is now successful. 5) Cliquee “Save” y será llevado a una vista previa del vídeo. Su conexión tuvo éxito.
- Page 15 3 - Camera Configuration 3 - Configuración de la Cámara Option 2 - Wired Network Configuration: Opción 2 - Configuración de la Red Cableada: 1) After logging in, click the '+' icon in the top right hand corner of your device. Select the third option Add device in the same WI_AN'.
- Page 16 4) You can click on the product icon to change settings. Puede hacer clic en el icono del producto para cambiar los ajustes.
- Page 17 FAQ: Q - How do you save videos on the camera? Q - ¿Cómo guardas los vídeos en la cámara? A - The camera supports FAT32G format Class6, Classic, TF Card with a maximum memory of 128G. When the memory on the TF card is full, it will delete the oldest video automatically and loop recording.
- Page 18 Notice: Whilst using the camera, please amend the user password for your own security. Please ensure when installing the equipment, your environment isdust and damp free.
- Page 19 Model Number: Country of Origin: Made in China Please retain this information for future reference. AIBOOSTPRO Soporte al Cliente: Correo Electrónico:support@aiboostpro.com Tel :+1(707)520-0808 Número del Modelo: País de Origen: Fabricado en China Por favor, guarde esta información para futuras referencias.
Need help?
Do you have a question about the A12 and is the answer not in the manual?
Questions and answers