
Subscribe to Our Youtube Channel
Related Manuals for Caltta PR900

Summary of Contents for Caltta PR900
- Page 1 ▲ QUICK REFERENCE GUIDE PR900 DIGITAL REPEATER All rights reserved.No spreading abroad without permission of Caltta.
- Page 2 ▲ PR900 Edition Date Author Reviewer Remarks V1.0 2019/3/20 All rights reserved.No spreading abroad without permission of Caltta.
- Page 3 The copyright of this document belongs to Caltta Technologies Co.,Ltd. Text contains proprietary information owned by Caltta Technologies Co.,Ltd., without the written permission of Caltta Technologies Co.,Ltd., any unit or individual shall not use or leak any document and pictures, this document contains tables, picture, data and other information.
-
Page 4: Table Of Contents
4 CPS-Menu..........................11 4.1 File 11 4.2 Model..........................12 4.3 Program..........................13 4.4 Tools..........................15 4.5 View..........................16 5 Common Setting........................16 5.1 Common Setting-General Setting..................16 5.1.1 Common Setting-General Setting-Common Setting........16 All rights reserved.No spreading abroad without permission of Caltta. - Page 5 6.1.5 Conventional Setting-Multi CTC/CDC............32 6.1.6 Conventional Setting-Contact................32 6.1.7 Conventional Setting-Network-Network............33 6.1.8 Conventional Setting-Network- Local Access Management......35 6.1.9 Conventional Setting-Network-Multisite Access Management....... 35 6.1.10 Conventional Setting-Network-Application Programming Interface.... 35 All rights reserved.No spreading abroad without permission of Caltta.
-
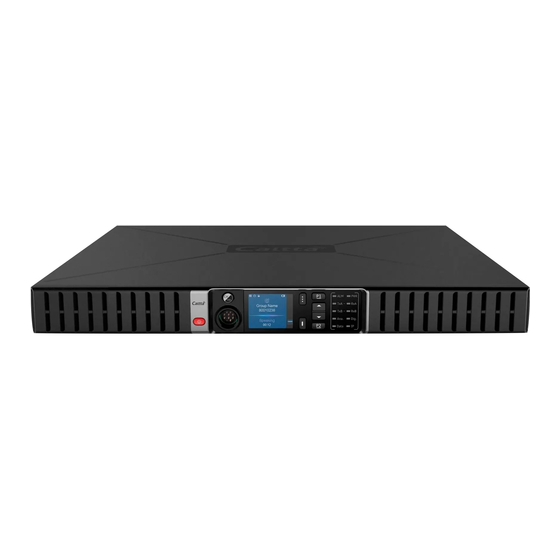
Page 6: Unpacking And Checking
Channel/Volume Button 13.6V DC Connector USB Connector Function Button Network Connector(IP) Front Panel LED Indicators MAP Connector Power ON/OFF Button Rx Connector MMP Connector Tx Connector AC Power Indicators GND Screw All rights reserved.No spreading abroad without permission of Caltta. -
Page 7: Led Indicators
Analog mode indicator Dig. Digital mode indicator Data Repeater signal indicator IP interconnection status indication 2.2 MMP Connector Indicators Description MMP10_Mic MMP10_Spk speaker MMP10_PTT External PTT,low level is effective MMP10_Hook Hang up signal All rights reserved.No spreading abroad without permission of Caltta. -
Page 8: Map Connector
Transmit audio input input for time slot 2 in digital mode. Undefined VBUS +5V DC power,max current 500mA USB_D+ USB_D+ signal USB_D- USB_D- signal USB_GND USB GND TX_UART_TXD TX UART TXD All rights reserved.No spreading abroad without permission of Caltta. -
Page 9: Ac Cable Connector
Press I to power on the AC power.Press O to power off the AC power. 2.5 DC Connector 2.6 Power ON/OFF Button Power ON/OFF the repeater 2.7 Operation Button Indicators Description Indicators Description All rights reserved.No spreading abroad without permission of Caltta. -
Page 10: Operations
“PWR” indicator lights up, and the LCD will enter the operation interface after the system is working normally. When the repeater is turned on, press (power button) to turn off the repeater . All rights reserved.No spreading abroad without permission of Caltta. -
Page 11: Voice And Data Transfer
This function opens a data file from the hard disk Open or other data media, for you to modify the file or Ctrl+O write it to your Repeater. All rights reserved.No spreading abroad without permission of Caltta. -
Page 12: Model
This function exits the CPS. 4.2 Model Model Information: This function shows the models and the corresponding frequency bands [MHz] in the configuration file. You can select a model as needed. All rights reserved.No spreading abroad without permission of Caltta. -
Page 13: Program
Repeater. After powering on your Repeater, connect it to a Clone PC and select Program > Clone from the menu. The Clone dialog box is displayed, asking you to select the target All rights reserved.No spreading abroad without permission of Caltta. - Page 14 After programming data is written completely, a message box is displayed, showing that data is written successfully. Your radio will be restarted automatically and then use the new configuration data. All rights reserved.No spreading abroad without permission of Caltta.
-
Page 15: Tools
Function Control Import fcla application file and fclc registration file for register to Authorization CPS.Through application, register and write on the function Registered control of the terminal for authorization. All rights reserved.No spreading abroad without permission of Caltta. -
Page 16: View
The repeater alias can be viewed and set via menu by users. The maximum length is 16 characters. Last Programmed Date This option indicates the last date on which the radio was programmed. All rights reserved.No spreading abroad without permission of Caltta. - Page 17 During a phone call, the Repeat Request Priority is set to First Come First Send; during a phone call or there is a phone request, the Path Priority is set to Repeat Request; All rights reserved.No spreading abroad without permission of Caltta.
- Page 18 The PTT signal is classified into Repeat Request and PTT Input according to the signal source. The Repeat Request signal is the audio signal that is being repeated by the All rights reserved.No spreading abroad without permission of Caltta.
- Page 19 This parameter decides the interval between the first repeating and the retrial made by the repeater for the same voice service. Within the interval, the repeater will be prohibited repeating the same voice service except other voice services. Default: 5s Range: 3-60s All rights reserved.No spreading abroad without permission of Caltta.
-
Page 20: Common Setting-General Setting-Digital Setting
Private and Group Call Hang Time to reserve the channel long enough to receive an emergency response. Range: 0.0~30.0s Default: 4s Step: 0.5s TX Preamble Duration All rights reserved.No spreading abroad without permission of Caltta. - Page 21 IDLE status and waits for the next activation. Range: Always/4.0~30.0s Default: 4s Step: 0.5s Vocoder This parameters sets the vocoder of the radio. Options: AMBE++ and NVOC. Default: NVOC. All rights reserved.No spreading abroad without permission of Caltta.
-
Page 22: Common Setting-General Setting-Analog Setting
Squelch Normal Level This function sets the squelch level of output Repeater. It can adjust the squelch enabling threshold of received signals. The value range of this parameter is variable, and All rights reserved.No spreading abroad without permission of Caltta. -
Page 23: Common Setting-Ui Setting
Range: 1-8 or Current (meaning that the volume is adjusted through the Volume button on your radio. Default: 1. Alarm Setting Local Alarm On/Off To enable or disable the local alarm function when the repeater abnormal. Over Temperature All rights reserved.No spreading abroad without permission of Caltta. - Page 24 Fan Control Setting Fan Control Mode To Select fan control mode Always On: the fan keep on always. Temperature Control:the fan on or off depend on the repeater current work temperature. All rights reserved.No spreading abroad without permission of Caltta.
-
Page 25: Common Setting-Ui Setting-Backlight
This parameter sets the minimum duration that you shall press and hold a button to trigger the long press function. Options: 0.5 s to 5.0 s. Step: 0.5 s. Default: 2.0 s. P1 Short All rights reserved.No spreading abroad without permission of Caltta. - Page 26 To turn on or off the speaker on the Analog mode only On/Off front panel of the repeater. To turn on or off the local alarm Local Alarm On/Off function when device abnormal. All rights reserved.No spreading abroad without permission of Caltta.
-
Page 27: Common Setting-Ui Setting-Menu
This parameter sets whether to display the Language menu on the radio. Default: enabled. Backlight This parameter sets whether to display the Backlight menu on the radio. Default: enabled. All rights reserved.No spreading abroad without permission of Caltta. -
Page 28: Conventional Setting
CPS writing operation on your terminal. You can only restore all configuration data of the radio to default factory settings to solve the CPS writing problem. Range: 1-255 (step: 1) or Infinite. Default: Infinite. Read Password All rights reserved.No spreading abroad without permission of Caltta. -
Page 29: Conventional Setting-Zone
Color code is used to identify a system. User who wish to communicate with each other are assigned with the same color code. Range:0~15. Slot This option is used for local PTT to transmit signals. IP Multi-site Connect All rights reserved.No spreading abroad without permission of Caltta. -
Page 30: Conventional Setting-Channel-Analog Channel
The pre-emphasis function filters transmitted signals, and the de-emphasis function filters received signals. Multi CTC/CDC This option allows users to apply the CTCSS/CDCSS table as the condition during decoding. CTCSS Tail Revert Option All rights reserved.No spreading abroad without permission of Caltta. - Page 31 This option allows users to set the squelch level for the current channel. Transmit Frequency[MHz] This option allows users to set a frequency for the current channel to transmit signals. Range:136-174MHz. Power Level All rights reserved.No spreading abroad without permission of Caltta.
-
Page 32: Conventional Setting-Multi Ctc/Cdc
Adds new members to the contact list. Insert Inserts a new member to the specified position in the contact list. Delete Deletes the specified member from the contact list. All rights reserved.No spreading abroad without permission of Caltta. -
Page 33: Conventional Setting-Network-Network
This option allows users to set the IP address of the DNS server. Via the DNS server IP, the slave can find the master. Moreover, the repeater SIP service can also be carried out. IP Multi-site Connect Setting Repeater Type All rights reserved.No spreading abroad without permission of Caltta. - Page 34 IP Multi-site Network can resolve this domain name to the corresponding IP address of the master, even though this IP address may change. Remote Upgrade/Data Writing Remote Upgrade UDP Port All rights reserved.No spreading abroad without permission of Caltta.
-
Page 35: Conventional Setting-Network- Local Access Management
AIS standard is able to communicate smoothly with the repeater. Server IP This option allows users to set the IP address of the dispatcher server. Password All rights reserved.No spreading abroad without permission of Caltta. - Page 36 This option allows users to set the interval between the repeater and the dispatcher server. Repeater Periodical Register This option allows users to set the interval for the repeater registering to the dispatcher server. All rights reserved.No spreading abroad without permission of Caltta.
- Page 37 FCC Warning: Any Changes or modifications not expressly approved by the party responsible for compliance could void the user's authority to operate the equipment. This device complies with part 15 of the FCC Rules. Operation is subject to the following two conditions: (1) This device may not cause harmful interference, and (2) this device must accept any interference received, including interference that may cause undesired operation.
Need help?
Do you have a question about the PR900 and is the answer not in the manual?
Questions and answers