
Related Manuals for Technics SA-C600


Summary of Contents for Technics SA-C600
- Page 1 Basic Owner’s Manual Network CD Receiver Manuel d’utilisation Fonctions de base Récepteur réseau avec lecteur CD SA-C600...
- Page 2 Music is borderless and timeless, touching people’s hearts across cultures and generations. Each day the discovery of a truly emotive experience from an unencountered sound awaits. Let us take you on your journey to rediscover music. Sans frontières, la musique est aussi intemporelle, touchant le coeur des gens en traversant les cultures et les générations.
- Page 3 Delivering the Ultimate Emotive Musical Experience to All At Technics we understand that the listening experience is not purely about technology but the magical and emotional relationship between people and music. We want people to experience music as it was originally intended and enable them to feel the emotional impact that enthuses and delights them.
-
Page 4: Table Of Contents
A more detailed owner’s manual is available in “Owner’s Manual” (PDF format). • To read it, download it from the website. www.technics.com/support/downloads/oi/SA-C600.html • You will need Adobe Reader to browse or print “Owner’s Manual” (PDF format). You can download and install a version of Adobe Reader that you can use with your OS from the following website. -
Page 5: Important Safety Instructions
IMPORTANT SAFETY INSTRUCTIONS Read these operating instructions carefully before AC power supply cord using the unit. Follow the safety instructions on the • The power plug is the disconnecting device. unit and the applicable safety instructions listed below. Install this unit so that the power plug can be Keep these operating instructions handy for future unplugged from the socket outlet immediately. - Page 6 This symbol is only valid in the European interference that may cause undesired operation. Union. FCC ID: ACJ-SA-C600 If you wish to discard this product, IC: 216A-SAC600 please contact your local authorities or This transmitter must not be co-located or operated dealer and ask for the correct method of in conjunction with any other antenna or transmitter.
-
Page 7: Installation
Installation To dispose of or transfer this Installation unit Turn off all the equipment before connection and read the appropriate operating instructions. Before disposing of or transferring this unit, be Be sure to raise this unit when moving, and do sure to erase all the recorded information by not drag this unit. -
Page 8: Control Reference Guide
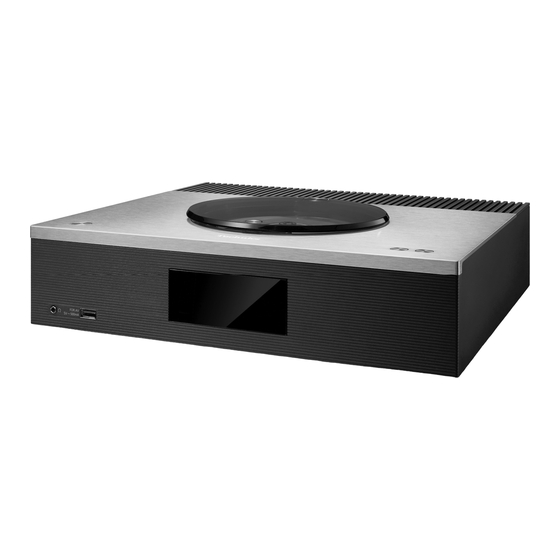
Control reference guide This unit (front) 01 Standby/on switch ( 06 Power indicator • Press to switch the unit from on to standby • Blue: The unit is on. mode or vice versa. In standby mode, the • Red: The unit is in standby mode with the unit is still consuming a small amount of network standby function. - Page 9 This unit (rear) 10 FM ANT terminal 18 Subwoofer output terminal ( 17) 19 Speaker output terminals 11 PHONO EARTH terminal ( 11) • For connecting the ground wire of a 20 Product identification marking turntable. • The model number is indicated. 12 Analog audio input terminals (PHONO) 21 AC IN terminal ( •...
- Page 10 Control reference guide (Continued) Remote control 01 [ ]: Standby/on switch • Press to switch the unit from on to standby mode or vice versa. In standby mode, the unit is still consuming a small amount of power. 02 [CD]/[RADIO]/[ -PAIRING]: Select the device to be operated (...
-
Page 11: Connections
Connections FM antenna connection Speaker connection Adhesive tape FM ANT terminal (not supplied) Insert the antenna plug to be connected all the way in. FM indoor antenna (supplied) • Tape the antenna to a wall or column at the position with the least amount of interference. Speaker cable Speaker cable (not supplied) - Page 12 Connections (Continued) AC power supply cord DO NOT connection Connect only after all other connections are completed. AC IN terminal • Wire the polarity (+/-) of the terminals correctly. Not doing so may adversely affect stereo effects or cause malfunction. •...
-
Page 13: Network Settings
• If “Firmware update is available” is displayed after the network connection is set up, the firmware for this unit is available. - For the update information, refer to the following website. www.technics.com/support/firmware/ ■ Preparation (Using Apple Home app) - Page 14 (Using Apple Home app) ( 15) 5 Open Apple Home app and follow Note the on-screen instructions to add • This unit will be displayed as “Technics- product to Home. ( 15) **** SA-C600- ” if the device name is not set.
- Page 15 Try this method again from the setup menu. If “Fail” is still displayed, try other methods. 2 Press [OK] to exit the setting. Note • This unit will be displayed as “Technics- **** SA-C600- ” if the device name is not set. **** (“...
-
Page 16: Playing Back Cds
Playing back CDs - When opening and closing the top cover ■ Repeat Playback/Random repeat playback Press [MENU]. Press [ ], [ ] repeatedly to select “Repeat”/“Random” and then press [OK]. Lens Press [ ], [ ] repeatedly to an item and then press [OK]. -
Page 17: Listening To Fm Radio
Listening to FM Radio ■ To listen to a preset FM channel Storing FM stations Press [MENU]. You can preset up to 30 channels for FM. Press [ ], [ ] repeatedly to select “Tuning • A station previously stored is overwritten Mode”... -
Page 18: Using Bluetooth
**** **** ” (“ ” stands device for a character that is unique to each set.) may be displayed before “Technics- 1 Press [MENU]. SA-C600- **** ” is displayed. 2 Press [ ], [ ] repeatedly to select • If the device name is set on the Google Home app, the set name is displayed. -
Page 19: Licenses
Licenses FLAC Decoder Copyright (C) 2000, 2001, 2002, 2003, 2004, 2005, 2006, 2007, 2008, 2009 Josh Coalson Redistribution and use in source and binary The Wi-Fi CERTIFIED™ Logo is a certification forms, with or without modification, are mark of Wi-Fi Alliance ®... -
Page 20: Specifications
Specifications ■ ■ GENERAL DISC SECTION Power supply AC 120 V, 60 Hz Playable Disc Power consumption 46 W CD, CD-R, CD-RW (8 cm (3”) or 12 cm Power consumption (5”)) in standby mode Pickup (Network Standby 0.15 W Wavelength 790 nm (CD) Off &... - Page 21 ■ ■ FORMAT SECTION Wi-Fi SECTION USB-A IEEE802.11a / b / g / n / Standard USB 2.0 High-speed USB Standard 2.4 GHz band USB Mass Storage class Frequency Band 5 GHz band USB-B WPA2™, USB 2.0 high-speed Security Mixed mode WPA2™/ USB Standard WPA™...
-
Page 22: Others
Others Limited Warranty (ONLY FOR U.S.A.) Technics Products – Limited Warranty UNDER “LIMITED WARRANTY COVERAGE”. Limited Warranty Coverage THE WARRANTOR IS NOT LIABLE FOR INCIDENTAL OR (For USA Only) CONSEQUENTIAL DAMAGES RESULTING FROM THE USE OF If your product does not work properly because of a defect in... - Page 23 3 (three) years parts and labour This warranty is given only to the original purchaser, or the person for whom it was purchased as a gift, of a Technics brand product mentioned above sold by an authorized Panasonic dealer in Canada and purchased and used in Canada, which product was not sold “as is”, and which product was delivered to you in new condition in the original packaging.
- Page 24 Un manuel d’utilisation plus approfondi est disponible dans “Manuel d’utilisation” (format PDF). • Pour le lire, téléchargez-le depuis le site Web. www.technics.com/support/downloads/oi/SA-C600.html • Adobe Reader est nécessaire pour parcourir ou imprimer le “Manuel d’utilisation” (format PDF). Vous pouvez télécharger et installer une version d’Adobe Reader utilisable avec votre système d’exploitation depuis le site Web suivant.
-
Page 25: Importantes Mises En Garde
IMPORTANTES MISES EN GARDE Avant d’utiliser l’appareil, lire attentivement - Ne laissez aucun objet en métal tomber à l’intérieur les instructions qui suivent. Se conformer tout de cet appareil. particulièrement aux avertissements inscrits sur - Ne posez pas d’objets lourds sur cet appareil. l’appareil et aux consignes de sécurité... - Page 26 - Ne mélangez pas les anciennes piles avec les piles d’en compromettre le fonctionnement. neuves ou différents types de piles. FCC ID : ACJ-SA-C600 • Pour jeter les piles, veuillez contacter les autorités IC : 216A-SAC600 locales ou votre revendeur afin de connaître la Cet émetteur ne doit pas être placé...
-
Page 27: Installation
Installation Mise au rebut ou transfert de Installation l’appareil Avant de brancher, mettez tout l’équipement hors marche et lisez les instructions d’utilisation Avant de mettre l’appareil au rebut ou d’en correspondantes. Lors d’un déplacement, transférer la propriété, veillez à effacer toutes soulevez cet appareil et ne le faites pas glisser. -
Page 28: Guide De Référence
Guide de référence Cette unité (avant) 01 Interrupteur attente/marche ( 06 Voyant d’alimentation • Appuyez sur cet interrupteur pour • Bleu : L’appareil est en marche. commuter l’appareil du mode d’attente au • Rouge : L’appareil est mise en mode d’attente mode de marche et vice versa. - Page 29 Cette unité (arrière) 10 Borne d’antenne FM 18 Borne de sortie d’enceinte d’extrêmes- graves (17) 19 Bornes de sortie d’enceinte 11 Borne de mise à la terre PHONO EARTH (11) • Pour la connexion du fil de terre d’une platine tourne-disque. 20 Plaque signalétique 12 Bornes d’entrée audio analogique •...
- Page 30 Guide de référence (suite) 01 Interrupteur d’attente/marche [ Télécommande • Appuyez sur cet interrupteur pour commuter l’appareil du mode d’attente au mode de marche et vice versa. En mode d’attente, l’appareil continue de consommer une petite quantité de courant. 02 Touche de sélection [CD]/[RADIO]/[ -PAIRING] : Pour sélectionner l’appareil à...
-
Page 31: Connexions
Connexions Connexion de l’antenne FM Connexion des enceintes Ruban adhésif Borne d’antenne FM (non fourni) Insérez à fond la fiche d’antenne à connecter. Antenne FM intérieure (fournie) • Fixez l’antenne à l’aide de ruban adhésif sur un mur ou une colonne à l’emplacement avec le moins d’interférences. - Page 32 Connexions (suite) Connexion du cordon INTERDIT d’alimentation Branchez le cordon d’alimentation après que tous les autres raccordements sont complétés. Prise d’alimentation c.a. • Câblez correctement la polarité (+/-) des bornes. Sinon, cela peut nuire aux effets stéréo ou causer des dysfonctionnements. •...
-
Page 33: Configuration Réseau
• Si “Une mise à jour du micrologiciel est disponible” est affiché après la configuration de la connexion réseau, le micrologiciel de cette unité est disponible. - Pour obtenir des informations sur la mise à jour, référez-vous au site Internet suivant. www.technics.com/support/firmware/ ■ Préparatifs (Utilisation de l’application Domicile d’Apple) - Page 34 (Utilisation de l’application Domicile d’Apple) (15) 5 Ouvrez l’application Domicile d’Apple Nota et suivez les instructions à l’écran • Cet appareil sera affiché sous “Technics- pour ajouter un accessoire à Mon **** SA-C600- ” si le nom du périphérique domicile. (15) **** n’est pas paramétré.
- Page 35 Nota Paramétrage du réseau depuis le • Cet appareil sera affiché sous “Technics- menu de configuration SA-C600- **** ” si le nom du périphérique **** n’est pas paramétré. (“ ” représente des 1 Appuyez sur [>SELECT<] pour caractères uniques pour chaque appareil.) sélectionner “Chromecast built-in”.
-
Page 36: Lecture Des Cd
Lecture des CD - Lors de la sélection de “CD” comme source d’entrée - Lors de l’ouverture et de la fermeture du couvercle ■ Lecture en reprise / Lecture en reprise aléatoire Appuyez sur [MENU]. Appuyez plusieurs fois sur [ ], [ ] pour sélectionner “Répéter”/“Aléatoire”, puis appuyez sur [OK]. -
Page 37: Écoute De La Radio Fm
Écoute de la radio FM ■ Écoute d’un canal FM préréglé Mémorisation de stations FM Appuyez sur [MENU]. Appuyez à répétition sur [ ], [ ] pour Vous pouvez prérégler jusqu’à 30 canaux en FM. sélectionner “Mode syntonisat.”, puis • Une station préréglée est écrasée lorsqu’une appuyez sur [OK]. -
Page 38: Utilisation De Bluetooth
Écoute de la musique stockée sur un périphérique Bluetooth ® Appareil Bluetooth ® 1 Appuyez sur [ -PAIRING]. • “Prêt” ou “Pairage” s’affiche à l’écran. Couplage d’un périphérique 2 Sélectionnez “Technics-SA-C600- ” **** Bluetooth ® à partir du menu de l’appareil Bluetooth ®... - Page 39 Licenses Décodeur FLAC Copyright (C) 2000, 2001, 2002, 2003, 2004, 2005, 2006, 2007, 2008, 2009 Josh Coalson La redistribution et l’emploi sous formes Le logo Wi-Fi CERTIFIED™ est une marque de source et binaire, avec ou sans modification, certification de Wi-Fi Alliance ®...
- Page 40 Spécifications ■ ■ DONNÉES GÉNÉRALES SECTION DISQUE Alimentation 120 V c.a./60 Hz Disque lisible Consommation 46 W CD, CD-R, CD-RW (8 cm (3 po) ou Consommation 12 cm (5 po)) électrique en veille Bloc de lecture (veille réseau hors 0,15 W Longueur d’onde 790 nm (CD) marche et pas...
- Page 41 ■ ■ SECTION FORMAT SECTION Wi-Fi USB-A IEEE802.11a / b / g / n / Norme USB 2.0 grande vistesse Norme USB Bande 2,4 GHz Mémoire de masse USB Bande de fréquence Bande 5 GHz USB-B WPA2™, Mode mixte Sécurité USB 2.0 grande vitesse WPA2™/WPA™...
- Page 42 Trois (3) ans, pièces et main-d’oeuvre La présente garantie n’est fournie qu’à l’acheteur original d’un des produits de marque Technics indiqués plus haut, ou à la personne l’ayant reçu en cadeau, vendu par un détaillant Panasonic agréé au Canada et utilisé au Canada. Le produit ne doit pas avoir été...
- Page 44 Panasonic Corporation of North America Panasonic Canada Inc. Two Riverfront Plaza, Newark, NJ 07102-5490 5770 Ambler Drive, http://www.panasonic.com Mississauga, Ontario, L4W 2T3 www.panasonic.com En Cf © Panasonic Corporation 2021 TQBM0764 Printed in Malaysia Imprimé en Malaisie M1221YY0...
Need help?
Do you have a question about the SA-C600 and is the answer not in the manual?
Questions and answers