Table of Contents
Advertisement
Quick Links
No: 341305 2/21
Catalog Number(s) • Numéro(s) de Catalogue • Les Numéros de Catalogue: WNRL10
Country of Origin: Made in China • Pays d'origine: Fabriqué en Chine • País de origen: Hecho en China
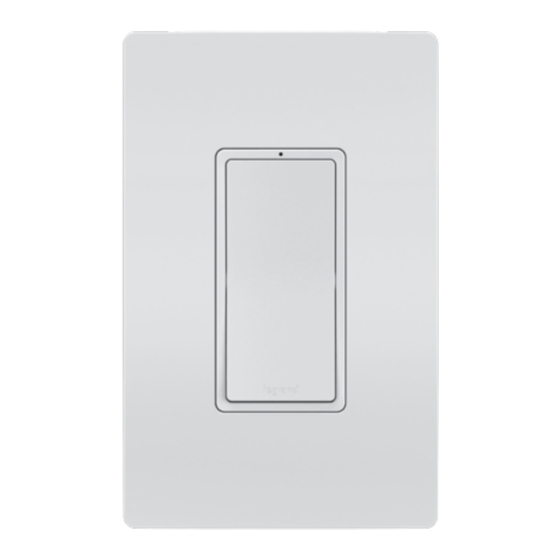
WNRL10
radiant
Smart Switch
®
BEFORE YOU START
Review this guide in its entirety. Consult an electrician with any questions or
if you are unsure of your abilities.
Warning: Incorrect installation could result in death, serious injury, and/or
damage to your home or devices.
Caution: To reduce the risk of injury and/or overheating and damage to
other equipment:
• For dry, indoor use only.
• Do not use to power medical equipment – not
suitable as a disconnecting means.
• Do not use with loads exceeding the device
load rating.
• Connect the smart switch to a 120 VAC, 60 Hz power source ONLY.
• Always use copper wire to install the smart switch & follow all applicable
local & national electrical codes.
WHAT YOU NEED
Required:
• Phillips-head screwdriver
• Flat blade screwdriver
You May Also Need:
Voltage tester, pliers, wire cutter, wire stripper, electrical tape, flashlight,
wiring leads (included), and wire nuts (included).
INSTALLATION & SETUP
1. Turn off power to device at circuit breaker
Flip existing light switch multiple times to confirm power is off.
NOTE: Ensure power is off to all devices in
electrical box.
2. Remove existing device
Check for the following wires:
a. HOT or LINE: Receives power from the circuit box. Referred to as "hot"
for the purpose of this guide. Do not touch or let "hot" wire contact
other wires.
1
2
b. LOAD: Directs power to your light(s).
c. NEUTRAL: Creates a path to return current to the power source when
the device is off. Required for your switch installation.
d. GROUND: Provides a safe path for electricity in the even of a short
circuit.
3. Wire Smart Switch
Use the wire nuts provided to secure the wires together.
a. Connect the WHITE neutral wire on the switch to the neutral wires in
the box, using the red wire nut.
b. Connect the LOAD wire on the switch to the load wire(s) in the box.
c. Connect the HOT wire on the switch to the hot wire(s) in the box.
d. Connect the GREEN ground wire on the switch to the ground wire(s) in
the box.
WNRL10
radiant
®
commutateur
intelligent
AVANT DE COMMENCER
Passer l'ensemble de ce guide en revue. En cas de question ou
d'incertitude concernant ses capacités, consulter un électricien.
Mise en garde : Une installation inappropriée pourrait entraîner la mort,
des blessures graves et (ou) des dommages à votre domicile ou à vos
dispositifs.
Mise en garde : Pour réduire le risque de blessures et (ou) de surchauffe et
de dommage à d'autre matériel :
• Pour usage intérieur dans un endroit sec seulement.
• Ne pas utiliser pour alimenter du matériel médical; ne convient pas
comme moyen de débranchement.
• Ne pas utiliser avec des charges dépassant la capacité de charge du
dispositif.
• Connecter l'interrupteur intelligent UNIQUEMENT dans une source
d'alimentation de 120 V c. a., 60 Hz.
• Toujours utiliser un fil de cuivre pour installer l'interrupteur intelligent et
respecter tous les codes de l'électricité locaux et nationaux applicables.
CE DONT VOUS AVEZ BESOIN
Obligatoire :
• Tournevis cruciforme
• Tournevis à tête plate
Autres éléments pouvant être requis :
Testeur de tension, pinces, pince coupe-fils, pince à dénuder, ruban isolant,
lampe de poche, fils de connexion (inclus) et connecteurs de fils (inclus).
INSTALLATION ET CONFIGURATION
1. Mettre le dispositif hors tension au niveau du disjoncteur
Appuyer plusieurs fois sur l'interrupteur actuel pour confirmer que le courant
est coupé.
radiant
Resistive: 120VAC, 60Hz, 15A; Standard + Electronic Ballast: 15A; Motor: 1/2 HP
Interrupteur intelligent radiant
Résistif : 120 V c. a., 60 Hz, 15 A; ballast standard/électronique : 15 A; moteur : 1/2 HP
Interruptor inteligente WNRL10 radiant
Resistivo: 120 VCA, 60 Hz, 15 A; Balasto estándar + electrónico: 15 A; Motor: 1/2 HP
Installation Instructions • Notice d'Installation • Instrucciones de Instalación
REGULATORY INFORMATION
FCC NOTICE: This device complies with Part 15 of the FCC rules.
Operation is subject to the following two conditions: (1) this device may
not cause harmful interference, and (2) this device must accept any
interference received, including interference that may cause undesirable
operation.
This equipment has been tested and found to comply with the limits for
a Class B digital device, pursuant to Part 15 of the FCC Rules. These
limits are designed to provide reasonable protection against harmful
interference in a residential installation. This equipment generates, uses,
and can radiate radio frequency energy and, if not installed and used in
accordance with the instructions, may cause harmful interference to radio
communications. However, there is no guarantee that interference will not
occur in a particular installation.
If this equipment does cause harmful interference to radio or television
reception, which can be determined by turning the equipment off and on,
the user is encouraged to try to correct the interference by one or more of
4. Secure Smart Switch
a. Fold the wires into electrical box, taking care not to pinch a wire.
b. Use included screws to secure smart switch to electrical box. Do not
fully tighten the screws.
Red
5. Test The Smart Switch
NOTE: See getting to know your switch section for feature details. Turn the
power back on at the circuit breaker, press switch to turn light on/off.
This device is designed to work with a radiant
Netatmo.
Follow the instructions from your app to finish setting up your switch.
a
Load
Supply
TROUBLESHOOTING TIP: If the device is not powering check wiring to
"Hot"
determine if you have reversed the "HOT" and "LOAD" wiring.
6. Attach Wall Plate
a. Use the sub-plate screws (provided) to secure the sub-plate to the
smart switch.
b. Tighten device screws to secure smart switch to the electrical box.
c. Angle the UP end of the wall plate over the top edge of the sub-plate.
Push the screwless wall plate down and in until it "snaps" into place
over the sub-plate.
NOTE: To remove the wall plate, place the tip of a flat blade screwdriver into
the slot under the wall plate and twist gently.
7. Set Up Your System
a. Download and launch the Legrand Home + Control app. The app is
available on the App Store or on Google Play.
b. Connect your smart device to your home network by following the step
by step instructions in the app.
c. Use the app to control your smart device.
RENSEIGNEMENTS SUR LA RÉGLEMENTATION
AVIS DE LA FCC : Ce dispositif est conforme à la section 15 des règlements de la
FCC. On peut s'en servir sous réserve des deux conditions suivantes : 1) ce dispositif
ne provoque pas d'interférences nuisibles; 2) ce dispositif doit être en mesure
d'accepter toute interférence reçue, y compris les interférences qui peuvent causer un
fonctionnement indésirable.
Ce matériel a été mis à l'essai et a été jugé conforme aux limites d'un dispositif
numérique de classe B, conformément à la section 15 des règlements de la FCC.
Ces limites visent à offrir une protection raisonnable contre les interférences nuisibles
dans une installation résidentielle. Ce matériel génère, utilise et peut émettre des
radiofréquences et, s'il n'est pas installé ou utilisé conformément aux directives, peut
causer des interférences nuisibles aux communications radio. Toutefois, il n'existe
aucune garantie contre la possibilité d'interférences au sein d'un milieu précis.
Si ce matériel cause des interférences nuisibles à la réception des téléviseurs et des
radios, ce qui peut être déterminé en mettant à l'arrêt, puis en remettant en marche le
matériel, l'utilisateur est encouragé à tenter de corriger ces interférences par l'une ou
plusieurs des mesures suivantes :
REMARQUE : S'assurer que tous les dispositifs du boîtier électrique sont
hors tension.
1
2. Retirer le dispositif actuel
Vérifier les fils suivants :
a. FIL CHARGÉ ou FIL DE LIGNE : Reçoit le courant du boîtier de
circuits électriques. Appelé fil « chargé » aux fins du présent guide. Ne
pas toucher aux fils « chargés » ni les laisser entrer en contact avec
d'autres fils.
b. FIL DE CHARGE : Dirige le courant vers la ou les lumière(s).
c. FIL NEUTRE : Crée un chemin pour renvoyer le courant à la source
d'alimentation lorsque le dispositif est hors tension. Requis pour
l'installation de votre interrupteur.
d. Mise à la terre : Fournit un chemin sécuritaire à l'électricité en cas de
court-circuit.
3. Relier les fils de l'interrupteur intelligent
Utiliser les connecteurs de fils fournis pour fixer les fils ensemble.
a. Connecter le fil neutre BLANC de l'interrupteur aux fils neutres du
WNRL10 Smart Switch with Netatmo Incandescent, Halogen: 1800W;
®
WNRL10 avec Netatmo; Incandescente, halogène : 1800 W;
®
the following measures:
• Reorient or relocate the receiving antenna
• Increase the separation between the equipment and receiver
• Connect the equipment into an outlet on a circuit different from that to
which the receiver is connected
• Consult the dealer or an experienced radio/TV technician for help
This equipment complies with FCC radiation exposure limits set forth for
an uncontrolled environment. This equipment should be installed and
operated with a minimum distance of 10 mm between the transmitter's
radiating structure(s) and the body of the user or nearby persons.
NOTE: Any changes or modifications to this device that are not expressly
approved by the manufacturer will void the warranty and the user's
authority to operate the equipment.
Contains FCC ID: 2AU5D982057
IC NOTICE: This device complies with Industry Canada license-exempt
RSS standards. Operation is subject to the following two conditions:
(1) this device may not cause interference; and (2) this device must
Supply
"Hot"
Green
Bare
Smart Gateway with
®
b
c
INSTRUCTIONS EN FRANÇAIS
• réorienter ou déplacer l'antenne de réception;
• augmenter la distance entre le matériel et le récepteur;
• brancher le matériel dans une prise de courant appartenant à un circuit électrique
différent de celui sur lequel le récepteur est branché;
• demander de l'aide au fournisseur ou à un technicien spécialisé en radio/télévision.
Ce matériel est conforme aux limites d'exposition aux radiations de la FCC énoncées
pour un environnement non contrôlé. Ce matériel doit être installé et fonctionner à une
distance minimale de 10 mm entre la structure rayonnante du transmetteur et l'utilisateur
ou les personnes se trouvant à proximité.
REMARQUE : Les changements ou les modifications apportés à ce dispositif qui ne
sont pas expressément approuvés par le fabricant pourraient annuler la garantie ainsi
que l'autorisation de l'utilisateur à se servir du matériel.
Contient le n° d'ident. de la FCC : 2AU5D9820570
AVIS DE L'IC : Ce dispositif est conforme aux normes CNR pour les appareils exempts
de licence d'Industrie Canada. On peut s'en servir sous réserve des deux conditions
2
Fournir
"Chaud"
con Netatmo incandescente, halógeno: 1800 W;
®
accept any interference, including interference that may cause undesired
operation of the device.
RF EXPOSURE STATEMENT: This equipment meets the SAR evaluation
limits given in RSS-102 Issue 5 requirements at the minimum separation
distance of 10 mm to the human body. Note: Any changes or modifi
cations to this device that are not expressly approved by the manufacturer,
will void the warranty and the user's authority to operate the equipment.
IC: 25764-982057
HVIN: 982057
For the most recent instruction sheets or more
information on this product, please see this link or scan
the QR code: https://www.legrand.us/p/wnrl10wh
Load
GETTING TO KNOW YOUR SWITCH
Item
Name
Description
1
Paddle
Press the top of the
Switch
paddle to turn light on
and the bottom of paddle
to turn light off.
2
LED Loca-
Indicates the current
tor Light
state of device. Refer
to "LED Locator Light
Explanations" for detail.
3
EZ Button
Used to enter setup
mode.
LED Locator Light Explanations
State of Light
Explanation
Solid White
Lit when load is off.
Solid Red
Factory reset, not in network.
Blinking Magenta
Device is attempting to connect to the network.
Solid Green
Device in network, temporarily open.
Reset To Factory Default
Deleting a device from the app will reset it to factory defaults.
To manually reset the device to factory defaults press and hold the EZ
button for 10 seconds until you see the LED blink red then release. The LED
will change to solid red when the reset is complete.
SPECIFICATIONS
Load
Rating
Resistive
120 VAC, 60 Hz, 15 A
Incandescent/Halogen
1800 W
Ballast
15 A standard/electronic
Motor
/
HP
1
2
Legrand reserves the right to change specifications without notice.
suivantes : 1) ce dispositif ne provoque pas d'interférences; 2) ce dispositif doit être en
mesure d'accepter toute interférence, y compris les interférences qui peuvent causer un
fonctionnement indésirable.
ÉNONCÉ RELATIF À L'EXPOSITION AUX RADIOFRÉQUENCES : Ce dispositif est
conforme aux limites d'évaluation du DAS énoncées dans les exigences CNR 102,
5e édition à la distance de séparation minimale de 10 mm de l'humain. Remarque :
Les changements ou les modifications apportés à ce dispositif qui ne sont pas
expressément approuvés par le fabricant pourraient annuler la garantie ainsi que
l'autorisation de l'utilisateur à se servir du matériel.
IC: 25764-982057
HVIN: 982057
boîtier à l'aide du connecteur de fils rouge.
b. Connecter le fil DE CHARGE de l'interrupteur au(x) fil(s) de charge du
boîtier.
c. Connecter le fil CHARGÉ de l'interrupteur au(x) fil(s) chargé(s) du
boîtier.
Charge
d. Connecter le fil de terre VERT de l'interrupteur au(x) fil(s) de terre du
boîtier.
4. Fixer l'interrupteur intelligent
a. Plier les fils dans le boîtier électrique en prenant soin de ne pas les
pincer.
b. Utiliser les vis fournies pour fixer l'interrupteur intelligent au boîtier
électrique. Ne pas serrer complètement les vis.
Rouge
Vert
Nu
2
3
1
Charge
Fournir
"Chaud"
Advertisement
Table of Contents

Related Manuals for LEGRAND radiant WNRL10


Summary of Contents for LEGRAND radiant WNRL10
- Page 1 Ballast 15 A standard/electronic the box, using the red wire nut. a. Download and launch the Legrand Home + Control app. The app is Motor available on the App Store or on Google Play. b. Connect the LOAD wire on the switch to the load wire(s) in the box.
- Page 2 ONE year from date of purchase by a consumer: cadre d’une utilisation correcte et normale dans les une année de la date d’achat par un consommateur : defecto de fabricación o material en los productos Legrand que se detecte a través de un uso adecuado y normal: (1) by repair or replacement, or, at Legrand’s option, (2) by return of an amount equal to consumer’s...
Need help?
Do you have a question about the radiant WNRL10 and is the answer not in the manual?
Questions and answers