Advertisement
Quick Links
PR EPA R AT I O N B EF OR E US E
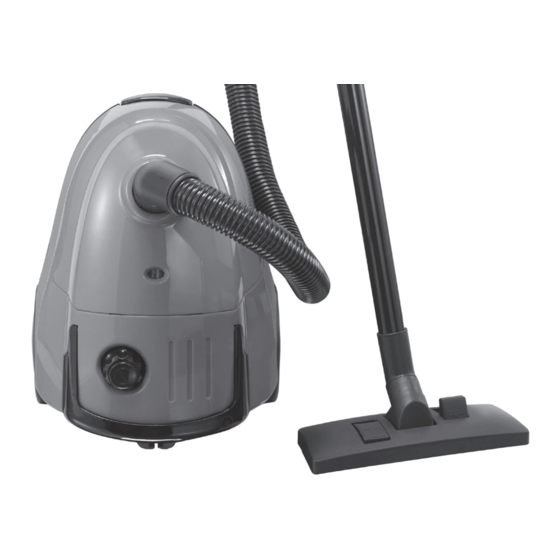
1. To connect the hose, insert the hose connector into the hose connection opening until you
hear a 'click' (Fig 1).
2. To connect the tubes to the handgrip of the hose, insert the narrow section into the wider
section while turning a little (Fig 2).
3. Connect the two tubes together, insert the narrow section into the wider section while turning
a little (Fig 3).
4. Connect a nozzle/brush suitable for the oor type to be cleaned. The hard oor brush (stored at
the rear of the unit) can be used with brush strips lowered or raised (Fig 4). You may also
connect the combination nozzle to vacuum corners, slots or grooves. It can also be used as a
brush nozzle by turning the brush out in the direction of the arrow. It is stored in a clip at the
bottom of the vacuum cleaner.
OP E R AT IO N
1. Hold the mains plug and pull the retractable mains cable out of the vacuum cleaner. Connect it
to the mains socket. The YELLOW mark indicates the ideal length to extend the cable. Do not
extend the mains cable beyond the RED mark which indicates the maximum length.
2. Press the ON/OFF button on the top of the vacuum cleaner to turn it on.
3. To move the vacuum cleaner from room to room, you can unplug and carry it by either the
handle or the handgrip. Never use the mains cable to pull the vacuum cleaner.
POW ER ING OF F A N D STO R AGE
1. Press the ON/OFF button on the top of the vacuum cleaner to turn it o and then remove the
mains plug from the mains socket.
2. To rewind the cord, push down the handle if it's already up; if it's down, lift and push it down
again.
3. Put the vacuum cleaner in an upright position and attach the lower tube to the clip on the
vacuum cleaner (Fig 5).
R EP L AC I N G T H E D U S T BAG
Replace the dustbag when the dustbag-full indicator turns red.
Always unplug the vacuum cleaner from the mains socket before replacing the dustbag.
1. Open the dustbag compartment cover (Fig 6).
2. Take out the dustbag holder and gently remove the full dustbag from the holder with the
dustbag's opening facing upwards (Fig 7).
3. Slide the cardboard front of the new dustbag into the two grooves of the dustbag holder (Fig 8).
4. Re t the dustbag holder back into the lower housing and close the dustbag compartment
cover until you hear a 'click' sound (Fig 9).
The dustbag compartment cover cannot be closed unless the dustbag is installed properly.
U S IN G A R E U S AB LE DU STBAG
You can use a reusable cotton dustbag (not supplied) instead of the paper dustbag. To remove
and replace a cotton dustbag, simply follow the instructions for replacing the paper dustbags.
CL EA N ING TH E M OTOR P ROTE C TI O N FILTE R
The motor protection lter should be cleaned twice a year, or when it appears to be visibly
clogged.
Always unplug the vacuum cleaner from mains socket before replacing the lter.
1. Open the dustbag compartment cover (Fig 6).
2. Take out the dustbag holder and remove the motor protection lter (Fig 7 & Fig 10).
3. Shake out the dust accumulated on the lter into a dustbin.
4. Re t the lter and dustbag holder back into the lower housing.
5. Close the dustbag compartment cover till you hear a 'click' (Fig 9).
CL EA N ING TH E EX H AU ST FI LTE R
Always unplug the vacuum cleaner from the mains socket before replacing the lter.
1. Unclip the grill and take out the exhaust lter (Fig 11 & Fig 12).
2. Shake out the dust accumulated on the lter into a dustbin.
3. Re t the lter and the grill.
SP EC IFIC AT IO NS
Supply voltage : 220-240V~ 50Hz Class II
Power input : 1200W (1400 MAX)
Dust capacity : 2.5L
Features and speci cations are subject to change without prior notice.
Visit Partmaster.co.uk today for the easiest way to buy
electrical spares and accessories. With over 1 million
spares and accessories available we can deliver direct
to your door the very next day. Visit www.partmaster.co.uk or call 0844 800 3456 (UK
customers only) Calls charged at National Rate.
This symbol on the product or in the instructions means that your
electrical and electronic equipment should be disposed at the end of its
life separately from your household waste. There are separate collection
systems for recycling in the EU. For more information, please contact the
local authority or your retailer where you purchased the product.
DSG Retail Ltd. (co. no. 504877)
Maylands Avenue, Hemel Hempstead, Herts., HP2 7TG, UK
BAGGED VACUUM CL EANER
IN STRUCTIO N MANUAL
C14B VR13
Thank You
We recommend that you spend some time reading this instruction manual in order
to fully understand all the operational features it offers.
Read all the safety instructions carefully before use and keep this instruction manual
for future reference.
U NPACKI NG
Remove all packaging from the unit. Retain the packaging. If you dispose of it please do so
according to any local regulations.
The following items are included:
• Main Unit
• Dust Bag x 3
If items are missing or damaged, please contact Partmaster (UK only).
Tel: 0844 800 3456 for assistance.
(P.N.: C14BVR13_IB_130118V1)
for purchasing your new Currys Essentials Bagged Vacuum Cleaner.
• Hose
• Telescopic Tube
• Combination Nozzle
• Floor Brush
• Instruction Manual
BA G GED V A C UUM C L EA N ER
IN S T R U C T I O N M AN U A L
C 14 BV R 12
Advertisement

Summary of Contents for Currys Essentials C14BVR13
- Page 1 3. Slide the cardboard front of the new dustbag into the two grooves of the dustbag holder (Fig 8). Thank You for purchasing your new Currys Essentials Bagged Vacuum Cleaner. 4. Re t the dustbag holder back into the lower housing and close the dustbag compartment We recommend that you spend some time reading this instruction manual in order cover until you hear a ‘click’...
- Page 2 SAF E T Y F I R S T ! PR OD UC T OV ER V I E W For your continued safety and to reduce the risk of injury or electric shock, please follow all the safety precautions listed below.
Need help?
Do you have a question about the C14BVR13 and is the answer not in the manual?
Questions and answers