Table of Contents
Advertisement
Quick Links
Advertisement
Table of Contents

Subscribe to Our Youtube Channel
Related Manuals for Fisher PLC-XU10N


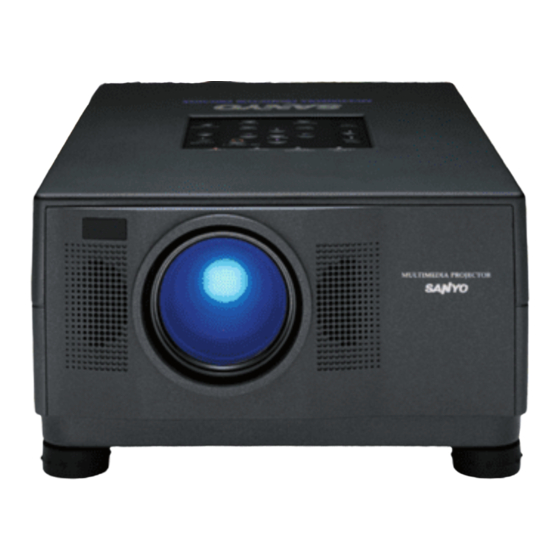
Summary of Contents for Fisher PLC-XU10N
- Page 1 Multimedia Projector PLC-XU10N MODEL Owner's Manual...
-
Page 2: To The Owner
TO REDUCE THE RISK OF FIRE OR ELECTRIC SHOCK, DO NOT EXPOSE THIS APPLIANCE TO RAIN OR MOISTURE. This Projector has a grounding-type AC line plug. This is a safety feature to be sure that the plug will fit into the power outlet. Do not try to defeat this safety feature. -
Page 3: Important Safety Instructions
If the projector has been dropped or the cabinet has been damaged. f. When the projector exhibits a distinct change in performance-this indicates a need for service. -
Page 4: Table Of Contents
FEATURES AND DESIGN PREPARATION NAME OF EACH PART OF THE PROJECTOR 6 SETTING UP THE PROJECTOR CONNECTING THE AC POWER CORD VENTILATION MOVING THE PROJECTOR CONNECTING THE PROJECTOR TERMINALS OF THE PROJECTOR CONNECTING TO THE VIDEO EQUIPMENT CONNECTING TO THE COMPUTER... -
Page 5: Features And Design
MENU DISPLAY is displayed with; English, Deutsch, Français, Italiano, Español, or Japanese PC CARD SLOT This projector has a PC CARD SLOT for easier presentation. Pictures can be projected just by inserting a memory card including image data and the presentation data can be edited by the software "Media Card Imager"... -
Page 6: Preparation
PREPARATION NAME OF EACH PART OF THE PROJECTOR... -
Page 7: Setting Up The Projector
SETTING-UP THE PROJECTOR Positioning the Projector This projector is basically designed to project on a flat projection surface. The projector can be focused from 4.6'(1.4m) ~ 35.4'(10.8m). Refer to the figure below to adjust the screen size. 35.4' (10.8m) 24.0' (7.3m) 300"... -
Page 8: Connecting The Ac Power Cord
AC Power Cord, the appliance is in Stand-by Mode and consumes a little electric power. This projector is equipped cooling fans for protection from overheating. Pay attention to the following to ensure the ventilation and avoid a possible risk of fire and malfunction. -
Page 9: Moving The Projector
When carrying the projector, use a carrying case recommended by Sanyo. Do not transport the projector by using a courier or transport service in an unsuitable transport case. This may cause damage to the projector. To transport the projector through a courier or transport service, use a case recommended by Sanyo. -
Page 10: Connecting The Projector
MAC/VGA Adapter is required. CONTROL PORT CONNECTOR Terminal : MULTI-POLE 12-PIN When controlling the computer with the projector's Wireless Remote Control Unit, connect control port (PS/2, Serial or ADB port) on your computer to this terminal. (Three types of cables are supplied.) -
Page 11: Connecting To The Video Equipment
· AUDIO CABLE (not supplied) NOTE : When connecting the cable, the power cords of both the projector and the external equipment should be disconnected from AC outlet. Turn the projector and peripheral equipment on before the computer is switched on. -
Page 12: Connecting To The Computer
Be sure to connect the MOUSE CABLE corresponding with the terminal of your computer. NOTE : When connecting the cable, the power cords of both the projector and the external equipment should be disconnected from AC outlet. Turn the projector and peripheral equipment on before the computer is switched... - Page 13 2. Pull the portion (A) to the arrow direction and remove connector. Use either of these Mouse Cables corresponding with your terminal of your computer. CONNECTING THE PROJECTOR MONITOR OUT COMPUTER IN CONTROL PORT MCI SERIAL AUDIO IN AUDIO OUT ¥...
- Page 14 · PC AUDIO CABLE (stereo / not supplied) NOTE : When connecting the cable, the power cords of both the projector and the external equipment should be disconnected from AC outlet. Turn the projector and peripheral equipment on before the computer is switched...
- Page 15 MAC/VGA ADAPTER Set the switches as shown in the table below depending on the RESOLUTION MODE that you want to use before your turn on the projector and computer. 13" MODE (640 x 480) 16" MODE (832 x 624) 19" MODE (1024 x 768) 21"...
-
Page 16: Before Operation
OPERATION OF THE REMOTE CONTROL This remote control unit is not only able to operate the projector but also usable as a wireless mouse for a PC. POINT button and two CLICK buttons are used for wireless mouse operation. (Refer to page 41.) Wireless mouse is usable when PC mouse pointer is displayed on the screen, the wireless mouse cannot be used when the On-Screen Menu is displayed. -
Page 17: Remote Control Batteries Installation
Operating Range of the Remote Control Point the remote control toward the projector (Receiver Window) whenever pressing the buttons. Maximum operating range for the remote control is about 16.4’ (5m) and 60° front and rear of the projector 16.4' (5 m) 60°... -
Page 18: Top Controls And Indicators
This indicator is lit in dim when (Refer to P43.) the projector is turned on. And the light is brightened when the projector is in stand- by mode. MENU BUTTON Used to active or terminate the MENU operation. -
Page 19: Operating On-Screen Menu
HOW TO OPERATE ON-SCREEN MENU FLOW OF ON-SCREEN MENU Display ON-SCREEN MENU Press MENU button to display the ON-SCREEN MENU (MENU BAR). The red frame is the POINTER. Select the MENU Move the POINTER (red frame) to the ITEM ICON that you want to select by pressing POINT RIGHT/ LEFT buttons. -
Page 20: Menu Bar
BEFORE OPERATION MENU BAR IN COMPUTER MODE MODE MENU AUTO IMAGE MENU Used to select Used to adjust Fine sync., Total dots, the Computer and Picture Position input mode. automatically. (Refer to P25) (Refer to P29) SYSTEM MENU Used to select a computer system. - Page 21 BEFORE OPERATION...
-
Page 22: Basic Operation
If the TEMPERATURE WARNING indicator still continues to flash, call your authorized dealer or service station. NOTE : The Cooling Fan may work for cooling while the projector is turned off. When the Cooling Fan is working, TEMPERATURE WARNING INDICATOR flashes red. -
Page 23: Adjusting The Picture
CURSOR FUNCTION This projector can display a cursor by pressing cursor button on the Remote Control. The cursor can be controlled with the POINT buttons. To terminate the Cursor Function, press CURSOR button again. -
Page 24: Sound Adjustment
BASIC OPERATION Direct Operation Sound Volume Adjustment Press the VOLUME (+/–) buttons (located on the Top Control or on the Remote Control Units) to adjust the volume. The Volume dialog box appears on the screen for a few seconds. (+) button to increase the volume, and (–) button decreasing. Sound Mute Setting Press the MUTE button on the Remote Control Units to cut off the sound. -
Page 25: Computer Mode
It shows the information of the computer of the mode selected. SELECTING COMPUTER SYSTEM Automatic Multiscanning system This projector automatically adapt to most different types of computer based on VGA, SVGA or XGA (refer to "COMPATIBLE COMPUTER SPECIFICATION" on page 27). When selecting Computer, this projector become automatically suited to the incoming signal and projectors the proper image without any special setting. -
Page 26: Pc Adjustment
However, some computers employ special signal formats which are different from the standard ones and may not be detected by this projector. If this happens, the projector cannot reproduce a proper image and the image is recognized as a flickering picture, a non-synchronized picture, a non-centered picture or a skewed picture. -
Page 27: Compatible Computer Specifications
COMPATIBLE COMPUTER SPECIFICATIONS Basically this projector can accept the signal from all computers with the V, H-Frequency below mentioned and less than 160 MHz of Dot Clock. H-Freq. ON-SCREEN RESOLUTION (kHz) DISPLAY VGA 1 640 x 480 31.47 VGA 2 720 x 400 31.47... -
Page 28: Picture Image Adjustment
COMPUTER MODE PICTURE IMAGE ADJUSTMENT Adjust Picture Image Manually Press the MENU button and the ON-SCREEN MENU will appear. Press the POINT LEFT/RIGHT buttons to select IMAGE press the SELECT button. Another dialog box PICTURE IMAGE ADJUSTMENT Menu will appear. Press the POINT DOWN button and a red-arrow icon will appear. -
Page 29: Auto Image Function
POSITION ADJUSTMENT on page 30 to adjust Picture Position.) Normal Function The normal picture level is preset on this projector by the factory and can be restored anytime by pressing the NORMAL button (located on the Top Control or on the Remote Control Units). The "Normal" display will be displayed on the screen for a few seconds. -
Page 30: Picture Position Adjustment
To pan the image, press POINT UP/DOWN/LEFT/RIGHT buttons. Panning function can work only when the image is larger than the screen size. This projector cannot display in the resolution more than 1280 X 1024. If your computer’s screen resolution is higher than 1280 X 1024, reset the resolution to the lower before connecting the projector. -
Page 31: Video Mode
When the Video System is PAL-M select the system manually. PAL / SECAM / NTSC / NTSC4.43 / PAL-M If the projector cannot reproduce the proper video image, it is required to select a specific broadcast signal format among PAL, SECAM, NTSC, NTSC 4.43, or PAL-M. -
Page 32: Picture Image Adjustment
PICTURE SCREEN ADJUSTMENT This projector has a picture screen resize function, which enables you to display the image in desirable size. Press the MENU button and the ON-SCREEN MENU will appear. -
Page 33: Mci Mode
Refer to SMARTMEDIA AND PC CARD ADAPTER on pages 38 and 39 for operation. NOTE : Some PCMCIA Adapter or PC Card is not available for this projector and cannot provide the image data. In that case, use our SmartMedia and PC Card Adapter. -
Page 34: Show The Data In The Memory Card
Display Data on Screen This projector can project only the image data edited with Media Card Imager or the data in Bit Map type or in JPEG type through PC CARD SLOT. Other data is not available and should be edited and written in a memory card with Media Card Imager before loading PC CARD SLOT. -
Page 35: Picture Image Adjustment
It closes the PICTURE IMAGE ADJUSTMENT Menu. Normal Function The normal picture level is preset on this projector by the factory and can be restored anytime by pressing the NORMAL button (located on the Top Control or on the Remote Control Units). The "Normal" display will be displayed on the screen for a few seconds. -
Page 36: Picture Position Adjustment
To pan the image, press POINT UP/DOWN/LEFT/RIGHT buttons. Panning function can work only when the image is larger than the screen size. This projector cannot display in the resolution more than 1280 X 1024. If your computer’s screen resolution is higher than 1280 X 1024, reset the resolution to the lower before connecting the projector. -
Page 37: Write Data Into The Memory Card
Operate Media Card Imager of PC to write/read the data in the PC card. (Refer to Owner's Manual of Media Card Imager for operation.) NOTE : Connect the projector to the computer with MCI Cable before turning those appliances on. Do not press any button while read/write the data through MCI Cable. -
Page 38: Smartmedia And Pc Card Adapter
MCI MODE SMARTMEDIA AND PC CARD ADAPTER SmartMedia and PC Card Adapter are provided with this LCD projector. SmartMedia can be used as a PC card conforming to the PC Card Standard-ATA by combining with PC Card Adapter. INSTALL Insert SmartMedia fully into PC Card Adapter. Make sure EJECT button pops out. - Page 39 Precautions and Specifications of the appliance. SmartMedia SmartMedia is a precision device. Do not bend it, drop it, subject it to strong forces or shocks or place where strong static electrical charge can be generated. Do not touch the surface of the Contact Area with fingers or allow it to be stained with foreign mate- rials.
-
Page 40: Setting
Move the arrow to the item that you want to set, and then press the SELECT button to set it "On" or "Off". When this function is in the "On" position, this projector Blue back will produce a blue image without video noise on the screen when the video source is unplugged or turned off. -
Page 41: Appendix
APPENDIX The Wireless Remote Control Unit is not only able to operate the projector but also usable as a wireless mouse for a PC. POINT buttons and two CLICK buttons are used for wireless mouse operation. Wireless mouse is usable when PC mouse pointer is displayed on the screen. When the menu or indicator of the projector is displayed on the screen instead of the PC mouse pointer, the wireless mouse cannot be used. -
Page 42: Maintenance
The Indicator stops to flash when the temperature of the projector become normal. When the TEMPERATURE WARNING Indicator continues to flash, make sure the matters below. The Ventilation slots of the projector are blocked. In such an event, reposition the appliance so that the ventilation slots are not obstructed. -
Page 43: Lamp Replacement
CAUTION For continued safety, replace with a lamp assembly of the same type. Allow the projector to cool for at least 45 minutes before you open the lamp cover. The inside of the projector can become very hot. Do not drop the lamp assembly or touch the glass bulb! The glass can shatter and may cause injury. -
Page 44: Troubleshooting
4. If the projector still does not produce the image, re-start the computer. 5. If the image sill does not appear, unplug the projector from the computer and check the computer monitor's display. The problem may be with your graphics controller rather than with the projector. (When you reconnect the projector, remember to turn the computer and monitor off before your power up the projector. - Page 45 Units dose not Control Units. work. Make sure you are not too far from the projector when using the Remote Control Units. Maximum operating range is 16.4 feet (5m). Check the cable connection between the projector and the computer. Wireless Mouse Check the mouse setting on your computer.
-
Page 46: Technical Specifications
TECHNICAL SPECIFICATIONS Projector Type Dimensions (W x H x D) Net Weight LCD Panel System Panel Resolution Number of Pixels Color System Scanning Frequency Projection Image size (Diagonal) Horizontal Resolution Projection Lens Throw Distance Projection Lamp AV Input Jacks Computer Input Jacks... - Page 47 This symbol on the nameplate means the product is Listed by Underwriters Laboratories Inc. It is designed and manufactured to meet rigid U.L. safety standards against risk of fire, casualty and electrical hazards.
- Page 48 OF SALE, SALES SLIP OR RENTAL AGREEMENT MUST BE SUBMITTED TO THE AUTHORIZED SANYO SERVICE CENTER AT THE TIME WARRANTY SERVICE IS REQUESTED. Subject to the OBLIGATIONS above and EXCLUSIONS below, SANYO FISHER COMPANY (SFC) warrants this SANYO product against defects in materials and workmanship for the periods of LABOR and PARTS specified below.
Need help?
Do you have a question about the PLC-XU10N and is the answer not in the manual?
Questions and answers