Table of Contents
Advertisement
Quick Links
Advertisement
Table of Contents

Related Manuals for Altwork FLEX Series

Summary of Contents for Altwork FLEX Series
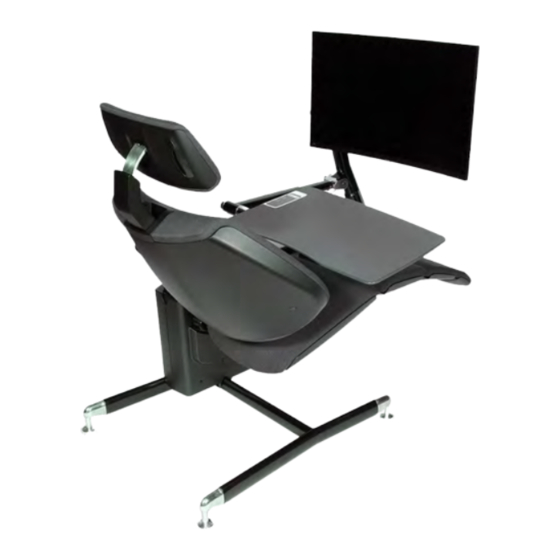
- Page 1 FLEX series Assembly Instructions...
- Page 2 Open the damaged box and photograph any damaged Altwork components. Open the remainder of the boxes and inspect all of the parts for damage before starting assembly. If any components are damaged, Email pictures of all damaged boxes and components to Altwork (support@altwork.com)
-
Page 3: Tools & Hardware
The new way to work Tools & Hardware Flush Cutters Bolts 6mm Hex Key 8mm Hex Key Pliers 3/16” Hex Key Level 3/8” Hex Key & Handle Nuts Plug 1/4” Hex Key... - Page 4 The new way to work Unboxing The Movement Core REMOVE PLASTIC CLIPS: Place two fingers in the OPEN THE BOX: Use the handles and lift the box CUT ZIP TIE: Cut and remove the zip tie. Then opening of the clips, squeeze and pull. Make sure to save straight up.
- Page 5 The new way to work Unboxing The Movement Core HEAVY LIGHT HEAVY REMOVE MOVEMENT CORE: Lift the light side of the move- ment core, then lift the heavy side. Then lift the entire movement core up and out of the box. LIGHT Make sure to place the movement core on a soft surface.
- Page 6 The new way to work Movement Core & Base Assembly Grasp the movement core by the metal tube inside (not the plastic cover) and slide the TILT THE BASE: Tilt the base towards the movement foam block underneath, so it rests about an inch behind the edge of the plastic cover. core, so the base holes align with the studs at the bottom of the movement core.
- Page 7 The new way to work Movement Core & Base Assembly CONNECT THE BASE & MOVEMENT CORE: Screw the nuts on with your fingers and Tilt the movement core up, so it sits on top of the base. use the t-handle wrench to tighten. Tighten the nuts on the base in a diagonal pattern. Make sure you firmly tighten all the nuts 2x.
-
Page 8: Seat Assembly
The new way to work Seat Assembly PREPARATION: Remove the plastic cap and INSTALLATION: Lift the seat and slide it onto the metal post. The person in Lift the seat cushion and screw in the bolt first cut the zip ties. the front will support the seat's weight and slowly raise or lower the front of the using your fingers. - Page 9 The new way to work Shipping Brace Removal PREPARATION: Remove the nut on the shipping brace closest to the REMOVAL: Put pressure on the arm of the station to rear of the station, Then remove the nut on the shipping brace closest to help loosen the bolts, then remove the shipping brace.
-
Page 10: Backrest Installation
The new way to work Backrest Installation PREPARATION: Place the metal cover over the movement INSTALLATION: Then lift the backrest and guide the channel over the movement core post. Move the backrest forward and back to align the channel on the post. core post. - Page 11 The new way to work Backrest Installation You will know that the post is completely engaged when you can see that the channel hole TIGHTEN: Insert the bolt into the post. For the bolt to fully align, the and the post hole are aligned. If the seatback plastic has lowered, you will need to press person supporting the weight of the backrest will need to slowly lift the the bottom of the plastic forward and slide the plastic to the highest position to get the hole backrest up and down while the person with the wrench ensures that the...
- Page 12 The new way to work Backrest Installation INSTALLATION: Once the bolt is tight, use the 3/8" hex key handle to Install the plastic plug. tighten fully. Push down until the aluminum handle begins to bend or breaks off completely. 3/8” Hex Key & Handle Bolt...
-
Page 13: Desk Assembly
The new way to work Desk Assembly PREPARATION: Unscrew the desk mount and make Insert the desk mount into the desk arm and screw the knob onto the shaft. sure the washer stack is present. - Page 14 The new way to work DESK LEVELING | Desk Too Low Desk Assembly Part 9 INSTALLATION: Insert the bolts and position the desk so the bolts line up with the desired holes. Most users mount the desk using the center two holes.
-
Page 15: Monitor Arm Installation
The new way to work DESK LEVELING | Desk Too Low Monitor Arm Installation Part 9 PREPARATION: Remove the bolt from the monitor arm, then remove the magnetic INSTALLATION: Slide the yoke grooves over the keys disk on the arm's right side by touching the ¼" hex key to the disk, then remove the bolt. on the monitor arm’s two disks. - Page 16 The new way to work DESK LEVELING | Desk Too Low Monitor Arm Installation Part 9 POSITION THE CLEVIS: Position the clevis, tilting at a 45° angle toward the seat when tightening. Insert the bolt and moderately tighten with the ¼" hex key provided.
- Page 17 The new way to work DESK LEVELING | Desk Too Low Leg Rest Assembly Part 9 PREPARATION: Cut the zip tie under the leg rest. Remove the pin on the bar under the leg rest, then slowly lift the POSITION LEG REST: Push up on the ratchet leg rest until you see the first hole in the bar under the leg rest.
-
Page 18: Cable Installation
The new way to work Cable Installation CONNECT THE ACTUATOR CORD: Open the ‘S’ AND ‘D’ CABLES: Plug the 'S' and ‘D' cables into the sockets of CABLE ROUTING: Route the AC monitor cover under the seat, and plug the actuator cord the connector box. - Page 19 The new way to work DESK LEVELING | Desk Too Low Cable Installation Part 9 TEST THE CIRCUIT BREAKER: Press the blue GFCI button. A green light will come on. Then turn the circuit breaker on by pressing the red button (So the switch lights up indicating power on).
- Page 20 The new way to work DESK LEVELING | Desk Too Low Desk Leveling Part 9 Before leveling the desk, install your monitor, as the weight of a monitor will affect the desk's angle. LEVEL DESK ARM: Raise the desk arm until you hear a click and then push it down firmly until the desk arm is level.
- Page 21 The new way to work DESK LEVELING | Desk Too Low Desk Leveling Part 9 DESK ANGLE: Place the level on the desk to check for levelness.Tilt the desk until it is level. Before leveling the desk, install your monitor, as the weight of a monitor will affect the desk's angle.
- Page 22 The new way to work DESK LEVELING | Desk Too Low Desk Leveling | Too Low Part 9 Loosen Tighten Turn the desk over and unplug. TIGHTEN: Fully tighten the keeper screw closest to the desk arm. This is critical to do in order. Fully tighten the keeper screw farthest LOOSEN: Loosen the keeper screw farthest from the desk arm by from the desk arm.
- Page 23 The new way to work Desk Leveling | Too High Loosen Tighten Turn the desk over and unplug. TIGHTEN: Fully tighten the keeper screw closest to the desk arm. It is critical that these steps are followed exactly as written.Then LOOSEN: Loosen the keeper screw farthest from the desk arm by fully tighten the keeper screw farthest from the desk arm.
Need help?
Do you have a question about the FLEX Series and is the answer not in the manual?
Questions and answers