Table of Contents
Advertisement
Quick Links
Advertisement
Table of Contents
Troubleshooting

Subscribe to Our Youtube Channel
Related Manuals for International Biomedical AeroNO 2.0

Summary of Contents for International Biomedical AeroNO 2.0
- Page 2 Aero oNOx x 2.0 rtable e Nitr ric O Oxide Titra ation n & M Monit toring g Sys stem Servi ice M Manua hone: (51 12) 873-00 ax: (512) 873-9090 Mail: les@int-b bio.com ebsite: h http://www w.int-bio. .com ailing add dress: ternation al Biome...
- Page 3 This page intentionally left blank.
-
Page 4: Table Of Contents
TABLE OF CONTENTS INTRODUCTION ........................10 1.1. Important Safety Considerations ................. 10 SPECIFICATIONS ........................15 2.1. Symbols Table ......................15 2.2. Abbreviations ........................ 17 2.3. Ventilator Compatibility ....................18 2.4. Measurement Range and Accuracy ................18 2.5. Backup Delivery Regulator ..................18 2.6. - Page 5 TABLE OF CONTENTS 5.7. SLA Battery Replacement .................... 55 5.8. LiFePO Battery Replacement ..................55 5.9. AeroNOx 2.0 MFM Flow Check/Leak Test Procedure ..........57 5.10. AeroNOx 2.0 Sample Rate Adjustment Procedure ..........61 5.11. AeroNOx 2.0 Gas Testing Procedure ............... 66 5.12.
- Page 6 LA A NGUAG G E DIS SCLAIM M ER Par rt No. 715-008 8 8, Rev. B - 3 -...
- Page 7 LA A NGUAG G E DIS SCLAIM M ER Par rt No. 715-008 8 8, Rev. B - 4 -...
- Page 8 LA A NGUAG G E DIS SCLAIM M ER Par rt No. 715-008 8 8, Rev. B - 5 -...
- Page 9 LA A NGUAG G E DIS SCLAIM M ER Par rt No. 715-008 8 8, Rev. B - 6 -...
- Page 10 LA A NGUAG G E DIS SCLAIM M ER Par rt No. 715-008 8 8, Rev. B - 7 -...
- Page 11 LA A NGUAG G E DIS SCLAIM M ER Par rt No. 715-008 8 8, Rev. B - 8 -...
- Page 12 LA A NGUAG G E DIS SCLAIM M ER Par rt No. 715-008 8 8, Rev. B - 9 -...
-
Page 13: Introduction
INTRO ODUCTION This se ervice man ual is inten ded for use e by qualifie ed service t technicians s with the to ools, facilitie and tra aining to re pair a med ical device. . For quest tions, conta act Internati ional Biome edical. - Page 14 Be certain all lines and cables are organized to prevent damage or occlusion. Use only parts, accessories, transducers, and cables designated by International Biomedical for use with the AeroNOx 2.0 . Cables and accessories other than those supplied by International Biomedical may result in unacceptable operation of the AeroNOx 2.0...
- Page 15 aution: U. S S. Federal a and Canad ian law res stricts this d device to sa ale by or on the order o of a physici other licen sed medica al practition ner. Outsid e Canada a and the U. S., check w with local la aws for...
- Page 16 Even when the external power supply is not connected, the battery provides a bias charge to the NO, , and O cells to keep sensors in a ready state. The power drawn from biasing the sensors will deplete a new fully charged battery in approximately one week. Because of this, it is recommended the external power supply of the AeroNOx 2.0 remain plugged in at all times to maintain battery charge.
- Page 17 Powering the unit off will shut off the delivery gas flow. Gas flow is terminated when the unit is powered off, whether intentionally, or during a complete loss of power. DO NOT exceed 2.00 LPM as displayed on the AeroNOx 2.0 flow display.
-
Page 18: Specifications
SPEC IFICATION 2.1. Symbols T Table The follow wing symbol s appear in n the AeroN NOx 2.0 d documentat ion and lab bels. “ON”/” ”OFF” Powe er (Hold for r ~3 Soft Key (3) Secon nds to turn o off) Silenc ce Alarm Bu... - Page 19 Device p part numbe Decrea ase Value Conf firmation Set Low A Alarm Limit elect High/L Low Alarm L Limits Set High Alarm Limi AC Power P Plugged in a Increa ase Value arging arm Tempor rarily Silenc ced for Scree en Lock Approximate...
-
Page 20: Abbreviations
CISPR International Special Committee on Radio Interference Centimeters Direct Current Electrostatic Discharge Fraction of Inspired Oxygen Full Scale Output Feet HFOV High Frequency Oscillatory Ventilation International Biomedical Inches L/min Liters per Minute Milliamps mbar Millibars mL/min Milliliters per Minute Millimeters... -
Page 21: Ventilator Compatibility
2.3. Ventilator Compatibility The AeroNOx 2.0 has been validated with the following ventilators: Conventional: Bio-Med Devices MVP-10 (CMV/IMV Mode) Bio-Med Devices CV2i+ (CMV/IMV Mode) Accutronic Fabian/TV-1 Evolution (IPPV Mode) HAMILTON-T1 (PCV Mode) Bio-Med Devices TV-100 (IPPV Mode) High Frequency: Percussionaire TXP-2D (frequencies between 5 Hz (300 bpm) and 8.3 Hz (500 bpm) and amplitude less than 30 cmH O with mean airway pressures of 8-18 2.4. -
Page 22: Aeronox
2.7. AeroNOx 2.0 Delivery Regulator Parameter Specification Inlet Pressure 500-2250 psi Outlet Pressure 45-75 psi Cylinder Valve Connection CGA 626 2.8. AeroNOx 2.0 Physical Specifications Parameter Specification Weight (device + protective cover only) 4.4 kg 33 cm 14 cm 25 cm Precision Metering Valve ~12 turns to fully open Service Life... -
Page 23: Electrical Specifications
Additionally, periodic maintenance as specified by International Biomedical will allow the device to continue to provide basic safety and essential performance. Part No. 715-0088, Rev. B... - Page 24 GUIDANCE AND MANUFACTURER’S DECLARATION - EMISSIONS The AeroNOx 2.0 is intended for use in the electromagnetic environment specified below. The customer or user of the AeroNOx 2.0 should ensure that it is used in such an environment. ELECTROMAGNETIC ENVIRONMENT - EMISSIONS TEST COMPLIANCE GUIDANCE...
- Page 25 GUIDANCE AND MANUFACTURER’S DECLARATION - IMMUNITY The AeroNOx 2.0 is intended for use in the electromagnetic environment specified below. The customer or user of the AeroNOx 2.0 should ensure that it is used in such an environment. COMPLIANCE ELECTROMAGNETIC IEC 60601 IMMUNITY TEST LEVEL ENVIRONMENT -...
-
Page 26: Physical Dimensions And Center Of Mass
2.13. Physical D Dimensions and Cente er of Mass 2.14. VESA Mou unting Patte Par rt No. 715-008 88, Rev. B - 23 -... -
Page 27: Theory Of Operation
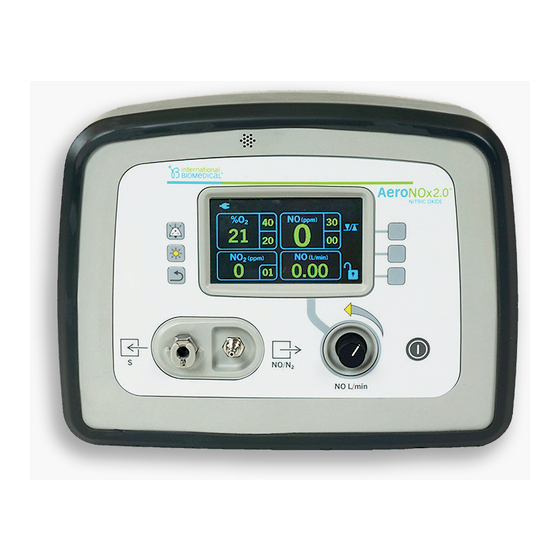
THEO RY OF OP ERATION The Ae eroNOx 2.0 is a dura able, light-w weight, port table, batte ry operated d device de esigned to deliver r Nitric Oxid de (NO) to a a ventilator r circuit and d continuou sly monitor r and displa concen... -
Page 28: Button Functions
3.3. Button Fun nctions BUTT FUNCTION Turn on/off devi ce (Hold fo or ~3 Secon nds to turn o off) Silen ces current t alarms for r 60 second ds and disp plays the “A Alarm Paus se” icon in t he upper ri ght hand co orner of the... -
Page 29: Rear Panel
3.4. Rear Pane The batter ry, sensors, , charging p port, NO inl et, and mo unting poin nts are acce essed from rear of the device. Se ee the follo owing view f for respecti ive location 3.5. Rear View w - Labeled 3.6. - Page 30 The follow wing figure d describes th he pneumat tic flow pat hs for both the sample e and the delivery sid de of the de evice when n connected d to a ventil lator. Par rt No. 715-008 8 8, Rev. B - 27 -...
-
Page 31: Delivery System
3.7. Delivery S ystem Regulated 50 psi Nitr ric Oxide is supplied to o the ‘NO/N Inlet’ quic ck disconne ect through braided sta ainless stee el hose. Th his feeds in to the man ual flow co ntrol valve in the instrument t. -
Page 32: Sample Analysis System
3.8. Sample An nalysis Sys Gas for an nalysis is dr rawn into th he device vi ia a sample e circuit with h Nafion tu ubing into t filtered “Sa ample Inlet” ” quick disc connect. Fr rom here, it t passes thr rough a che eck valve, a... -
Page 33: General Features And Operation
3.9. General Features and Operation 3.9.1. Microprocessor The AeroNOx 2.0 is designed around the TEKMOS TK68HC711E9CFNE3 microprocessor operating with a clock frequency of 3MHz. The microprocessor and associated software are responsible for the NO and NO analysis operations and the delivery of NO. Firmware may only be updated by International Biomedical. - Page 34 3.9.4. Battery, Charger, and Battery Monitor The software in the AeroNOx 2.0 monitors the condition of battery charge and displays it on the LCD display in the upper left hand corner. In addition, it also determines if there is sufficient power to correctly operate the instrument. There are two battery options used in the AeroNOx 2.0 .
- Page 35 High Priority A Alarms < High > NO limit + (Altern nating) High > N limit Medium m Priority Alarms NO H High NO > NO O limit + (Altern nating) NO H High NO > N NO limit Samp le line Bloc cked...
- Page 36 her Messa ages FETY FETY ERROR CODE ES LEGEND KNOWN LCD_RET_ER LCD_TIMEOU INTER RNAL M_CORRUPTE M_WRITE_FA AILURE ATE_CORRUP PTED I_STOPPED TCHDOG_TIM _OVERRUN 3.9.6. Saf fety On/Off ring initial s etup with e each patient t, the user m may find sit tuations wh here safety alar...
-
Page 37: 3.10. Environmental Effects
3.10. Environmental Effects 3.10.1. Nitric Oxide and Nitrogen Dioxide Sensors The Nitric Oxide (NO) and Nitrogen Dioxide (NO ) sensors utilized in the AeroNOx 2.0 are amperometric (also called electrochemical). They can be thought of as micro fuel cells, as they produce a measurable electric current while oxidizing or reducing traces of electroactive gases. - Page 38 Gas diffusing into a cell becomes part of a reaction at the SENSE electrode: oxidation (e.g. Nitric Oxide) or reduction (e.g. nitrogen dioxide). Each reaction can be represented in standard chemical equation form. Nitric Oxide (NO): NO + 2H + 3H + 3e (Oxidation) Nitrogen Dioxide (NO...
- Page 39 3.10.4. Nitric Oxide (NO) Analyzer Circuit The Nitric Oxide analyzer circuit is similar in design to the NO circuit. The amplifier circuit and standby cell conditioning are different due to the nature of the electrochemical cell. The signal conditioning, cell bias, and output amplifier are contained on the sensor board.
- Page 40 3.10.8. Humidity Effects Toxic gas cells use aqueous electrolytes, which, in conjunction with the porous diffusion barrier, permit water vapor to be absorbed into the electrolyte under conditions of high water vapor pressure, and allow the electrolyte to dry out at very low ambient water vapor pressure.
- Page 41 Do not use solvent based glue directly on or near the cell as the solvent will cause crazing of the plastic and damage to the electrodes can result from high concentrations of solvent vapors. Do not store or assemble in areas that contain solvent vapors, including aerosols used in the environment such as air-freshener, wax polish, window cleaner, and all organic solvents.
- Page 42 3.10.13. Oxygen Analyzer Circuit As the O sensor also contains the output resistor, minimal signal conditioning is required. This circuitry is located on the sensor board and provides an output voltage proportional to the % oxygen. This voltage is sent to the control board where it is read directly by the processors internal Analog to Digital Converter.
-
Page 43: 3.11. Mass Flow Meter Circuit
3.10.17. Temperature / Pressure Dependence The output of an Oxygen cell varies slightly with gradual changes in temperature, but when exposed to a step change in temperature, these sensors exhibit a transient response - a signal decrease for a sharp rise in temperature and a signal increase for a sharp drop in temperature. -
Page 44: Calibration
CALIB BRATION The Ae eroNOx 2.0 must be e zeroed da aily and high h calibrated d at least w eekly as pa art of norma use to ensure the e sensors a are function ing correctl ly and the d device is op perating no rmally. -
Page 45: O 2 High Range Calibration (Weekly)
Press s and hold “ “Hold to Z ERO” soft ntil timer com mpletes (~3 3 seconds) en zero cal ibration is f finished it w will ead “Done”. Monitor r should ind dicate: NO - 0 ppm - 0 ppm –... - Page 46 Connect c alibration c circuit (P/N 7 38-1850) to o 100% O gas source Set O to ~1 L/Min NOTE E: Check v valve will du ump excess w if oversup pply of O is given. Conne ect sample line plug of f calibration circuit t into AeroN...
-
Page 47: High Range Calibration (Weekly)
4.3. NO High R Range Calib bration (We eekly) Ensure tha at low range e calibratio n was perfo ormed first. NO High h Range Ca alibration If O gh calibratio on was just completed, press the “ “BACK” bu utton until gas se election scr... - Page 48 Connect ca alibration re egulator to N calibration gas. Conn ect calibrat tion circuit to o calibration n regulator. 1. Calibrat ion regulato or (731-91 2. Calibra ation Circuit t (738-185 ss “NO” so oft key. NO ppm b becomes hig ghlighted a displays c current mea...
-
Page 49: 2 High Range Calibration (Weekly)
hen NO dis splay has st tabilized aft fter 2- 4 minutes, , use “UP A AND DOWN N” arrow ke eys to adjus st reading to concentratio on on label (i.e., 45 pp pm). 4.4. High Range Cali ibration (W eekly) Perform lo ow range ca... - Page 50 btain NO Calibration g gas, confirm m the follow wing from th he label: Expiration Date . Concentra ation Connect ca alibration re gulator to N calibration gas. Conn ect calibrat tion circuit to o calibration n regulator. 1. Calibrat ion Regulat tor (731-91 2.
- Page 51 ppm b becomes hi ghlighted a displays c current mea asured valu Turn cylinde er on. (Rep place cylind der if pressu ure is below w 500 psi). Allow gas to o vent for 10 0 seconds t then tach calibra ation circuit to the Aero oNOx...
-
Page 52: Maintenance
MAINTENANCE 5.1. AeroNOx 2.0 Service Procedures Overview The AeroNOx 2.0 has a Nitric Oxide (NO) delivery flow path and a Sampling flow path to verify the NO concentration delivered to the ventilator circuit. During assembly, repair, or yearly PM, both paths must be verified to be leak-free and measuring accurately. This must be done in addition to in-use low and high calibration that is performed each day or each week. -
Page 53: Maintenance Tools
5.2. Maintenance Tools DESCRIPTION SPECIFICATIONS USAGE EXAMPLE Phillips Screwdriver #1, #2 tips assembly / disassembly Xcelite X101 Xcelite X102 HEX Wrenches 2.5 mm, assembly / disassembly 5 mm, 0 .035” Diagonal Cutters component removal / Weller 170-M replacement Xcelite 54CG Needle Nose Pliers component removal / Xcelite 57CG... -
Page 54: Cleaning The Aeronox 2.0
5.4. Cleaning the AeroNOx 2.0 Disconnect external power before cleaning. Apply cleaning solution to a cloth and wipe down outer surface and cable. Use only the following cleaning agents. Allow unit to dry thoroughly before use. Immediate use after exposure to excessive cleaning agents such as Isopropyl Alcohol can affect sensor performance. -
Page 55: Replacing No, No And O Sensors
5.6. Replacing NO, NO and O sors Sens sor Replace ement Descrip ption Step Illustra tion UTION: DIS SCONNEC BATT TERY AND D EXTERNA WER BEFOR RE SERVIC Remo ove rear se nsor cover osening the e 4 screws 1. R Remove bot onnectors. - Page 56 1. R Remove the e new senso rom their pa ackaging an emove sho rting spring wires, or bia as board fro ensor if pre esent. 2. C Carefully clip p tabs from ides of sen sors to flus with sensor body.
- Page 57 Instal l new senso ors in rever order of removal . Be sure N and N sensor rs are place in the eir respecti ve location They have the s same physic pin co onfiguration n but are NO interchang geable.
-
Page 58: Sla Battery Replacement
5.7. SLA Battery Replacement Replace SLA battery at least every year. Rationale: Cycle life vs. depth of discharge (Battery datasheet) 200 cycles for 100% discharge (66.7 full discharge events per year) 450 cycles for 50% discharge (150 discharge events per year) 1200 cycles for 30% discharge (400 discharge events per year) Potential for decreased length of discharge cycle, noticed at a time of increased vulnerability (i.e. - Page 59 Desc cription Ill l ustration The A AeroNOx 2 is ship pped with an un ninstalled re echargeable e battery. To fu unction pr roperly, the e device st have the e battery in nstalled. The batte eries are NO interch hangeable.
-
Page 60: Aeronox
5.9. AeroNOx 2.0 MFM Flow Check/Leak Test Procedure This document contains detailed instructions for checking the MFM (mass flow meter) flow and for ensuring that there are no leaks in the delivery circuit plumbing or around the stainless steel fittings in an AeroNOx 2.0 . Nitrogen is used as a test flow gas. This procedure is to be performed as part of the AeroNOx 2.0 production process prior to initial release of the product, at least once annually for units returning from the field, and... - Page 61 5.9.2. Lea ak Check 5.9. .2.1. Recor rd the seria al number o of the devic ce, flowmete er tool ID#, Calibr ration Due d date on the e Test Reco ord. 5.9. .2.2. Skip d disassembly y steps if ru unning a lea ak check on n a comple...
- Page 62 5.9.2.13. Open the AeroNOx 2.0 flow control knob fully (CCW). If already fully opened, do not force it further. Knob may turn 10+ times. 5.9.2.14. Connect Beswick (small quick disconnect) to AeroNOx 2.0 . 5.9.2.15. Turn on the AeroNOx 2.0 . Hold down the Alarm Silence and Back buttons simultaneously for ~5 seconds to enter “Safety Off”...
- Page 63 AeroN NOx 2.0 MFM Flow Check / Le eak Test Re ecord for AeroN NOx 2.0 S/N _______ ________ cord the too ol control nu umber and c calibration date for the e following: Flow wmeter Too ol # _______ ______ Cal.
-
Page 64: Aeronox
5.10. AeroNOx 2.0 Sample Rate Adjustment Procedure This document provides instructions for adjusting sample flow and the “Sample Blocked” trip point for AeroNOx 2.0 devices. This procedure is to be performed for all production units prior to their initial release, yearly for units returning from the field, and as part of every servicing process. - Page 65 owmeter w ith Precisio on Meterin ng Valve an nd Manom meter NOTE An a lternative p pressure me eter may be e used inste ead of a wa ater mano ometer. 5.10 0.2.4.Conn ect the othe er end to th he precision n metering v valve fitting...
- Page 66 5.10 0.2.8. If sam mple flow ra ate adjustm ment is requ uired, proce eed as follow UTION: Perform th is procedu ure in acco ordance wi ith ESD Co ontrol. 5.10 0.2.9. Powe er the Aero NOx 2.0 off, disconn nect the pow wer supply , and remov...
- Page 67 5.10.2.19.Partially close precision metering valve and verify flow rate at -50 O when pump shuts off is 130 mL/min and 210 mL/min. Record Value. 5.10.2.20.Record check mark if “SAMPLE BLOCKED” visual and audible alarms occur. 5.10.2.21.Record results of procedure Pass/Fail and why. Repeat adjustment procedure if necessary.
- Page 68 Aero oNOx 2.0 Sample R Rate Adjus stment Rec cord for AeroN NOx 2.0 S/N _______ ________ Record th he equipme ent identifi ication num mber and t the calibra ation due d date (if applicable e) for the f following: Gas Flowm meter:...
-
Page 69: Aeronox 2.0 Gas Testing Procedure
The device must have a battery connected to function properly, even with external power applied to the DC jack. This procedure applies to all AeroNOx 2.0 units manufactured by International Biomedical and is to be performed as part of the AeroNOx 2.0 production process or as part of the servicing process. - Page 70 5.11.3. Battery / Charge Indicator Check 5.11.3.1. Ensure that the battery symbol is full when external power is temporarily unplugged. Record this by placing a checkmark in the corresponding box on the AeroNOx 2.0 Gas Testing Record Form. 5.11.3.2. Ensure that the charge symbol is displayed, green LED lights up on front and on back when connected to the 9 V power supply specified for use with the AeroNOx 2.0 .
- Page 71 5.11.6. Nitric Oxide (NO) Gas Testing 5.11.6.1. NO Calibration 5.11.6.1.1. Ensure that the AeroNOx 2.0 complete with sensors to be calibrated has been plugged in for at least 48 hours prior to being gas tested. This will ensure that the NO sensor has biased properly.
- Page 72 5.11.6.1.9. Disconnect the O Calibration circuit and close the Oxygen Cylinder valve. Open the 80 ppm NO Cylinder valve and connect the 80 ppm NO Calibration Circuit to the AeroNOx 2.0 sample port. Wait for at least 2 minutes for the gas concentrations to stabilize. Ensure the displayed NO value returns to the established high cal value.
- Page 73 5.11.7.2. NO Mid-Range Reference Testing Repeat the steps for NO Mid-Range Reference Testing (Section 5.11.6.2.) substituting NO in place of NO, noting the following differences. 5.11.7.2.1. Note that the AeroNOx 2.0 accuracy is 0.1 ppm for , so displayed values need to be within this specification.
- Page 74 5.11.7.4.2. While in “NITRIC OFF” alarm condition, simultaneously pressing and holding the back and alarm silence buttons for 5 seconds enables the safety shutoff override. The display should read “SAFETY OFF” once the safety shutoff has been overridden. Ensure that “SAFETY OFF” is not displayed before 5 seconds has elapsed.
- Page 75 5.11.7.6. NO Safety Shutoff Alarm Check the safety shutoff alarm function by ensuring that: 5.11.7.6.1. When the displayed NO value exceeds the value set on the “HI” alarm limit by 1 ppm (or more), the audible alarm activates and the AeroNOx 2.0 display alternates between the message “NITRIC OFF”...
- Page 76 eroNOx 2 Testing Record F Form oNOx 2.0 S/N:______ ______ ate:________ _______ Time:_____ ______ M Flow/Leak k Check and Procedures s Completed mple Flow C alibration Batt tery / Charge e Indicators Battery Indi icator Charge I ndicator Zero o Calibration =21% NO=0 0 ppm...
-
Page 77: Repair Maintenance
5.12. Repair Ma aintenance 5.12.1. Fr ront Extern nal Layout 5.12.2. Re ear Extern nal Layout Par rt No. 715-008 88, Rev. B - 74 -... - Page 78 5.12.3. Re ear Interna al Layout 5.12.4. Fr ront Intern al Layout Par rt No. 715-008 8 8, Rev. B - 75 -...
- Page 79 5.12.5. Se ervice Part ts List Compone ent/Subassem mbly Part Number Power PCB BA, SLA 3-0007 Power PCB BA, LiFePO 3-0008 Control PC CBA w/ Proce ssor 723- 0001-XX Sample Pu ump Assembl 3-0005 AeroNOx 2 2.0 4.3” LCD 8-1908 Mass Flow w Meter 8-1835...
- Page 80 Compone ent/Subassem mbly Part Number Sample Inl et Port 8-1905 Delivery G as Outlet Por 8-1846 NO/N2 Ga s Input Port 8-1814 Protective Cover 8-1934 ervice parts s may be ob btained from m your Aer roNOx 2.0 distributor r or epresentativ ve.
- Page 81 5.12.6. General Disassembly Remove the protective boot. Start at top front corners and slip the boot backwards. Then slip the bottom front corners of the boot backwards. Remove battery cover, disconnect battery cable, and remove battery. Remove five M5 screws holding enclosure together. Do not lose sealing washers.
- Page 82 Unscrew sample pump retaining clamp. Remove right angle barb fitting from manifold. Remove tube from pressure sensor, breaking glue joint. Note that it must be reconnected to the same barb upon reassembly (barb closest to wall). Snip the zip tie bundling the tubes and cables. Note that it is not pinching the tube closed.
- Page 83 5.12.13. Sample Inlet Port Perform general disassembly. Perform Control PCBA removal steps as required for easier access to the sample inlet port nut. Disconnect 1/8” tube from the sample fitting. Remove the sample fitting (5/8” Socket). Reverse order to reassemble. 5.12.14.
-
Page 84: Troubleshooting
TROU UBLESHOO OTING 6.1. Troublesho ooting Alar ms Guide High Priority A Alarms gh Priority Alarms sible Caus Recomm mended Act tion 1. Alarm m is set Make sure a alarm is set inapp propriately ppropriately y for the O etting delive ered on the entilator. - Page 85 High Priority A Alarms gh Priority Alarms sible Caus Recomm mended Act tion 1. Alarm m is set . Make sur re alarm is inapp propriately appropria ately for the setting de elivered on ventilator 2. O alibration m . Perform a a low and h high have...
- Page 86 Medium m Priority Alarms dium Priori ity Alarms ossible Cau Recomm mended Ac ction 1. Wa ater contam minates Replace fil ter or samp line. mple line or r filter. 2. Sam mple line m may be a. Make s sure sample e line cked or pin...
- Page 87 Medium m Priority Alarms dium Priori ity Alarms ossible Cau Recomm mended Ac ction 1. Bat ttery voltag e has a. Disconn nect patien t and opped to a p point manual lly ventilate e with ere data is INOstat t Bagger.
- Page 88 Priority A larms ow Priority y Alarms ssible Caus Recomme ended Act tion 5. Out of date or w wrong a. Verify ca alibration ga calib used. bration gas expiratio on date. b. Replace e calibration n gas and perf form a low high ran ge calibrati...
-
Page 89: Troubleshooting Other Symptoms And Solutions
6.2. Troubleshooting Other Symptoms and Solutions The following section describes the most common symptoms that are likely to occur with the AeroNOx 2.0 and suggests the possible solutions. SYMPTOMS AND SOLUTIONS Instrument has been sitting for some time. It has not been connected to a charger and the power switch does not turn the instrument on. - Page 90 NO or NO sensors are very slow to respond or response is very low. Possible solutions: Sample flow rate low. Verify flow rate is 120-220 mL/min. Replace old pump, failed orifice, or adjust sample flow rate potentiometer. Sensor may be old and the catalyst has been depleted. Check the date code on the sensor - the last 3 digits of the serial number represent the month and year (e.g., 126 = December 2016).
- Page 91 NO or NO values drift while instrument is in use. Possible solutions: See possible solutions for NO or NO very slow to respond (Symptom #5). Check wiring harness and connectors that connect the sensors to the circuit boards for loose wires or intermittent connections.
-
Page 92: Customer Service
Any equipment sent to International Biomedical without an RMA will not be accepted for delivery. Do not ship any products to International Biomedical without first obtaining an RMA. Part No. 715-0088, Rev. B... -
Page 93: Appendix
Return Merchandise Authorization To return AeroNOx 2.0 contact customer service at International Biomedical. Disconnect battery. Pack AeroNOx 2.0 as requested by customer service along with any requested accessories. Put RMA number on outside of packaging and send to location specified by customer service. -
Page 95: Nitric Oxide Sensor Specifications
7.3. Nitric Oxid d e Sensor S S pecificatio Par r t No. 715-008 88, Rev. B - 92 -... - Page 96 Par rt No. 715-008 8 8, Rev. B - 93 -...
-
Page 97: 2 Sensor Specifications
7.4. Senso o r Specifica a tions Par r t No. 715-008 88, Rev. B - 94 -... - Page 98 Par rt No. 715-008 8 8, Rev. B - 95 -...
-
Page 99: Oxygen Sensor Specifications
7.5. Oxygen Se e nsor Spec c ifications Par r t No. 715-008 88, Rev. B - 96 -... -
Page 100: Mass Flow Sensor Specifications
7.6. Mass Flow w Sensor Sp pecification ass Flow M Meter - 2.00 L/min n, 0.5 V - 4 .5 V (0.5 V offset at ze e ro, 4 V Sp pan) Par rt No. 715-008 88, Rev. B - 97 -... -
Page 101: Recommended Practices For Handling Of Gas Cylinders And Regulators To Maintain Gas Quality
7.7. Recommended Practices for Handling of Gas Cylinders and Regulators to Maintain Gas Quality Any time a regulator is installed on a tank or cylinder of compressed gas, certain precautions must be followed to prevent contamination of the gas in the tank with the air that is trapped in the dead space of the regulator. - Page 102 Purge Method 2: Install a shut-off valve on output of regulator. Install and tighten the regulator onto tank. Open regulator to allow flow through it. Close shut-off valve. Crack and immediately close the tank valve. Open shut-off valve and bleed pressure to 0, preferably to an external vent. Close shut-off valve.
- Page 103 Each time a regulator is mounted on a tank and not properly purged, the concentration of NO could be reduced by 0.4 ppm by diffusion of the Oxygen back into tank through the valve. Conversely, NO concentration could increase by 0.4 ppm each time. As a tank empties, for example at 1000 psi, with 816 ml of NO left in the tank, 0.84 ml now represents [(0.84 / 816) 100]% = 0.102% of the NO present in the tank.
-
Page 104: System Wiring Diagram
231 0032 MAIN CABLE BAT_V SAMPLE_BLOCKED# SYS_ON CHARGING...
Need help?
Do you have a question about the AeroNO 2.0 and is the answer not in the manual?
Questions and answers