Table of Contents
Advertisement
Advertisement
Table of Contents

Subscribe to Our Youtube Channel
Related Manuals for Puqpress Mini


Summary of Contents for Puqpress Mini
- Page 1 USER MANUAL MODEL Mini 1-210-0074-4...
- Page 2 User manual www.puqpress.com/manuals WARNING For more information see the extended manual online about safe installation and operation. Original manual...
- Page 3 IMAGES �� Mini...
- Page 4 ��...
- Page 5 IMAGES ��...
- Page 6 �� �� �� �� ��...
- Page 7 IMAGES �� �� �� ��...
-
Page 8: Table Of Contents
3.2 Personnel requirements Please read this manual closely so you and 3.3 Explanation of the symbols on the your customers will enjoy the PUQpress to the product and packaging fullest and store the manual away safely after 4 Installation reading. If anything remains unclear, please 4.1 Preparation feel free to contact your authorized dealer or 4.2 Adjusting the port-a-filter clamp contact us directly. 4.3 Switching on the PUQpress We wish you all the fun and perfection with 5 Operation your new PUQpress! 5.1 Preparation 5.2 Using the PUQpress Greetings from Amsterdam, 5.3 Adjusting the tamping force Barista Technology B.V. 5.4 Selecting the tamping mode 5.5 Checking the tamping cycle count 1 INTRODUCTION 5.6 Checking the cleaning cycle count ... -
Page 9: Warranty
1.2 non-authorized personnel. • The warranty period is 2 years from the date of purchase. Refer to the chapter 1.3 Disclaimer ‘ S pecifications’ on the amount of tamping Copyright © 2020 Barista Technology B.V. All cycles covered by the warranty. rights reserved. No part of this publication • The warranty covers all damages that may be reproduced or transmitted in any can be attributed to inferior materials or form or by any means without the prior defective workmanship. The written permission of Barista Technology B.V. corresponding PUQpress will be repaired The information in this publication is or replaced free-of-charge, with the proprietary to Barista Technology B.V. exception of transport or freight charges. Proper transport is the responsibility of 2 PRODUCT DESCRIPTION the customer, so please try to avoid damages during a product return by Intended use correctly packing the PUQpress. Use the 2.1 original packaging to return the The PUQpress is intended as a fully automatic PUQpress. coffee tamper. • This warranty does not cover damages ... -
Page 10: Specifications
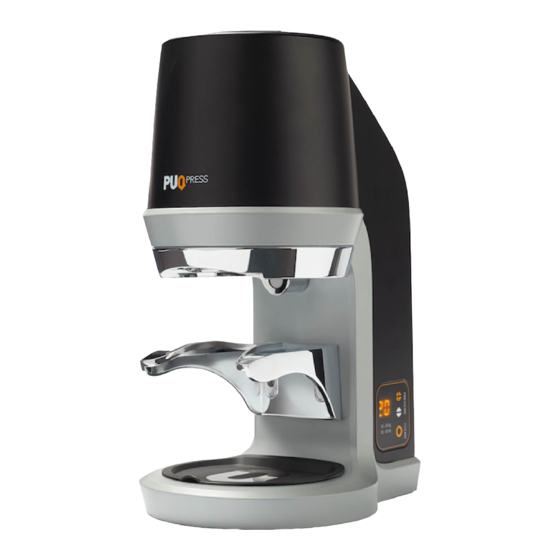
Serial number See tag plate on the bottom of the PUQpress. Year built See tag plate on the bottom of the PUQpress. Tamper diameter See tag plate on the bottom of the PUQpress. Main parts 2.3 1. Tamper base bolt See �� for an overview of the main parts of 2. Upper clamp the Mini. 3. Tamper base See �� for an overview of the main parts of 4. Contactless sensor the Q1. 5. Lower clamp See �� for an overview of the main parts of 6. Lower clamp bolts the Q2. 7. Ground coffee basket See �� for an overview of the main parts of 8. Display the Mini/Q1/Q2. -
Page 11: Safety
11. Set button • Never immerge cables, plugs or the 12. On/off switch PUQpress itself into water or other 13. Power cable port liquids to avoid electric shock, or injury. 14. Adjustment wheel • Always switch off the PUQpress before 15. Power cable performing maintenance or cleaning on 16. T-wrench (10 mm) the PUQpress to avoid electric shock, or 17. Allen key (4 mm) injury. • Always remove the plug from the outlet before performing maintenance or 3 SAFETY cleaning on the PUQpress to avoid electric shock, or injury. 3.1 Safety instructions • Always unplug the PUQpress from the power source and other equipment if WARNING problems occur to avoid electric shock, • Ensure you have fully read and or injury. -
Page 12: Personnel Requirements
3.3 Explanation of the symbols on the observe these instructions. product and packaging • Never drop the PUQpress and avoid Electronic equipment needs to bumping. Not doing so results in the bear the CE mark in order to be PUQpress getting damaged. marketed in the EU. CE marking shows that a product is assessed • Never unplug the PUQpress by pulling the before being placed on the market cable. Always grasp the plug and pull. and that it meets EU safety, health • Always place the PUQpress on a level, and environmental protection vibration-free surface. requirements. CE marking is also • Never operate the PUQpress in moist or sometimes accepted as a means of compliance with type-approval wet conditions. requirements; for example, • Make sure the port-a-filter (group handle) electronic components that does not wiggle after adjusting. require type-approval and also CE • Make sure not to use a damp/wet cloth to ... -
Page 13: Installation
Provided tools and materials PUQpress is ETL Intertek certified. • T-wrench Indication to explain that the 4.2 Adjusting the port-a-filter clamp PUQpress is PSE certified. The PUQpress is designed so that all different Indication to explain that the port-a-filters from various espresso PUQpress is KC certified. machines fit into the clamp for even and level tamping. Indication to explain that the PUQpress needs to be collected CAUTION separately when disposed. Do not throw in the trash bin. Always adjust the lower clamp before use. Indication to explain that the Not doing so results in exposure of packaging can be recycled. dangerous moving parts. NOTICE 4 INSTALLATION Make sure to adjust the lower clamp before You have received your PUQpress in use. Not doing so can result in uneven and operating condition. Now you only need to unlevelled tamping. adjust the port-a-filter and switch on the PUQpress. Refer to the chapter ‘ S afety 1. Slightly loosen the bolts of the lower instructions’ for more information. clamp. Use the provided T-wrench. ��... -
Page 14: Switching On The Puqpress
2. Mini/Q1: Pull down the lower clamp. �� service personnel. For this reason, please Q2: Rotate the adjustment wheel contact a customer service repair facility or counter-clockwise to move the lower your dealer. clamp down. �� 3. Insert the port-a-filter between the 1. Plug the power cable into the PUQpress. upper and lower clamp. �� 2. Plug the other side of the power cable Mini/Q1: Move up the lower clamp. �� into a socket and/or (wall) outlet. Q2: Rotate the adjustment wheel 3. Switch on the PUQpress by setting the clockwise to move the lower clamp up. on/off switch to I. �� 5. Slightly fasten the bolts of the lower 5 OPERATION clamp. Use the provided T-wrench. Your PUQpress is now in operating condition. NOTICE Now you only need to use PUQpress and Make sure not to fasten the bolts entirely. adjust the settings to create perfect coffee! Refer to the chapter ‘ S afety instructions’ for Remove the port-a-filter. �� more information. 7. Fasten the bolts of the lower clamp with ... -
Page 15: Adjusting The Tamping Force
Adjust the tamping force by using the display SINGLE Single tamp and the buttons: 1. Press the up button to increase the 4. Press the set button to confirm the force. setting. 2. Press the down button to decrease the force. 5.5 Checking the tamping cycle count 1. When the PUQpress is not in use, press NOTICE and hold the up and down button for 3 The force is displayed in kilograms (kg) or seconds. pounds (lbs). 2. The display flashes a number for 5 seconds. Multiply this number by 5,000 to 5.4 Selecting the tamping mode get the tamping cycle count. 1. Press and hold the set button for 5 seconds. ... -
Page 16: Maintenance
Contactless Brush Daily chapter ‘ S afety instructions’ for more sensor information. 6.2.1 Cleaning the tamper base 6.1 Preparation Clean the tamper base regularly: 1. Press the set button. The tamper base 6.1.1 Tools and materials moves down in the cleaning position. Required tools and materials 2. Remove the lid of the PUQpress. • Allen key 3. Unscrew the tamper base bolt by turning the Allen key counter-clockwise. �� Provided tools and materials 4. Remove the bolt. • Brush 5. Unscrew the tamper base by turning it • Damp cloth counter-clockwise. �� •... -
Page 17: Storing
6.3 Storing There are two types of upper clamps Store the PUQpress indoors in a dry and available. Which clamp you should use secure location, out of reach of children. depends on the diameter range of the tamper base: 6.4 Maintaining • Upper clamp 1: 53 – 55 mm • Upper clamp 2: 56 – 59 mm 6.4.1 Servicing If the filter basket diameter of your new Any required repairs may only be conducted espresso machine falls within the other range by authorized specialist personnel. For this as the one your PUQpress is suitable for, both reason, please contact a customer service the upper clamp and the tamper base need to repair facility or your dealer. Refer to the be changed. If it falls within the same range, safety instructions in chapter ‘ S afety only the tamper base needs to be changed. instructions’. It is advised to conduct all maintenance and 6.4.2 Ordering spare parts repairs by a customer service centre or your ... -
Page 18: Troubleshooting
TROUBLESHOOTING 7 Problem Cause(s) Solution(s) Ground coffee sticks to The tamper base is greasy or dirty. Clean the tamper base. the tamper base. The tamper base is wet. Dry the tamper base. The PUQpress does not The power cable is not inserted in the Plug the power cable into the start, the display does PUQpress. PUQpress. not work. The power cable is not plugged into the Plug the power cable into the socket socket and/or (wall) outlet. and/or(wall) outlet The power cable is not correctly Unplug the power cable and correctly plugged into the socket and/or (wall) plug the power cable into the socket outlet. and/or (wall) outlet. The socket and/or (wall) outlet is not Unplug the power cable and try another functioning. socket and/or (wall) outlet. Tamping does not start The sensor does not detect a Re-adjust the port-a-filter clamp. -
Page 19: Disposal
DISPOSAL 8 This symbol indicates that the PUQpress should not be thrown away with other household waste throughout the EU. To prevent possible harm to the environment or human health by uncontrolled waste disposal, you are responsible for recycling it so that it can promote the sustainable reuse of raw materials. To return your used PUQpress, you can use the regular return and collection systems or contact the dealer where the PUQpress was purchased. They can recycle the PUQpress for the environment. Dispose of the PUQpress following the locally applicable regulations or return the PUQpress to your dealer. Use the original packaging to return the PUQpress. -
Page 20: Barista Technology B.v
PUQpress is a product of Barista Technology B.V. Barista Technology B.V. info@baristatechnology.com Kotterstraat 14, 3133 KW Vlaardingen The Netherlands...
Need help?
Do you have a question about the Mini and is the answer not in the manual?
Questions and answers