Table of Contents
Advertisement
Quick Links
Advertisement
Table of Contents

Related Manuals for Lucznik Laura 555

Summary of Contents for Lucznik Laura 555
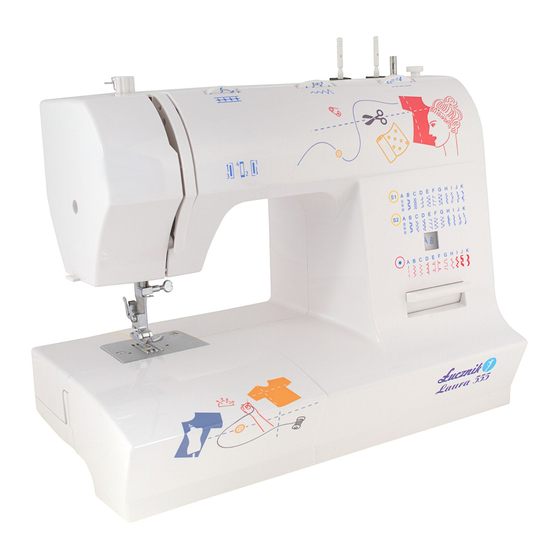
- Page 1 USER MANUAL...
- Page 2 Important safety instructions Please read the following instructions before using the machine. When using an electrical appliance, basic safety precautions should always be followed, including the following: 1. Read the manual carefully before using the machine. 2. The manual should be kept close to the machine. If the machine is passed on to a third party, it must be handed over together with the instructions.
- Page 3 In case of any problems, please contact us in writing or by phone: SEWING MACHINES IMPORTER: ASPA Electro Sp. z o. o. ul. Miechowskiego 1, 51-162 Wrocław tel: +48 71 32 73 138 CENTRAL SERVICE: ASPA Electro Sp. z o. o. ul.
-
Page 4: Main Parts
MAIN PARTS 1. Thread tension dial 2. Foot pressure regulator 3. Thread take-up lever 4. Thread cutter 5. Footer 6. Needle plate 7. Sewing table and accessory box 8. Bobbin stopper 9. Stitch length dial 10. Stitch width dial 11. Stitch display 12. - Page 5 ACCESSORIES Standard accessories 1 Optional equipment 2 a. Universal foot m. Foot for sewing buttons b. Zipper foot n. Blind stitch foot c. 4-step buttonhole foot o. Double needle d. Embroidery plate p. Darning foot e. Quilting guide q. Shirring foot f.
- Page 6 FITTING THE SPAN-IN SEWING TABLE Hold the snap-in sewing table horizontal, and push it in the direction of the arrow (1) The inside of the snap-in sewing table can be utilized as an accessory box. To open, lift up at the point of the arrow (2)
- Page 7 CONNECTING THE SEWING MACHINE TO THE POWER SOURCE Caution: Always make sure that the machine is unplugged from the power source and the main switch is on „O” when the machine is not in use and before inserting or removing parts. This machine is equipped with a polarized plug which must be used with an appropriate electrical outlet.
- Page 8 When sewing several layers or thick fabrics, the presser foot can be raised to the second pressure level, which makes it easier to work. ADJUSTMENT OF THE FOOT PRESSURE The presser foot pressure is factory set and does not require special adjustment for a specific type of fabric (light or heavier).
-
Page 9: Attaching The Presser Foot Holder
ATTACHING THE PRESSER FOOT HOLDER Attention: Turn the power switch to “O” before carrying out any of the operations below. Raise the needle to its highest position and raise the presser foot lever. Attach the presser foot holder (b) to the presser foot bar (a) Pic.1 Attaching the presser foot: Lower the presser foot holder (b) until the cut-out (c) is directly above the pin (d) Pic.2... -
Page 10: Winding The Bobbin
WINDING THE BOBBIN Place an empty bobbin on the bobbin winder spindle. Take the thread from the spool through the bobbin winder tension disc. (1) Wind the thread a few times by hand around the empty bobbin in a clockwise direction. Push the bobbin to the right towards the bobbin winding position. -
Page 11: Inserting The Bobbin
INSERTING THE BOBBIN Attention: Turn the power switch to “O” before inserting or removing the bobbin. When inserting or removing the bobbin, the needle must be fully raised. Open the hinged cover. Hold the bobbin case on hand. Insert the bobbin so that the thread runs in a clockwise direction (arrow). -
Page 12: Changing The Needle
CHANGING THE NEEDLE Caution: Turn the power switch to “O” before inserting or removing the needle. Replace the needle at the first sign of thread breakage or skipped stitches. Select the correct type and size of the needle for the fabric to be sewn. Turn the balance wheel towards you until the needle is at the highest position. -
Page 13: Threading The Upper Thread
THREADING THE UPPER THREAD Caution: Before threading, turn the power switch to “O” Raise the needle bar to its highest position. Follow exactly the numbered threading sequence illustrated below. If you skip a step or fail to properly engage the thread in any of the thread guides, the machine will not sew properly (1-5). - Page 14 AUTOMATIC THREAD TENSION TOOL (ADDITIONAL OPTION) Caution: Turn the power switch to “O” Raise the needle bar to its highest position. Push the lever (A) down. The thread automatically twists to the threading position (B) Wrap the thread around the hook (C) Bring the thread to the front, needle, around the hook (D), down, and up.
- Page 15 THREAD TENSION Note: The bobbin thread tension has been adjusted at the factory and readjustment is usually not required. Lower thread tension: To test the bobbin thread tension, remove the bobbin case and bobbin from the machine and hold the bobbin case suspended by the thread.
-
Page 16: Bringing Up The Lower Thread
BRINGING UP THE LOWER THREAD Hold the upper thread with the left hand. Turn the handwheel towards you with your right hand until the needle goes down and comes up again to its highest position (1). Lightly draw the needle thread forming a loop with the bobbin thread. -
Page 17: Reverse Sewing
REVERSE SEWING Reverse sewing is used for locking the end of seams and where reinforcement is needed. At the end of the seam, press down the reverse sewing lever and touch the foot control lightly. Sew a few reverse stitches. Release the lever and the machine will sew forwards again (A). -
Page 18: Matching Needle/Fabric/Thread
MATCHING NEEDLE/FABRIC/THREAD IMPORTANT: Match needle size to thread size and weight of the fabric NEEDLE, FABRIC SELECTION Note: Twin needles, can be purchased for utility and decorative work. When sewing with twin needles, the stitch width dial should be set at less than “2.5” European needles show sizes 65, 70, 80, etc. -
Page 19: How To Choose Your Pattern
HOW TO CHOOSE YOUR PATTERN For straight stitch select pattern “A” with pattern selector dial (4). Adjust the stitch length with the stitch length dial (2). You may choose any needle position, by turning the stitch width dial (1). For zigzag stitch, select pattern “B” with pattern selector dial (4). Adjust the stitch length (2) and stitch width (1) according to the fabric being used. -
Page 20: Straight Stitching And Needle Position
STRAIGHT STITCHING AND NEEDLE POSITION Turn the pattern selector dial so that the stitch display shows the straight stitch position. Generally speaking, the thicker the fabric, thread, and needle, the longer the stitch should be. Choose your needle position, from the left position to right needle position by changing the stitch width dial (1) from “0”... -
Page 21: Zig Zag Sewing
ZIG ZAG SEWING Turn the pattern selector dial to B. Function of stitch width dial: The maximum zigzag stitch width for zigzag stitching is “5”, however, the width can be reduced on any pattern. The width increases as you move the zigzag dial from “0”-“5”. - Page 22 BLIND STITCH / LINEN SEAM The blind hem foot is included as standard equipment. For hems on curtains, trousers, skirts, shirts etc. Blind hem for stretch fabrics. D position of the selector dial Blind hem for firm fabrics. Position E or F of the selector dial Set the machine parameters according to the drawings.
-
Page 23: Overlock Stitches
OVERLOCK STITCHES The overcasting is an optional accessory not supplied with your machine. All overlock stitches are suitable for sewing and neatening edges and visible seams in one operation. When neatening, the needle should just go over the edge of the fabric. -
Page 24: Button Sewing
BUTTON SEWING Attach the embroidery plate to the needle plate as shown in figure 1. Change the presser foot to the button sewing foot. Place the fabric under the presser foot. Place the button in the right place and lower the presser foot. Turn the stitch selection dial to zigzag. -
Page 25: Utility Sewing
UTILITY SEWING Prepare Take off the universal foot and attach the buttonhole foot. Measure diameter and thickness off button and add 0.3 cm(1/8”) for bar tacks; mark buttonhole size on fabric. Place the fabric under the foot, so that marking on the buttonhole foot aligns with starting marking on fabric. -
Page 26: Zippers And Piping
ZIPPERS AND PIPING Set the machine as illustrated. Dial selector on“A”. Set stitch length control between “1”-“4” (according to the thickness of the fabric). The zipper foot can be inserted right or left, depending on which side of the foot you are going to sew (1). -
Page 27: Step Zigzag
3-STEP ZIGZAG Sewing on lace and elastic, darning, mending, reinforcing edges. Set the machine as illustrated. Pattern selector on “C”. Place patch in position. The stitch length can be shortened to produce very close stitches (1). When mending tears, it is advisable to use a piece of backing fabric to reinforce. -
Page 28: Stitch Selection
STITCH SELECTION Triple straight stitch: (1/3) -Pattern selector on “A” -For hardwearing seams -Turn the stitch length dial to “S1” -The machine sews two stitches forwards and one stitch backward. This gives triple reinforcement. Triple zigzag (2/4) -Pattern selector on “B” -For hardwearing seams, hems, and decorative seams -Turn the stitch length dial on “S1”... -
Page 29: Smocking Stitch
SMOCKING STITCH Seams, hems, T-shirts, underwear, etc. Set the machine as illustrated. This stitch can be used for all types of jerseys as well as for woven fabrics (1). Sew at 1 cm (1/4’) from the fabric edge and trim the surplus fabric (2). -
Page 30: Practical Stitches
PRACTICAL STITCHES Set the machine as illustrated. Turn the switch width dial and stitch length dial to suit the fabric. Shell hem (A) For decorative edges. 3~5 Suitable for edges on sheer, fine, and stretch fabrics. The larger stitch should go just over the edge of the fabric to create the shell effect. - Page 31 DARNING - Set the desired stitch length with the pattern selection dial. - Set the pattern selection dial to straight stitch and the needle to the center position. - Place the darning fabric under the presser foot with the lining to be sewn on. - Lower the presser foot and sew forward or backward using the reverse sewing lever.
- Page 32 APPLIQUE -Turn the stitch length dial to the desired length. -Turn the pattern selector dial to zigzag. -Select a narrow zigzag width. -Cut out the applique design and baste it to the fabric. -Sew slowly around the edge of the design. -Trim excess material outside the stitching.
-
Page 33: Maintenance
MAINTENANCE Caution: Always make sure that the machine is unplugged from the power source and the main switch is on “o” before inserting or removing any parts and before cleaning. Remove the stitch plate: Turn the handwheel until the needle is fully raised. Open the hinged front cover and unscrew the needle plate screw with the screwdriver (1) Cleaning the transporter: Remove the bobbin case and use the brush supplied to clean the whole area (2) -
Page 34: Troubleshooting
TROUBLESHOOTING...
Need help?
Do you have a question about the Laura 555 and is the answer not in the manual?
Questions and answers