Table of Contents
Advertisement
Quick Links
Advertisement
Table of Contents

Summary of Contents for KRUG+PRIESTER IDEAL 8590
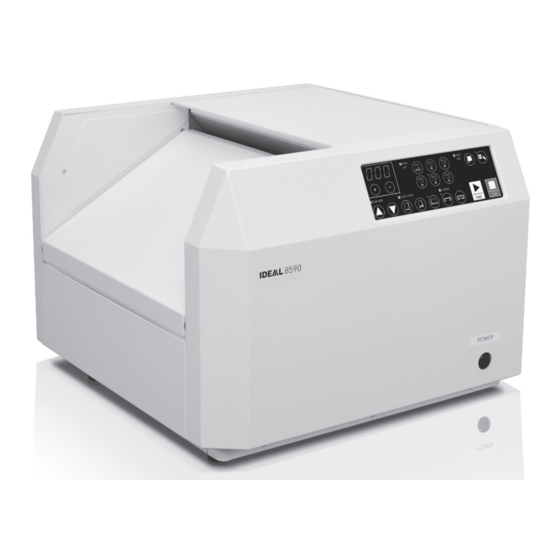
- Page 1 Broschürenfertiger Betriebsanleitung Booklet Maker Operating Instructions Agrafeuse-plieuse Mode d´emploi Plegadora grapadora Bookletmaker Instrucciones de uso Urządzenie do broszurowania Gebruiksaanwijzing Instrukcja obsługi IDEAL 8590 www.krug-priester.com...
-
Page 2: Table Of Contents
Operating Instructions (23 – 43) Definition of normal use Safety instructions Product features Included in the box Overview and description of parts Control panel Startup Making booklets Adjusting the paper stop Refilling staples Adjusting the stapling heads Care and maintenance Troubleshooting Technical data Terms of warranty... -
Page 3: Definition Of Normal Use
Introduction Thank you for choosing a device from IDEAL. Definition of normal use • The IDEAL 8590 is a tabletop bookletmaker. • Please read these operating instructions before starting to use the device and please follow the safety instructions. The operating instructions must be kept available with the device at all times. - Page 4 Safety instructions • Children may not recognise hazards associated with electrical equipment. You should therefore always supervise children near and around the bookletmaker. • Anyone who is not familiar with the operating instructions, any children and anyone under the influence of medication, alcohol or drugs must not use the device or may only use it under supervision.
-
Page 5: Product Features
• Easy and intuitive to operate with membrane keyboard, self-explanatory symbols and integrated LED counter. • The IDEAL 8590 bookletmaker folds and staples automatically in a single process. • Patent pending for staple mechanism with conventional stapling and space-saving flat stapling. -
Page 6: Included In The Box
Included in the box IDEAL 8590 1 box of staples Foldaway (5000 staples) collection box Broschürenfertiger Betriebsanleitung Booklet Maker Operating Instructions Agrafeuse-plieuse Mode d´emploi Plegadora grapadora Bookletmaker Instrucciones de uso Urządzenie do broszurowania Gebruiksaanwijzing Instrukcja obsługi IDEAL 8590 www.krug-priester.com Power cable... -
Page 7: Overview And Description Of Parts
Overview and description of parts Front Top cover Bottom cover Control panel Power switch Foldaway collection box Back Power connection... -
Page 8: Control Panel
Control panel PAPER PAPER SIZE FEED FREE – COUNT MODE STAPLE & FOLD CLINCHER START STOP Counter • In "Total counter" mode , the counter displays the number of booklets the device has counted. In "Preset counter" mode , the counter subtracts the number of booklets that have been counted from a preset value and displays the remaining number. - Page 9 Control panel PAPER PAPER SIZE FEED FREE – COUNT MODE STAPLE & FOLD CLINCHER START STOP Counter mode • Press the button for Total counter mode or the button for Preset counter mode. In Preset counter mode, you must define a preset value. Use the plus minus buttons to adjust the preset value.
-
Page 10: Startup
Startup Open the top cover. This cover has a scale for setting the paper format. Connect the power cable to the device first, then to the socket. Switch on the device using the power switch. The counter starts to flash, then is lit continuously after a few seconds. -
Page 11: Making Booklets
Making booklets 1. Choose between automatic and PAPER PAPER SIZE FEED manual paper feed mode. FREE – 2. Select stapling method: COUNT MODE STAPLE & FOLD CLINCHER START STOP 3. Select staple, PAPER PAPER SIZE FEED fold or FREE –... - Page 12 Making booklets 6. Set the paper format (paper guide) to your sheet size. Paper guide 7. Place the sheets in the paper tray. The sheets should held in place, but not too tight in the paper guides. If you have selected automatic mode , the device starts automatically.
-
Page 13: Adjusting The Paper Stop
Adjusting the paper stop 1. Switch off the device at the power switch. Disconnect the mains plug. Open the bottom cover. 2. Place a sheet of paper in the paper tray. Set the paper format (paper guide) to your sheet size. Check the end of the sheet against the stop. -
Page 14: Refilling Staples
Refilling staples 1. Switch off the device at the power switch. Disconnect the mains plug. Open the bottom cover. Pull the staple holder down and hook it into the applicable recess. 2. Open the magazine. 3. Insert the new staples. Only use a new set of staples that is at least 5 cm long to refill the magazine.The system may jam if a set of staples shorter than 5 cm... -
Page 15: Adjusting The Stapling Heads
Adjusting the stapling heads The device has two stapling heads that can be attached at spacings of 90, 135 and 180 mm. Switch off the device at the power switch. Disconnect the mains plug. Open the bottom cover. Attach the stapling heads (secured with a wing bolt) at the positions you require: 90 mm 135 mm... -
Page 16: Care And Maintenance
Care and maintenance Cleaning the optical sensor • Clean the optical sensor every day to ensure that the device functions reliably. • Switch off the device at the power switch. Disconnect the mains plug. Open the bottom cover. Clean the optical sensor in the centre of the paper stop with an ordinary paint- brush. -
Page 17: Troubleshooting
Troubleshooting Problem Cause Action The device cannot Is the power cable connected Switch off the power switch and be switched on. correctly? insert the mains plug securely into the socket. Check that the power connection on the back of device is not loose. -
Page 18: Technical Data
IDEAL 8590 technical data Power supply 220-240V 50Hz / 100-120V 60Hz Dimensions (W x H x D) 490 × 355 × 474 mm Weight 20 kg Operating environment For use in Indoor environment Max. recommended altitude Max. 2000 m above sea level Operating temperature 0 to 50 ˚C... -
Page 19: Terms Of Warranty
Terms of warranty IDEAL provides a warranty for this device from the date of purchase. The terms of warranty are defined by our local representative. • If a material or design defect occurs during the warranty period, IDEAL shall repair or replace the device, or repay the purchase price, at its discretion. - Page 20 The company Krug + Priester has the following certifications: • Quality management system according to DIN EN ISO 9001:2015 • Environmental management system according to DIN EN ISO 14001:2015 • Energy management system according to DIN EN ISO 50001:2011...
- Page 21 The unit is CE compliant and adheres to the following guidelines: • 2014/35/EU for electric safety • 2014/30/EU for electromagnetic compatibility • 2011/65/EU, 2015/863/EU RoHS directive The exact technical specifications can be found on the technical specifications sticker on the machine. To claim under guarantee, the machine must still carry its original identification label.
- Page 22 EC-declaration of conformity - Herewith we declare that IDEAL 8590 Made in Vietnam - complies with the following provisons applying to it 2014/35/EU Low voltage directive 2014/30/EU EMV Electromagnetic compatibility directive 2011/65/EU, 2015/863/EU RoHS directive - Applied harmonised standards in particular...
Need help?
Do you have a question about the IDEAL 8590 and is the answer not in the manual?
Questions and answers