
Subscribe to Our Youtube Channel
Related Manuals for DigiTech AR1948


Summary of Contents for DigiTech AR1948
- Page 1 DAB+ & FM Audio Receiver with Bluetooth® Technology Model: AR1948 Instruction Manual...
- Page 2 DO NOT use any sharp object to operate your unit’s touch-screen display. Excessive force could damage the LCD display. 6. The AR1948 unit IS NOT WATERPROOF. Avoid exposing it to rain or other forms of excessive moisture. Water damage is not covered under the warranty.
-
Page 3: Table Of Contents
Table of Contents Features & Specfications Appearance and Key Descriptions Getting Started Operation Modes Switching Scanning for DAB+ Stations Manual Tune Preset the DAB+ Stations DAB+ Information Display Scanning for FM Stations Preset the FM Stations FM Station Information Display Menu &... -
Page 4: Features & Specfications
FEATURES: • Upgrade solution for the existing audio system to receive FM / DAB / DAB+ / Bluetooth • 53 x 28.6mm LCD screen for displaying radio information • With auto-scan function and multiple buttons for station presetting • Line-in / line-out for connecting external players / speakers or Bluetooth headsets •... -
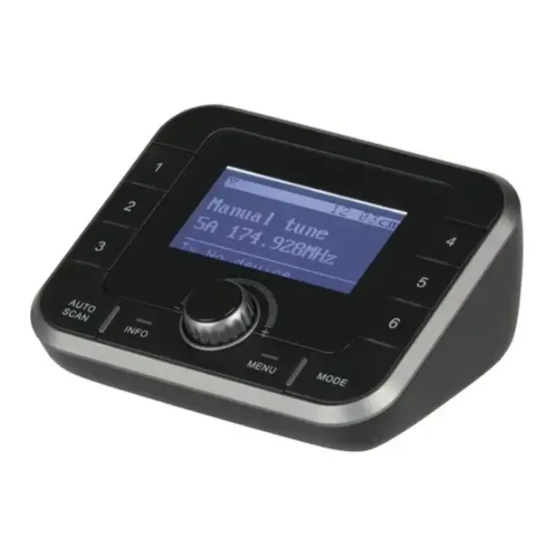
Page 5: Appearance And Key Descriptions
Check the battery symbol displays on the right-top of the screen to see the remaining battery. If the battery is less than 1 box, please connect the power adapter to the back of AR1948 and plug it into a power socket. •... -
Page 6: Operation Modes Switching
FM radio or music from your cell phone from the speaker. Bluetooth Receiver Mode: turn on Bluetooth on your phone (or other Bluetooth devices), search for a new device and select “AR1948” to start pairing. Once connected, you can enjoy music from your cell phone from the speaker. - Page 7 OPERATIONS MODE SWITCHING: Illustration of Connection Conditions: Line-out Adaptor Speaker without Bluetooth Line-in Bluetooth Receiver Mode Bluetooth Headset Line-in Adaptor Speaker with Bluetooth Bluetooth Transmitter Mode...
-
Page 8: Dab
DAB: Note: Before listening to the radio, ensure the antenna is adjusted with proper placement and direction. The icon on the top-left corner of the screen shows the signal reception quality. Scanning for DAB+ Stations Press “AUTOSCAN” to run full scan of all stations. The scanning will stop at an available station. -
Page 9: Menu & Settings
MENU & SETTINGS: Note: At any operation mode, press “MENU” to enter the system menu & settings in order to change the device configurations. Tuning the knob to select submenu and press the knob to confirm. Backlight Select illumination level of the backlight (High / Medium / Low) Clock Setup Go to the Clock Setup and the Hour digits will flash and are ready for setting, rotate the knob to adjust the hour and press the knob to confirm. -
Page 10: Troubleshooting
TROUBLESHOOTING: Errors Solutions The device does not switch on. 1. The battery may out of power. Check if the power adaptor is connected properly with the power supply. 2. The device may malfunction when used in areas with strong radio interference. The device will work properly again once interference ceases. - Page 11 These materials are protected by copyright law and international treaties. Any unauthorized use, reproduction or distribution of these materials, or any portion herein, will result in severe civil and criminal penalties and fines. Violators will be prosecuted to the fullest extent of the law.
- Page 12 Distributed by: Electus Distribution Pty. Ltd. 320 Victoria Rd, Rydalmere NSW 2116 Australia www.electusdistribution.com.au Made in China...
Need help?
Do you have a question about the AR1948 and is the answer not in the manual?
Questions and answers