
Related Manuals for Vigilant Reliance Series


Summary of Contents for Vigilant Reliance Series
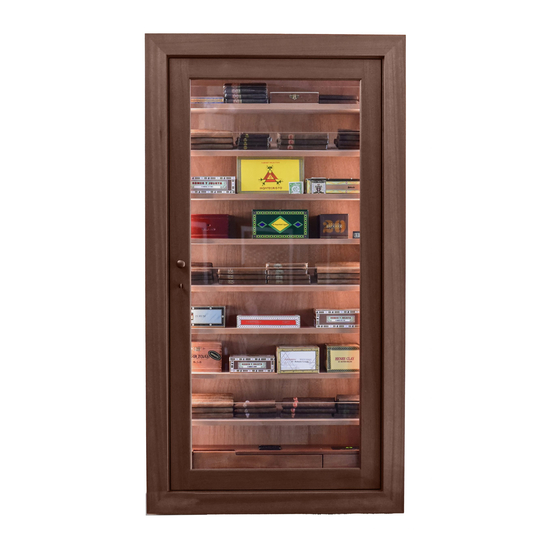
- Page 1 Reliance & Slim Series Wall Humidors Owner’s Manual Models – Reliance 300, 350, 450, 550 & 750 | Slim 250 & 300 85 Industrial Park Drive | Dover, NH 03820 | 888-812-4427 | info@vigilantinc.com...
-
Page 2: Table Of Contents
Congratulations! Your Reliance & Slim Wall Humidors will protect your investment in cigars and preserve them perfectly for years to come. In fact, this quality, handcrafted piece and its state-of-the-art electronic climate control system will be enjoyed for generations. Please read this entire manual before plugging in and operating your cigar cabinet. -
Page 3: Unpacking Your Cigar Cabinet
• Utility knife • Accessories Order Form Save all packing materials and sales receipt. Vigilant products should only be returned in original packaging. IMPORTANT! DO NOT PLUG IN YOUR VIGILANT ELECTRONIC CIGAR CABINET UNTIL ALL PACKING MATERIALS ARE REMOVED AND YOU HAVE CAREFULLY READ THESE INSTRUCTIONS. - Page 4 Instructional Videos Our step-by-step instructions are on the following pages, but you can also check out our how-to videos that cover installation of both the Reliance series (350, 450, 550 & 750) and our Slim series (250 & 300). Reliance Series –...
-
Page 5: Installation Instructions
Installation Instructions (Reliance Series only) Preparing the Rough Opening This wall humidor is designed to fit between two 16’’ on-center studs. Locate the area where you’ll install it and mark accordingly. The easiest installation is between studs. If this is not exactly where you want it, more extensive framing and drywall skills are required. - Page 6 5. Carefully cut along pencil lines using a drywall or reciprocating saw. We recommend cutting each side in this order: bottom, right, top, left. Pull out drywall and insulation to reveal rough opening with the stud running down the center. See Figures 3-4. TIP: Have a helper hold a shop vacuum near cutting blade while cutting to Figures 3 &...
- Page 7 Framing the Opening 9. Cut two top and bottom plates out of 2 x 4s (or 2 x 6s) to 30.5‘’ to use for framing the humidor on the top and bottom. Lay the bottom blocking on top of the center stud and tap into place.
- Page 8 Inserting the Cabinet 12. Before inserting the humidor cabinet into the opening, remove the glass cabinet door from the hinges and set aside. See Figure 10. Figure 10 13. Review location of power cord on the HARDWIRE TERMINAL cabinet and make necessary changes to accommodate your installation.
- Page 9 With the help of a partner carefully insert the cigar humidor into the rough opening until the trim is flush with the drywall and check for level. Secure the cabinet to the wall by driving four 2” screws through the pre- drilled holes in the side of the cabinet.
-
Page 10: Setting Up Your Humidification System
Setting up Your Humidification System Pull open the wood panel at the bottom left of the cabinet interior. Locate the black plastic water reservoir positioned in the center of the opening. Remove all packing materials from around the reservoir. Carefully fill the reservoir with 1.5 quarts of distilled water. USE ONLY DISTILLED WATER. -
Page 11: Operating A Sentry System
Operating a Sentry System The Sentry Humidification System electronically controls the humidity level of your wall humidor cabinet using a digital display. This system has a manual dial to adjust the relative humidity within your cabinet and is accurate to +/-5% of your desired set point. Note: This is our standard system. -
Page 12: Operating A Guardian System
Operating a Guardian System NOTE: Humidors shipped after July 2, 2021 have a Guardian system model with an LED display panel that is blue not green. If you did an option upgrade to the Guardian system and took delivery after this date, the complete Guardian system manual is found here: vigilantinc.com/support/instructions/cigar/Owner's-Manual-2021-GHS-10-100-150.pdf The Guardian Humidification System is a digitally controlled humidification system with a push button control panel. - Page 13 Adjusting the Set Point To view the current set point simply press the menu access button. To adjust the set point use either the up or down arrow buttons until you hit your desired humidity level. Note: The adjustability range for this cigar humidor is 60-80% RH.
-
Page 14: Led Lighting
LED Lighting The wall humidor has the option of dimmable LED display lighting that comes with a convenient, easy-to-use touch control. Maintenance Your wall humidor is more than just a humidor; it is a fine piece of handcrafted furniture. Regularly dust the exterior of the cabinet with a soft cloth that has been lightly sprayed with a dusting spray like Endust®. -
Page 15: Seasoning Your Wall Humidor
Seasoning Your Wall Humidor Your Wall Humidor’s interior is made of natural, untreated Spanish cedar and mahogany. When delivered, the moisture content of this wood interior is equal to the humidity in the air. To accelerate the seasoning of the interior, you may need to rub the shelves and cabinet interior with distilled water prior to the start-up period. -
Page 16: Troubleshooting
Troubleshooting Humidor not powering on 1. Check the power to your power outlet. Plug a light that you know operates properly into the outlet. If the outlet works properly, move to the next step. 2. Check your fuse or breaker box for the circuit controlling the outlet. If the circuit is breached, the fuse or breaker may have to be exchanged for higher amperage. -
Page 17: Guarantee
100% unconditional guarantee on our standard products.* If for any reason you are not satisfied with your Vigilant purchase within the first 30 days of receiving it, return it to Vigilant in original condition and original packaging and be issued a full refund, less inbound and outbound freight. - Page 18 Conditions to Limited Lifetime Wood Products Warranty • Vigilant will not be held responsible for damage incurred during a product’s return as a result of improper packaging. It is strongly suggested that all original packaging material from Vigilant be retained for returns.
Need help?
Do you have a question about the Reliance Series and is the answer not in the manual?
Questions and answers