Advertisement
Available languages
Available languages
Quick Links
Advertisement

Related Manuals for iOttie Aivo View

Summary of Contents for iOttie Aivo View
- Page 1 Aivo View Smart Dash Cam Setup Manual...
- Page 2 Aivo View Smart Dash Cam Setup Manual English French Italian German Spanish Japanese...
- Page 3 Index 01 Getting Started Welcome to the Aivo View Dash Cam! This For an optimal user experience, please follow manual will walk you through detailed product the detailed instructions in this manual: information, device installation and operation, using Alexa, and so much more!
- Page 4 What’s in the Box The Aivo View Dash Cam requires a Micro SD Card that must be inserted prior to operation. Aivo View Dash Cam, Magnetic Mounting (Does not come included). Base, Bluetooth Remote Button, 12ft Micro USB Compatible Sizes Cable, and 2 Cable Clips.
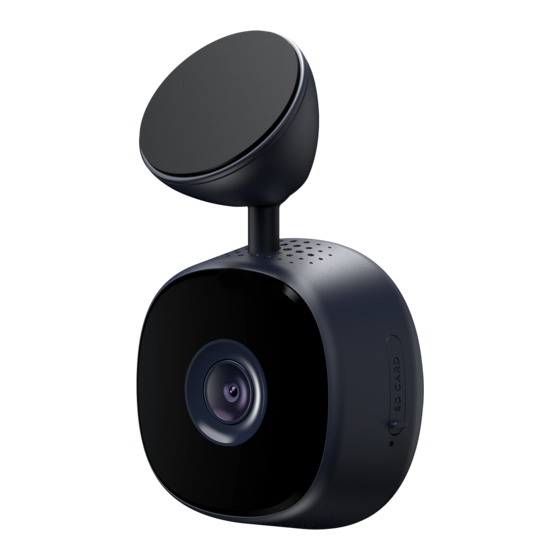
- Page 5 Product Specifications Dash Cam Item Specification Input 5V/1.5A Charging Port Micro USB Depth 1.66" Model # DCCRIO120 Width 2.6" Sensor Resolution 5M Pixel Height 4.0" Lens Angle/Aperture 140 Degrees/F1.8 Weight 3.92oz 1600p/1440p/ Recording Resolution 1080p/720p Micro SD Card Slot 32–128GB Recording Format Car Charger Item...
- Page 6 Aivo View Dash Cam. Dash Cam off and back on. There are two mounting options, dashboard *You can use the Live View (in the iOttie Connect App) or windshield. to guide you in making additional adjustments.
- Page 7 To mount the Bluetooth Remote Button, To power your Aivo View Dash Cam 1. Select a convenient space on your dash or 1. Connect the (12 ft) power cable to the Dash windshield for the Bluetooth Remote Button.
- Page 8 Do NOT mount the Dash Cam in front of an to the use of your Aivo View Dash Cam. airbag field of deployment or in a position that obscures any mirrors.
- Page 9 03 iOttie Connect App Connecting to Wi-Fi navigates Settings Wi-Fi out of the iOttie Connect App Wi-Fi To connect your Aivo View, you’ll need to and launches your phone’s Aivo View-XXXX download the iOttie Connect App and create Wi-Fi Settings. an account.
- Page 10 04 Works with Alexa Enabling Alexa Skills To connect the Aivo View and Alexa, the Dash Though it’s possible to use the Aivo View Cam must be added as a device to the Alexa solely with the iOttie Connect App, it also App (in addition to the iOttie Connect App).
- Page 11 Alexa, ask Dash Cam to turn Privacy Mode able to launch it at a later time. on/off. *Aivo View skills are currently available in English Alexa, ask Dash Cam to turn on/off ONLY. Aivo skills are updated regularly and may differ Privacy Mode.
- Page 12 Indice 01 Commencer Bienvenue à l’Aivo View Dash Cam! Ce manuel Pour une expérience utilisateur optimale, vous guidera à travers des informations veuillez suivre les instructions détaillées dans détaillées sur le produit, l’installation et le ce manuel fonctionnement de l’appareil, l’utilisation Commencer d’Alexa, et bien plus encore!
- Page 13 Qu’y a-t-il dans la boîte L’Aivo View Dash Cam nécessite une carte Micro SD qui doit être insérée avant son Aivo View Dash Cam, base de montage utilisation. (Non incluse). magnétique, bouton de télécommande Formats compatibles Bluetooth, câble Micro USB de 3,65 cm et 2 De 32 à...
- Page 14 Spécifications du produit Dash Cam Article Spécifications Entreé 5V/1.5A Port de Chargement Micro USB Profondeur 1.66" Modèle DCCRIO120 Largeur 2.6" Résolution du capteur 5M Pixel Hauter 4.0" Angle/ouverture 140 Degrés/F1.8 Poids 3.92oz de l’objectif Résolution 1600p/1440p/ Fente pour carte 32–128GB d’enregistrement 1080p/720p Micro SD...
- Page 15 *Alignez le marquage sur la base de l’Aivo View de manière à ce qu’il soit opposé à l’objectif de la caméra. 3. Une deuxième poussée vers Cela garantit une gamme maximale d’angles de caméra.
- Page 16 Pour installer le bouton de la télécommande Pour alimenter votre Aivo View Dash Cam Bluetooth 1. Connectez le câble d’alimentation (3,65 m) au 1. Choisissez un emplacement pratique sur votre port Micro-USB de la Dash Cam.
- Page 17 être encourus dans le cadre d’une loi ou d’une Ne pas installer la Dash Cam devant le champ de ordonnance locale ou nationale relative à l’utilisation déploiement d’un airbag ou dans une position qui de votre Aivo View Dash Cam. obstrue les rétroviseurs.
- Page 18 03 L’application iOttie Connect Se connecter au Wi-Fi, quitter Settings Wi-Fi l’application iOttie Connect et Wi-Fi Pour connecter votre Aivo View, vous devez de lancer les paramètres Wi-Fi Aivo View-XXXX télécharger l’application iOttie Connect et de votre téléphone. créer un compte.
- Page 19 04 Fonctionne avec Alexa Enabling Alexa Skills Pour connecter l’Aivo View et Alexa, la Dash Bien qu’il soit possible d’utiliser l’Aivo View Cam doit être ajoutée comme appareil à uniquement avec l’application iOttie Connect, l’application Alexa (en plus de l’application elle fonctionne également avec Alexa, iOttie Connect).
- Page 20 *Les compétences Aivo View sont actuellement Privacy Mode. disponibles en anglais UNIQUEMENT. Les Alexa, ask Dash Cam to mute/unmute. compétences Aivo View sont mises à jour Alexa, ask Dash Cam to turn on/off the régulièrement et peuvent différer de celles contenues microphone.
- Page 21 Indice 01 Iniziare Benvenuti alla Aivo View Dash Cam! Seguire le istruzioni dettagliate in questo Questo manuale guiderà l’utente attraverso manuale Per un’esperienza utente ottimale informazioni dettagliate sul prodotto, sull’installazione e sul funzionamento del Iniziare dispositivo, sull’utilizzo di Alexa e su molto altro...
- Page 22 Contenuto della confezione La Aivo View Dash Cam richiede una scheda Micro SD che deve essere inserita prima del Aivo View Dash Cam, base di montaggio funzionamento (non è inclusa). magnetica, pulsante Bluetooth a distanza, cavo Dimensioni compatibili micro USB da 3,6 metri e 2 fermacavi.
- Page 23 Caratteristiche del prodotto Dash Cam Elemento Caratteristiche Ingreso 5V/1.5A Porta Di Carica Micro USB Profonditá 1.66" Larghezza 2.6" Modello DCCRIO120 Altezza 4.0" Risoluzione del sensore 5M Pixel Peso 3.92oz Angolo/apertura della lente 140 Gradi/F1.8 Risoluzione di 1600p/1440p/ Slot per scheda Micro SD 32–128GB registrazione 1080p/720p...
- Page 24 2. Rimuovere la copertura È necessaria una scheda Micro SD (classe 10 adesiva della base e attaccarla con tra 32 - 128GB) per l’utilizzo di Aivo View. a un’area pulita. 1. Rimuovere la copertura in silicone 3. Tieni premuto per 30...
- Page 25 Per montare il pulsante remoto Bluetooth 1. Selezionare uno spazio conveniente sul Per alimentare la Aivo View Dash Cam cruscotto o sul parabrezza per il pulsante del 1. Collegare il cavo di alimentazione (3,6 metri) telecomando Bluetooth.
- Page 26 Dash Cam in modo da garantire un’adesione assoluta. L’utilizzo della Dash Cam o di iOttie Connect App durante la guida NON è raccomandato e in alcuni casi può essere illegale. L’utente *L’area verde mostra dove la videocamera può...
- Page 27 È Log In Una volta collegati, tornare all’App iOttie possibile iscriversi anche usando Connect per gestire la Dash Cam Aivo View. il proprio account Apple, Google, Facebook o Amazon. Aggiornamento del firmware Aggiungere un nuovo Per un’esperienza utente ottimale, assicurarsi...
- Page 28 04 Funziona con Alexa Abilitare le abilità di Alexa Per collegare Aivo View e Alexa, la Dash Cam Anche se è possibile utilizzare Aivo View solo deve essere aggiunta come dispositivo all’App con l’app iOttie Connect, funziona anche in Alexa (oltre all’App iOttie Connect).
- Page 29 Alexa, ask Dash Cam to turn on/off *Le competenze di Aivo View sono attualmente Privacy Mode. disponibili SOLO in inglese. Le Aivo View Skills Alexa, ask Dash Cam to mute/unmute. sono aggiornate regolarmente e possono differire Alexa, ask Dash Cam to turn on/off the da quelle contenute in questo manuale.
- Page 30 Index 01 Einstieg Willkommen bei der Aivo View Dashcam! Diese Für eine optimale Benutzererfahrung befolgen Anleitung informiert Sie ausführlich über das Sie bitte die detaillierten Anweisungen in Produkt, die Installation und Bedienung, die diesem Handbuch Verwendung von Alexa u. v.! Einstieg...
- Page 31 Die Aivo View Dashcam benötigt eine Micro Was befindet sich in der box SD-Karte, die vor dem Gebrauch eingesetzt Aivo View Dashcam, Magnetische Halterung, werden muss. (Nicht im Lieferumfang Bluetooth-Fernbedienungstaste, Mikro-USB- enthalten.) Kabel (3,6 m) und 2 Kabelklemmen. Kompatible Größen...
- Page 32 Produktspezifikationen Dash Cam Artikel Spezifikationen Eingang 5V/1.5A Ladeanschluss Micro USB Tiefe 1.66" Modell DCCRIO120 Breite 2.6" Sensorauflösung 5M Pixel Höhe 4.0" Angolo/apertura della lente 140 Grad/F1.8 Gewicht 3.92oz 1600p/1440p/ Micro SD- Aufnahmeauflösung 32–128GB 1080p/720p Kartensteckplatz Aufzeichnungsformat Caricatore per Auto Bluetooth-Fernbedienungstaste Artikel Spezifikationen Batterietyp...
- Page 33 *Die ideale Stelle ist hinter dem Rückspiegel. Einlegen der Micro SD-Karte 2. Entfernen Sie den Klebestreifen Für den Gebrauch der Aivo View ist eine Micro der Halterung und befestigen Sie SD-Karte (32 - 128 GB, Class 10) erforderlich. sie an der gereinigten Stelle.
- Page 34 Möglichkeit Videos und Fotos mit nur einem Knopfdruck aufzunehmen. So befestigen Sie die Bluetooth- Einschalten Ihrer Aivo View Dashcam Fernbedienungstaste 1. Schließen Sie das Netzkabel (3,6 m) an den 1. Suchen Sie sich einen geeigneten Platz auf dem Micro-USB-Anschluss der Dashcam an.
- Page 35 Befestigungsstelle, um eine optimale Haftung zu gewährleisten. Es wird NICHT empfohlen, die Dashcam oder die iOttie Connect App während der Fahrt zu bedienen. In gewissen Ländern kann dies sogar illegal sein. *Der grüne Bereich zeigt, wo die Kamera angebracht werden kann, der rote Bereich zeigt, wo sie NICHT Der Benutzer ist verantwortlich für die Verwendung...
- Page 36 03 Die iOttie Connect-App Wenn Sie eine WLAN-Verbindung Settings Wi-Fi herstellen wird die iOttie Connect Wi-Fi Um Ihre Aivo View zu vernetzen müssen Sie die App verlassen und die WLAN- Aivo View-XXXX iOttie Connect App herunterladen und ein Konto Einstellungen Ihres Telefons erstellen.
- Page 37 04 Betrieb mit Alexa Alexa Skills aktivieren Um die Aivo View mit Alexa zu verbinden, Die Aivo View kann zwar ausschließlich mit muss die Dashcam als Gerät zur Alexa App der iOttie Connect App verwendet werden, sie hinzugefügt werden (zusätzlich zur iOttie funktioniert aber auch mit Alexa.
- Page 38 Informationen zu dem Skill gelöscht. Sie können ihn on/off. trotzdem später wieder aktivieren. Alexa, ask Dash Cam to turn on/off *Aivo View-Fähigkeiten sind derzeit NUR auf Englisch Privacy Mode. verfügbar. Aivo View Skills werden regelmäßig Alexa, ask Dash Cam to mute/unmute.
- Page 39 Índice 01 Empezando ¡Bienvenido a la Aivo View Dash Cam! Este Para una experiencia óptima, siga las manual le brindará información detallada del instrucciones detalladas en este manual. producto, la instalación y el funcionamiento del dispositivo, el uso de Alexa, ¡y mucho más!
- Page 40 Contenido de la Caja La Aivo View Dash Cam requiere una tarjeta Micro SD que debe insertarse antes de su Aivo View Dash Cam, Base de montaje funcionamiento (No viene incluida). magnética, Botón remoto bluetooth, Cable Tamaños compatibles micro USB de 3,5 metros y 2 Clips de Cable.
- Page 41 Especificaciones del Dash Cam producto Artículo Especificación Entrada 5V/1.5A Puerto de Carga Micro USB Profundidad 1.66" Ancho 2.6" Modelo DCCRIO120 Altura 4.0" Resolución del sensor 5M Pixel Peso 3.92oz Ángulo/Apertura de la lente 140 Grados/F1.8 Ranura para tarjetas 1600p/1440p/ 32–128GB Resolución de grabación Micro SD 1080p/720p...
- Page 42 1. Limpie el área donde usted planea fijar la base de montaje magnética. *La base de montaje magnética está construida para que la Aivo View Dash Cam se pueda quitar y volver a *La colocación ideal es detrás del espejo retrovisor. montar fácilmente.
- Page 43 Para montar el Botón remoto Bluetooth Para cargar su Aivo View Dash Cam 1. Seleccione un espacio conveniente en su 1. Conecte el cable de alimentación (3,5 metros) tablero o parabrisas para el Botón.
- Page 44 Aivo View Dash Cam. NO monte la Dash Cam delante del campo de despliegue de una bolsa de aire o en una...
- Page 45 Al conectarse al Wi-Fi, se sale de Settings Wi-Fi la aplicación iOttie Connect y se Wi-Fi Para conectar su Aivo View, deberá descargar la inicia la configuración del Wi-Fi Aivo View-XXXX aplicación iOttie Connect y crear una cuenta. del teléfono.
- Page 46 04 Funciona con Alexa Habilitar las habilidades de Alexa Para conectar la Aivo View y Alexa, la Dash Aunque es posible utilizar la Aivo View Cam debe añadirse como dispositivo a la App únicamente con la App iOttie Connect, Alexa (además de la App iOttie Connect).
- Page 47 Alexa, ask Dash Cam to turn on/off *Las “skills” de Aivo View están actualmente Privacy Mode. disponibles SOLAMENTE en inglés. Las “skills” de Alexa, ask Dash Cam to mute/unmute. Aivo View se actualizan periódicamente y pueden Alexa, ask Dash Cam to turn on/off the diferir de las que se incluyen en este manual.
- Page 48 目次 入門 01 最適なユーザーエクスペリエンスを得るには、 この Aivo View Dash Cameraの世界にようこそ!この取 マニュアルの詳細な手順に従ってください 扱説明書は製品の詳細情報、 デバイスのインストー ルと操作、 Alexaの使い方などをご説明します! 入門 ユーザー側の準備 箱には何が入っていますか? 製品の仕様書 ユーザー側の準備 製品セットアップ Dash Camのセッ トアップ MicroSDカードを挿入する 電源 Bluetoothリモートボタン Dash Camの位置を決める iOttieコネクトアプリ iOttieコネクトアプリをアッ プルの ログイン/新規アカウン トの作成 App StoreまたはGoogle Playストアからお手持ちの 新しいデバイスを追加する スマホにダウンロードしてください。 ファームウェアのアップデート *信頼きるたはモバイル通信を使用し、 電源に接続している...
- Page 49 箱には何が入っていますか Aivo View Dash CamはMicroSDカードが必要なの で、 操作前にカードを挿入しておいてください。 (製 Aivo View Dash Cam、 マグネット式台 品に付属されていません。 ) 座、 Bluetoothリモートボタン、 12フィートの 互換性のある容量 MicroUSBケー ブル、 ケー ブルクリッ プ2つ。 クラス10で、 32GBから128GBまで 中心部の調整ガイド *互換性のあるMicroSDカードを使用しないと、 SDカードを フ ォーマッ トできない場合があります。 SDカードス マグネット式台座 ロット Aivo Viewの推定録画時間 (分単位) 32GB 64GB 128GB USBポート...
- Page 50 製品の仕様書 Dash Cam 仕様 アイテム 入力 5V/1.5A 充電ポート Micro USB 深さ 1.66" モデル 幅 2.6" DCCRIO120 の高さ センサー解像度 4.0" 5M Pixel ウェイト 140 角度/F1.8 レンズのアングル/口径 3.92oz 1600p/1440p/ Micro SD カードスロット 録画解像度 32–128GB 1080p/720p 録画フォーマット 車載充電の仕様 仕様 アイテム Bluetoothリモートボタン 入力 12V–24V 電池のタイプ...
- Page 51 Aivo View Dash Camを素早く簡単に取り付けるため、 以 *画像を縦にする場合 - Dash Camを一度オフにしてから 下の指示に従ってください。 ダッシュボードかフロントガ もう一度オンにする必要があります。 ラスのどちらかを選んで取り付けます。 *さらに調整する場合は、 Live View (iOttieコネク トアプリ 内にある)を使い、 ガイドしてもらうこともできます。 Dash Camのセットアップ *マグネッ ト式の台座は、 Aivo View Dash Camが簡単に 1. マグネット式台座を固定したい場所をきれいにする。 脱着できるように作られています。 *理想的な位置は、 バックミラーの後ろです MicroSDカードを挿入する 2. ベースの粘着カバーを外し、 き れいにした部分にく っつける。 Aivo Viewで使用するMicroSDカードは (クラス10で...
- Page 52 電源 Bluetoothリモートボタン ケーブルクリップ 同封のBluetoothリモートボタ ンを使ってボタンを押しても、 ユ ーザーの動画や画像を記録で きます。 Bluetoothリモートボタンを取り付ける 1. ダッシュボードやフロントガラスで、 Bluetoothリ Aivo View Dash Camの電源 モートボタンを取り付けるのに便利なスペースを選び ます。 1. Dash CamのMicroUSBポートに(12 フィート) の 電源ケー ブルを差込みます。 *運転席側から簡単に届く位置に取り付けることをお勧めし ます。 2. 充電ケー ブルを助手席側のドアに向けて淵に沿っ て這わせ、 ケー ブルが邪魔になって視界が妨げられ 2. 取り付けたい場所をきれいにします。 ないようにします。 同封のケー ブルクリッ プを使って 3. ボタンの裏側の粘着カバーを外し、 所定位置にデバ...
- Page 53 条例を確認して ください。 車のフロン トガラスに物を取り付ける のを禁止、 または制限している法律もあります。 ユーザーにはす Dash Camを車に取り付ける時は、 必ずデバイスをフ べての適用法令と規制を遵守してデバイスを取り付ける責任が ロントガラスにしっかりと固定し、 可能な部分では電 あります。 源ケー ブルを隠して ください。 * お客様のAivo View Dash Camの使用に関連して、 州や地元の Dash Camの電源ケー ブルが、 ハンドル、 ペダル、 シフ 法令や条例により発生するかもしれないいかなる罰金、 罰則、 ま たは損害に対しても、 iOttieは何ら責任を負いません トレバーなど、 運転手の操作を邪魔しないように注 意して ください。 エアバッグが装着されている部分の前面やミラーの 視界を邪魔する位置にDash Camを取り付けないで...
- Page 54 Wi-Fi 話のWi-Fi設定を立ち上げます。 Aivo View-XXXX ウンロードしてアカウントを作成する必要があります。 Wi-Fi 名: Aivo View-XXXX ログイン/新規アカウン トの作成 パスワード:12345678 Eメールアドレスを登録し、 新規 接続が済んだら、 iOttie Connectア パスワードを設定してサインアッ プリに戻り、 Aivo View Dash Cam プしてください。 あるいは既存の を管理します。 Apple、 Google、 Facebook、 Amazonア Log In ファームウェアのアップデート カウントを使ってサインアッ プすることも できます。 最適なユーザーエクスペリエンスのため、 iOttie Connectアプリから最新のデバイスファームウェア をインストールしていることを確認してください。 ア...
- Page 55 Aivo Connect、 Easy One Touch Connect Pro、 ま たはEcho Autoなどのデバイスを使用しなければな りません。 これら製品はAlexa ソフトウェアを内蔵 して製造されているので、 あらゆるAlexa機能にア 2. 右下角にある 「more」 をタッ クセスできます。 運転中の使用に特化してエンジニ プして 「Skills & Games」 を選択 アリングされたオートモードも含まれます。 する。 お使いの車がワイアレスのApple CarPlayをサポ ートしている場合、 Amazon Alexa アプリに接続し 続けることができないかもしれません。 3. 「iOttie Smart Dash Cam」 と 入力する。...
- Page 56 Alexa, ask Dash Cam to mute/unmute. Alexa, ask Dash Cam to turn on/off the microphone. App Control Alexa, ask Dash Cam to show live view. Alexa, ask Dash Cam to open iOttie Connect App. Alexa, ask Dash Cam to open iOttie App.
- Page 57 Declaration of Conformity: Hereby, iOttie, Inc. declares that used in accordance with the instructions, may cause harmful the radio equipment type Aivo View of DCCRIO120 is in interference to radio communications. However, there is compliance with Directive 2014/53/EU.
- Page 58 Designed in New York City. 20 W 37th St, New York, NY 10018. The Aivo View is backed by a 2 year warranty. Made in China. U.S. Patent Pending ©2021 iOttie. All rights reserved.
Need help?
Do you have a question about the Aivo View and is the answer not in the manual?
Questions and answers