Table of Contents
Advertisement
Available languages
Available languages
Quick Links
MANUAL INSTRUCCIONES
MARZO 2020
CÓDIGO 80389 REV A
Armario conservador con doble compresor
Combined Refrigerator and Freezer
TEMPLOW YC
2101288
J
.P. SELECTA s.a.u.
Autovía A-2 Km 585.1 Abrera 08630 (Barcelona) España Tel 34 937 700 877 Fax 34 937 702 362
e-mail: selecta@jpselecta.es - website: http://www.jpselecta.es
Advertisement
Table of Contents

Summary of Contents for J.P. SELECTA TEMPLOW YC
- Page 1 MARZO 2020 CÓDIGO 80389 REV A Armario conservador con doble compresor Combined Refrigerator and Freezer TEMPLOW YC 2101288 .P. SELECTA s.a.u. Autovía A-2 Km 585.1 Abrera 08630 (Barcelona) España Tel 34 937 700 877 Fax 34 937 702 362 e-mail: selecta@jpselecta.es - website: http://www.jpselecta.es...
-
Page 2: Table Of Contents
Indice 1. INSTRUCCIONES DE FUNCIONAMIENTO .................. 3 2. AVISOS DE SEGURIDAD ........................ 4 3. ADVERTENCIAS .......................... 6 4. INSTALACIÓN .......................... 7 5. VISTA GENERAL Y COMPONENTES .................... 9 6. DESCRIPCIÓN FUNCIÓN DEL PANEL VISUALIZACIÓN .............. 10 7. DESCONGELACIÓN, PARADA Y MANTENIMIENTO .............. 17 8. SOLUCIÓN DE PROBLEMAS ...................... 19 9. ESPECIFICACIONES ........................ 20 10. RENDIMIENTO ........................... 22 Index 1. OPERATION INSTRUCTION ...................... 24 2. SAFETY NOTICES .......................... 25 3. ATTENTION .......................... 27 4. INSTALLATION .......................... 27 5. COMPONENTS AND OVERVIEW .................... 30 6. DISPLAY PANEL FUNCTION DESCRIPTION .................. 31 7. DEFROST, STOP USING AND MAINTENANCE ................ 38 8. TROUBLESHOOTING AND MAINTENANCE SERVICE .............. 40 9. SPECIFICATIONS ........................... 41 10. PERFORMANCE ... -
Page 3: Instrucciones De Funcionamiento
1. INSTRUCCIONES DE FUNCIONAMIENTO Para su seguridad personal y un mejor rendimiento de esta unidad, lea detenidamente este Manual de usuario y guárdelo correctamente para futuras consultas. Deberá leer, comprender y seguir las instrucciones de este manual para evitar daños ocasionales en la unidad, lesiones al personal operativo y un rendimiento deficiente del equipo. Preste atención sobre todo a las advertencias y avisos de seguridad. Para utilizar el equipo correctamente, instálelo con el método de instalación correcto. El producto solo podrá ser utilizado por personal capacitado o autorizado. -
Page 4: Avisos De Seguridad
2. AVISOS DE SEGURIDAD La primera vez que use el producto, preste atención a las señales y advertencias, y lea atentamente los elementos de seguridad para hacer funcionar correctamente el equipo. Signos de advertencia de seguridad: ADVERTENCIA: PRECAUCIÓN: el incumplimiento de las advertencias El incumplimiento de las precauciones puede provocar lesiones personales graves puede provocar lesiones al personal y o la muerte. daños a la unidad. Evitar la luz solar directa Marca de toma de tierra El contenido de la caja debe colocarse No inclinar en la dirección de la flecha. Evitar que se moje ... - Page 5 Enchufe el producto en el zócalo de forma segura y fiable para evitar fugas. Se debe usar un enchufe separado y conectado a tierra de manera fiable. No alargue el cable de alimentación. Si fuera realmente necesario alargarlo, asegúrese de usar un conductor de cobre de 2.5 metros cuadrados o más. La sección transversal del conductor de cobre en la pared conectada a la toma de corriente debe ser de 4 metros cuadrados o más, para evitar un incendio. ...
-
Page 6: Advertencias
Para garantizar el funcionamiento normal de la máquina y de la ventilación y la disipación de calor, la parte posterior y lateral del armario han de estar al menos a 30 cm de la pared. ¡No bloquee la entrada y la salida con obstáculos! Este dispositivo debe estar conectado a una toma de tierra. Nota: El incumplimiento de las precauciones puede ocasionar lesiones personales o fallos en el equipo y daños a la propiedad relacionados. Se prohíbe estrictamente que los armarios congeladores almacenen objetos vivos, flores u otros artículos que sean estrictamente inadecuados según los requisitos de temperatura. Cuando no se use el equipo durante mucho tiempo, desenchúfelo y guárdelo Cuando reinicie el armario conservador o cuando la alimentación esté apagada, verifique primero la configuración del dispositivo; de lo contrario, los elementos de ... -
Page 7: Instalación
4. INSTALACIÓN 4.1 Entorno de Instalación 1. Temperatura ambiente: 16 ‐32 , el mejor rango de temperatura es de 18 ‐25 . Deberá usar aire acondicionado cuando sea necesario. 2. Humedad relativa: ≤80% 3. Que no se produzcan fuertes vibraciones y gases corrosivos alrededor. 4. Evite grandes cantidades de polvo. 5. Evite balancear o sacudir la máquina. 6. Altitud donde utilizar este equipo: por debajo de los 2000m. 7. Sin luz solar directa y otras fuentes de frío y calor e interferencias electromagnéticas. Las interferencias ... - Page 8 Advertencia: 1. No conecte a tierra el armario conservador a través de tuberías de gas, tuberías de suministro de agua, líneas telefónicas o pararrayos, etc., ya que podrían causar descargas eléctricas . 2. Después de la instalación, el cable de alimentación debe ser de fácil acceso para facilitar la desconexión en caso de emergencia. 3. Ningún artículo debe cubrir las rejillas de ventilación de los congeladores. 4.3 Preparación antes de su Uso a. Retire todo el embalaje, incluida la espuma protectora que venga con el producto. Evite que los niños jueguen con las bolsas de plástico para evitar accidentes por asfixia . b. Verifique los accesorios que vienen con el congelador, que coincida con la lista de embalaje . c. Limpieza: deberá limpiar la unidad antes de usarla . ...
-
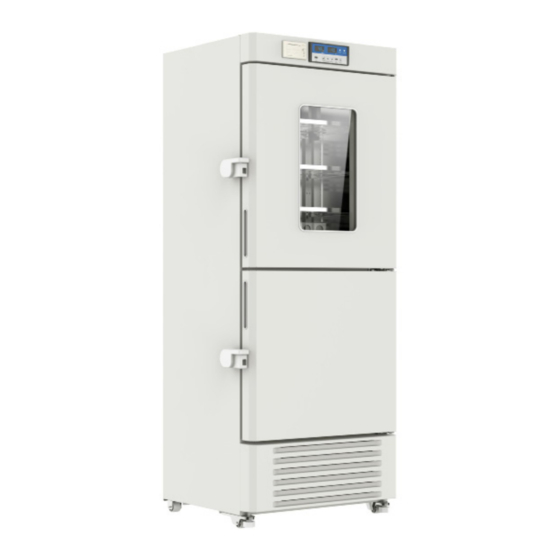
Page 9: Vista General Y Componentes
corto de tiempo. De lo contrario, debido a la inercia del frío y el calor, es posible que no pueda lograr la temperatura deseada. Al introducir los artículos, asegúrese de dejar un espacio de circulación de aire a su alrededor. Sobre todo, no bloquee el sensor de temperatura en el interior del armario o afectará la estabilidad y el control preciso de la temperatura dentro del armario. 4.6 Funcionamiento después del Apagado El producto tiene una función de memoria del valor establecido. Al encender el equipo continuará ... -
Page 10: Descripción Función Del Panel Visualización
6. DESCRIPCIÓN FUNCIÓN DEL PANEL VISUALIZACIÓN 6.1 Introducción a la placa de control a. Los displays de 4.6ºC y ‐40ºC indican la temperatura en condiciones normales de funcionamiento, la temperatura media en el congelador. En el estado de configuración se pueden mostrar diferentes caracteres (ver más abajo para más detalles). b. DOOR: El indicador de puerta abierta se ilumina cuando se abre la puerta del congelador y se apaga cuando se cierra la puerta. La alarma de puerta abierta se activará si la puerta permanece abierta durante más de 1 minuto. ... - Page 11 h. Tecla para ajustar/silenciar. Cuando no haya alarma y la tecla esté bloqueada, pulse . Mostrará la temperatura ambiente durante 5 segundos y después volverá a la visualización normal; Si está desbloqueada, pulse durante 3 segundos, y entre en el menú de usuario. Cuando la alarma sonora (que incluye la alarma de temperatura alta / baja, alarma de puerta abierta, alarma de fallo del sensor, etc.) se encuentra en estado bloqueado, pulse primero , el zumbador dejará de sonar y 5 segundos después de mostrar la temperatura ambiente, volverá a la pantalla normal (la tecla silencio es solo para apagar el zumbador en un estado anormal de la alarma. Si se elimina el ...
- Page 12 bloqueo de las teclas al valor predeterminado: "005"), y desbloquear en este momento. Pulse la tecla durante 3 segundos después del desbloqueo, la pantalla mostrará el código "PS1" e introducirá el ajuste de configuración. Utilice las teclas arriba y abajo para desplazarse por los parámetros. El orden de visualización es b1‐b2‐Set1‐H01‐L01‐Set2‐H02‐L02‐n‐y‐r‐S‐F‐Pt‐tH1‐P1‐PS1. Pulse la tecla de Silencio para confirmar la categoría. Se mostrará el primer nombre de parámetro de este tipo. 1. Pulse arriba o abajo para desplazarse por los valores 2. Pulse la tecla Silencio para mostrar el valor correspondiente 3. Pulse arriba o abajo para aumentar o disminuir el valor 4. Pulse la tecla Silencio para almacenar temporalmente el valor modificado del bloqueo y volver al parámetro de visualización. 5. Si necesita modificar otros parámetros, repita los pasos 1‐4. 6. ...
- Page 13 activará la alarma de alta temperatura cuando la temperatura interna del congelador> "Configuración de temperatura + valor de desviación de la alarma de alta temperatura". 8 L02 0.0‐10.0 5.0 Configuración del valor de desviación de la alarma de baja temperatura (Alarma baja). Se activará la alarma de baja temperatura cuando la temperatura dentro del congelador <"Configuración de temperatura + valor de desviación de la alarma de baja temperatura". 9 n 10‐50 Ajustado a Año datos reales 10 y 01‐12 Ajustado a Mes datos reales 11 r 01‐31 Ajustado a Fecha datos reales 12 S 00‐23 Ajustado a ...
- Page 14 de 3 segundos o, si no hay acción en los siguientes 60 segundos, salga del programa de configuración de parámetros. Nivel Alcance Valor por Items Notas menú parámetro defecto PS2 000~999 022 Contraseña ajustes de fábrica tP1 ~ ~ Temperatura de sensor superior tP2 ~ ~ Temperatura del sensor de alarma superior tP3 ~ ~ Temperatura del sensor más baja tP4 ~ ~ Temperatura del sensor de alarma inferior tP5 ~ ~ Temperatura del sensor de ambiente Temperatura del sensor del evaporador tP6 ~ ~ ...
- Page 15 t11 1~30 3 Tiempo calentamiento de la puerta del modo 1 tP9 8 Temperatura de parada de descongelación ‐20~20 Selección modo trabajo del ventilador del condensador P2 1~2 1 P3 1~2 1 Selección modo trabajo del ventilador del evaporador Scy 10 Intervalo de registro de los datos de temperatura 1~240 n ~ ~ Año y ~ ~ Mes r ~ ~ Día S ~ ~ ...
- Page 16 3. Pruebe con una buena placa principal. Si el problema persistiera, sustitúyala. (esto pasa raramente) Mantenga la unidad al menos a 30 cm de distancia de H03 Alarma de temperatura ambiental alta otros objetos y abra el aire acondicionado para enfriarla. 1. Mantenga la unidad al menos a 30 cm de distancia de A larma de temperatura alta del ...
-
Page 17: Descongelación, Parada Y Mantenimiento
1. Verifique la conexión del sensor del evaporador E6 Error del sensor del evaporador 2. Reemplácelo 1. Verifique la conexión del sensor del condensador Error del sensor del condensador E7 superior superior 2. Reemplácelo Verifique la conexión del sensor del condensador Error del sensor del condensador E8 inferior ... - Page 18 energía. Se recomienda realizar la descongelación cuando la capa de escarcha sea demasiado gruesa. 1) Corte el suministro eléctrico, abra la puerta y transfiera los artículos a otro lugar fresco. 2) Use una pala de descongelación para eliminar suavemente la escarcha de la superficie (también permita que la temperatura dentro del producto aumente de forma natural para que se vaya derritiendo) 3) Para acelerar el proceso de descongelación, se pueden colocar recipientes de fondo plano con menos de 50°C de agua caliente dentro del equipo. 4) Luego utilice un paño seco para limpiar el agua helada restante. Una vez limpio, devuelva los artículos al congelador. ...
-
Page 19: Solución De Problemas
8. SOLUCIÓN DE PROBLEMAS Observe el funcionamiento del equipo durante su uso. Si encuentra alguna anomalía, consulte la siguiente tabla. Si no puede resolver el problema, deberá notificárselo sin falta a su proveedor. El producto tiene una vida útil de 10 años. Problema Motivo y solución La unidad no funciona ¿La toma de corriente tiene electricidad? ¿El enchufe está insertado o se ha perdido? ¿Está desconectado el fusible de alimentación? ¿El voltaje de la fuente de alimentación es demasiado bajo o demasiado alto? ... -
Page 20: Especificaciones
9. ESPECIFICACIONES Armario conservador con doble compresor Nombre Modelo Templow YC Armario exterior Placa de acero con recubrimiento de pintura epoxi en polvo de poliéster Puerta exterior Placa de acero con recubrimiento de pintura epoxi en polvo de poliéster Condensador Condensador de tubo de alambre Evaporador Refrigeración: tubo de vapor; Congelador: evaporador de tubo de alambre Aislamiento Relleno rígido de espuma de poliuretano Compresor Completamente cerrada Termostato Microprocesador Sensor temperatura NTC Sistema alarma Alarma de temperatura alta‐baja, alarma de puerta entreabierta, alarma de fallo de energía, alarma de batería baja, alarma de error del sensor. Nota 1: Mantenimiento de baterías recargables, sustitución y reciclaje. 1. Durante un apagón o un transporte, el interruptor principal deberá estar apagado. De lo contrario, la batería será deficiente o puede dañarse permanentemente debido a una descarga. Si se apaga la ... - Page 21 9.2 Sustitución de la batería A. Apague el interruptor de alimentación y desconecte el producto de la toma de corriente. Use un destornillador para retirar los tornillos de la cubierta superior del armario. Nota: Hay componentes eléctricos de alto voltaje en la caja eléctrica. La alimentación debe estar apagada antes de abrir la fuente. Retire el enchufe de alimentación y apague el interruptor de alimentación principal. La apertura de la caja eléctrica debe realizarse por ingenieros calificados o personal de mantenimiento. ...
-
Page 22: Rendimiento
10. RENDIMIENTO 10.1 Parámetro técnico principal Modelo TEMPLOW YC Temperatura ambiente 16~32 Tipo clima N Refrigerante / cantidad Refrigerador: R134a/45g Congelador: R290/60g Tensión nominal (V) 220 Frecuencia nominal (Hz) 50 Potencia de entrada (W) 360 Consumo energía (kWh/24h) 3.5 Temperatura almacenamiento (ºC) Refrigerador: 2 ‐ 8 Congelador: ‐10 ‐ ‐40 Capacidad neta (L) 289 Corriente nominal (A) 2.7 Peso (Kg) 136 Dimensiones exteriores (An*Pro*Al) 700*640*1828 mm Condiciones de conexión de energía Y 10.2 Lista de Embalaje Producto Manual usuario Cerradura y llave ... - Page 23 10.3 Diagrama eléctrico ...
-
Page 24: Operation Instruction
1. Operation Instruction Thank you for choosing our products! For your personal safety and better performance of this unit, please read this Operation Manual thoroughly and save it properly for future reference. Failure to read, understand and follow the instructions in this manual may result in damage to the unit, injury to operating personnel and poor equipment performance, and we are not responsible for such damages caused. Because of our quick product update, this manual may not comply with our products fully, please refer to the final product. ... -
Page 25: Safety Notices
2. Safety Notices For the first time using the product, please pay attention to warning signs and meanings, and carefully read safety items, to operate the equipment properly. Safety warning labels CAUTION: WARNING: Failure to follow precautions can Failure to observe WARNING signs could result in serious personal injury or death. result in injury to personnel and damage to the unit and associated property. Avoid direct sunlight Grounding mark The ... - Page 26 Please plug the product in socket securely and reliably to avoid leakage. A separate dedicated socket must be used and grounded reliably. Do not lengthen the power cord. If it is really necessary to lengthen it, be sure to use a copper conductor of 2.5 square meters or more. The cross‐section of the copper conductor in the wall connected to the power socket must be 4 square meters or more, in order to avoid fever or fire. Do not use power supplies other than those specified in the design of the equipment to avoid overheating, short circuits, and other faults. Connecting a 110 V rated voltage product to a 220 V power supply may cause overheating or burn out the equipment. The machine uses a 220V/50HZ AC power supply. If the voltage is too low or too high, an appropriate automatic voltage regulator must be used. ...
-
Page 27: Attention
This device must be connected to a ground wire. Note: Failure to observe the precautions may result in personal injury or equipment failure and related property damage. Medical refrigerators are strictly prohibited from storing live objects, flowers, or other items that are strictly unsuitable for temperature requirements in medical refrigerators. When the medical refrigerator is not used for a long time, unplug the product and store it. ... - Page 28 4.1 Installation Environment Ambient temperature: 16℃~32℃, best temperature range is 18℃~25℃, should use air conditioning when necessary. Relative humidity: ≤80% There is no strong vibration and corrosive gas around. Avoid large amounts of dust Avoid swinging or shaking the machine Working altitude: less than 2000m. Without direct sunlight and other cold and heat sources and electromagnetic interference, electromagnetic interference will affect the normal operation of the control system. In severe cases, it will directly damage the system .
- Page 29 pipes, telephone lines, or lightning rods, etc., which may cause electric shock. After installation, the power cord must be easy reach to facilitate unplug in an emergency. No items should cover the vents of medical refrigerators. 4.3 Preparation Before Using Remove all packaging components, including protective foam inside the product. Pay attention not to put plastic bag in the place where the children can reach, to prevent suffocation accidents. Check accessories inside the refrigerator, please check the accessories and document according to the packing list. Cleaning: should clean the unit before using. ...
-
Page 30: Components And Overview
batches, sub‐step temperature cooling, until the desired temperature. Do not use unapproved electrical appliances inside the medical refrigerator. Do not change the set temperature frequently in a short time. Otherwise, due to the inertia of cold and hot, you may not be able to achieve your desired adjustment effect. When placing items, ensure that there is a certain amount of air circulation space around the box. In particular, please don’t block the temperature sensor inside the box (for the temperature ... -
Page 31: Display Panel Function Description
control panel, which is convenient to use and reliable in performance. 6. Display Panel function description 6.1 Control board introduction 4.6 and ‐40 are display window for temperature, under normal operating conditions, the average temperature in the cabinet is displayed in units of °C. Different prompt characters can be displayed in the setup state (see below for details). Door open indicator: The indicator lights up when the product refrigerating compartment door is opened, will goes out when the door is closed. Door open alarm will be activated if the door is opened for more than 1 minute. Fault indicator: The indicator is off when the product is operating normally, the indicator is on when the product is operating abnormally. LIGHT: After the unit is powered on, the default light is off. Press the light switch key to adjust the light on and off. When the lamp is off, the lamp can be turned on when the door is opened, and turned off when the door is closed. When the lamp is on, the lamp does not change ... - Page 32 parameter. For example, when setting the temperature, increase the set temperature value. When setting the parameter value, press and hold the up button for a long time and the parameter will increase rapidly. Under normal conditions, press and hold the key for 3 seconds to import the data of 12 months into the U disk. is the button for set/mute, when there is no alarm state and the key is locked, press ,Displaying ambient temperature for 5 seconds then return to normal display; In the unlocked state, press for 3 seconds, enter into the user menu. When buzzer alarm (including ...
- Page 33 6.2 Function settings C. Turn on the power, the product enter into the working state. D. User parameter settings: Unlock: In the normal running state, press the key and for 3 seconds at the same time, the digital tube will display the parameter code "000", and input the password "005" (enter the user menu password, enter "099" to restore the key lock password to the default "005"), unlock at this time. Press the key for 3 seconds after unlock, the digital tube displays the parameter code "PS1" and enters the setting adjustment. Use the up or down key to scroll through the parameters. The display order is b1‐b2‐Set1‐H01‐L01‐Set2‐H02‐L02‐n‐y‐r‐S‐F‐Pt‐tH1‐P1‐PS1. ...
- Page 34 activated. Low temperature alarm deviation 5 L01 0.0‐10.0 5.0 value setting (Low Alarm), when the temperature inside the freezer < “ Setting temperature + Low temperature alarm deviation value”, the Low temperature alarm will be activated. 6 Set 2 ‐10.0‐ ‐40.0 ‐40.0 Temperature setting in freezer compartment 7 H02 0.0‐10.0 5.0 High temperature alarm deviation value setting (High Alarm), when the internal temperature of freezer > “ Setting temperature + High temperature alarm deviation value”, the High temperature alarm will be activated. 8 L02 0.0‐10.0 5.0 Low temperature alarm deviation value setting (Low Alarm), when the temperature inside the freezer < ...
- Page 35 13 P1 2. Automatic 1 Mode 1: door open and close as one heating mode 1 time, heating 5 minutes, (time can be 3. Automatic set), if the door opens and closes heating mode 2 again during the heating period, 4. Automatic refresh the heating time. heating mode 3 5. Always open 6. Always close 14 PS1 000‐999 005 User menu password settings 6.3 Factory setting mode Under the unlock status, press the Enter key with longer time to enter the factory menu (till PS2 display. ...
- Page 36 Ad6 ‐8~8 0 evaporator sensor temperature correction(forbidden) Ad7 ‐8~8 ~ upper condenser sensor temperature correction Ad8 ~ lower condenser sensor temperature correction ‐8~8 set the temperature fluctuates when the upper cabinet rd1 0~10 2 compressor turn on set the temperature fluctuates when the upper cabinet rd2 0~10 2 compressor turn off set the temperature fluctuates when the lower cabinet rd3 0~10 2 compressor turn on set the temperature fluctuates when the lower cabinet rd4 2 0~10 compressor turn off t1 1~30 3 compressor startup delay t2 1 ...
- Page 37 1.Check the settings of warning temperature are correct for you. If Upper alarm sensor low not, change the settings using buttons of display panel. temperature alarm (Temp ≤ MIN of 2.Check the sensor is good and its connection is correct. If sensor L01 setting warning temperature, rarely defective, replace sensor. happen) ...
-
Page 38: Defrost, Stop Using And Maintenance
Check the upper sensor connection E1 Upper sensor error 2. Replace the upper sensor Check the upper alarm sensor connection E2 ... - Page 39 the equipment while maintaining the medical refrigerator. Otherwise, your health will be endangered. 7.1 Defrost After the product has been working for a period of time, its internal surface will be frosted, which will affect the cooling effect and increase the power consumption. It is recommended that defrosting should be performed when the frost layer is too thick. 6) Cut off the power, open the door, and transfer the items to a cool place. 7) Use a defrost scoop to gently remove the surface area cream (Also allow the temperature inside the product to naturally rise, melt the frost) 8) In order to speed up the defrosting process, flat bottom containers with less than 50°C hot water can be placed in the product. ...
-
Page 40: Troubleshooting And Maintenance Service
make sure that the child does not get close to the cabinet and that the door cannot be completely closed. Disposal of cabinets should be performed by appropriate personnel to prevent accidents such as asphyxiation. 8. Troubleshooting and Maintenance Service Any product has the possibility of failure. Please observe the operation of the product in time during use. If there is any abnormality, please check the following table. If you can't solve the trouble, you should notify supplier in time, so as not to cause losses to you. The product has a service life of 10 years. Trouble Reason and solutions The unit doesn’t work Does power socket have electricity? Is the plug inserted or lose? Is the power fuse disconnected? Is the power supply voltage too low or too high? Compressor doesn’t work Is temperature setting correct? Is the temperature inside the cabinet too low? Temperature does not reach the set value Is the door open or closed too often? Are too many items stored at one time? Is the ambient temperature too high? Big noise Is the product placed on flat floor? Does the cabinet hit the wall? Glass window surface condensation During rainy and humid seasons, the window may condense, which is normal. Wipe it off with a dry cloth. The following conditions are not faults: 1.Slight sound of water flowing from the refrigerant in the pipe. 2.When the compressor is started or stopped, the switch parts will make a slight percussion sound. For the first use of the product when starting up, there will be a long working time, which is normal. 3.In rainy and humid seasons, the surface of the cooler temperature of the product may be frosted, wiped with a dry cloth. ... -
Page 41: Specifications
5.The freezer door opening time should be more than 5 minutes, otherwise the hot air enter into the cabinet and the temperature drops sharply, result in negative pressure which makes it difficult to open the door. Before inform the maintenance engineer, please clean and disinfect the product first. Storage conditions: Do not shake or collide during transportation or use, prevent from rain. Storage and transportation environment temperature: ‐40 ~ +55 , relative humidity: 10% ~ 90%. 9. Specifications Name Medical refrigerator‐freezer Model YCD‐FL289 Outside cabinet Epoxy polyester powder spray coated steel plate Outside door Epoxy polyester powder spray coated steel plate Condenser Wire tube condenser Evaporator Refrigeration: tube vapour; Freezer: wire tube evaporator Insulation Rigid polyurethane foam filling Compressor ... - Page 42 time to complete the charge, each charging period is not less than 24 hours. B.When the power supply is interrupted, the main power switch should be turned off in time. Otherwise, the battery may be depleted, cause serious damage to the battery. C.The battery is a consumable, and the battery life is about 2 to 3 years. If the battery is unreasonably used, such as loss of power or reach the service life of the battery, it will cause low battery alarm (does not affect the cooling use but there is an alarm and will influence the use of the ...
-
Page 43: Performance
10. Performance 10.1 Main Technical Parameter Model TEMPLOW YC Ambient temperature 16~32 Climate type N Refrigerant/amount Refrigerator: R134a/45g Freezer: R290/60g Rated voltage(V) 220 Rated frequency(Hz) 50 Input power(W) 360 Power consumption (kWh/24h) 3.5 Storage temperature( ) Refrigerator: 2 ‐ 8 Freezer: ‐10 ‐ ‐40 Net capacity(L) 289 Rated current(A) 2.7 Weight(Kg) 136 Exterior dimension(W*D*H) 700*640*1828 mm ... - Page 44 10.3 Electrical Diagram ...
Need help?
Do you have a question about the TEMPLOW YC and is the answer not in the manual?
Questions and answers