Table of Contents
Advertisement
Quick Links
Assembly Instructions
& User's Manual
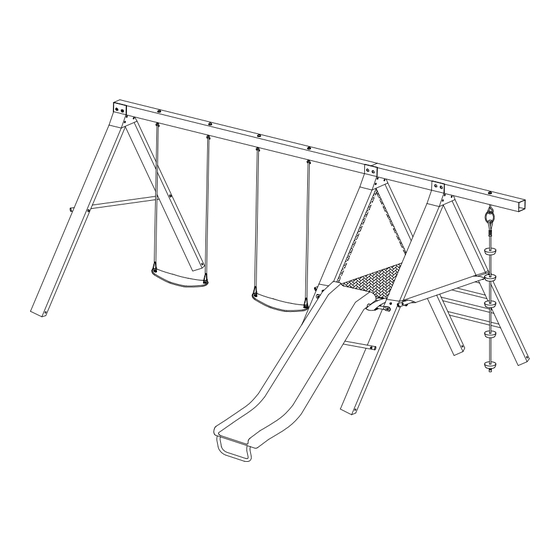
160394 AGame Wootal Metal Playset
160394
Please keep this instruction manual for future reference
Customer Service: (888) 922-2336
7:00 am to 12:00 am CST (daily)
Live Chat at: www.academy.com
Email: customerservice@academy.com
Imported by: Academy, Ltd.
1800 N Mason Rd., Katy, TX 77449
Item No.: 160394
Advertisement
Table of Contents

Related Manuals for ACADEMY AGame Wootal Metal Playset

Summary of Contents for ACADEMY AGame Wootal Metal Playset
- Page 1 Assembly Instructions & User’s Manual 160394 AGame Wootal Metal Playset 160394 Please keep this instruction manual for future reference Customer Service: (888) 922-2336 7:00 am to 12:00 am CST (daily) Live Chat at: www.academy.com Email: customerservice@academy.com Imported by: Academy, Ltd.
-
Page 2: Table Of Contents
Table of Contents Warnings…………………………………..……………………………..3 Important Warnings and instructions..........4 Important Consumer Information Sheet..........7 Tools and Parts…………………………………………...………………8 Assembly Instructions………………………………..…………………12 Anchoring..................24 Play Structure Use Zone………………………………..………………25 Care and Maintenance………………………………….…………...…27 Warranty Information…………………………………..……....28 Note:Before beginning assembly of product, make sure all parts are present. Compare parts with package content list and hardware contents. - Page 3 If eplacement parts or customer service is needed please contact Customer Service: (888) 922-2336 7:00 am to 12:00 am CST (daily) Live Chat at: www.academy.com Email: customerservice@academy.com (Made in China) This gym is designed to be used safely by up to five (5)
-
Page 4: Warnings
Warnings READ ALL INSTRUCTIONS BEFORE ASSEMBLING OR USING THIS EQUIPMENT AGE & WEIGHT LIMIT This product is designed to be used by up to five (5) children between the ages of 3 to 8. Maximum user weight is 100 pounds (45 kg) each with a combined maximum weight of 500 pounds (227 kgs). -
Page 5: Important Warnings And Instructions
Important Warnings and instructions DO NOT install your play set over hard surface, e.g. asphalt, concrete, packed earth, tile or brick floor. A fall onto a hard surface can result in serious injury or death to the user. The following is a list of recommended ground covers from the Consumer Product Safety Commission: SUGGESTED MATERIAL UNCOMPRESSED DEPTH... - Page 6 Important Warnings and instructions WEATHER CONDITIONS DO NOT use this equipment if the swing seat, slide or any parts are wet. Use the play set only when the parts are clean and dry. If the equipment is wet, the user could slip and suffer injuries.
- Page 7 Important Warnings and instructions INSPECTION PRIOR TO EACH USE OR DAILY INSPECTION DO NOT use the equipment if any bolts or nuts are missing or loose. ALWAYS check to ensure the equipment and all parts are well secured and stable before each use.
-
Page 8: Important Consumer Information Sheet
Important Consumer Information Sheet The Consumer Product Safety Commission estimates there are more than 200,000 playground related injuries involving children each year. Injuries involving this hazard pattern tend to be among the most serious of all playground injuries and have the potential to be fatal, particularly when the injury is to the head. -
Page 9: Tools And Parts
Tools Required Allen Wrench Wrench Parts List for main frame assembly A-frame connector 3pcs Main frame long bar Main frame short bar Section leg A 2pcs Section leg B 2pcs Section leg C 2pcs Cross bar A Cross bar B 2pcs Cross support connecting bar 7pcs... - Page 10 Hardware for main frame assembly Bolt M8*115mm 6pcs Bolt M8*104mm 18pcs Bolt M8*75mm 14pcs Arc washer (large) 10pcs Spring washer (large) 38pcs Flat washer (large) 28pcs Nut (large) 38pcs Cord 6pcs Hook Anchor 6pcs Parts List for slide assembly Slide front support Slide top support bar Slide fixded iron piece Slide...
- Page 11 Hardware for slide assembly Bolt 1/4 *75mm 4pcs Bolt M8*53mm 2pcs Spring washer (small) 9pcs Spring washer (large) 2pcs Screw M5.5 5pcs Flat washer (large) 2pcs Flat washer (small) 5pcs Nut (small) 4pcs Nut (large) 2pcs Page 10 of 28...
- Page 12 Partlist for swing set assembly Swing seat 2pcs Hardware for swing set assembly Flat washer (large) 4pcs Nut (large) 4pcs Spring washer (large) 4pcs PVC covered chain 4pcs Eye bolt with attachment 38-1 4pcs bolt (preassembled on 38) Spring snap hooks 38-2 4pcs (preassembled on 38)
-
Page 13: Assembly Instructions
Assembly Instructions Part# Hardware# Step 1: Insert #3 to #2. Step 2: Connect #1 to #2 & #3 and secure using #13、#16、#17 & #18. Helpful Hint: All round holes should be facing up and oval holes facing down. Page 12 of 28... - Page 14 Assembly Instructions Part# Hardware# Step 3: 1. Connect #4 、#5 & #6 into #1 and secure using #13、#16、#17 and #18. Helpful Hint: Insert bolt closest to top beam first. Page 13 of 28...
- Page 15 Assembly Instructions Part# Hardware# Step 3: 2. Connect #7 & #4 and secure using #12、#16、#15 and #18 Page 14 of 28...
- Page 16 Assembly Instructions Part# Hardware# Step 4: 1. Connect #38-2 to the two small holes at the ends of the swing seat #34. 2.Connect #38-1 & to #2 and secure using #35、#36 & #37 Page 15 of 28...
- Page 17 Assembly Instructions Part# Hardware# Step 5: Connect #9 and #5 and secure using #14、#16 & #17 & #18 . Helpful Hint: Do not install on the first hole First Hole First Hole Page 16 of 28...
- Page 18 Assembly Instructions Part# Step 6: Insert #9 and #8 into #11 respectively as shown below. Step 7: 1.Connect #8 to #5 & #6 and secure Helpful Hint: using #12, #15, #16 and #18 as shown below. Landing pad(#11) will be attached to parts 8. Part# Page 17 of 28...
- Page 19 Assembly Instructions Part# Hardware# Step 7: 2.Connect #9 to #5 & #6 and secure using #14, #15, #16 and #18 as shown below. Helpful Hint: Landing pad(#11) will be attached to parts 8. Page 18 of 28...
- Page 20 Assembly Instructions Step 8: 1.Connect #9 to #6 and secure using #14、 #16 、 #17 and #18 as shown below. Part# Hardware# 2.Connect #21 to #6 and secure using #30、 #27、 #33 and #25 as shown below. Part# Hardware# Helpful Hint: Helpful Hint: To keep the black arrow outwards and upwards when assembling...
- Page 21 Assembly Instructions Step 9: Attach #10 around #5 and #6. Lace rope(#19) through #10 side wall to secure #5,#6,and#8. Part# Page 20 of 28...
- Page 22 Assembly Instructions Step 10: Connect #20 into #23 and secure using #24、 #26 and #32 as shown below. Part# Hardware# Page 21 of 28...
- Page 23 Assembly Instructions Step 11: 1.Connect #22 to #21 and secure using #26、 #28 and #31 as shown below. 2.Connect #22 to #23 and secure using #26、 #28 and #31 as shown below. Part# Hardware# Page 22 of 28...
- Page 24 Assembly Instructions Step 12: Insert #39 to #3 and secure using #40、 #41、 #42. Part# Hardware# Page 23 of 28...
-
Page 25: Anchoring
Anchoring WARNING Please properly anchor the swing set to minimize the risk of injury or death. If the swing set is used without proper anchoring, it may be dangerous and may tilt over. There are different ways of anchoring the equipment, depending on the type of ground on which the equipment is to be installed. -
Page 26: Play Structure Use Zone
Play Structure Use Zone 1 Select Protective Surfacing—One of the most important things you can do to reduce the likelihood of serious head injuries is to install shock- absorbing protective surfacing under and around your play equipment. The protective surfacing should be applied to a depth that is suitable for the equipment height in accordance with ASTM Specification F1292. - Page 27 Play Structure Use Zone 1.4 Poured-In-Place Surfaces or Pre-Manufactured Rubber Tiles—You may be interested in using surfacing other than loose- fill materials – like rubber tiles or poured-in-place surfaces. 1.4.1 Installations of these surfaces generally require a professional and are not “do-it-yourself” projects. 1.4.2 Review surface specifications before purchasing this type of surfacing.
-
Page 28: Care And Maintenance
Care and Maintenance Inspect all nuts and bolts twice monthly during the usage season for tightness and tighten as required. It is particularly important that this procedure is followed at the beginning of each season. Oil all metallic moving parts monthly during the usage period. Sand rusted areas on metal tubing and repaint using a nonlead-based paint meeting the requirements of Title 16 CFR Part 1303. -
Page 29: Warranty Information
Warranty Information This product has been manufactured under the highest standards of quality and workmanship. We warrant to the original consumer purchaser that all aspects of this product will be free of defects in material and workmanship for one year from the date of purchase. A replacement for any defective part will be supplied free of charge for installation by the consumer.
Need help?
Do you have a question about the AGame Wootal Metal Playset and is the answer not in the manual?
Questions and answers