Table of Contents
Advertisement
Quick Links
Advertisement
Table of Contents

Related Manuals for Gram ECO MIDI KG 60


Summary of Contents for Gram ECO MIDI KG 60
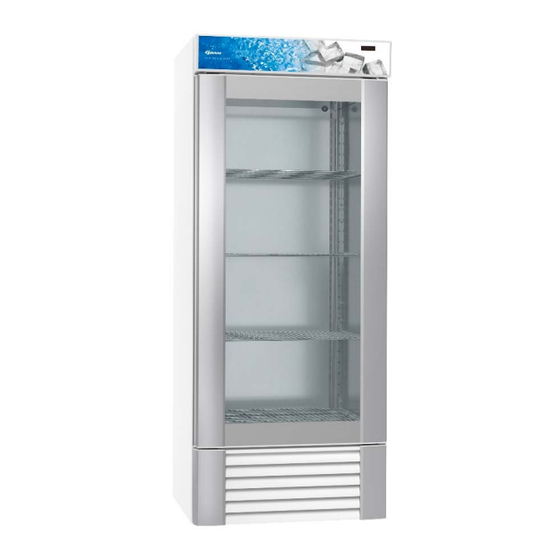
- Page 1 Operating- and servicemanual Eco Midi KG/FG 60/82 765041996 Rev. 001...
-
Page 2: Table Of Contents
Contents Operating the product ....................3 Temperature setting ....................4 Keyboard lock ......................4 Alarms ......................... 5 Error codes on the display ..................6 Defrosting ........................7 Setting the configuration parameters ................8 ... -
Page 3: Operating The Product
Operating the product Connect the product to the socket. This is done by mounting the accompanying power cord first as shown in Fig. 4, and then subsequently connecting the cord to the socket. To switch the product on and set the desired temperature for the cabinet, the uppermost panel must be flipped up and held in that position. -
Page 4: Temperature Setting
Temperature setting Set the desired cabinet temperature in the following manner: It is important to make sure first that the keyboard is not locked. See how in the section below on keyboard locking. Press the key. The compressor lamp blinks, and the current cabinet temperature setting is shown in the display. -
Page 5: Alarms
Alarms The controls can show alarms that are related to the settings for the controls or the product's operation. The following alarms can occur: High temperature alarm. This code is shown in the display if the cabinet temperature is too high in relation to the product's set point. The alarm is automatically reset when the correct temperature is re-established. -
Page 6: Error Codes On The Display
Error codes on the display If Pr1 is shown in the display, it means that there is an error on the temperature sensor in the product, and service assistance should be summoned. The product will in the meantime attempt to maintain the set temperature. If the display is showing Pr2, there is an error with the evaporator sensor. -
Page 7: Defrosting
Defrosting Defrosting is automatically performed 4 times every 24 hours, by circulating the air inside the cabinet during a forced standstill of the compressor. The defrost LED lights to indicate the defrosting cycle is running. Defrosting is automatically performed 4 times every 24 hours, by a defrost heating element. Manual defrosting: If the cabinet is operating under severe load (frequent door opening and frequent replenishment), manual defrosting can become necessary. -
Page 8: Setting The Configuration Parameters
Setting the configuration parameters 765041996 Rev. 001... -
Page 9: Manufacturer's Settings
Manufacturer’s settings 765041996 Rev. 001... -
Page 10: Working Setpoint And Configuration Parameters
Working setpoint and configuration parameters GRAM FG GRAM KG GRAM FG GRAM KG WORKING SETPOINT HAV HAV FAV FAV PARAM. MIN. MAX. U.M. DEF. working setpoint; see also r0 and r12 SP r1 r2 °C/°F (1) 0 ‐18 5 ‐18 5 GRAM FG GRAM KG GRAM FG GRAM KG ANALOG INPUTS HAV HAV FAV ... - Page 11 0 15 min 1 3 3 3 3 number of compressor operation hours above which the request for maintenance is triggered 0 = the request shall never be triggered C10 0 999 10 h 0 160 160 0 0 GRAM FG GRAM KG GRAM FG GRAM KG DEFROST HAV HAV FAV FAV PARAM. MIN. MAX. U.M. DEF. if d8 = 0, 1 or 2, defrost interval 0 = interval defrost will never be activated if d8 = 3, maximum defrost interval d0 0 99 h ...
- Page 12 A9 0 240 min 15 15 15 15 15 differential of A1 and A4 parameters A11 0,1 15 °C/°F (1) 2 2 2 2 2 GRAM FG GRAM KG GRAM FG GRAM KG EVAPORATOR FAN AND CONDENSATOR FAN HAV HAV FAV FAV PARAM. MIN. MAX. U.M. DEF. evaporator fan activity during normal operation 0 = switched off 1 = switched on; see also F4, F5, i10 and HE2 (15) 2 = in parallel with the compressor; see also F4, F5, F9, F15, F16, i10 and HE2 (16) 3 = depending on F1; see also F4, F5, i10 and HE2 (17) (18) 4 = switched off if the compressor is switched off, depending on F1 if the compressor is switched on; see also F4, F5, i10 and HE2 (17) (19) F0 ...
- Page 13 0 240 ‐‐ 180 0 0 0 0 minimum duration of the door switch input activation such as to provoke the defrost activation 0 = defrost will never be activated due to the effect of this condition i14 0 240 min 32 0 0 0 0 GRAM FG GRAM KG GRAM FG GRAM KG DIGITAL OUTPUTS HAV HAV FAV FAV PARAM. MIN. MAX. U.M. DEF. utility managed through the K4 digital output (23) 0 = ROOM LIGHTING ‐ see parameters i0 and u2 1 = DEMISTER HEATING ELEMENTS ‐ see parameter u6 2 = AUXILIARY OUTPUT ‐ see parameters i5 and u2 3 = ALARM OUTPUT 4 = NEUTRAL AREA OPERATION HEATING ELEMENTS ‐ see parameter u7 6 = CONDENSER FAN ‐ see parameters P4, F11 and F12 ...
- Page 14 ‐20 if the P4 parameter is set at 0, 2 or 3, the condenser fan shall work in parallel with the compressor ‐21 the condenser fan is switched on provided that the compressor is switched on and is switched off when the condenser temperature falls below the value set with parameter F11 provided that the compressor is switched off ‐22 the compressor is switched off 10 s after the activation of the input; if the input is activated during defrost or when the evaporator fan is deactivated, the activation will not have any effect on the compressor ‐23 to avoid damaging the connected load, set the parameter when the device is switched off (“stand‐by” status). 765041996 Rev. 001...
-
Page 15: Wiring Diagram
Wiring diagram 765041996 Rev. 001...
Need help?
Do you have a question about the ECO MIDI KG 60 and is the answer not in the manual?
Questions and answers