
Related Manuals for Enviro MQL B Series

Summary of Contents for Enviro MQL B Series
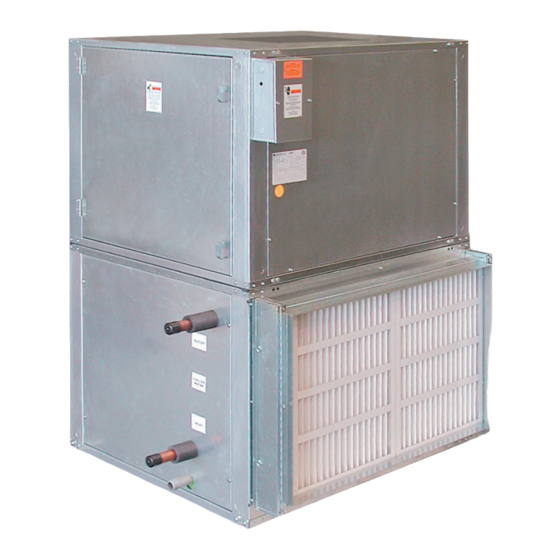
- Page 1 INDOOR AIR HANDLING UNIT INSTALLATION, OPERATION & MAINTENANCE Supersedes: ET102.19-NOM1 (517) Form ET102.19-NOM1 (0521) MODEL MQL SERIES B...
- Page 2 All wiring must be in accordance with ENVIRO-TEC’ published specifications and must be performed only by a qualified electrician. ENVIRO-TEC will NOT be responsible for damage/problems resulting from improper connections to the controls or application of improper control signals.
- Page 3 More than one source of power may be power and control circuits prior to servic- present. Disconnect all power sources ing to avoid burns. to avoid electrocution or shock injuries. ENVIRO-TEC...
- Page 4 CHANGEABILITY OF THIS DOCUMENT In complying with ENVIRO-TEC’ policy for continu- Operating/service personnel maintain responsibility for ous product improvement, the information contained the applicability of these documents to the equipment.
-
Page 5: Table Of Contents
Air Balancing ............................20 Sheaves ............................20 SECTION 4 - PERIODIC MAINTENANCE AND SERVICE ..................21 PERIODIC MAINTENANCE AND SERVICE ....................21 General ..............................21 After 48 Hours of Operation ........................21 Weekly ..............................21 Every Month ............................21 Every Three to Six Months ........................21 ENVIRO-TEC... - Page 6 Vibration Levels .............................29 Vibration Causes ...........................30 Periodic Service and Maintenance ......................30 APPLICATION RECOMMENDATION FOR COILS ..................30 General ..............................30 Water Cooling Coils ..........................30 Direct Expansion Coils ..........................30 Steam Coils ............................31 Water Heating Coils..........................32 SECTION 5 - TROUBLESHOOTING ........................33 ENVIRO-TEC...
- Page 7 TABLE 4 - Fan Bearing Maximum Grease Capacity ....................20 TABLE 5 - Recommended Motor Greasing Schedule ....................21 TABLE 6 - Determining Deflection Force ........................25 TABLE 7 - Forward Curve Fan Data ........................26 TABLE 8 - Vibration Levels .............................26 TABLE 9 - MQL Troubleshooting Analysis ......................29 ENVIRO-TEC...
- Page 8 FORM ET102.19-NOM1 (0521) LIST OF FIGURES THIS PAGE INTENTIONALLY LEFT BLANK. ENVIRO-TEC...
-
Page 9: Section 1 - Introduction
Modules bolt together from the inside of the upstream equipment is ready for final placement, as damage to module. equipment can result. Do not remove protective caps from piping connections until ready to connect piping. FIGURE 1 - LIFT POINTS FOR UNITS WITH BASE RAILS ENVIRO-TEC... -
Page 10: Storage
Set equipment off ground if in moisture prone areas. STORAGE To transfer equipment from truck to storage site, refer to Rigging And Handling on page 9 FIGURE 2 - LIFT POINTS FOR UNITS WITH BASE RAILS ENVIRO-TEC... -
Page 11: Assembling Equipment
If the dampers are different sizes they must be driven by individual actuators and con- trolled separately. FIGURE 4 - ASSEMBLY, UNITS WITH BASE RAILS ENVIRO-TEC... - Page 12 FORM ET102.19-NOM1 (0521) SECTION 1 - INTRODUCTION THIS PAGE INTENTIONALLY LEFT BLANK. ENVIRO-TEC...
-
Page 13: Section 2 - Installation
The MQL product line is not designed to be suspended from the top of the equipment. Be- fore hanging the equipment, all field assembly must be completed. ENVIRO-TEC... -
Page 14: Figure 7 - Hand Identification
FORM ET102.19-NOM1 (0521) SECTION 2 - INSTALLATION Left Hand Fan Access Door FIGURE 7 - HAND IDENTIFICATION ENVIRO-TEC... -
Page 15: Suspending Using Field Supplied Supports
TXV. All FIGURE 8 - REMOVE HOLD DOWNS coil connections are stubbed out of cabinet panel with the exception of refrigerant (DX) coils. Field penetra- tion of panels is required for liquid line piping. FIGURE 9 - ISOLATOR INSTALLATION ENVIRO-TEC... -
Page 16: Dx Connection Steps
Thermal protection and a disconnect switch are the addition of fittings or refrigerant specialties to provided by others. be furnished and installed by others. 6. Review wiring diagram and make necessary con- nections accordingly. ENVIRO-TEC... -
Page 17: Inspection & Start-Up Checklist
Install Ductwork, Fittings & Grilles As Required Control Outside Air For Freeze Protection Proper Supply & Return Grille Type & Size Used Insulate All Ductwork As Required Verify All Ductwork Is Complete, Dampers, And Filters Are Installed Prior To Startup ENVIRO-TEC... - Page 18 FORM ET102.19-NOM1 (0521) SECTION 2 - INSTALLATION INTENTIONALLY LEFT BLANK ENVIRO-TEC...
-
Page 19: Section 3 - Startup
Operation of the units in conditions out- Thorough safety precautions should always be taken lined above could result in damage to the equipment when performing startup and service. Only qualified or buildings and furnishings and void all manufacturer individuals should perform these tasks. warranty. ENVIRO-TEC... -
Page 20: First Time Motor Startup
6. Be sure that all shipping materials, braces, and construction debris are out of equipment. 7. Manually rotate motor shaft to ensure that it ro- tates freely. 8. Replace all panels that were removed during in- stallation. ENVIRO-TEC... -
Page 21: Section 4 - Periodic Maintenance And Service
• Align fan and motor sheaves. Tighten sheave set- screws to the proper torque (see Table 1 on page 22). • Check and adjust fan belt tension. • Tighten electrical connections • Inspect coils for dirt build-up or coil freeze-up. ENVIRO-TEC... -
Page 22: Drain Pan
1. Disconnect all electrical power to the unit, tag and mild bleach and water solution or an EPA-ap- lock out power source. proved sanitizer specifically designed for HVAC 2. Put on appropriate personal protective equipment. use. Carefully follow the sanitizer manufacturer ENVIRO-TEC... -
Page 23: Fan Bearings
Table 4 on page 23 for recommended greasing which ever occurs first. Operating conditions will vary intervals, operating range, and bearing grease capacities. the frequency of inspection and lubrication. Table 5 (Table 5 on page 25) lists recommended motor ENVIRO-TEC... -
Page 24: Lubrication And Bearings
Refer to Table 1 on page 22 for minimum torque of A high-grade ball or roller bearing grease should be motor mounting and bearing bolts. used. See Table 3 on page 23 for Recommended Greases. Chevron SRI (Factory Installed) - Polyurea Base ENVIRO-TEC... -
Page 25: Drives
7. Be sure that all keys are in place. Make sure all If the setscrew (a) is not fully in contact setscrews and capscrews are torqued properly be- with key, the sheave assembly could come fore starting drive. Check setscrew and belt ten- off. sion after 24 hours of service. ENVIRO-TEC... -
Page 26: Mounting Split Tapper Sheaves
- some gap should remain between flange and hub after tightening. 5. Adjust pitch diameter by opening or closing the movable flange(s) by a half or full turn. Opening the flange(s) will decrease the blower speed, clos- ing the flange(s) will increase blower speed. ENVIRO-TEC... -
Page 27: Belts
• Mount belts straight. Shaft must be parallel and sheave grooves in alignment to prevent unneces- sary belt wear. • Do not overload belt. Belts have a specific HP rat- LD14011 ing that must not be exceeded. FIGURE 14 - BELT TENSION ENVIRO-TEC... -
Page 28: Coils
2501 - 4000 400 - 2500 3.8 - 4.8 2501 - 4000 400 - 2500 5.0 - 7.0 2501 - 4000 860 - 2500 4.4 - 5.6 2501 - 4000 860 - 2500 5.8 - 8.6 2501 - 4000 ENVIRO-TEC... -
Page 29: Refrigerant Coils
The freezing of coils is not the responsibil- entering airside. Use a block-off to prevent spray ity of ENVIRO-TEC®. from going through the coil and into dry sections of the unit and/or system ductwork. Carefully fol- OPERATING GUIDELINES low the cleaning solution manufacturer’s usage... -
Page 30: Vibration Causes
.20 in/sec. Maximum velocity Note: Excessive vibration from any cause contributes to premature fan and motor bearing failure. Overall, vibration levels should be monitored every six months of operation. An increase in levels is an indication of potential trouble. ENVIRO-TEC... -
Page 31: Steam Coils
Consideration should be given to the use of 6. Do not drip supply mains through the coil. two or three coils in series with two posi- tion steam control valves on that coil or coils ENVIRO-TEC... -
Page 32: Water Heating Coils
Provision must be made to close fresh air enters the coil. dampers if steam supply pressure falls below minimum specified. ENVIRO-TEC... -
Page 33: Section 5 - Troubleshooting
Use Table 9 to assist in identifying the cause (s) of mal- function in the MQL. This table is intended as a diagnostic aid only. For detailed repair procedures, con- tact your ENVIRO-TEC ® representative. TABLE 9 - MQL TROUBLESHOOTING ANALYSIS SYMPTOM PROBABLE CAUSE... - Page 34 Level unit. STANDING WATER Improper trap design. Design trap for unit. IN DRAIN PAN Missing filters. Replace filters. EXCESS DIRT IN UNIT Reduce filter bypass. Filter bypass. MOLD INSIDE AIR HANDLER Standing water in drain pan. See “Standing water” symptoms. ENVIRO-TEC...
- Page 35 FORM ET102.19-NOM1 (0521) SECTION 5 - TROUBLESHOOTING ENVIRO-TEC...
- Page 36 Catalog: ET102.19-NOM1 (0521) Supersedes ET102.19-NOM1 (517) ENVIRO-TEC is a mark and/or registered mark. Unauthorized use is strictly prohibited. © 2021 Johnson Controls www.enviro-tec.com...
Need help?
Do you have a question about the MQL B Series and is the answer not in the manual?
Questions and answers