Table of Contents
Advertisement
Quick Links
atlantic
GUIDE À CONSERVER PAR L'UTILIS ATEUR
A
FELHASZNÂLÔ ÂLTAL MEGTARTANDÔ ÛTMUTATÔ
GIBS TE BEWAREN DOOR DE GEBRUIKER
PYKOBOACTBO AOn>KHO XPAHIIITbCSI Y nonb30BATEnSI
THEOLA DIGITAL
RADIATEUR SÈCHE-SERVIETTES ÉLECTRIQUE
ELECTRIC TOWEL
ELEKTRYCZNA SUSZARKA t.AZIENKOWA
ELEKTROMOS TÔRÔLKÔZÔSZÂRITÔ FÜTÔTEST
ELEKTRISCHE RADIATOR HANDDOEKDROGER
3nEKTPW· I ECKl,11/1 nonOTEHL.tECYWl,1TEnb
GUIDE TO BE KEP T BY THE USER
PRZEWODNIK DLA U:ZYTKOWNIK A
SENSIS
-
DRYING HEATER
-
P._
-
-
Notice d'installation et d'utilisation
User and installation manual
lnstrukcja instalacji i obsl:.ugi
Telepftési és felhasznâlôi kézikônyv
Gebruiks- en installatiehandleiding
L-1HCTPYKL\11151 no ycTaHOBKe 1,1 3KcnnyaT8l.\l,11,1
J:
�=
Advertisement
Table of Contents

Subscribe to Our Youtube Channel
Related Manuals for Atlantic SENSIS

Summary of Contents for Atlantic SENSIS
- Page 1 GUIDE TO BE KEP T BY THE USER PRZEWODNIK DLA U:ZYTKOWNIK A FELHASZNÂLÔ ÂLTAL MEGTARTANDÔ ÛTMUTATÔ GIBS TE BEWAREN DOOR DE GEBRUIKER PYKOBOACTBO AOn>KHO XPAHIIITbCSI Y nonb30BATEnSI THEOLA DIGITAL SENSIS Notice d'installation et d'utilisation RADIATEUR SÈCHE-SERVIETTES ÉLECTRIQUE ELECTRIC TOWEL DRYING HEATER User and installation manual lnstrukcja instalacji i obsl:.ugi...
-
Page 2: Table Of Contents
Contents Warning . . . . . . . . . . . . . . . . . . . . . . . . . . . . . . . . . . . . . . . . . . . . . . . . . . . . . . . . . . . . . . . 2 Installation . -
Page 3: Warning
Warning Attention surface très chaude. Caution hot surface. CAUTION : Certain parts of this product can become very hot and cause burns. Particular attention must Attention : Surface très be paid in the presence of children and vulnerable chaude individuals. Caution hot surface This appliance must be kept away from children under the age of 3,... - Page 4 When the appliance is heated for the first time, a slight odour may be noted. This results from the evacuation of any traces linked to the manufacture of the appliance. As the surface of the appliance can be very hot, pay particular attention if placing delicate clothing on top (e.g.: nylon, ...).
-
Page 5: Installation
Installation PREPARING TO INSTALL THE APPLIANCE Installation rules This appliance has been designed for installation in a residential setting. For any other scenario, please consult your dealer. Installation must be carried out in accordance with good industrial practice, and with standards in force in the country of installation. In wet environments such as bathrooms and kitchens, the connection box must be installed at least 25 cm from the floor. -
Page 6: Connecting The Appliance
CONNECTING THE APPLIANCE Connection rules The device must be powered with 220-230 V Single phase 50Hz. The device's power supply must be connected directly to the network after the circuit breaker and without an intermediate switch. The power supply must be connected directly to the network after the single-pole disconnection mechanism in accordance with the installation rules . -
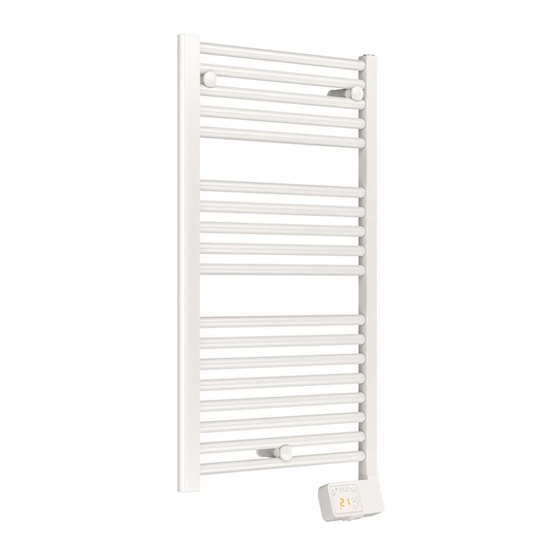
Page 7: Operation
Operation A quick-start user manual is available on the rear of the control panel . Manual Programming Settings mode mode Activate Switch mode Deactivate Access BOOST settings Confirm BOOST Back indicator (press and hold) Increase Setpoint Lock temperature (press and hold both buttons) BOOST time Decrease Heating... -
Page 8: Screen Display
SCREEN DISPLAY Time and day setting in Comfort temperature progress Eco temperature Allocate predefined No heating programs to the 7 days of the week Enter menu Personalise programs Exit menu OPERATING MODES Several operating modes are available: anual Mode The appliance continuously follows the setpoint temperature (desired temperature). -
Page 9: Boost Mode
INITIAL SWITCH-ON Press any button to activate the display . When it is first powered on, Manual mode is selected, and the setpoint temperature is set to 19° C. BOOST MODE Boost mode is used to operate the appliance at maximum power for a period of between 15 and 60 minutes, in order to increase the temperature quicker. -
Page 10: Programming Mode
Increase or decrease from 12°C min. to 28°C max. Decrease further to 7° C (non-modifiable frost protection temperature). Decrease until oF is displayed (appliance stops heating) . BOOST mode remains accessible . PROGRAMMING MODE elecTing rograMMing Mode To use programming mode, you must first set the time and short day in Settings... - Page 11 Use the buttons to display the appliance's operating program (Co, Ec, oF). If the screen displays Co, you are in a Comfort operating slot. If the screen displays Ec, you are in an ECO operating slot. The ECO temperature is set 3.5°C below the Comfort temperature. The ECO temperature cannot exceed 19°...
-
Page 12: Settings
SETTINGS In Settings , you can: • Set the time and day ( • Select the program (P1 to P7) for each day of the week (d1 to d7) ( • Personalise each of the programs (P1 to P7), selecting the operating program (Co, Ec, oF) for each hour of the day (from 0:00 to 23:00) ( elecTing eTTingS... -
Page 13: Selecting A Predefined Program For Each Day Of The Week
elecTing a Predefined PrograM for each day of The week 1 - Select Settings . The symbol will be displayed 2 - Press twice to display 3 -Press to display the first day. The day number will be displayed 4 - Select the day to set using the buttons . -
Page 14: Locking Access To The Controls
So you need to change the time slots between 00:00 and 04:00 from Eco to Off, and change the slot between 08:00 and 09:00 from Comfort to Eco, change the slot between 12:00 and 13:00 from Eco to Comfort, and then change the slot between 18:00 and 19:00 from Comfort to Eco. -
Page 15: Advanced Functions
Advanced functions cceSSing The advanced funcTionS at the same time min . 3 seconds Press any button to activate the display . Then press and hold these two buttons at the same time for more than 3 seconds. CALIBRATION There may be a difference between the setpoint temperature and the temperature actually measured in the room. -
Page 16: Heating Standby Indicator
HEATING STANDBY INDICATOR There is an automatic inactivity timeout on the control panel display after a few seconds, with the exception of the heating indicator, which is lit when the resistor power supply is on. It is possible to configure the panel so that the indicator goes out when the panel display is switched off. -
Page 17: Troubleshooting
Troubleshooting Problem encountered Checks to carry out The control panel The display is on standby. Press any button to activate the display. Check does not light up . that the appliance is connected to the power supply. Check that the switch is in position I . - Page 18 Problem encountered Checks to carry out The appliance makes Upon unpacking or installation, it is normal to hear the fluid circulating in a liquid noise when the appliance's frame. operated . The appliance does Check that the date and time are set. not follow the Check that the appliance is in Programming mode.
-
Page 19: Specifications
Specifications Model references SFLC IC0 Specification Symbol Value Unit Thermal output Rated thermal output P nom 0 .30 to 0 .75 300 to 750 Minimum thermal output P min 0 .30 Maximum continuous thermal output P max,c 0 .75 At rated thermal output el max 0 .00 At minimum thermal output... -
Page 20: Warranty Conditions
. This information can be found on the information plate situated on the side of the device. To claim under guarantee, contact your installer or dealer. If necessary, contact : ATLANTIC INTERNATIONAL 2 Allée Suzanne Penillault-Crapez 94110 ARCUEIL...
Need help?
Do you have a question about the SENSIS and is the answer not in the manual?
Questions and answers