Table of Contents
Advertisement
Available languages
Available languages
Quick Links
Advertisement
Table of Contents

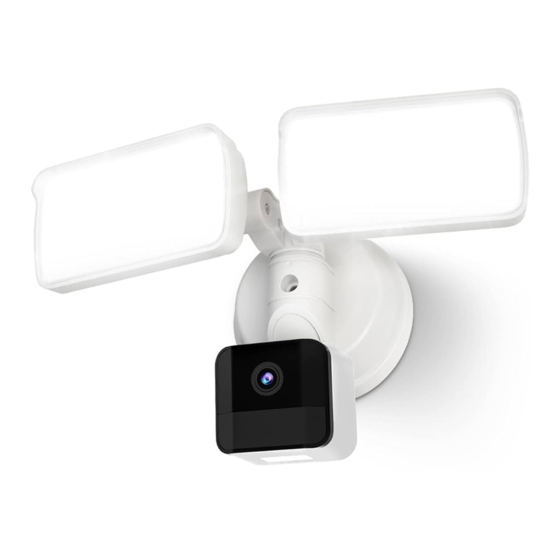
Summary of Contents for Lepro PR906501-US
- Page 1 Floodlight Camera User Manual...
-
Page 2: Table Of Contents
English Package Contents Introduction Installation Guide APP Pairing APP Using Troubleshooting... - Page 3 Français Contenu Introduction Guide d'installation Couplage avec APP Utilisation de l’APP Astuces de dépannage...
-
Page 4: Package Contents
E: Nut x 1 F: Wire Nuts x 3 Model No.: PR906501-US 28 W(Lamp 22W / Camera 6W), 2400 lm, 110-130V ~, 60 Hz, 0.235 A, CRI>70, PF 0.6, IP65, 5000 K, -25 °C – 40 °C / -13 °F - 113 °F... -
Page 5: Introduction
Introduction This Floodlight Camera is a sophisticated smart home security system combin- ing advanced PIR motion sensor lighting and real-time video monitoring. It can help monitor and keep an eye on your home day and night. It will alert you the minute someone enters your property, including an intruder, and allows you to talk to them right away. -
Page 6: Installation Guide
Installation Guide RECOMMENDED INSTALLATION HEIGHT: 6.5-8.25 feet above the ground. At a detection angle of 75°, the sensor will provide a maximum sensing range of up to 39 feet. Motion Sensor 6.5 ft. Downward 5° Height Detection Coverage 39 ft 8.25 ft. - Page 7 TOOLS YOU NEED (not included) Flathead Screwdriver Screwdriver Silicone Sealant Step Ladder Protective Eye Wear Pliers Notice: To attain maximum product performance and avoid unnecessary environmental disturbance, please be sure to comply with the following conditions during product installation: • Do not install the product in close proximity to thermal sources, like air conditioner outdoor unit or kitchen smoke outlet, etc.
- Page 8 You can install the Floodlight Camera by following the steps below: Step 1: Shut the power off at the circuit breaker (NOT THE SWITCH). WARNING: Risk of electrical shock! Notice: • Please make sure the power voltage is 110-130 V~, 60 Hz. •...
- Page 9 Step 3: Wiring the Floodlight Camera Remove the paper barrier from the EVA gasket (B) and adhere the gasket to the crossbar and outer edge of the round surface junction box. Ensure that the short screw on the crossbar threads the hole of the EVA gasket(B). Then wire as below: a.
- Page 10 Step 4: Mounting the Floodlight Camera Make sure wire connections are secure. Carefully align wires through the junction box. Mount the Floodlight Camera onto the crossbar(A) and fasten with the supplied Nuts(E). DO NOT over-tighten them. Ring (E) Step 5: Restore power for the test Restore power at the circuit breaker.
- Page 11 Last step: Waterproof treatment After mounting the Floodlight Camera, to ensure it is water-resistant, seal the entire junction box with a silicone sealant to prevent water from leaking in. It is crucial and necessary for wet locations. Notice: Please do not install the product in a harsh environment. The product may be damaged if exposed to high temperature, high humidity, heavy dust, smoke, etc.
-
Page 12: App Pairing
• Make sure your phone bluetooth function is ON. Download the App 1. Download and install the "Lepro LampUX" APP from the App Store/Play Store and register to create a new account. 2. Power on the floodlight fixture, the light will switch on for a few seconds. - Page 13 3. Open the Lepro LampUX APP, tap on the "+" sign, and follow the onscreen steps to select the appropriate "Floodlight Camera" to start the connection from the device list. 4. When you get the prompt for the WiFi connection, enter the username and password and click "next."...
- Page 14 7. After pairing the phone and camera, rename the light on your APP and then save. Now, you are all ready to go. Added successfully Floodlight Camera Device added successfully Note: If this doesn’t work, please reset the product. Long-press the reset button for around 5 seconds until you hear a short audible beeping tone.
- Page 15 Voice Control Third-party Control Help Center More Services Method A Settings Google Alexa Assistant Home Smart Alexa SKILL Amazon Alexa Method B Google ACTION Google Home If the light does not work, please go to Amazon Alexa or Google Home APP and click DISCOVER DEVICES. Examples of Alexa control commands: Alexa, show me the “DEVICE NAME”.
-
Page 16: App Using
APP Using 2021-07-08 19:39:15 2021-07-08 19:39:15 Full-screen Screenshot Long press Record video More (saved to the phone) to talk (saved to the phone) Functions... - Page 17 Auto recorded videos will be stored here. Please insert an 8-128G TF(Micro SD) card (it needs to be purchased separately) or enable the cloud storage function, then you can watch the saved playback videos. Playback Manually saved screenshots or videos will be stored to your phone. Make sure storage permission on your phone is turned on.
- Page 18 Settings...
- Page 19 4) You can set up schedules to start or stop recording. d. Share Devices: You can share the device with other people who have Lepro LampUX accounts. e. FAQ and Feedback When encountering a problem, you can check out FAQs on the app. If your problem...
-
Page 20: Troubleshooting
Troubleshooting Tips • Serious stroboscopic picture showing in live view. It is mainly caused by different AC frequencies, which you can solve by changing the AC frequency in the App settings-Picture/View. • Device is offline in the device list? Check the quality of the device network and see if it is good or not. If you already inserted a TF card, please unplug the TF card, and reset the device and router. - Page 21 Federal Communication Commission (FCC) Statement for Users Warning: Changes or modifications to this unit not expressly approved by the party responsible for compliance could void the user’s authority to operate the equipment. This device complies with Part 15 of the FCC Rules. Operation is subject to the following two conditions: (1) this device may not cause harmful interference, and (2) this device must accept any interference received, including interference that...
-
Page 22: Contenu
E: Anneau x 1 F: Écrous serre-fil x 3 Model No.: PR906501-US 28 W (Lampe 22 W / Caméra 6 W), 2400 lm, 110-130 V ~, 60 Hz, 0.235 A, CRI>70, PF 0.6, IP65, 5000 K, -25 °C – 40 °C / -13 °F - 113 °F... -
Page 23: Introduction
Introduction La caméra Floodlight est un système de sécurité domotique intelligent qui associe la détection de mouvement PIR et la surveillance vidéo en temps réel. Cette caméra vous permet de garder un œil sur votre maison jour et nuit. Elle vous avertira immédiatement de toute visite ou intrusion sur votre propriété... -
Page 24: Guide D'installation
Guide d'installation HAUTEUR RECOMMANDÉE: Un à deux mètres et demi au-dessus du sol: avec un angle de détection de 75°, le rayon de détection du capteur peut aller jusqu'à 12 mètres environ. Détecteur de mouvement Hauteur incliné vers le bas à 5° 1,80 m Couverture de détection 12 m environ Hauteur... - Page 25 LES OUTILS DONT VOUS AUREZ BESOIN (non inclus) Tournevis à tête plate Tournevis Joint silicone Échelle Lunettes de protection Pince Remarque Pour assurer une performance optimale et éviter les perturbations environne- mentales, veuillez respecter les instructions ci-dessous durant l'installation. • N'installez pas l'appareil à proximité d'une source de chaleur, comme une sortie d'air conditionné, une hotte de cuisine, etc.
- Page 26 Suivez les étapes ci-dessous pour installer la caméra Floodlight. Étape 1: couper le courant au compteur électrique (PAS AU COMMUTA- TEUR) AVERTISSEMENT: Risque de choc électrique! Remarque: • Le voltage doit être de 110-130V ~, 60 Hz. • Reliez correctement l'appareil à la terre. •...
- Page 27 Étape 3: connecter la caméra Floodlight Retirez la protection papier du joint EVA (B), utilisez le joint pour fixer la barre transversale et la boîte de dérivation. Veillez à placer correctement la vis courte de la barre transversale dans le trou de filetage. Connectez ensuite l'appareil selon les instructions ci-dessous: a.
- Page 28 Étape 4: installer la caméra Floodlight Assurez-vous que le câblage électrique a été correctement effectué. Alignez soigneusement les fils dans la boîte de dérivation. Fixez la caméra Floodlight sur la barre transversale (A) à l'aide des écrous fournis (E). Ne serrez pas trop les écrous. Ring (E) Étape 5: rétablir le courant pour effectuer un test Rétablissez le courant au compteur électrique.
- Page 29 Étape 6: étanchéité Après l'installation de la caméra Floodlight, imperméabilisez entièrement la boîte de dérivation à l'aide d'un joint de silicone de façon à prévenir tout risque d'infiltration d'eau et à assurer une parfaite étanchéité. Cette opération est nécessaire et même cruciale dans les emplacements humides. Remarque: Veuillez ne pas installer l'appareil dans un environnement aux conditions climatiques extrêmes.
-
Page 30: Couplage Avec App
• Assurez-vous que la fonction bluetooth de votre téléphone est sur ON. Téléchargez l'application 1. Téléchargez et installez l'application « Lepro LampUX » disponible dans le App Store/Play Store et enregistrez-vous pour créer un nouveau compte. 2. Mettez l'appareil sous tension, la lumière s'allumera pendant quelques secondes. - Page 31 3. Ouvrez l'application Lepro LampUX, cliquez sur le signe « + » et suivez les étapes qui s'affichent à l'écran pour sélectionner la caméra « Floodlight » et commencer la connexion à partir de la liste d'appareils répertoriés. 4. Lorsque l'invite de connexion WiFi apparaît, indiquez le nom d'utilisateur et le mot de passe, puis cliquez sur «...
- Page 32 7. Après le couplage du téléphone et de la caméra, renommez l'appareil sur votre application et sauvegardez. Tout est prêt. Added successfully Floodlight Camera Device added successfully Remarque : si cela ne fonctionne pas, veuillez réinitialiser l'appareil. Appuyez longuement sur le bouton de réinitialisation pendant environ 5 secondes jusqu'à...
- Page 33 Voice Control Third-party Control Help Center More Services Method A Settings Google Alexa Assistant Home Smart Alexa SKILL Amazon Alexa Method B Google ACTION Google Home Si la lumière ne fonctionne pas, veuillez vous rendre sur Amazon Alexa ou Google Home APP et cliquez sur DÉCOUVRIR APPAREILS. Exemple de commande Alexa: Alexa, Montre ma “device_name”.
-
Page 34: Utilisation De L'app
Utilisation de l’APP 2021-07-08 19:39:15 2021-07-08 19:39:15 Plein écran Capture d'écran Appuyez Enregistrer une vidéo Plus de (sauvegardée sur longuement (sauvegardée sur fonctions le téléphone) pour appeler le téléphone) - Page 35 Lecture : Insérez une carte TF(Micro-SD) 8-128G (achetée séparément) ou activez la fonction de stockage en nuage, puis vous pouvez regarder les vidéos enregistrées. Playback Galerie : Les captures d'écran ou les vidéos enregistrées seront stockées sur votre téléphone. Assurez-vous que l'autorisation de Gallery stockage sur votre téléphone est activée.
- Page 36 Paramètres...
- Page 37 4) Le mode d'enregistrement vous permet de choisir entre l'enregistrement d'événe- ments et l'enregistrement non-stop. d. Share Devices / Partager les appareils : Vous pouvez partager l'appareil avec d'autres personnes possédant un compte Lepro LampUX. e. FAQ and Feedback / FAQ et commentaires : vérifiez si les problèmes rencontrés peuvent être résolus.
-
Page 38: Astuces De Dépannage
Astuces de dépannage • Effet stroboscopique sur l'image en direct. Il est dû principalement à des variations de fréquences, que vous pouvez résoudre en modifiant la fréquence du courant alternatif dans l'application à l'aide de la fonction Paramètres Image/vue (settings-Picture/View). •... - Page 40 (1) This device may not cause harmful interference, and (2) this device must accept any interference received, including interference that may cause undesired operation. LE Innovation Inc 3651 Lindell Rd Ste D, Las Vegas, NV 89103, USA www.lepro.com + 1 866-287-2558 cs.oc@lepro.com Made in China Fabriqué en Chine...
Need help?
Do you have a question about the PR906501-US and is the answer not in the manual?
Questions and answers