Table of Contents
Advertisement
Quick Links
Advertisement
Table of Contents

Summary of Contents for Sonardyne Lodestar 500
- Page 1 UM-8084-6510 User Manual for Lodestar 500 Issue A Rev 1 Issue Date: 27 January 2016 Sonardyne International Limited T. +44 (0) 1252 872288 Blackbushe Business Park F. +44 (0) 1252 876100 Yateley, Hampshire E. support@sonardyne.com GU46 6GD United Kingdom W. www.sonardyne.com...
- Page 2 Sonardyne’s then prevailing terms and conditions of sale. This user manual has been compiled to the best of Sonardyne’s knowledge and belief, but no representation, warranty (whether express or implied) or guarantee is made to any persons or legal entities as to the accuracy, reliability or completeness of the information contained in this user manual.
- Page 3 Contacting the Sonardyne Support Team 24-hour Emergency Telephone Helpline: +44 (0) 1252 877600 The Sonardyne 24-hour helpline is answered at the UK Headquarters during normal office hours (08:00 to 17:00). Outside these hours, your call is automatically transferred to an agency, which logs the details of your emergency and alerts the appropriate Sonardyne personnel.
-
Page 4: Table Of Contents
Site Preparation ..................... 11 4.4.2 Mounting Holes and Dowels ................... 11 Vehicle Alignment ........................ 12 Preparing the Lodestar 500 for use ..................12 4.6.1 Checking the Pressure Relief Vent Valve ............... 13 4.6.2 Checking Communications with the Lodestar ............13 Section 5 –... - Page 5 10.3.2 Restore Lodestar Factory Settings ................. 25 Section 11 – Spares ........................27 11.1 Introduction .......................... 27 11.2 Lodestar 500 Spares List ..................... 27 Section 12 – Technical Specifications..................28 12.1 Technical Drawing ....................... 28 12.2 Specifications ........................28 12.2.1 Performance ......................
- Page 6 Figure 3-2 Lodestar 500 Connect Ports ..................6 Figure 3-7 Pressure Relief Vent Valve ................... 9 Figure 4-1 Lodestar 500 Mounting and Alignment ................ 11 Figure 4-2 Endcap Alignment Markings ..................12 Figure 10-1 Lodestar Hardware Test Procedure ................24 Figure 12-1 Lodestar Outline Dimensions (mm) ................
-
Page 7: Amendment History
UM-8084-6510 User Manual for Lodestar 500 Issue A Rev 1 Amendment History The amendment history records all amendments and additions made to this manual. Issue Revision Date Comments Section Page 27/01/16 Initial Issue... -
Page 8: Section 1 - Introduction
U.S. Department of Commerce License This product contains U.S. Department of Commerce controlled items. As such the Lodestar 500, or Lodestar portion of the product, must not be removed from the housing, be disassembled or repaired, outside of the terms and conditions detailed in the U.S. Department of Commerce Re- Export Licence under which the product was sold. -
Page 9: Section 2 - Safety
Section 2 – Safety Introduction Before any activity is carried out on the equipment, it is recommended that the included Sonardyne Safety Manual and all warnings and cautions in this manual are read and fully understood. It is recommended that the operator complies with the Health and Safety Regulations applicable to the vehicle and the region before operating this equipment. -
Page 10: Cautions
2.2.2 Cautions Incorrect Power Supply. Make sure the Lodestar is supplied with 20 VDC to 50 VDC. Do not use an AC power supply. Damage to connectors. Failure to clean sand or silt correctly could result in damage to the connectors and O-ring seals. -
Page 11: Section 3 - Technical Description
• Data output through RS232 serial, RS485 serial or Ethernet interfaces. • The Lodestar 500 has undergone independent and exhaustive testing against an industry- recognised reference and has proved capable of delivering accurate measurements in highly dynamic marine environments. Lodestar 500 benefits from Sonardyne’s world-class manufacturing, support and training organisation, which has a well-established record for providing trusted solutions. -
Page 12: Physical Layout
Power The Lodestar is powered from an external 20V to 50V DC power supply through the CP port. A power supply is not provided with the Lodestar 500. Refer to Section 12 – Technical Specifications for power requirements. Power Pass Through The Lodestar is capable of passing through input power (20V to 50V DC from an external power supply) to sensors connected to the Lodestar’s C1, T1 and T2 ports. -
Page 13: Battery
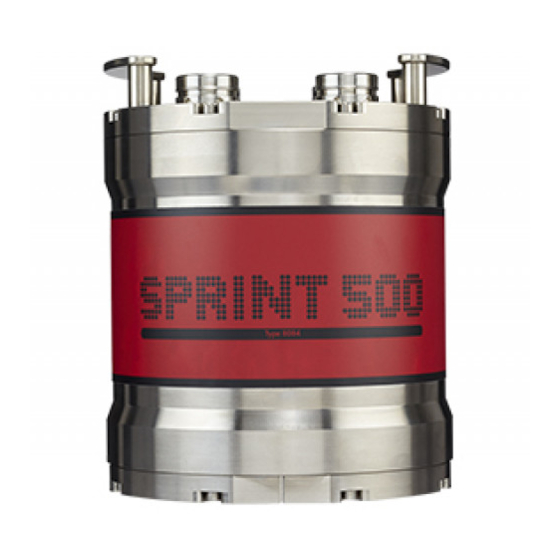
20 minutes to reach full charge. Connector Ports The Lodestar 500 is provided with 4 x Seacon connector ports as shown in Figure 3-2. The connector port functions are described in Table 3-1. -
Page 14: Cp/E1 Pin Out Functions
3.6.1 CP/E1 Pin out Functions The Lodestar 500 CP/E1 connector pin functions are shown in Table 3-2. Table 3-2 Lodestar 500 CP/E1 Pin Out Seacon Pin No. Function Connection DC 0V Black Socket DC In Red Socket RS232 & RS485 Pin 5... -
Page 15: T1/T2 Pin Out Functions
3.6.3 T1/T2 Pin out Functions The Lodestar 500 CP/E1 connector pin functions are shown in Table 3-4. Table 3-4 Lodestar 500 T1/T2 Pin Out Seacon Pin No. Function Connection RS232 & RS485 = Pin 5 BNC Inner Trigger 0v BNC Outer... -
Page 16: Pressure Relief Vent Valve
Pressure Relief Vent Valve A Pressure Relief Vent Valve is provided to stop a build-up of gas inside the transponder caused by the charging process or a failing battery. The Pressure Relief Vent Valve must be checked before installing and operating the Seanet Lodestar;... -
Page 17: Section 4 - Installation
Installation Location The Lodestar 500 can be installed at any convenient location on the vehicle. However, to gain optimal performance from the system, identify a location to install the Lodestar 500 that conforms as... -
Page 18: Mounting
4.4.1 Site Preparation The Lodestar 500 can be installed in any convenient orientation with respect to the vessel’s body frame. You can compensate for any misalignment between the Lodestar 500 and the vessel by carefully measuring the mounting angles and entering them in the AHRS or SPRINT software; refer to Section 4.5 “Vehicle Alignment”. -
Page 19: Vehicle Alignment
Four flats machined into the base plate serve as alignment references. If it is not possible to mount the Lodestar 500 within the limits described above for coarse alignment or if you wish to mount the Lodestar at other angles with respect to the reference axes on the vessel, ROV or platform, the mounting angles must be measured and configured on the Lodestar 500. -
Page 20: Checking The Pressure Relief Vent Valve
4.6.1 Checking the Pressure Relief Vent Valve Check the Pressure Relief Vent Valve is flush with the endcap. If the Pressure Relief Vent Valve is not flush it could indicate a pressure build-up during previous operations due to a fault developing in the backup battery pack. -
Page 21: Section 5 - Operation
Section 5 – Operation Introduction The type 8084-6510 Lodestar 500 can be operated as both an AHRS and a SPRINT INS. The Lodestar 500 connector ports restrict communications functionality compared to standard connector Lodestar variants, as shown below: Lodestar 500 Port... -
Page 22: Section 6 - Retrieval And Storage
On retrieval from the installation location, the following procedures must be carried out before the Lodestar 500 is stored. Clean the Lodestar 500; refer to Section 7.4 “Cleaning”. Inspect the Lodestar 500; refer to Section 7.5 ”Inspecting”. Place Seacon connector covers on all connector ports. -
Page 23: Section 7 - Maintenance
The Seacon connectors are dry mating and do not require lubrication on the connector pins/sockets. Corrosion The Lodestar 500 housing is manufactured from titanium and is highly resistant to corrosion. Under normal use the housing should not show any signs of corrosion and no maintenance is necessary. -
Page 24: Recalibration
Recalibration Lodestar 500 uses rugged and durable high quality inertial sensors of unrivalled and thoroughly field proven reliability: The sensors are used in systems qualified for the most demanding and safety critical applications and are standard fit for use in the main navigation systems of the majority of today’s commercial and business aircraft. -
Page 25: Section 8 - Firmware Update
Introduction The Lodestar firmware can be updated in the field by using the Lodestar PC utility software tool (included with the Lodestar 500). Customers will be informed of any required firmware updates by Sonardyne support. The Lodestar will accept firmware updates on the CP port only. - Page 26 Click Download Firmware. Click Yes to confirm. Browse to the folder and select the new IMU.HEX file to download (supplied by Sonardyne). A warning will be displayed asking if you are sure that selected file is a Lodestar firmware file.
- Page 27 10. Select a Baud Rate for the download (Sonardyne recommends 115200 baud for all firmware downloads). 11. Click Start to commence the download (at this point the progress bar will show download status; download time at 115200 is less than five minutes).
- Page 28 13. At this point the utility will re-boot the Lodestar. 14. Once complete, the Lodestar PC Utility will re-program the Lodestar with the same configuration it had before the update. Section 8 – Firmware Update...
-
Page 29: Section 9 - Lodestar Messages Specification
Section 9 – Lodestar Messages Specification AHRS Messages Input and output messages supported by the Lodestar for AHRS operation are listed in the Lodestar AHRS Messages manual refer to UM-8084-109 “Lodestar AHRS Messages”. SPRINT INS Operation In addition to the AHRS messages referenced above, additional Input and Output messages are supported for SPRINT INS Operation. -
Page 30: Section 10 - Troubleshooting
10.2 Lodestar Hardware Test Procedure Figure 10-1 shows the recommended test procedure to follow if it is suspected that Lodestar 500 has developed a fault. You can use this test procedure after installation to check the system operates correctly, or if you suspect a fault during normal operation. -
Page 31: Figure 10-1 Lodestar Hardware Test Procedure
Figure 10-1 Lodestar Hardware Test Procedure Section 10 – Troubleshooting... -
Page 32: Recovery Procedures
Wait two minutes after applying power to allow the Seanet Lodestar to start up. Click Start > Programs > Sonardyne > Lodestar > Lodestar to open the Lodestar PC Utility. Click Connect and select the COM port that the Lodestar is connected to. - Page 33 Click Reset to Factory Default. Click Yes to confirm. The PC Utility will reboot Lodestar and reset it to factory default state. It will then wait for Lodestar to re-boot. After the boot process has completed the Lodestar PC Utility will attempt to connect to Lodestar using factory default settings.
-
Page 34: Section 11 - Spares
The part number The drawing number (if known) The description Enquiries about, or orders for spare parts should be directed to your local Sonardyne office or agent (see back page for Sonardyne office addresses). 11.2 Lodestar 500 Spares List Description... -
Page 35: Section 12 - Technical Specifications
Section 12 – Technical Specifications 12.1 Technical Drawing Figure 12-1 Lodestar Outline Dimensions (mm) 12.2 Specifications 12.2.1 Performance Parameter Specification Heading Accuracy 0.04° to 0.1° Secant latitude RMS Settling time Better than 5 minutes Follow-up speed >500° per second Roll and pitch range -90°... -
Page 36: Electrical
Parameter Specification Roll and pitch accuracy 0.01° 12.2.2 Electrical Parameter Specification Electrical power requirement 20 VDC to 50 VDC Power demand 18 watts nominal, 30 watts maximum excluding power pass through Backup battery type Lithium-ion rechargeable, Backup battery support Up to 5 minutes from a fully charged condition Data storage 8 GB onboard Number of digital communication ports... -
Page 37: Definitions
Definitions Term Definition AAINS Acoustically Aided Navigation System Alternating Current Accelerometer A sensor that measures changes in velocity (acceleration) AHRS Attitude and Heading Reference System. An inertial sensor that provides outputs of heading, pitch and roll Direct Current Forward Inertial Measurement Unit Inertial Navigation System A navigation aid that uses inertial sensors to continuously calculate the (INS) - Page 38 T. +55 22 2123 4950 T.+65 6542 1911 T. +44 (0) 1252 872288 F. +55 22 2123 4951 F. +65 6542 6937 F. +44 (0) 1252 876100 brasil.sales@sonardyne.com asia.sales@sonardyne.com sales@sonardyne.com Houston, USA Aberdeen, UK 24/7 Emergency Helpline 8280 Willow Place Drive North Units 12–14,...
Need help?
Do you have a question about the Lodestar 500 and is the answer not in the manual?
Questions and answers