Chapters
Table of Contents

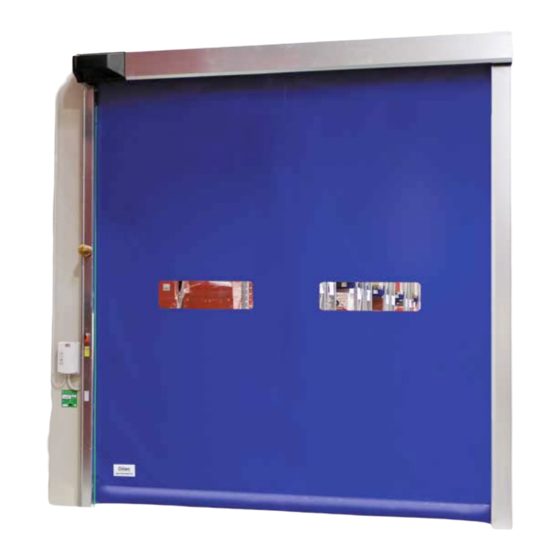
Related Manuals for Entrematic Group Ditec Sector Reset

Summary of Contents for Entrematic Group Ditec Sector Reset
- Page 1 0DT848 Ditec Sector Reset rev. 2020-01-13 Handbuch die montage, wartung, bedienung. (Übersetzung) Installation manual, maintenance, use. (Translation) www.ditecentrematic.com...
-
Page 2: Table Of Contents
Verformungen im Betrieb. Reparatur und Austausch sind ausschließlich Originalersatzteile Die Sicherheitseinrichtungen (Photozellen, Lichtschranken, Entrematic Group AB zu verwenden. Der Einbaubetrieb ist Nothalteinrichtungen usw.) sind nach den Regeln der Technik verpflichtet, dem Benutzer alle notwendigen Informationen für so zu installieren, daß die geltenden Vorschriften... -
Page 3: Technisch Merkmale
Rif. Beschreibung Rif. Beschreibung Laufschiene Modulares Gegengewicht Motor K10 Abdeckung rechte Stütze Treibkette Abdeckung linke Stütze Wickelwelle Rechte Stütze Manueller Entriegelungshebel Linke Stütze Führung aus Polyzen oberer Bereich Schaltkreis Führung aus Polyzen unterer Bereich Lichtschranke 5FB Befestigungshalter für die Führung Torbehang aus Polyester SLE (linearer Encoder) Fenster aus transparentem PVC... -
Page 4: Mechanische Installation
3. MECHANISCHE INSTALLATION Siehe die entsprechenden Zeichnungen für die mechanische Installation auf Seite 26 - 27 (das mittlere Blatt lässt sich herausnehmen) 3.1 Überprüfungen des Durchgangs (Abb.1). • Die Abmessungen der Öffnung mit den Außenmaßen des gelieferten Tors vergleichen. Bei Installation in der lichten Durchgangsbreite die eventuell erforderlichen Toleranzen berücksichtigen. -
Page 5: Elektrische Anschlüsse
4. ELEKTRISCHE ANSCHLÜSSE 4.1 Schaltschrank • Die Kabel mit den vorverkabelten Klemmleisten in das Gehäuse einführen (Abb. 14) und diese an den Platinen anschließen (wie im Kap. 5 gezeigt wird). Die Kabel im Kabelkanal verlegen und die vorgerüsteten Verbinder am Motor anschließen (Abb.15). Die Verkabelung darf nur durchgeführt werden, wenn das Steuergerät seit mindestens 30 Sekunden nicht mehr unter Spannung steht. -
Page 6: Elektronische Schalttafel 5.1 49E - Anschlüsse
5.1 ELEKTRONISCHE SCHALTTAFEL 49E - ANSCHLÜSSE EINGANG Commande Funktion Beschreibung N.O Automatische Die permanente Schließung des Kontaktes aktiviert die automatische Öffnung. Schließung N.O Öffnung Bei DIP1=ON wird beim Schließen des Kontaktes eine Öffnung ausgelöst. Schrittbetrieb Bei DIP1=OFF wird beim Schließen des Kontaktes eine Öffnung oder Schließung in folgender Reihenfolge ausgelöst: Öffnet-Stopp-Schließt-Öffnet. - Page 7 EL07L 00000000000 EL07PW1 00000000000 RP TC 1 2 3 4 5 6 - LK + POWER 17 14 12 11 0 0 0 1 1 2 3 4 6 8 9 20 41 Weiß Braun A933A Orange Schwarz Braun Blau Weiß...
- Page 8 1-9 schaltet sich die automatische Schließung erst nach einem Befehl für die totale Öffnung, die teilweise Öffnung oder die Öffnung im Schrittbetrieb ein. Einstellung teilweise Öffnung Motor. Von 0 bis 30 s. 30 s Dip-switch Beschreibung Für Ditec Sector Reset DIP 1 Funktion Befehl 1-3. Schrittbetrieb. Öffnung. die Dip-switch wie folgt positionieren: Verlängerung Zeit...
- Page 9 EL07L 00000000000 EL07PW1 00000000000 www.ditec.it RP TC 1 2 3 4 5 6 - LK + POWER 17 14 12 11 0 0 0 1 1 2 3 4 6 8 9 20 41 SICHERUNGEN Werte Größe Schaltkreis F1 - F2 - F3 8A - 500V 10.3 x 38 Dreiphasenleitung...
-
Page 10: Inverter) - Anschlüsse
5.2 ELEKTRONISCHE STEUERUNG 52E (UMRICHTER) - Anschlüsse EINGÄNGE Befehl Funktion Beschreibung Öffner STOP Wenn im Programmiermenü (S.15 Punkt 16) Der Kontakt 1-2 aktiviert ist, führt die Öffnung des Kontakts zum Anhalten des Tors (STOPP) 3 SCHLIEßER Öffnung Die Schließung des Kontakts aktiviert die Öffnungsbewegung. 4 SCHLIEßER Schließung Die Schließung des Kontakts aktiviert den Schließvorgang. - Page 11 2 3 4 5 6 7 1 2 3 4 5 6 7 8 S3 S4 +F -F U V W °C BACK 1 IN NC C NO 1 11 12 13 41 40 20 9 0 LAMP Blau 9036 Schwarz Weiss 9038...
- Page 12 EINSTELLUNGEN UND ANZEIGEN Trimmer Beschreibung NICHT BELEGT 30 s NICHT BELEGT 10 s NICHT BELEGT NICHT BELEGT Einstellung des Display-Kontrasts. Dip-Schalter Beschreibung DIP 1 Zukünftiger Gebrauch – – DIP 2 Zugriff auf erweitertes Menü Deaktiviert. Aktiviert. DIP 3 Aktivierung Trimmer Deaktiviert.
- Page 13 2 3 4 5 6 7 1 2 3 4 5 6 7 8 S3 S4 +F -F U V W BACK 1 IN NC C NO 1 11 12 13 41 40 20 9 0 LAMP SICHERUNGEN Werte Größe Schaltkreis F1 - F2 12A - 500V...
-
Page 14: Programmiermenü
6 PROGRAMMIERMENÜ 6.1 INSTALLATIONSMENÜ Beim Einschalten der Steuerung zeigt die Vorrichtung zuerst die Meldung DITEC ENTREMATIC und SW-VERSION Mikroprozessor und Platine an und geht dann automatisch in das Installationsmenü und zeigt die Meldung SPRACHAUSW an. Bestätigen mit Während der Programmierung alle mit PIN 3 - 4 - 20 angeschlossenen Kabeln trennen SCH. -
Page 15: Erweitertes Menü
6.2 ERWEITERTES MENÜ Das erweiterte Menü gestattet die Änderung der Position der zuvor eingestellten Endschalter und die Änderung der Standardparameter. Für den Zugriff auf das erweiterte Menü: Das Tor auf STOPP stellen Den DIP 2 auf ON stellen 1 2 3 4 5 6 7 8 Auf dem Display wird “ENCODER-EINST.”... -
Page 16: Menü Zeitgeschaltete Öffnung
SCH. Optionen 1. Stufe Durchlaufen Bestätigen Optionen 2. Stufe Anmerkungen Schließgeschwindigkeit WERT ÄNDERN Die Einstellung von höheren in (Hz) Werten muss abhängig von den Torabmessungen und den Betriebsbedingungen abgewogen werden. Aktivierung Service- Alarm NEIN RÜCKSETZEN? Setzt die Zählung der fehlenden Manöver bis zum Service zurück Serviceschwelle WERT ÄNDERN... -
Page 17: Servicemenü
6.4 Servicemenü (passwortgeschützt) Das Servicemenü gestattet die Änderung der Schwellen des Bremswiderstands, der Schwelle des Überstroms und der Windschutzfunktion für die Auslösung des Encoders. Für den Zugriff auf das Servicemenü: Das Tor auf STOPP stellen Den DIP5 auf ON stellen PW eingeben: Tastenfolge ÖFFNEN - ÖFFNEN - SCHLIEßEN - TEILÖFFNUNG 1 2 3 4 5 6 7 8 Während der Programmierung alle mit PIN 3 - 4 - 20 angeschlossenen Kabeln trennen... -
Page 18: Einstellung Der Sicherheitsvorrichtung Sle (Linearer Encoder)
7. EINSTELLUNGEN 7.1 Einstellung der Sicherheitsvorrichtung SLE (linearer Encoder) Trimmer Beschreibung Einstellung der Sensibilität bei Hindernissen. Eingeschaltet / Blinkt Ausgeschaltet Keine Stromversorgung Vorhandene Stromversorgung vorhanden • Initialisierung • Eingriff wegen Hindernis Normaler Vorgang kein • Test im Gange Hindernis vorhanden. •... -
Page 19: Störungssuche
Die folgenden Anweisungen richten sich ausschließlich an qualifiziertes und befugtes Personal. Die ACHTUNG spezifischen Gesetze und Normen müssen immer befolgt werden, auch wenn nicht ausdrücklich darauf hingewiesen wird. Für Reparaturen oder Austausch von Bauteilen immer nur Originalersatzteile der Entrematic Group AB verwenden. BEFEHL PROBLEM ÜBERPRÜFUNG... -
Page 20: Wartungsplan
9. WARTUNGSPLAN (ALLE 6 MONATE) Es empfiehlt sich regelmäßig Überprüfungen durch einen qualifizierten und befugten Techniker Entrematic Group AB entsprechend den nationalen Vorschriften und den Angaben in den Produktunterlagen vornehmen zu lassen. Die Anzahl der Wartungseingriffe sollte in Übereinstimmung mit den nationalen Anforderungen und entsprechend den Angaben in den Produktunterlagen festgelegt werden. -
Page 21: Allgemeine Sicherheitshinweise
“Roll-als auch ein Paketierungsmechanismus” und ist für den Gebrauch für den Sie ausdrücklich hergestellt wurde, bestimmt. Jeder andere Gebrauch wird als Mißbrauch angesehen und ist daher gefährlich. Entrematic Group AB lehnt jede Verhaftung für Schäden, die wegen einem Mißbrauch entstanden sind, ab. - Page 22 9. WARTUNGSPLAN (ALLE 6 MONATE) Es empfiehlt sich regelmäßig Überprüfungen durch einen qualifizierten und befugten Techniker Entrematic Group AB entsprechend den nationalen Vorschriften und den Angaben in den Produktunterlagen vornehmen zu lassen. Die Anzahl der Wartungseingriffe sollte in Übereinstimmung mit den nationalen Anforderungen und entsprechend den Angaben in den Produktunterlagen festgelegt werden.
- Page 23 EN 60204-1 Sonstige angewendete Normen oder technische Spezifikationen: EN 60335-2-103 Die nachstehende benannte Stelle (für die komplette Anschrift kontaktieren Sie bitte die Entrematic Group AB) hat die Typ-Prüfbescheinigung für die gegenständliche Vorrichtung ausgestellt: CSI Spa Reg. - N° 0497 Der Produktionsprozess gewährleistet die Konformität der Vorrichtung mit der technischen Akte.
- Page 24 ANLEITUNG ZUM WIEDEREINRICHTEN DES BEHANGS MIT NOTAUSGANG STOP - 24 - 0DT848 2020-01-13...
- Page 25 BAUTEILLISTE Bezug Beschreibung Menge Linke Stütze Rechte Stütze Wickelwelle Gegengewicht Schaltkreis Schachtel für das Zubehör - 25 - 0DT848 2020-01-13...
- Page 26 ZEICHNUNGEN FÜR DIE MECHANISCHE INSTALLATION standard (Top) 6000 1700 5000 Ø 8 mm Ø 8 x 20 Ø 4,5 ≥ 1,8 m Ø 4,5...
- Page 27 MECHANICAL INSTALLATION DRAWINGS 1/2H ~ 0,5 m...
- Page 28 PACKING LIST Reference Description Quantity Left column Right column Transom with rolled curtain Counterweight Control unit Hardware box - 28 - 0DT848 2020-01-13...
- Page 29 EMERGENCY EXIT – RESTORE CURTAIN INSTRUCTION STOP - 29 - 0DT848 2020-01-13...
-
Page 30: General Safety Precautions
For repairs or replacements of products only Entrematic Group AB original spare parts must be used. danger areas. The fitter must supply all information corcerning the automatic, Check that the existing structure has the necessary strength and stability. -
Page 31: Technical Characteristics
Ref. Description Ref. Description Transom Modular counterweight Motor K10 Right column cover Transmission chain Left column cover Rolling shaft Right column Manual release lever Left column Polyzene guide upper section Electronic board Polyzene guide lower section Photocell 5FB Fixing plate of the guide Polyester curtain Linear Encoder (SLE) PVC transparent window... -
Page 32: Mechanical Installation
3. MECHANICAL INSTALLATION See the relevant drawings of the mechanical installation at page. 26 - 27 (central sheet to be removed). 3.1 Checking the opening (fig.1). • Check the dimensions of the opening, and their correspondence to the overall dimensions of the door supplied, taking into consideration any necessary tolerances in the case of installation in an archway. -
Page 33: Electric Connections
4. ELECTRICAL CONNECTIONS 4.1 Electrical panel • Insert the cables with the pre-wired terminal boards in the housing (fig. 14) and connect them to the boards (as shown in chap. 5). Fit the cables in the conduit and connect the connectors on the motor (fig.15). Cabling connection on the board must be done with main power cut off, for at least 30 sec. -
Page 34: Electronic Control Panel 5.1 49E - Connections
5.1 49E ELECTRONIC CONTROL PANEL - CONNECTIONS INPUTS Command Function Description N.O Automatic closing Permanently closing the contact enables automatic closing. N.O Opening With DIP1=ON the closure of the contact activates an opening operation. Step-by-step With DIP1=OFF the closure of the contact activates an opening or closing operation in the following sequence: open-stop-close-open. - Page 35 EL07L 00000000000 EL07PW1 00000000000 RP TC 1 2 3 4 5 6 - LK + POWER 17 14 12 11 0 0 0 1 1 2 3 4 6 8 9 20 41 White Brown A933A Orange Black Brown Blue White Orange Blue...
- Page 36 30 s automatic closing is only activated after a total, partial or step-by-step opening command. Motor partial opening adjustment. From 0 to 30 s. 30 s Dip - switch Description Ditec Sector Reset DIP 1 Control 1-3 function. Step-by-Step Opening Dip-switches...
- Page 37 EL07L 00000000000 EL07PW1 00000000000 www.ditec.it RP TC 1 2 3 4 5 6 - LK + POWER 17 14 12 11 0 0 0 1 1 2 3 4 6 8 9 20 41 FUSES Value Dimension Circuit F1 - F2 - F3 8A - 500V 10.3 x 38 Three phase line...
-
Page 38: Inverter) - Connections
5.2 52E CONTROL PANEL (INVERTER) - Connections INPUTS Command Function Description STOP If on the programming menu (page 15 point 16) Contact 1-2 enabled, opening of the contact STOPS the door Opening The closure of the contact activates the opening operation. Closure The closure of the contact activates the closing operation. - Page 39 2 3 4 5 6 7 1 2 3 4 5 6 7 8 S3 S4 +F -F U V W °C BACK 1 IN NC C NO 1 11 12 13 41 40 20 9 0 LAMP Blue 9036 Black White 9038...
- Page 40 ADJUSTMENTS AND SIGNALS Trimmer Description NOT USED 30 s NOT USED 10 s NOT USED NOT USED Adjustment of display contrast. Dip-switches Description DIP 1 Future use – – DIP 2 Access to advanced menu Disabled. Enabled DIP 3 Trimmer enabling Disabled Enabled Counter...
- Page 41 2 3 4 5 6 7 1 2 3 4 5 6 7 8 S3 S4 +F -F U V W BACK 1 IN NC C NO 1 11 12 13 41 40 20 9 0 LAMP FUSES Value Size Circuit F1 - F2 12A - 500V...
-
Page 42: Programming Menu
6 PROGRAMMING MENU 6.1 Installation menu When the control panel is switched on, after showing the messages DITEC ENTREMATIC and microprocessor and card FW VERSION, the device automatically enters the installation menu and displays the message SELECT LANGUAGE. Confirm with Remove cables from PIN 3, 4, 20 during programming STEP level options... -
Page 43: Advanced Menu
6.2 Advanced menu The advanced menu allows you to modify the position of the limit switches which have previously been set and modify the set default parameters. To access the Advanced Menu: STOP the door Set DIP 2 to ON 1 2 3 4 5 6 7 8 “ENCODER CALIB.”, the first item in the advanced menu, will appear on the display. -
Page 44: Timed Opening Menu
STEP 1 level options Scrolling Confirm level options Notes Closing speed CHANGE VALUE The setting of higher values in (Hz) must be assessed according to door dimensions and operating conditions. Enable service alarms RESET? Restart the service count down Service thresh CHANGE VALUE Option available only if YES has been selected for point 14). -
Page 45: Service Menu
6.4 Service menu (password required) The Service menu is used to modify the brake resistance thresholds, the overcurrent threshold and the anti-wind function when the encoder intervenes. To access the Service menu: STOP the door Set DIP5 to ON Enter the PW: button sequence OPEN- OPEN- CLOSE- PARTIAL OPENING 1 2 3 4 5 6 7 8 Remove cables from PIN 3, 4, 20 during programming STEP 1... -
Page 46: Adjusting And Starting
7. ADJUSTING AND STARTING 7.1 Adjustment of the Safety Linear Encoder (SLE) Trimmer Description Obstacles sensitivity adjustment On / Flashing Power supply on Power supply off • Initialisation • Intervention due to obstacle Normal operating no • Test running obstacle •... -
Page 47: Troubleshooting
The following instructions are for qualified and authorised personnel only. Specific laws and standards WARNING must always be complied with even when not expressly indicated. For repair work or replacements, use only original Entrematic Group AB spare parts. COMMAND PROBLEM... -
Page 48: Maintenance
9. MAINTENANCE TO BE CARRIED OUT EVERY 6 MONTHS Regular inspections should be made according to national regulations and product documentation by a Entrematic Group AB trained and qualified technician. The number of service occasions should be in accordance with national requirements and with the product documentation. -
Page 49: General Safety Precautions
This automation is a “vertical-roll door”; it must be used for the specific purpose for which it was designed. Any other use is to be considered inappropriate and so dangerous. Entrematic Group AB declines all responsibility for damage caused by improper, incorrect or unreasonable use. - Page 50 9. MAINTENANCE TO BE CARRIED OUT EVERY 6 MONTHS Regular inspections should be made according to national regulations and product documentation by a Entrematic Group AB trained and qualified technician. The number of service occasions should be in accordance with national requirements and with the product documentation.
- Page 51 EN 60335-2-103 EC type examination or certificate issued by a notified or competent body (for full address, please contact Entrematic Group AB) concerning the equipment: CSI Spa Reg. - N° 0497 The manufacturing process ensures the compliance of the equipment with the technical file.
- Page 52 Entrematic Group AB Lodjursgatan 10 SE-261 44, Landskrona Sweden www.ditecentrematic.com...
Need help?
Do you have a question about the Ditec Sector Reset and is the answer not in the manual?
Questions and answers