Table of Contents
Advertisement
Quick Links
Advertisement
Table of Contents

Subscribe to Our Youtube Channel
Related Manuals for Techroutes TSR 2800-20-DC

Summary of Contents for Techroutes TSR 2800-20-DC
- Page 1 TSR 2800-20-DC Router’s Hardware Installation Manual...
-
Page 2: Table Of Contents
2.3.4 Power Requirements...........................8 2.4 Installation Tools and Device ..........................8 Chapter 3 Router Installation ............................9 3.1 Installation Procedure of TSR 2800-20-DC Router ..................9 3.2 Installing Router’s Hull ...........................9 3.2.1 Installing the Chassis on the Desk.....................10 3.2.2 Installing the Chassis on the Cabinet ....................10 3.3 Connecting the Port .............................10... -
Page 3: Chapter 1 Tsr 2800-20-Dc Modularized Router
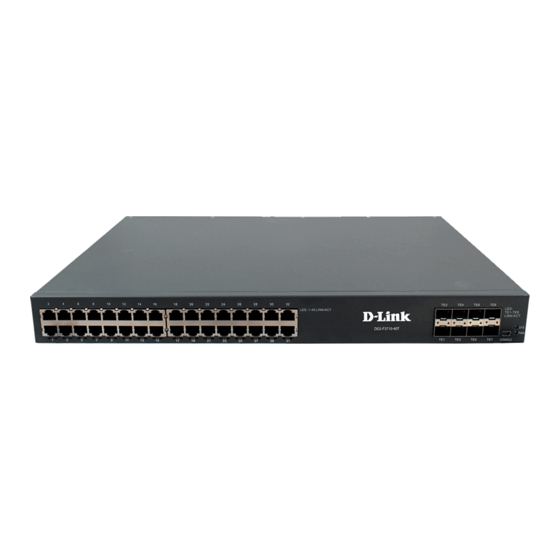
There are also four interface card slots, one power socket, one power on-off, one grounding column, one ventilation hole and one long-shape ventilation hole. The front template of the TSR 2800-20-DC modularized router is shown the following figure: Table 1-2 Parts at the front template of TSR 2800-20-DC router Abbrev. -
Page 4: Characteristic Parameters Of The Router
“OFF” means the switch is closed. Power AC power socket AC100-240V The back template of TSR 2800-20-DC router is shown in the following figure: Table 1-3 Parts at the front template of TSR 2800-20-DC router Abbrev. Name Remarks Grounding column The grounding must be fine. - Page 5 TSR 2800-20-DC Router’s Hardware Installation Manual EPROM:512K Bytes; Flash Memory:8~32M Bytes; Memory SDRAM:64MBytes; Two fast-Ethernet 10/100M ports One Console port One AUX port Standard configuration One USB port 4 slots for interface card, that is, 2 slots for Network Interface Card (NIC) and 2 slots for expanded interface card 442.5mm×...
-
Page 6: Rohs Description
TSR 2800-20-DC Router’s Hardware Installation Manual 1.3 ROHS Description - 4 -... -
Page 7: Chapter 2 Installation Preparation
Similar to other electronic products, the semiconductor chip easily gets damaged if you power on and off abruptly and frequently. To restart up the router of TSR 2800-20-DC, you have to open the power on-off after the power is cut down for three to five seconds. - Page 8 TSR 2800-20-DC Router’s Hardware Installation Manual Read the installation guide carefully before you operate the system. Only professionals are allowed to install or replace the router. Pull out the AC power socket and close the direct-current power before operating on the chassis or working beside the power source.
-
Page 9: Requirements For Common Locations
TSR 2800-20-DC Router’s Hardware Installation Manual Electrostatic Discharge Prevention Electrostatic discharge may damage devices and circuits. Improper treatment may cause the router to malfunction completely or discontinuously. Move or locate the devices according to the measures of electrostatic discharge prevention, ensuring the chassis connects the ground. Another measure is to wear the static-proof hand ring. -
Page 10: Power Requirements
TSR 2800-20-DC Router’s Hardware Installation Manual Ensure that nice ventilation is provided for the devices installed at the bottom of the cabinet. The clapboard separates exhaust gas and inflow air, and boost the cool air to flow in the chassis. The best location of the clapboard is decided by the air flow mode in the chassis, which can be obtained through different location tests. -
Page 11: Chapter 3 Router Installation
Caution: Only professionals are allowed to install or replace the devices of the switch. 3.1 Installation Procedure of TSR 2800-20-DC Router 3.2 Installing Router’s Hull The hull of the router can be installed on the desk or can be fixed to other cabinets. -
Page 12: Installing The Chassis On The Desk
TSR 2800-20-DC Router’s Hardware Installation Manual 3.2.1 Installing the Chassis on the Desk TSR 2800-20-DC router can be directly put on the smooth and safe desk. Note: Do not put things weighing 4.5 kg or over 4.5 kg on the top of the router. - Page 13 RJ45 socket, whose pins can be aligned from left to right with the value from 1 to 8. The following figure shows how to connect the console port of TSR 2800-20-DC modularized router and the computer: - 11 -...
-
Page 14: Connecting Fast-Ethernet Interface
It is used to connect the Modem. Signal ground The cable is used to connect the console port of the TSR 2800-20-DC modularized router and the outside console terminal device. One end of the cable is a 8-pin RJ45 plug and the other end is a 9-hole plug (DB9). The RJ45 plug is put into the socket of the console port on the TSR 2800-20-DC modularized router. - Page 15 TSR 2800-20-DC Router’s Hardware Installation Manual 1. Connecting the 10/100Mbps auto-adaptation Ethernet port and HUB 2. Pins of the UTP port Name Symbol Remarks Sending normal TPTXD+ Output phase of the data Sending the paraphase TPTXD- Output of the data...
-
Page 16: Connecting The Usb Port
TSR 2800-20-DC Router’s Hardware Installation Manual Note: The color arrangement of UTP connection complies with EIA/TIA 568A. You can use the UTP intersection cable when Ethernet ports of two TSR 2800-20-DC routers connect. The UTP intersection cable can also be used to directly connect a router and a UTP port of a single host. - Page 17 TSR 2800-20-DC Router’s Hardware Installation Manual The following table lists slot-supported NICs: Note: Do configuration according to the following table and do not incorrectly insert NIC into a slot. Type of NIC Slot1 Slot2 Slot3 Slot4 Slot 1 for Slot 1 for...
-
Page 18: Chapter 4 Router Maintenance
Caution: Before opening the chassis, make sure that you have released the static you carried and then turn off the power on-off of TSR 2800-20-DC. Before operating any step in Appendix B, read the section “Safety Advice”. Before performing operations beside the power source or on the hull, plug out the power cable. -
Page 19: Memory Upgrade
If you want to upgrade or replace TSR 2800-20-DC router, uninstall and install SDRAM according to the following steps: Turn off the power on-off of TSR 2800-20-DC router and plug out the power plug. Find the SARAM SIMM slot on TSR 2800-20-DC router according to the following main board diagram. - Page 20 TSR 2800-20-DC Router’s Hardware Installation Manual Figure 4-1 Inserting and plugging the SDRAM Figure 4-2 SDRAM bar Note: If the SDRAM slot cannot be broken off, check whether it is locked. Slowly break off the pinchcock at both sides of the SDRAM SIMM slot according to the previous method.
-
Page 21: Closing Chassis
TSR 2800-20-DC Router’s Hardware Installation Manual C. When uninstalling the two locating steel slices, break off them outwards. At the same time, push down the SDRAM extensible bar until the circuit board completely breaks away the locating steel slices. Plug out the SDRAM extensible bar in an angle of 45 degree. -
Page 22: Chapter 5 Hardware Fault Analysis
9600 bps, eight data bits, no sum check bit and one stop bit. 5.2 LED Description The LED indicator shows that the router is running. The following table shows the LEDs of TSR 2800-20-DC router and their description: Abbrev. Name Remarks... - Page 23 Ethernet connects HUB through the twisted pair. 10/100M TP port Each TSR 2800-20-DC router has its own indicators, names and description of which can be seen in Interface Card Installation Manual. Copyright Claims Without the written approval of , any person or group cannot transcribe, copy or change partial or all contents of this manual, and must not broadcast it in any manner.
Need help?
Do you have a question about the TSR 2800-20-DC and is the answer not in the manual?
Questions and answers