Table of Contents
Advertisement
Advertisement
Table of Contents

Related Manuals for Dell Alienware P01E


Summary of Contents for Dell Alienware P01E
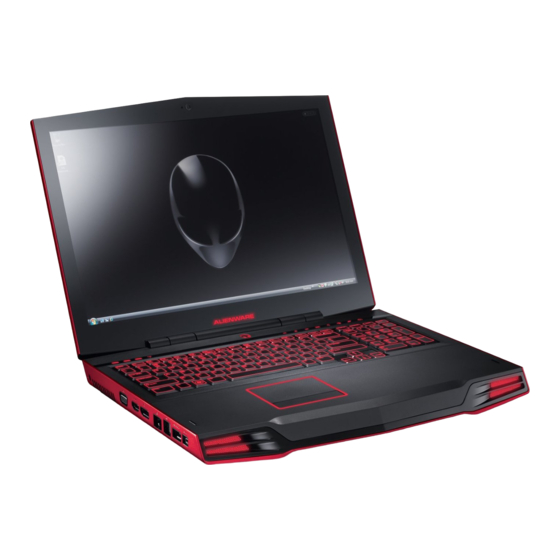
- Page 1 ALIENWARE M17x MOBILE MANUAL ®...
- Page 2 Trademarks used in this manual: Alienware, AlienRespawn, AlienFX, and the AlienHead logo are trademarks or registered trademarks of Alienware Corporation. Dell is a trademark of Dell Inc. Microsoft, Windows, Windows Vista, and Windows Vista start button logo are either trademarks or registered trademarks of Microsoft Corporation in the United States and/or other countries.
-
Page 3: Table Of Contents
CONTENTS INTRODUCTION ............5 CHAPTER 1: SETTING UP YOUR NOTEBOOK . - Page 4 APPENDIX C: WARRANTY AND SUPPORT INFORMATION ....74 APPENDIX D: DELL SOFTWARE LICENSE AGREEMENT....88 APPENDIX E: CONTACTING ALIENWARE .
-
Page 5: Introduction
INTRODUCTION Dear Valued Alienware Customer, Welcome to the Alienware family. We are thrilled to include you among the growing number of savvy high-performance mobile users. The Alienware technicians who have crafted your machine have made certain that your high-performance mobile is properly optimized and performs to its fullest potential. -
Page 6: Chapter 1: Setting Up Your Notebook
CHAPTER 1: SETTING UP YOUR NOTEBOOK CHAPTER 1: SETTING UP YOUR NOTEBOOK CHAPTER 1: SETTING UP YOUR NOTEBOOK Before Setting Up Your Notebook Congratulations on the purchase of your Alienware ® M17x! Please read all safety and setup instructions before plugging in your new notebook. Begin by carefully opening the box and removing all components that were shipped to you. -
Page 7: Setting Up Your Alienware Mobile
Product Documentation and Media The documentation that ships with your Alienware mobile is designed to provide ® answers to many of the questions that may arise as you explore your new notebook’ s capabilities. You may refer to the documentation for technical information or general use as needed to answer questions in the future, or aid you in finding answers and solutions. - Page 8 STEP 2. Press the Power Button CHAPTER 1: SETTING UP YOUR NOTEBOOK STEP 3. Windows Vista Setup ® CAUTION: Do not interrupt the operating system’ s setup process. Doing so may render your notebook unusable. If you selected Windows Vista operating system while ordering, your notebook is preconfigured with Windows Vista.
-
Page 9: Chapter 2: Getting To Know Your Notebook
CHAPTER 2: GETTING TO KNOW YOUR NOTEBOOK This chapter provides information about your new notebook to familiarize you with its various features and get you up and running quickly. CHAPTER 2: GETTING TO KNOW YOUR NOTEBOOK CHAPTER 2: GETTING TO KNOW YOUR NOTEBOOK... -
Page 10: Examining Your Notebook
Examining Your Notebook Before you start using your notebook, you need to get acquainted with your notebook’ s main features and interfaces: 1 left digital array microphone 2 webcam activity indicator 3 webcam 4 right digital array microphone 5 edge-to-edge LCD with integrated webcam and digital array microphone 6 back of the notebook... -
Page 11: Front View Features
CHAPTER 2: GETTING TO KNOW YOUR NOTEBOOK Front View Features Back View Features 1 left speaker 3 right speaker 1 AC adapter connector 2 consumer IR underneath... -
Page 12: Left View Features
Left View Features 1 kensington lock 5 RJ45 LAN connector 2 VGA connector 6 USB connectors (2) 3 HDMI-Out connector 7 USB/eSATA combo connector with USB PowerShare feature 4 DisplayPort connector 8 IEEE 1394A connector CHAPTER 2: GETTING TO KNOW YOUR NOTEBOOK Right View Features 1 ExpressCard slot 2 optical drive... -
Page 13: Top View Features
Top View Features 1 power button 5 keyboard 2 touch controls (9) 6 status LEDs (3) 3 touch pad buttons on rocker (2) 7 hinge cover 4 touch pad CHAPTER 2: GETTING TO KNOW YOUR NOTEBOOK Bottom View Features 1 compartment door 3 battery meter 2 battery latch 4 battery pack... -
Page 14: Status Leds
Status LEDs The three status LEDs are located at the top-left side of the keyboard. For the exact location, please refer to the “Top View Features” diagram on page 13. Scroll Lock LED The LED lights up when the scroll lock option is switched on. Caps Lock LED The LED lights up when the keyboard is in Caps Lock mode. -
Page 15: Touch Controls
Touch Controls The touch controls are located near the top of the keyboard. For the exact location, refer to the “Top View Features” diagram on page 13. To activate, gently touch the desired control. The control will illuminate temporarily to confirm your selection. Eject Increase volume Rewind/Play previous... - Page 16 F5 – Decrease Display Brightness Press <Fn><F5> to decrease the brightness of the LCD display. F6 – Extend Desktop Press <Fn><F6> to switch between the various external display options available either simultaneously or separately. F7 – Toggle between Integrated/Discrete Graphics Press <Fn><F7>...
-
Page 17: Battery Pack
CAUTION: To avoid damage to the notebook, use only the battery designed for this particular Alienware notebook. Do not use batteries designed for other Alienware or Dell computers. CHAPTER 2: GETTING TO KNOW YOUR NOTEBOOK Follow the steps below to remove the battery pack. -
Page 18: Battery Maintenance
Battery Maintenance To maintain the battery pack’ s maximum capacity, you should occasionally let the notebook deplete its battery power completely before recharging. To carry out a complete depletion of the battery, disconnect the AC adapter and let your notebook consume the remaining battery power. To speed up the depletion, use the hard drive as much as possible and set the LCD as bright as possible. -
Page 19: Power Management
Power Management Understanding Power Consumption In order to fully utilize the power of your battery packs, it would be a good idea for you to spend some time acquiring a basic understanding of the power management concept from your operating system. operating systems, you can go through Power Options of the Control In Windows ®... -
Page 20: Chapter 3: Connecting Devices
CHAPTER 3: CONNECTING DEVICES This section provides information about connecting optional devices to your notebook to enhance your audio, visual, and digital experience. CHAPTER 3: CONNECTING DEVICES CHAPTER 3: CONNECTING DEVICES... -
Page 21: Connecting External Displays
VGA cable from the notebook’ s 15-pin VGA connector or a DVI cable via a DisplayPort-to-DVI adapter. This adapter can be purchased through Alienware, Dell, or other electronics retailers. Turn off your notebook. - Page 22 Connecting External Speakers Your Alienware notebook has three integrated audio out connectors and one audio in connector. The audio out connectors deliver quality sound and support 5.1 surround audio. You can connect the audio input connector from a home stereo or speaker system for a heightened gaming and media experience.
-
Page 23: Connecting Printers
Connecting Printers Connecting a Plug and Play Printer If your printer supports plug and play, Windows Vista will detect it and attempt to install the printer automatically. In some cases, Windows may require a driver for the printer. This driver is located on the software CD that is included with the printer. -
Page 24: Chapter 4: Using Your Notebook
CHAPTER 4: USING YOUR NOTEBOOK Alienware Command Center The Alienware Command Center gives you access to Alienware’ s exclusive ® software and is a continuously upgradable control panel. As Alienware releases new programs, they download directly into the Command Center allowing you to build a library of system management, optimization, and customization tools. -
Page 25: Stealth Mode
Stealth Mode Stealth Mode helps you switch your notebook to a low power state to facilitate the use of a 65 W auto/air adapter. This state is well suited for casual use such as e-mail, music/video/DVD playback. Stealth mode will switch the notebook from discrete to integrated graphics mode, and also incorporate additional system power savings to extend battery life and reduce power consumption. -
Page 26: Working With Raid
Working With RAID A redundant array of independent disks (RAID) is a disk storage configuration that increases performance or data redundancy. There are two basic RAID levels discussed in this section. • RAID level 0 is recommended for higher performance (faster throughput). •... -
Page 27: Configuring The Bios
Configuring the BIOS System Setup The System Setup options allow you to: • Change the system configuration information after you add, change, or remove any hardware in your notebook. • Set or change a user-selectable option. • Read the current amount of memory or set the type of hard drive installed. Before you use System Setup, it is recommended that you write down the current System Setup information for future reference. - Page 28 System Setup Options NOTE: Depending on your computer and installed devices, the items listed in this section may not appear, or may not appear exactly as listed. Main Menu System Time Displays the system time. System Date Displays the system date. BIOS Version Displays the BIOS revision.
- Page 29 Advanced Menu USB Emulation Allows you to enable or disable the USB emulation feature. This option defines how the BIOS, in the absence of a USB-aware operating system, handles USB devices. USB emulation is always enabled during POST (Power On Self Test). Note: You cannot boot any type of USB device (floppy, hard drive, or memory key) when this option is off.
- Page 30 Graphics Settings Sub-Menu Hybrid Graphics Allows you to enable or disable the Hybrid Graphics feature. Hybrid Graphics is only supported in Windows Vista and needs to be disabled in other operating systems or for AMD discrete graphics cards. Integrated GPU Allows you to switch between Integrated and Discrete GPU.
- Page 31 Security Menu Computrace ® Allows you to activate or disable the BIOS module interface of the optional Computrace Absolute ® Software. The Computrace ® agent from Absolute is a service solution designed to help track assets and provide recovery services in the event the computer is lost or stolen.
-
Page 32: Chapter 5: Installing Additional Or Replacement Components
You can purchase components for your notebook at www.dell.com or www.alienware.com. NOTE: Refer to the Alienware Service Manual at the Dell™ support website, support.dell.com for installation instructions of all serviceable components. Parts purchased from Dell and Alienware will ship with specific replacement... -
Page 33: Before You Begin
CAUTION: Only a certified service technician should perform repairs on your notebook. Damage due to servicing that is not authorized by Dell is not covered by your warranty. -
Page 34: Upgrading/Replacing Memory
CAUTION: To avoid damaging the notebook, perform the following steps before you begin working inside the notebook. Ensure that the work surface is flat and clean to prevent the notebook cover from being scratched. Turn off your notebook (for details, refer to “Turning Off Your Notebook” on page 33). - Page 35 Removing the Memory Module(s) Below is the procedure on how to remove the memory module(s). Follow the instructions in “Before You Begin” on page Loosen the two captive screws and remove the compartment door. 1 compartment door 3 front of the notebook 2 captive screws (2) CHAPTER 5: INSTALLING ADDITIONAL OR REPLACEMENT COMPONENTS Loosen the captive screw and remove the memory module door.
- Page 36 Use your fingertips to carefully spread apart the upper memory module connector’ s spring-locks until the module pops up. Remove the upper memory module. Use your fingertips to carefully spread apart the lower memory module connector’ s spring-locks until the module pops up. Remove the lower memory module.
-
Page 37: Upgrading/Replacing Hard Drives
Upgrading/Replacing Hard Drives Your notebook is equipped with two sets of hard drive sockets. • If only one hard drive is being installed, place the primary hard drive in the socket indicated by the “HDD0” designation. • If two hard drives are being installed, place the primary hard drive in the socket indicated by the “HDD0”... - Page 38 Loosen the four captive screws on the primary hard drive (HDD0). Slide the primary hard drive (HDD0) towards the back using the pull tab and lift it out. Primary Hard Drive (HDD0) 1 primary hard drive (HDD0) 3 captive screws (4) 2 pull tab CHAPTER 5: INSTALLING ADDITIONAL OR REPLACEMENT COMPONENTS Loosen the four captive screws on the secondary hard drive (HDD1).
- Page 39 Remove the four screws from the sides of both the hard drives. Slide the hard drives out of the respective brackets. 1 hard drive 3 screws (4) 2 hard drive bracket CHAPTER 5: INSTALLING ADDITIONAL OR REPLACEMENT COMPONENTS Remove the interposer from the secondary hard drive (HDD1). Secondary Hard Drive (HDD1) 1 interposer To replace the hard drives, perform the removal steps in reverse order.
-
Page 40: Chapter 6: Troubleshooting
CHAPTER 6: TROUBLESHOOTING CHAPTER 6: TROUBLESHOOTING CHAPTER 6: TROUBLESHOOTING Basic Hints and Tips • Computer does not power on: Is your computer securely plugged into a working electrical outlet? If plugged into a power strip, make sure that the strip is actually working. •... -
Page 41: Backup And General Maintenance
Backup and General Maintenance • Always backup your important data on a regular basis and keep copies of your operating system and software safe. Do not forget to note the serial numbers if you are storing them outside of their original cases - e.g., in a CD wallet. •... -
Page 42: Software Diagnostic Tools
Software Diagnostic Tools Pre-Boot System Assessment (PSA) The computer runs the Pre-boot System Assessment (PSA), a series of initial tests of your system board, keyboard, display, memory, hard drive, etc. To invoke PSA, press <F12> to access the Boot Menu. Select “Diagnostics” from the menu and press <Enter>. - Page 43 NOTE: The Support CD/DVD contains drivers for your computer. You can also download the latest drivers and software for your computer from support.dell.com. Review your notebook’ s configuration information, and ensure that the device that you want to test displays in the system setup program and is active. Start the Alienware Diagnostics from the Support CD/DVD.
-
Page 44: Answers To Common Problems
“GENERAL AND ELECTRICAL SAFETY PRECAUTIONS“ on page 58 and “DETAILED SAFETY, ENVIRONMENTAL, AND REGULATORY INFORMATION“ on page 60. For additional safety best practices information, see the Regulatory Compliance Homepage at www.dell.com/regulatory_compliance. CAUTION: Follow the instructions in “Before You Begin” on page 33 before working inside your notebook. - Page 45 System The computer fails the POST: The computer POST (Power On Self Test) tests the computer, insuring that it meets the necessary system requirements and that all hardware is working properly before starting the remainder of the boot process. If the computer passes the POST, the computer will continue to start normally.
- Page 46 Other software problems Check the software documentation or contact the software manufacturer for troubleshooting information: • Ensure that the program is compatible with the operating system installed on your computer. • Ensure that your computer meets the minimum hardware requirements needed to run the software.
- Page 47 Internet Cannot browse the Internet/Error: “Unable to locate host.”: Check that you are connected to the Internet. Check that the Web address typed into the address bar is correct and for a valid site. Try a different Web address, or URL. If the error message still appears, disconnect from the Internet Service Provider (ISP) and close the browser.
- Page 48 Monitor If the display is blank NOTE: If you are using a program that requires a higher resolution than your computer supports, it is recommended that you attach an external monitor to your computer. Check the battery: If you are using a battery to power your computer, the battery charge may be depleted.
- Page 49 Mouse The mouse is not working: Check that the mouse cable is properly plugged into the USB connector of your computer. Check that the mouse cable is not damaged or there are no bent or broken pins. If the mouse cable is damaged, or there are bent or broken pins, the mouse will most likely need to be replaced.
- Page 50 Speakers There is no sound from the speakers (external): Ensure that subwoofer and the speakers are turned on: See the setup diagram supplied with the speakers. If your speakers have volume controls, adjust the volume, bass, or treble to eliminate distortion. Adjust the Windows volume control: Click or double-click the speaker icon in the lower-right corner of your screen.
-
Page 51: Chapter 7: System Recovery
- Contains operating system installation media. • Support CD/DVD - Contains drivers for your computer. You can also download the latest drivers and software for your computer from support.dell.com. • Optional AlienRespawn v2.0 disc (if ordered) - Contains the AlienRespawn recovery image. -
Page 52: Alienrespawn V2.0
AlienRespawn v2.0 NOTE: Back up all data before initiating a system recovery. Backup functionality is included in AlienRespawn™ v2.0, but as a precaution it would be better to backup critical files onto an external media before initiating recovery. AlienRespawn™ v2.0 is a recovery solution which is capable of resolving many software-related problems, including operating system configuration errors, driver installation errors, system file corruption, spyware/virus infection (when used in conjunction with antivirus software), and more. -
Page 53: Password Protection
Advanced Recovery This method will completely reformat your hard drive and return your computer to its original factory configuration resolving all software/configuration issues. This option is best for most software-related issues. A backup of your entire current hard drive will be created in C:\BACKUP, from which data files may be copied to permanent locations. -
Page 54: Alienrespawn V2.0 Disc
AlienRespawn v2.0 Disc If you ordered the optional AlienRespawn v2.0 disc, you will receive it along with your computer. This disc will allow you to re-deploy AlienRespawn v2.0 to a new hard drive in the event of a hard drive failure. To Use the AlienRespawn v2.0 Disc NOTE: The Alienware recovery system is set up to boot from your CD-ROM drive, please verify through the Boot Menu hotkey (see “Boot Menu”... -
Page 55: Chapter 8: Basic Specifications
CHAPTER 8: BASIC SPECIFICATIONS This chapter provides the basic specifications of your notebook. CHAPTER 8: BASIC SPECIFICATIONS CHAPTER 8: BASIC SPECIFICATIONS... - Page 56 Dimensions Height 51.31 mm to 53.59 mm (2.02 inches to 2.11 inches) - Front to Back Width 405.89 mm (15.98 inches) Depth 321.31 mm (12.65 inches) Weight 5.3 kg (11.68 lbs) (with WUXGA LCD, single NOTE: The weight of your notebook will vary NVIDIA graphics card, and depending on the configuration ordered and 9-cell battery)
- Page 57 Discs/Cards supported Optical drive formats SATA compliant Blue-ray, DVD-RW combo Reader card types • Secure digital (SD) memory card • Secure Digital High Capacity (SDHC) card • Secure Digital Input/Output (SDIO) card • Multi Media Card (MMC) • Memory Stick •...
-
Page 58: Appendix A: General And Electrical Safety Precautions
APPENDIX A: GENERAL AND ELECTRICAL SAFETY PRECAUTIONS Computer Setup Read all instructions marked on the product and in the documentation before operating your computer. Retain all safety and operating instructions. Never use this product near water or a heat source. Only set-up the computer on a stable work surface. - Page 59 When You Should Contact Alienware • The battery, power cord or plug is damaged. • Your computer has had liquid spilled into it. • Your computer was dropped or the case was damaged. • Normal operation of the computer does not occur when the operating instructions are followed.
-
Page 60: Appendix B: Detailed Safety, Environmental, And Regulatory Information
You can find additional Safety Best Practices information on the Regulatory Compliance Homepage on www.dell.com at the following location: www.dell.com/regulatory_compliance. NOTE: In this document, product, equipment, and device are used interchangeably and refer to all computers. - Page 61 When Working Inside Your Device Do not attempt to service the equipment yourself, except as explained in your product documentation or in instructions otherwise provided to you by Dell. Always follow installation and service instructions closely. Some internal components, such as PC Cards, may become very warm during normal operation.
- Page 62 • The AC adapter may become hot during normal operation of your computer. Use care when handling the adapter during or immediately after operation. • Do not use an auto adapter DC power cable connected via either an automobile cigarette lighter adapter or an empower-type connector in vehicles with high voltage (24 VDC), such as commercial transport vehicles.
- Page 63 WARNING: Viewing a display or external monitor screen for extended periods of time may result in eye strain. For additional information concerning ergonomics, please go to the Regulatory Compliance homepage on www.dell.com at the following location: www.dell.com/regulatory_compliance. Weitere Informationen zur Ergonomie finden Sie auf unserer Website...
- Page 64 Environmental Considerations Recycling Information Dell recommends that customers dispose of their used computer hardware, monitors, printers, and other peripherals in an environmentally sound manner. Potential methods include reuse of parts or whole products and recycling of products, components, and/or materials.
- Page 65 Registration, Evaluation, and Authorization of Chemicals (REACH) REACH is the European Union (EU) chemical substances regulatory framework. Information on substances of very high concern contained in Dell products in a concentration above 0.1% weight by weight (w/w) can be found at www.dell.com/ downloads/global/corporate/environ/Dell_REACH_SVCH_Table.pdf.
- Page 66 France For Mainland France • 2.400 - 2.4835 GHz (Channels 1-13) authorized for indoor use • 2.400 -2.454 GHz (Channels 1-7) authorized for outdoor use For Guiana and Reunion • 2.400 - 2.4835 GHz (Channels 1-13) authorized for indoor use •...
- Page 67 Italien En generel godkendelse er nødvendig for udendørs brug i Italien. Brug af disse udstyr reguleres af: • D.L.gs 1.8.2003, n. 259, article 104 (aktivitet underlagt generel godkendelse) for udendørs brug og article 105 (gratis brug) for indendørs brug, i begge tilfælde til privat brug.
- Page 68 CE sull’etichetta della normativa dei prodotti, o sulla scheda plug-in 802.11, di cui segue un esempio: N.B. Il numero dell’organismo notificato indicato con ‘NBnr’ sarà presente solo se necessario e se non ha alcun rapporto con la limitazione all’uso, se presente o meno.
- Page 69 105 (uso libero) per l’uso interno, in entrambi i casi per uso privato. • D.M. 28.5.03, per fornitura al pubblico dell’accesso RLAN a reti e servizi di telecomunicazione. Restriksjoner på brukerinformasjon For produkter med trådløse LAN / 802.11-nettverkskort Produkter som faller inn under denne kategorien er merket med et Klasse 2-identifikasjonssymbol (utropstegn i en sirkel) ved siden av CE-merket på...
- Page 70 ПРИМЕЧАНИЕ: Номер уполномоченного органа, указанный как ‘NBnr’, присутствует только в случае необходимости, а также не имеет какое-либо влияние на ограничения по использованию вне зависимости от их наличия. Франция Для материковой части Франции ГГц (Каналы 1-13), одобренные для использования в • 2,400 - 2,4835 помещениях...
- Page 71 Italia Se solicita una autorización general para uso en exteriores en Italia. El uso de estos equipos está regulado por: • D.L.gs 1.8.2003, n. 259, artículo 104 (actividad sujeta a autorización general) para uso en exteriores y artículo 105 (uso gratuito) para uso en interiores, en ambos casos para uso privado.
- Page 72 電源ケーブルをコンセントに接続します。 Alienware 製品のリサイクルに関しては、 http://www.dell.com/jp/recycle/cons_recycle にある消費者用 ビスまでご連絡ください。 한국 에너지 관련 정보 본 제품의 소비 전력은 플러그를 뽑은 상태에서는 제로가 될 수 있습니다. APPENDIX B: DETAILED SAFETY, ENVIRONMENTAL, AND REGULATORY INFORMATION Norge Generell strømsikkerhet Hvis produktet leveres med en 3-stiftet strømledning, skal strømledningen bare settes i en jordet stikkontakt.
- Page 73 APPENDIX B: DETAILED SAFETY, ENVIRONMENTAL, AND REGULATORY INFORMATION 台灣 公司聯絡詳細資料 依照商品檢驗法案第 11 條條文,Dell 提供對於本文件所涉及產品在台灣地區認證機 構的公司聯絡細節: Dell B.V. 台灣分公司 台灣台北市大安區敦化南路二段 218 號 20 樓...
-
Page 74: Appendix C: Warranty And Support Information
Dell. If you do not receive an invoice or acknowledgement in the mail, via e-mail, or with your Product, information about your purchase may be obtained at https://support.dell. - Page 75 Dell’ s policy is one of ongoing update and revision. Dell may revise and discontinue Product at any time without notice to you and this may affect information saved in your online “cart.” Dell will ship Product that has the functionality and performance of the Product ordered, but changes between what is shipped and what is described in a specification sheet or catalog are possible.
- Page 76 Dell’ s advertising, or any related purchase SHALL BE GOVERNED BY THE LAWS OF THE STATE OF TEXAS, WITHOUT REGARD TO CONFLICTS OF LAW.
- Page 77 This Retail Purchaser End User Agreement (“Agreement”) governs your retail purchase and use of products and/or services and support (“Product”) sold in the United States by Dell, including its affiliates and subsidiaries. By purchasing and using the product, you (“Customer”) agree to be bound by the terms of this agreement.
- Page 78 You also represent that you own the copyright, or have a license to make copies, to all files on your system and do not have any data that would cause Dell to be liable for copyright infringement if those files were copied by Dell and/or your third-party service provider.
- Page 79 Any award of the arbitrator(s) shall be final and binding on each of the parties, and may be entered as a judgment in any court of competent jurisdiction. Dell will be responsible for paying any individual customer arbitration fees. If any Customer prevails on any claim that affords the prevailing party attorneys’...
- Page 80 Dell-branded hardware: • Portable computer batteries carry the lesser of either a 1-year limited hardware warranty or the length of the limited hardware warranty for the Dell computer with which the battery is shipped. •...
- Page 81 Dell begins on the date of the packing slip, invoice, or receipt. The warranty period is not extended if we repair or replace a warranted product or any parts. Dell may change the availability of limited warranties, at its discretion, but any changes will not be retroactive.
- Page 82 What if I purchased a service contract? If your service contract is with Dell, service will be provided to you under the terms of the service agreement. Please refer to that contract for details on how to obtain service. If you purchased through us a service contract with one of our third- party service providers, please refer to that contract for details on how to obtain service.
- Page 83 Restocking Fees: Unless the product is defective or the return is a direct result of a Dell error, Dell may charge a restocking fee of up to 15% of the purchase price paid. How to Return a Product: Before returning a product, you must first contact Dell customer service and obtain a Credit Return Authorization (CRA) number before the end of the applicable return period.
- Page 84 • Portable computer batteries carry the lesser of either a 1-year limited hardware warranty or the length of the limited hardware warranty for the Dell computer with which the battery is shipped. • The limited hardware warranty for Power Adapters purchased independent of a system is one year.
- Page 85 Dell computer on which such parts are installed. The limited hardware warranty on all Dell-branded and Alienware-branded products from Dell begins on the date of the invoice. The warranty period is not extended if we repair or replace a warranted product or any parts. Dell may change the availability of limited warranties, at its discretion, but any changes will not be retroactive.
- Page 86 APPENDIX C: WARRANTY AND SUPPORT INFORMATION Dell Return Policy (Canada Only) Dell values our relationship with you, the end user, and offers a return policy for most products that you purchase directly from Dell. Under this policy, you may return...
- Page 87 1-800-847-4096 and receive a Credit Return Authorization Number within the return policy period applicable to the product you want to return. You must ship the products to Dell within five (5) days of the date that Dell issues the Credit Return Authorization Number. You must: •...
-
Page 88: Appendix D: Dell Software License Agreement
Software. If you are a commercial customer of Dell or a Dell affiliate, you hereby grant Dell, or an agent selected by Dell, the right to perform an audit of your use of the Software during normal business hours, you agree to cooperate with Dell in such audit, and you agree to provide Dell with all records reasonably related to your use of the Software. - Page 89 This agreement is binding on successors and assigns. Dell agrees and you agree to waive, to the maximum extent permitted by law, any right to a jury trial with respect to the Software or this agreement. Because this waiver may not be effective in some jurisdictions, this waiver may not apply to you.
-
Page 90: Appendix E: Contacting Alienware
APPENDIX E: CONTACTING ALIENWARE NOTE: If you do not have an active Internet connection, you can find contact information on your purchase invoice, packing slip, bill, or Dell product catalog. Dell provides several online and telephone-based support and service options. -
Page 91: Appendix F: Important Information
APPENDIX F: IMPORTANT INFORMATION • PLEASE BACKUP ANY DATA YOU HAVE BEFORE INITIATING A SYSTEM RECOVERY OR SENDING YOUR NOTEBOOK IN FOR REPAIR OR UPGRADES. • PLEASE RETAIN ALL BOXES THAT WERE ORIGINALLY SHIPPED TO YOU IN CASE YOU NEED TO RETURN ANY MERCHANDISE. •... - Page 92 Printed in China. Printed on recycled paper.
Need help?
Do you have a question about the Alienware P01E and is the answer not in the manual?
Questions and answers